• Skip to primary navigation
  • Skip to main content
  • Skip to primary sidebar

Sew Woodsy logo

  • Patriotic
  • DIY
  • Crafts
  • Cricut
  • Travel
  • About
menu icon
go to homepage
search icon
Homepage link
  • Home
  • Patriotic
  • DIY
  • Cricut
  • Travel
  • About Us
    • Email
    • Facebook
    • Instagram
    • Pinterest
    • RSS
    • Twitter
    • YouTube
  • ×

    Sew Woodsy » Project

    Published: Mar 20, 2019 · Modified: Mar 25, 2019 by Katie · This post may contain affiliate links.

    DIY Minnie Mouse Paper Plates

    Sharing is caring!

    164 shares
    • Facebook5
    • Twitter

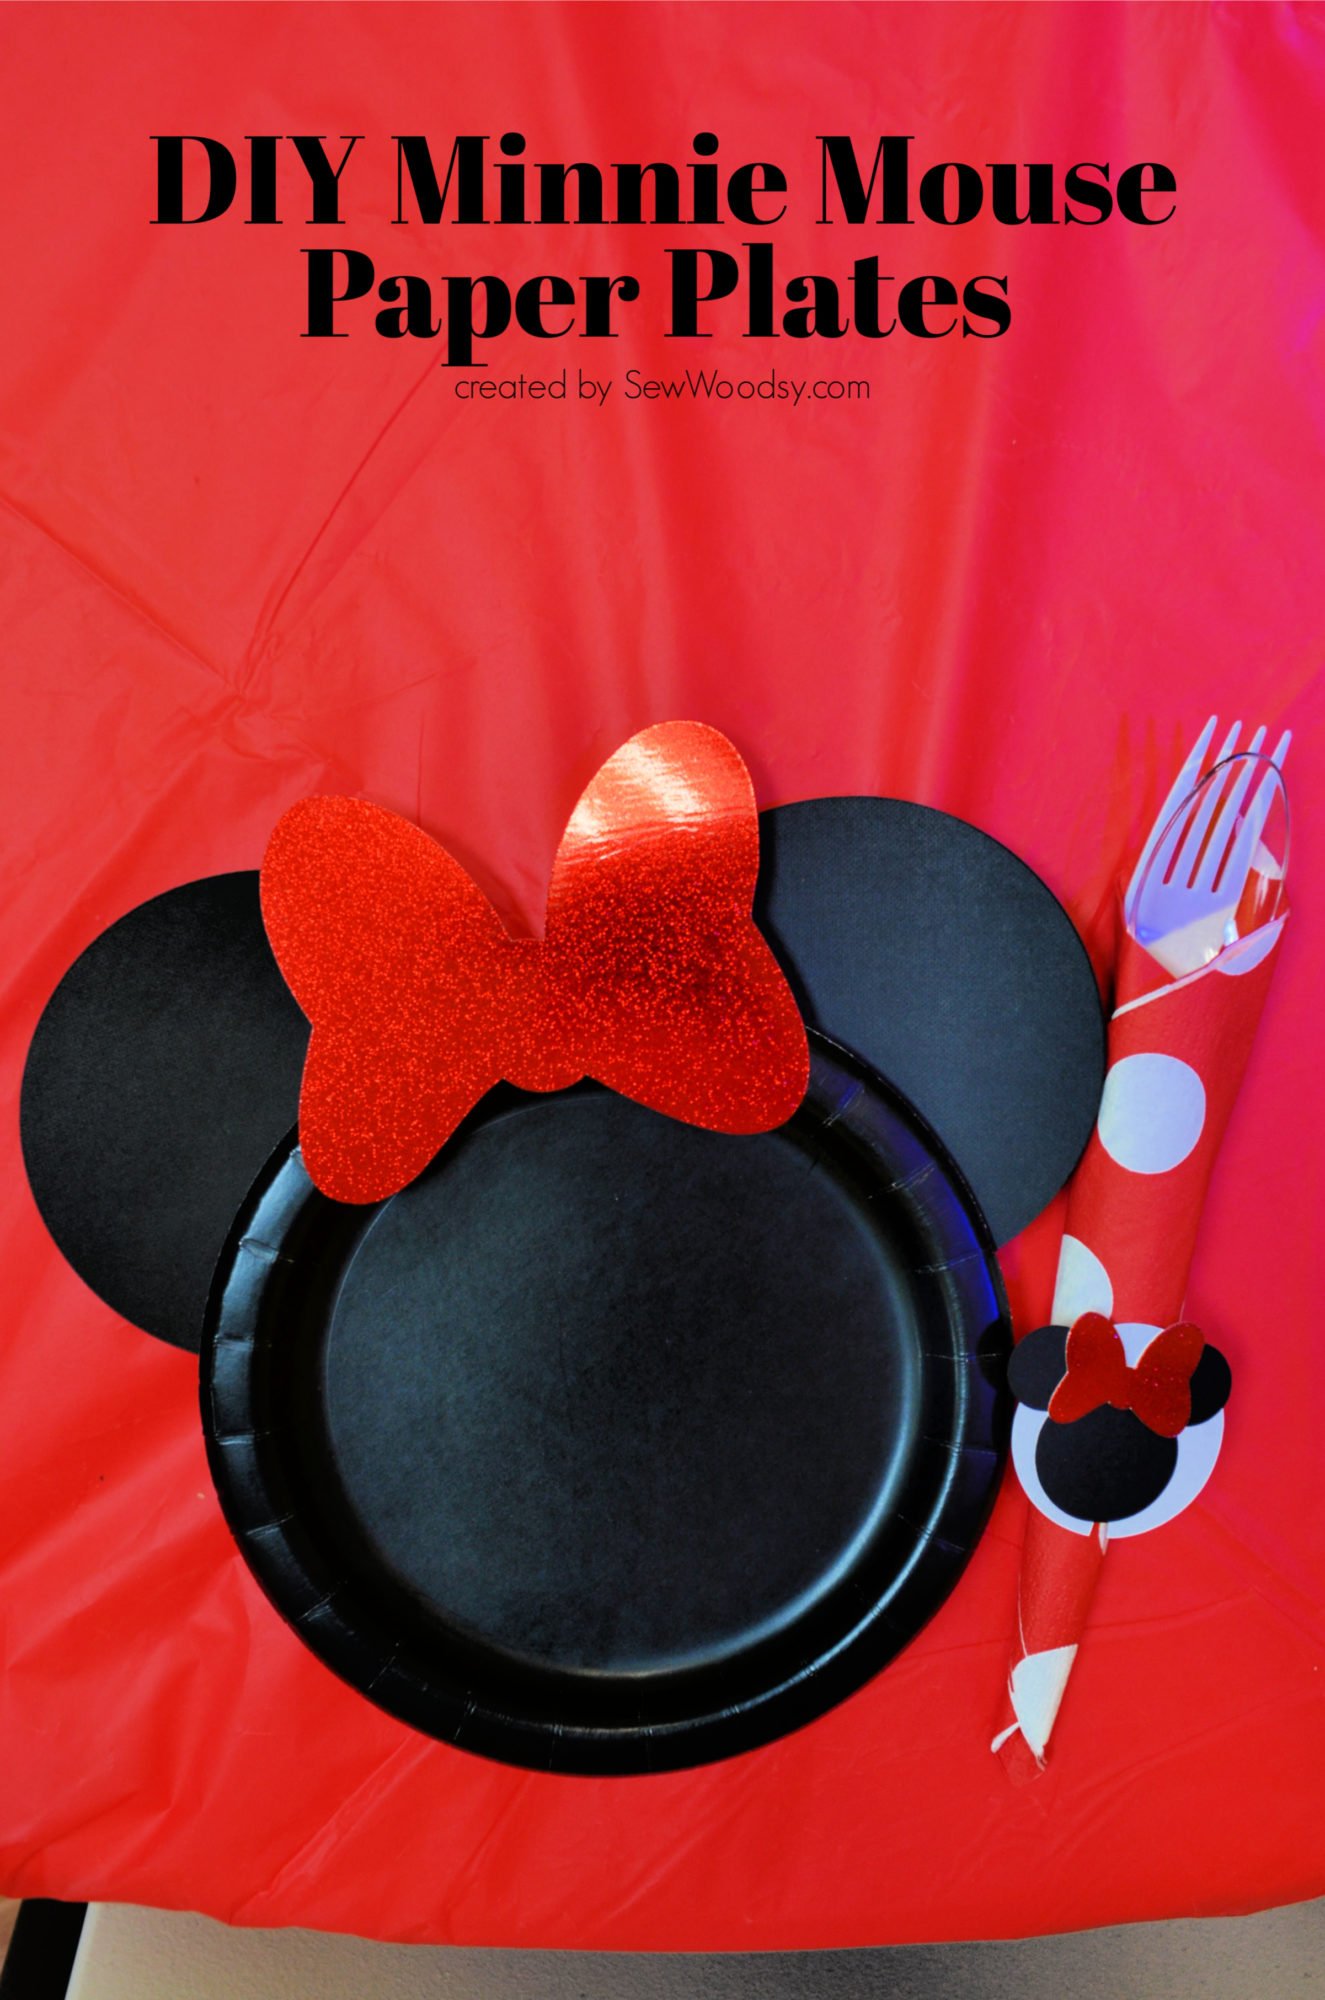
    Create adorable DIY Minnie Mouse Paper Plates for the your next Minnie Mouse themed Birthday party using a Cricut, Cardstock, double-stick tape, and paper plates!

    DIY Minnie Mouse Paper Plates

    I’m so excited to share how I made these adorable DIY Minnie Mouse Paper Plates for my daughters Minnie Mouse Birthday party last month. After doing a little “Googling” I saw others who had transformed paper plates. I knew I wanted to do this for the tables in our party room. With the help of the Cricut Maker, Black Paper Plates, Black and Red cardstock, and some Double-Sided Tape I was in business in no time. This is honestly, such an easy but impactful party decoration to add to your Minnie Mouse themed Birthday party. Of course, if you are having a Mickey Mouse themed party just don’t add the bow!

    DIY Minnie Mouse Paper Plates Supplies

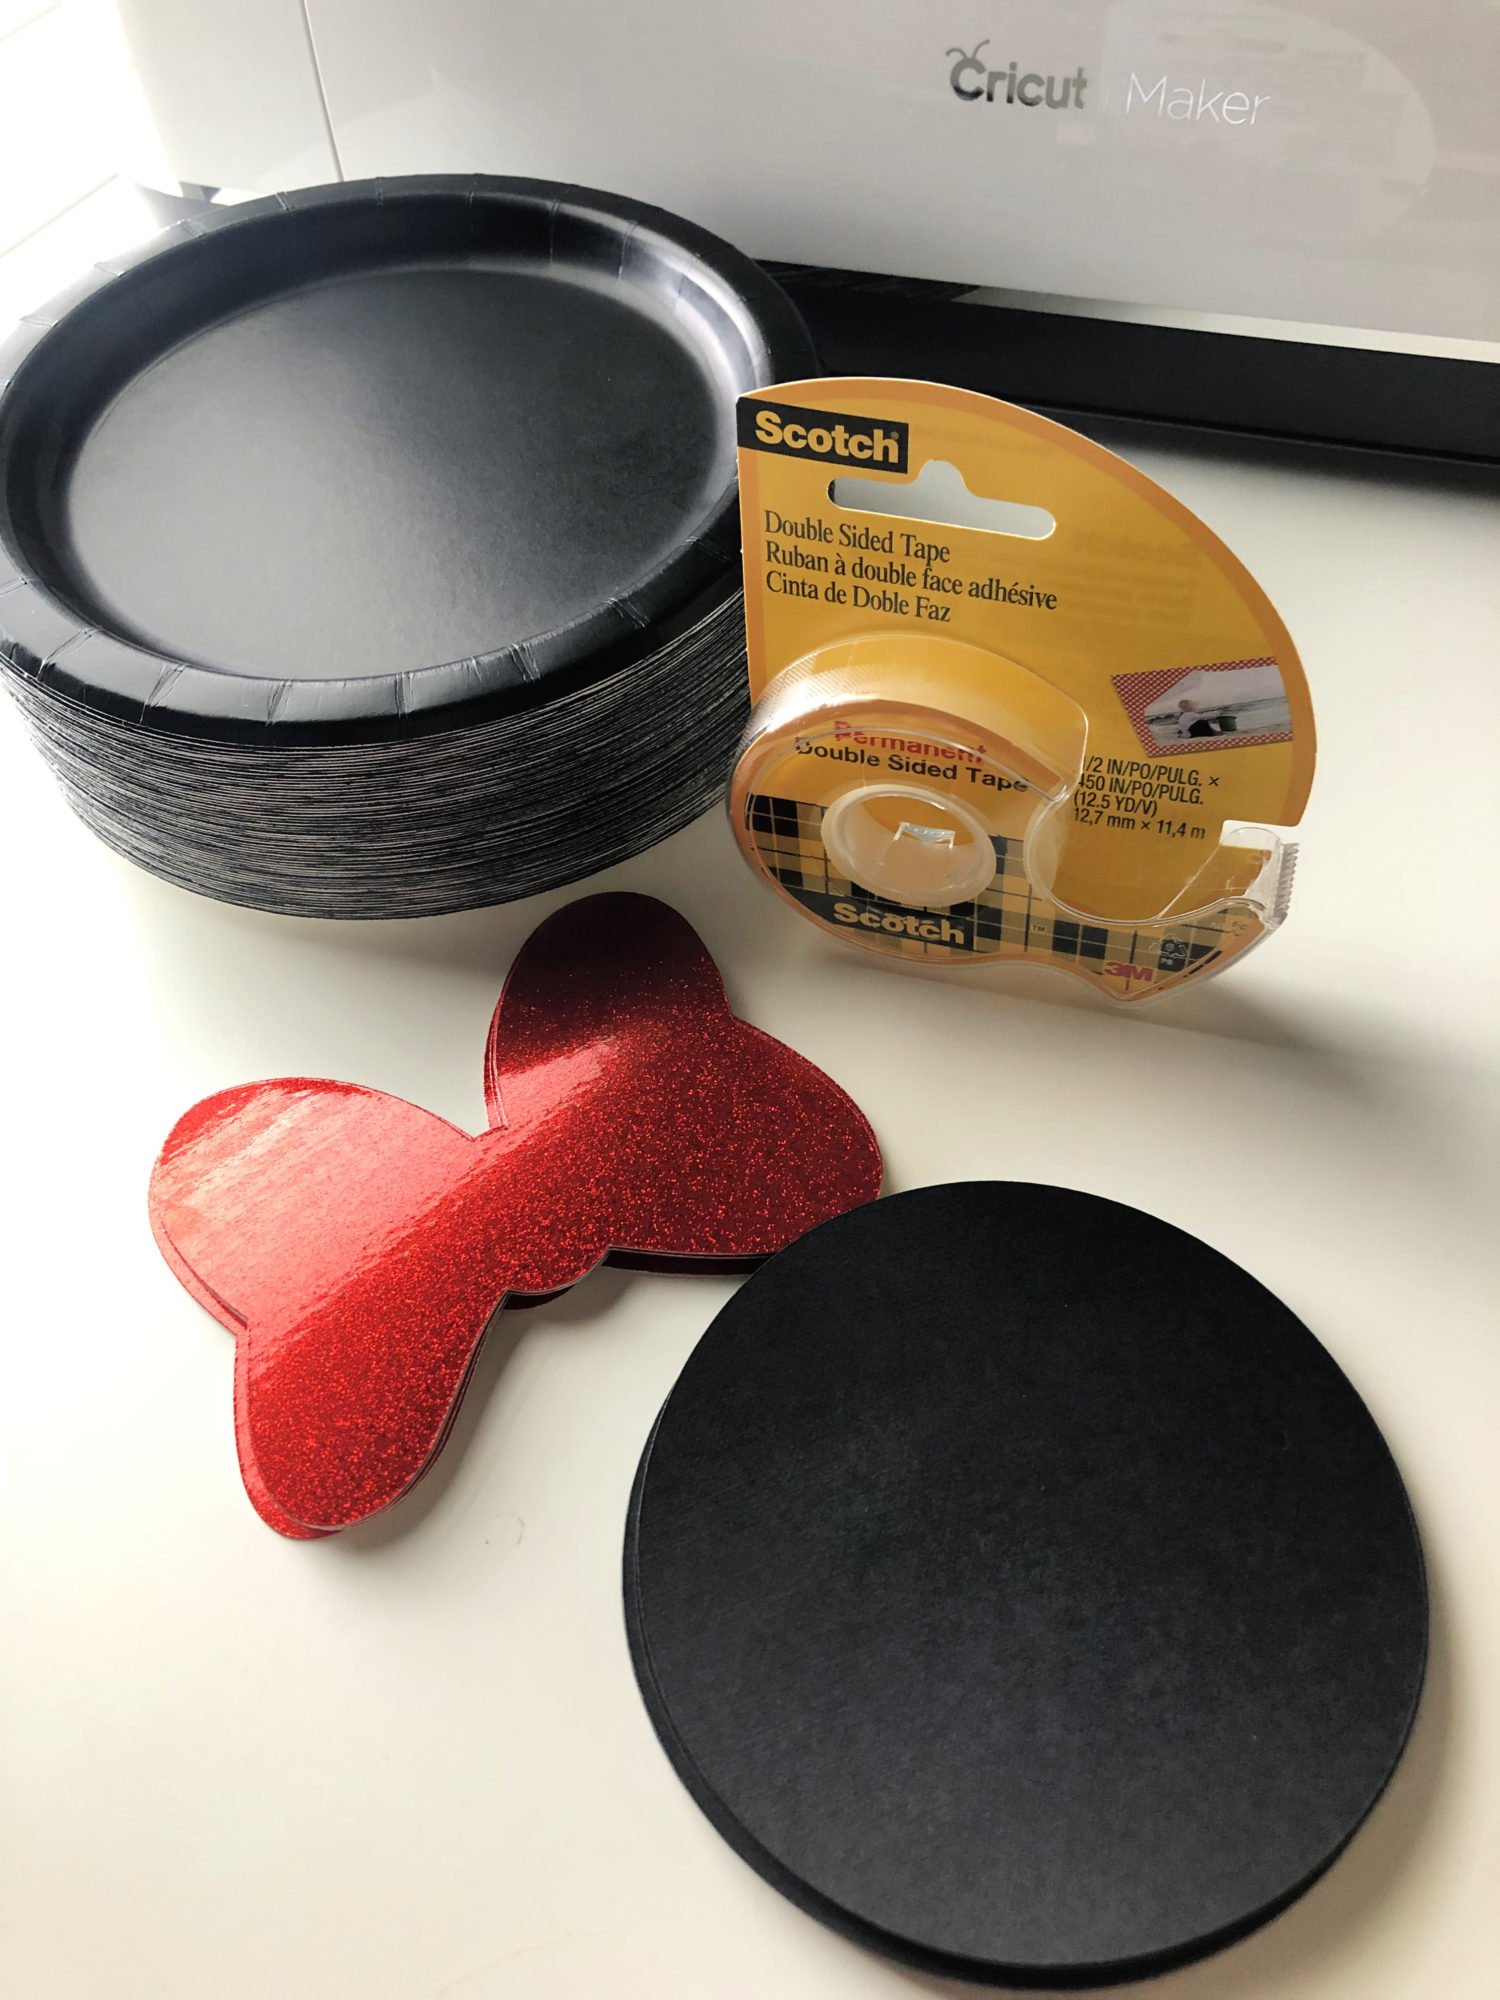
    Supplies needed to make DIY Minnie Mouse Paper Plates:

    • Cricut Maker
    • Cricut Design Space® + DIY Minnie Mouse Paper Plates file
    • Cricut Mat
    • Cricut Black Cardstock
    • Cricut Shimmer Paper, bedazzler sampler
    • Black Paper Plates
    • Double-Sided Tape

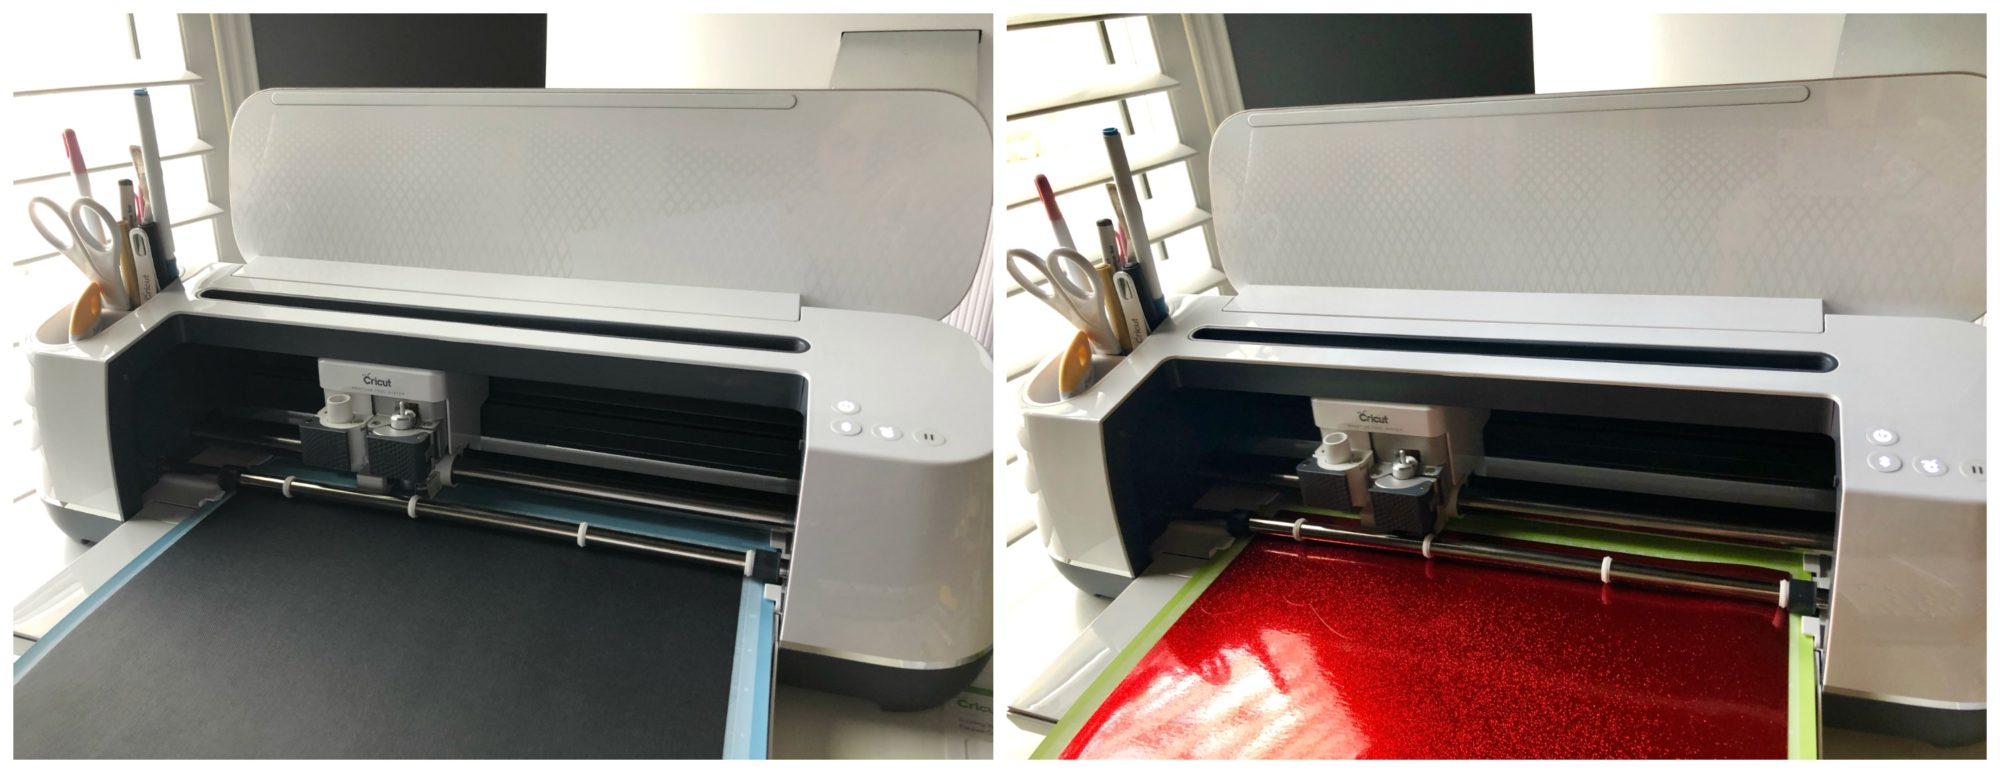
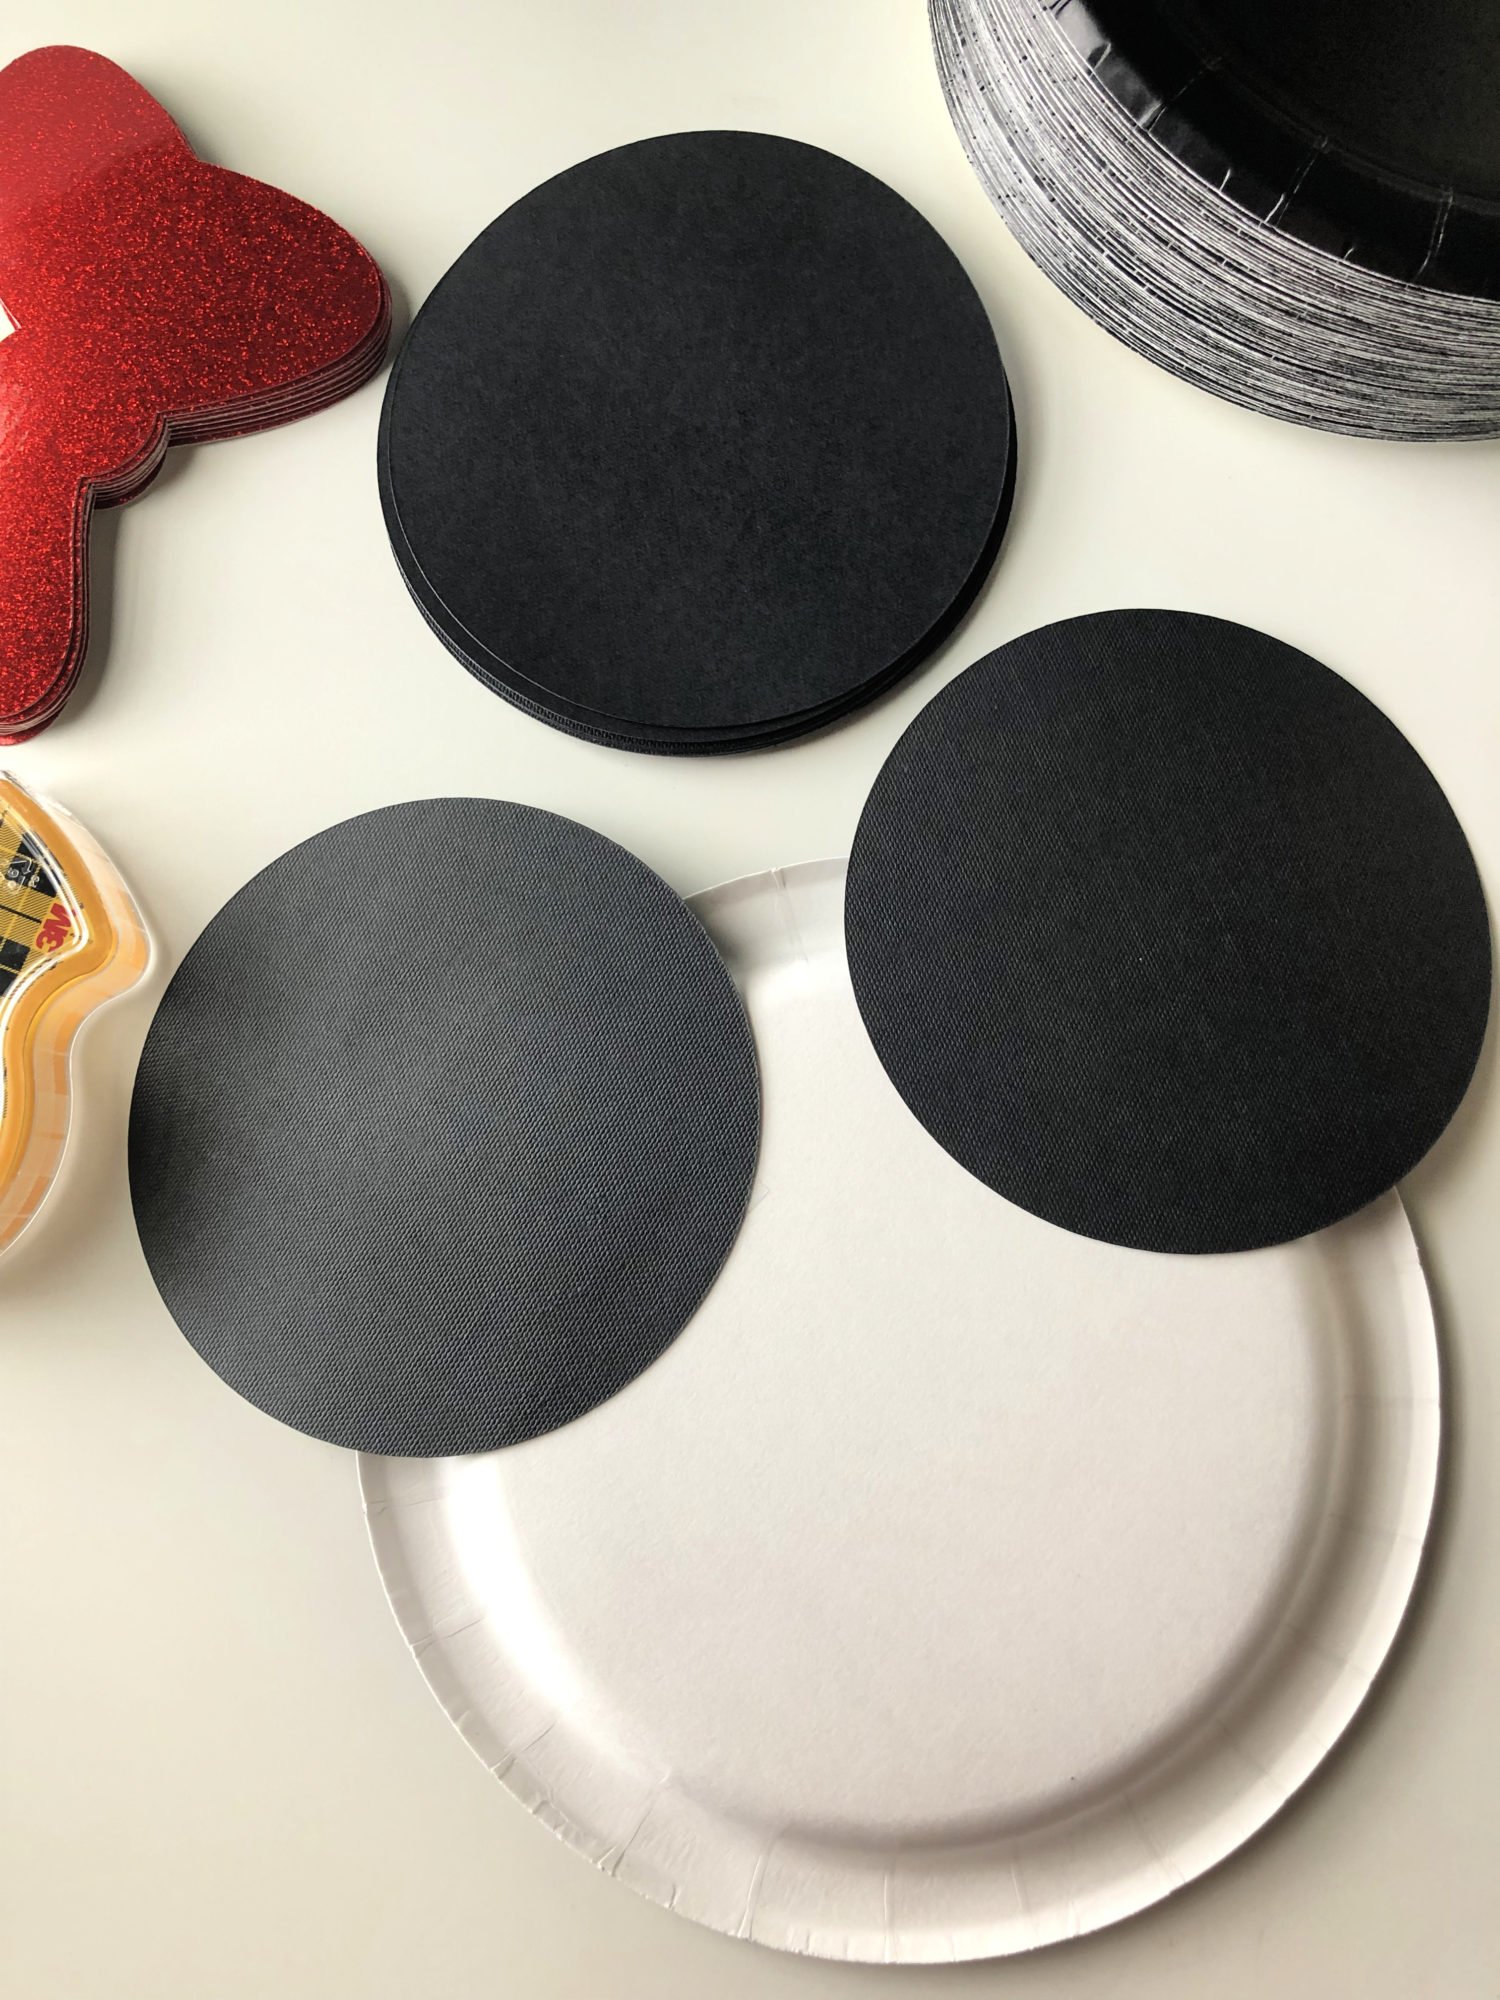
    First, you need to cut your circles and red bows using your Cricut Maker. If you own a Cricut–I’ve done all the heavy lifting for you and created a cut-file! Just click on this Minnie Mouse Paper Plates file.
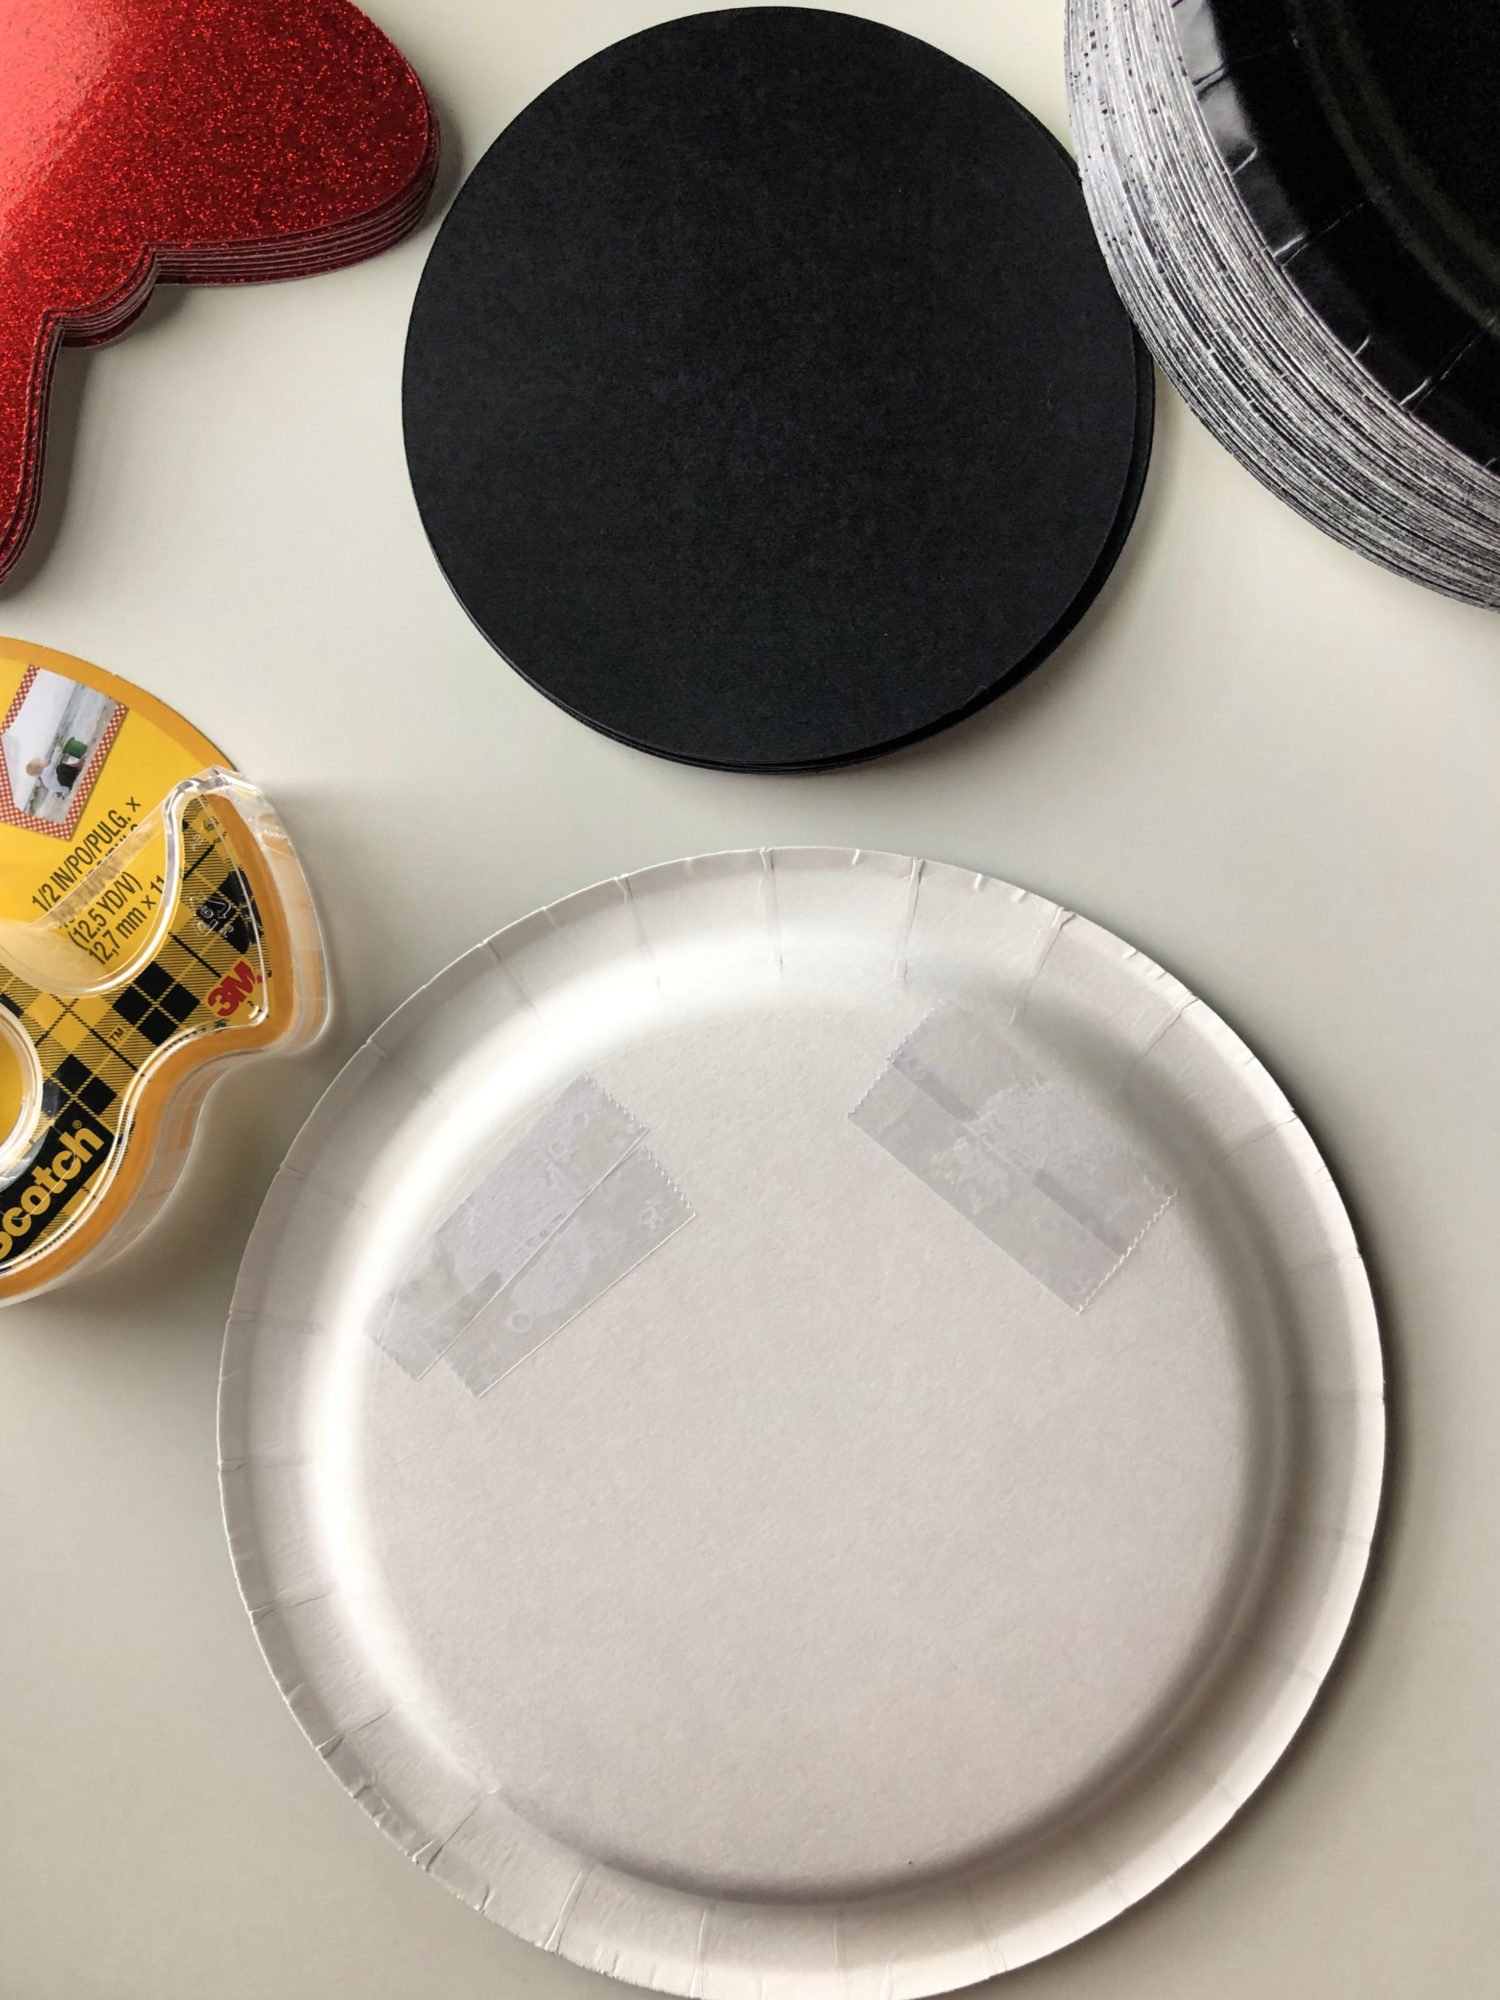
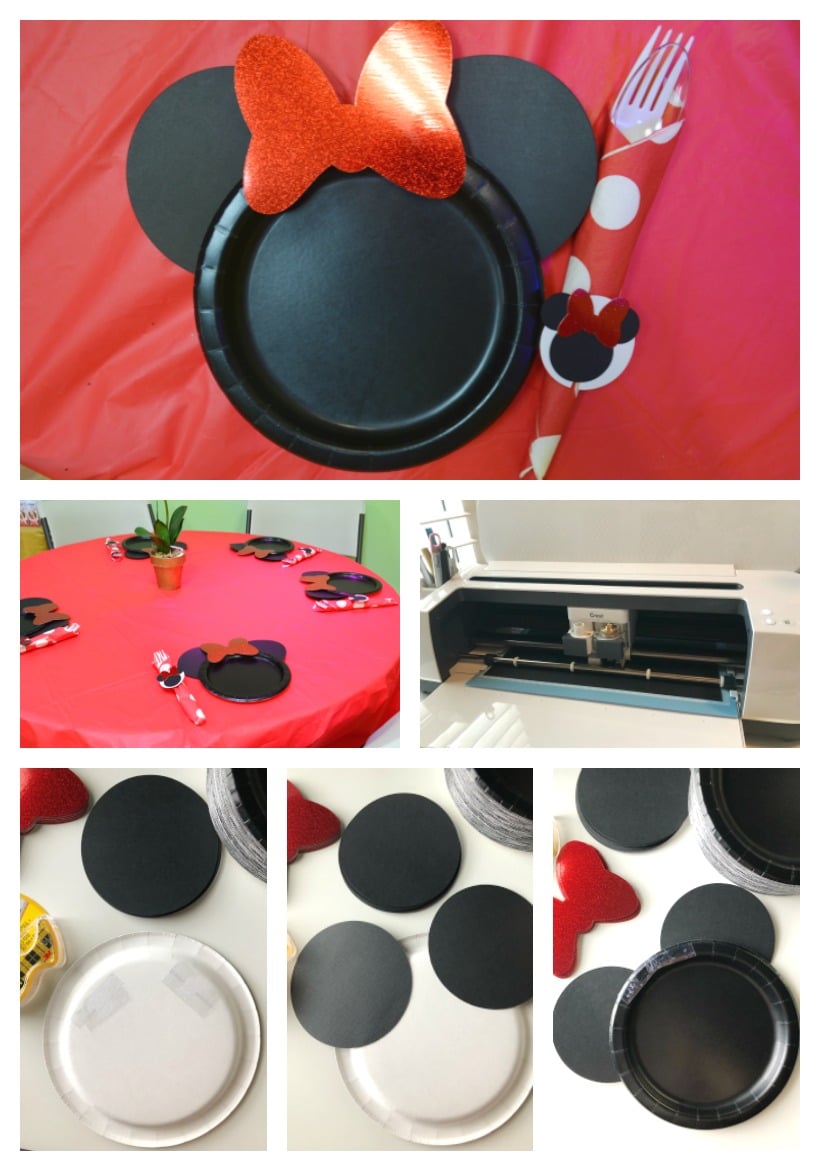
    DIY Minnie Mouse Paper Plates Step 1

    Step 1

    Once you’ve cut your circles and bows it’s time to assemble. First, place two pieces of Double-Sided Tape on each side of the plate (as pictured above).

    DIY Minnie Mouse Paper Plates Step 2

    Step 2

    Next, place the two black circles on the tape.
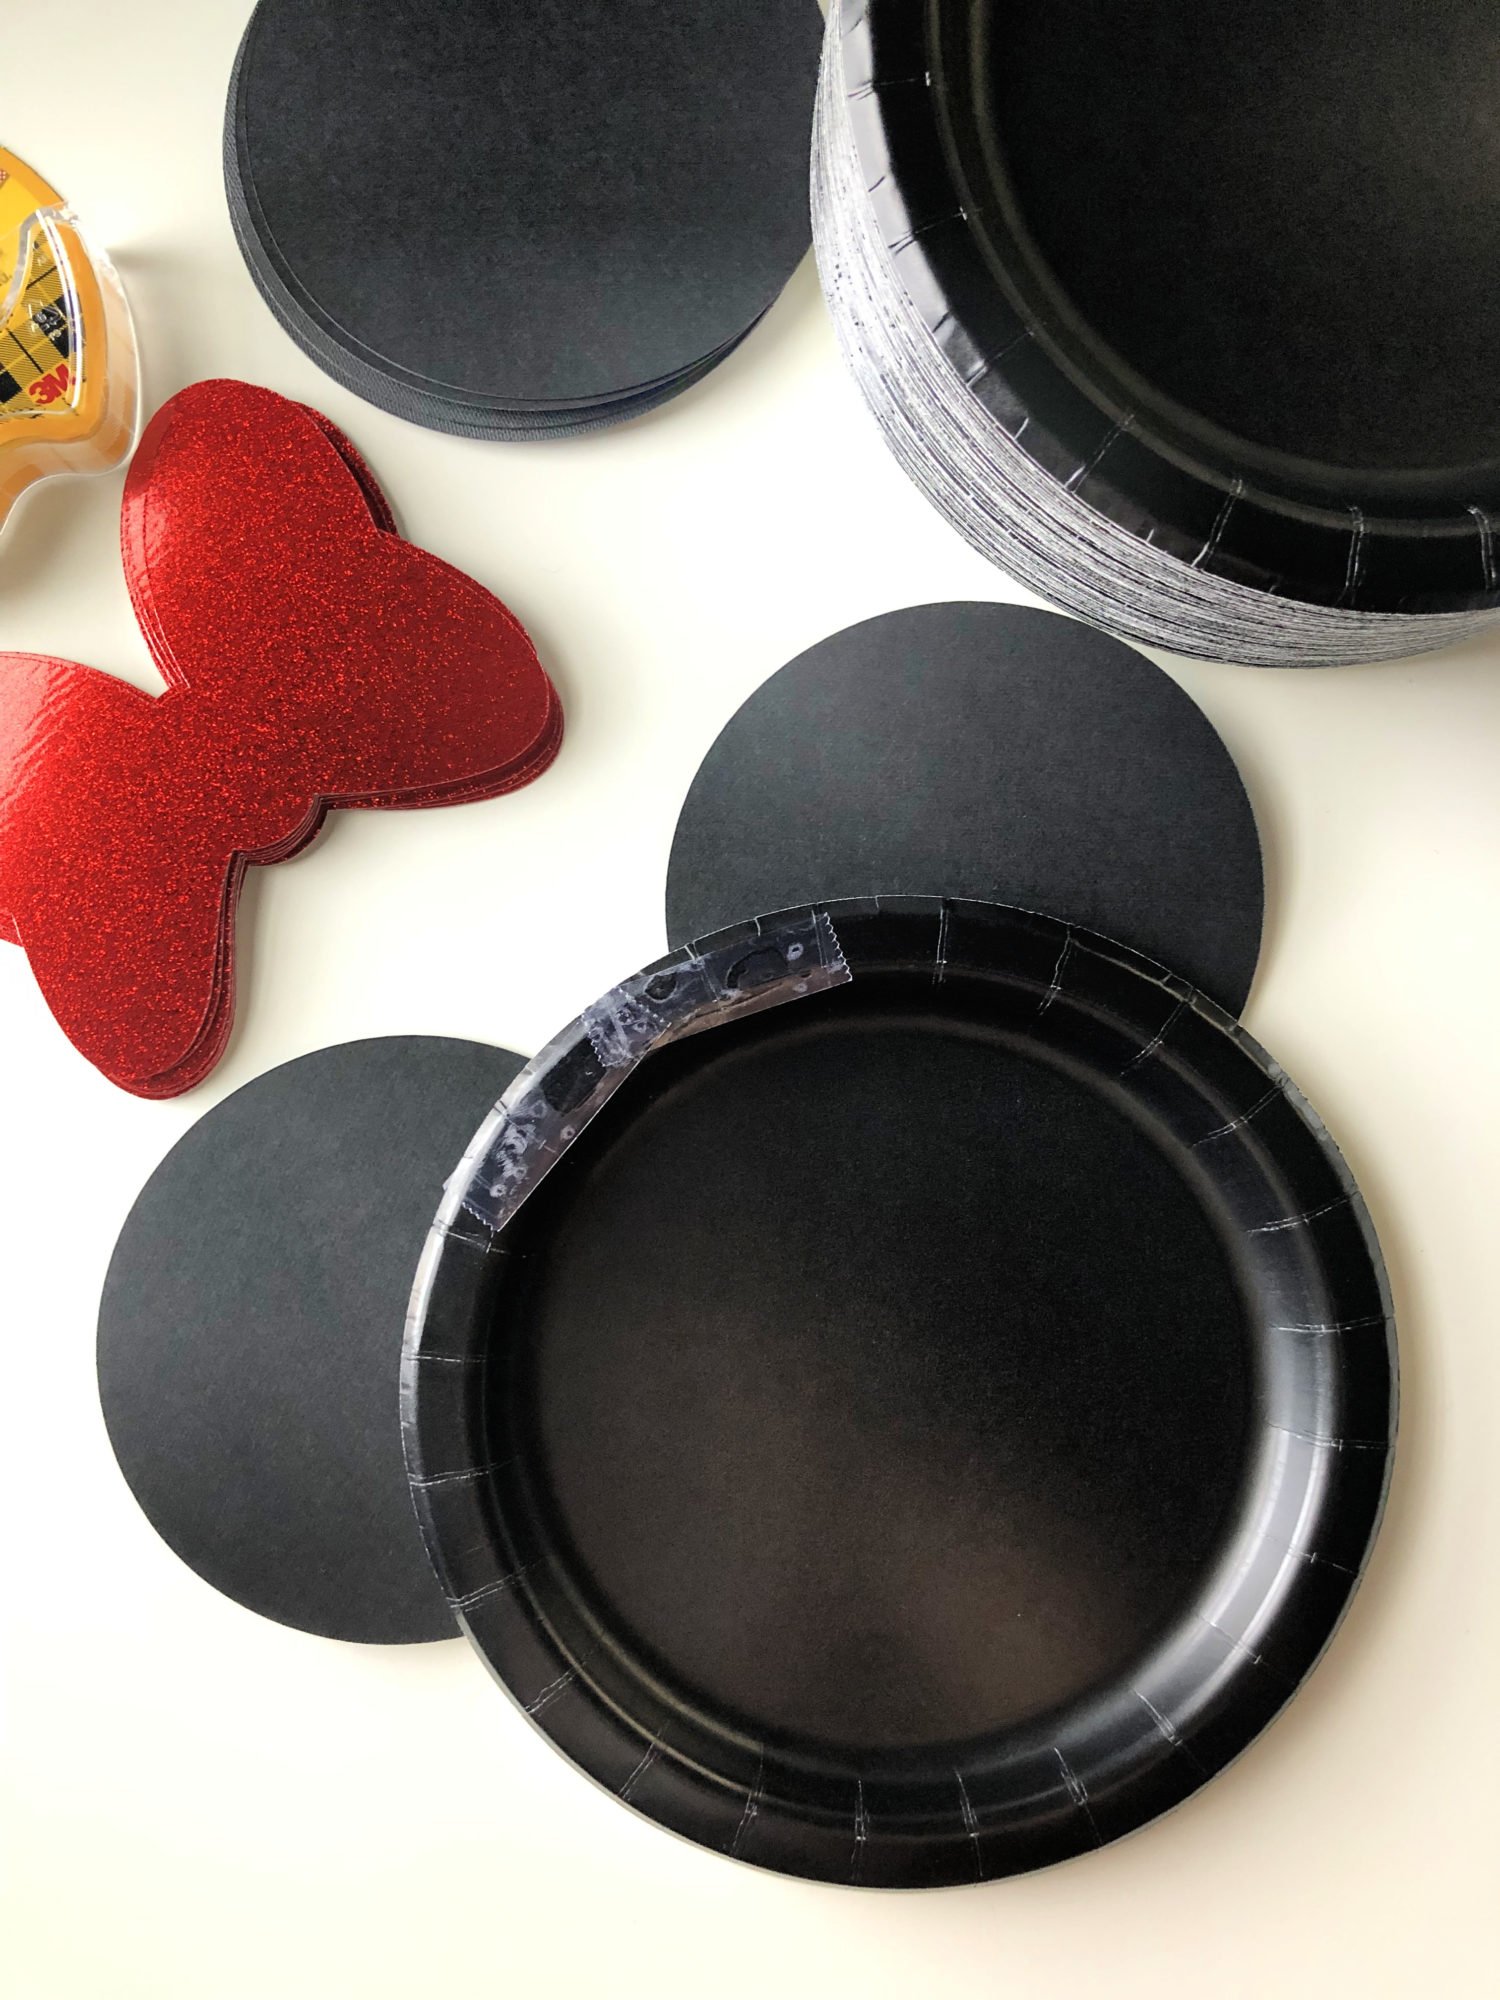
    DIY Minnie Mouse Paper Plates Step 3

    Step 3

    This is how it will look once you turn it over. Then, place two pieces of Double-Sided Tape in the middle where the bow will go.
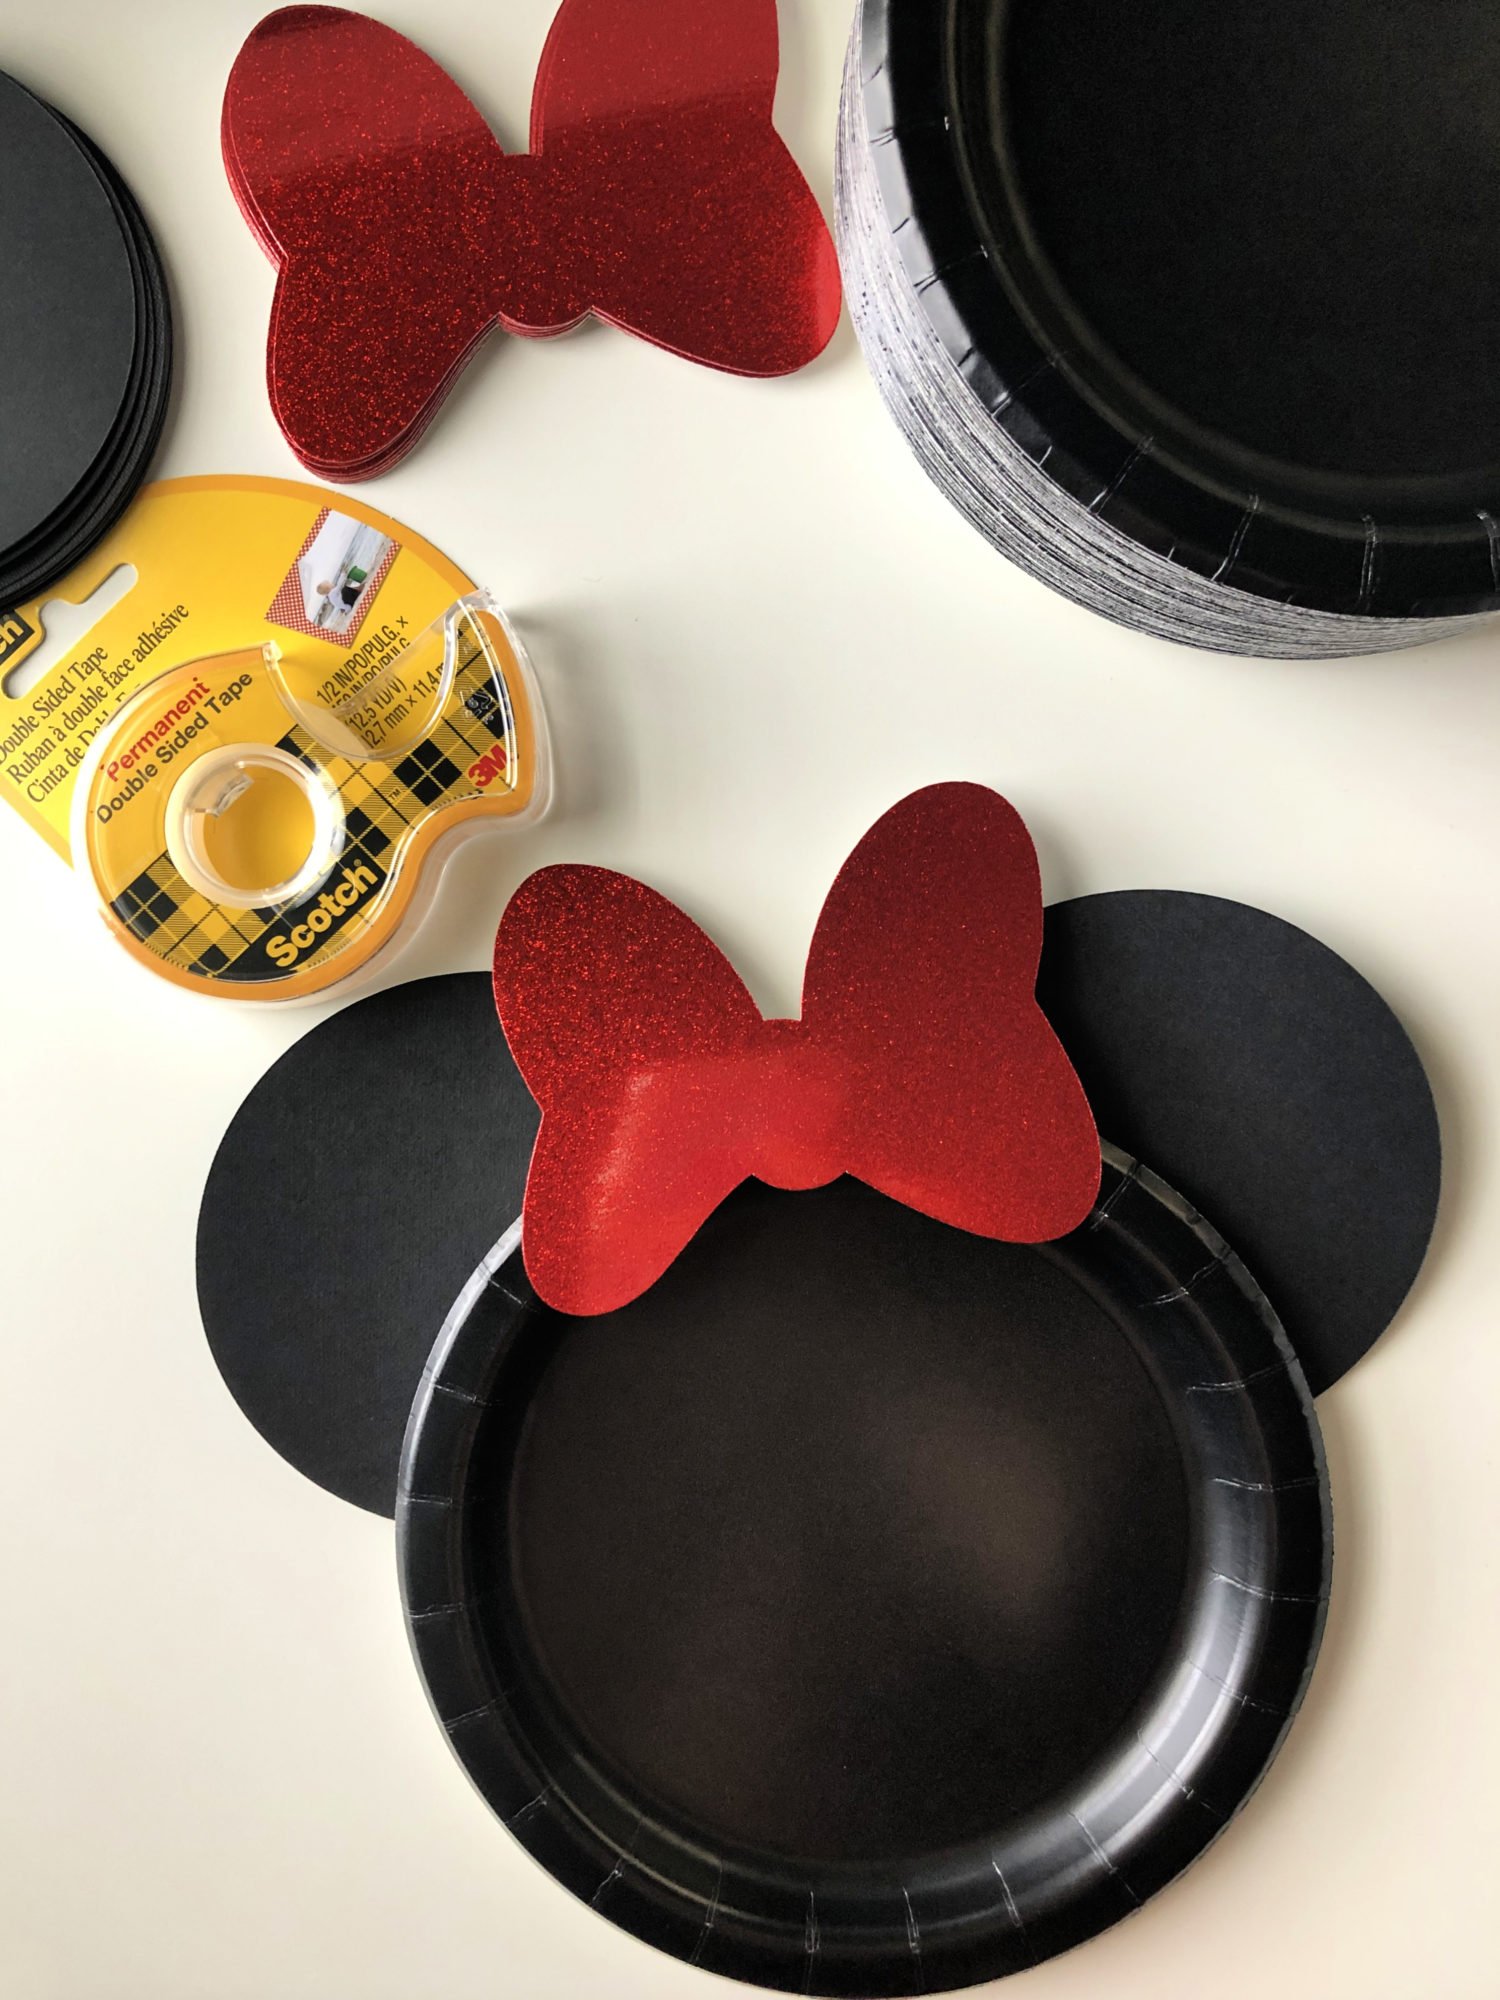
    DIY Minnie Mouse Paper Plates Step 4

    Step 4

    Then, add on the red shiny bow! Repeat until you have as many plates done as you desire. I ended up doing over a dozen for my daughters party and it took me maybe 30 minutes if that from start to finish.

    DIY Minnie Mouse Paper Plates

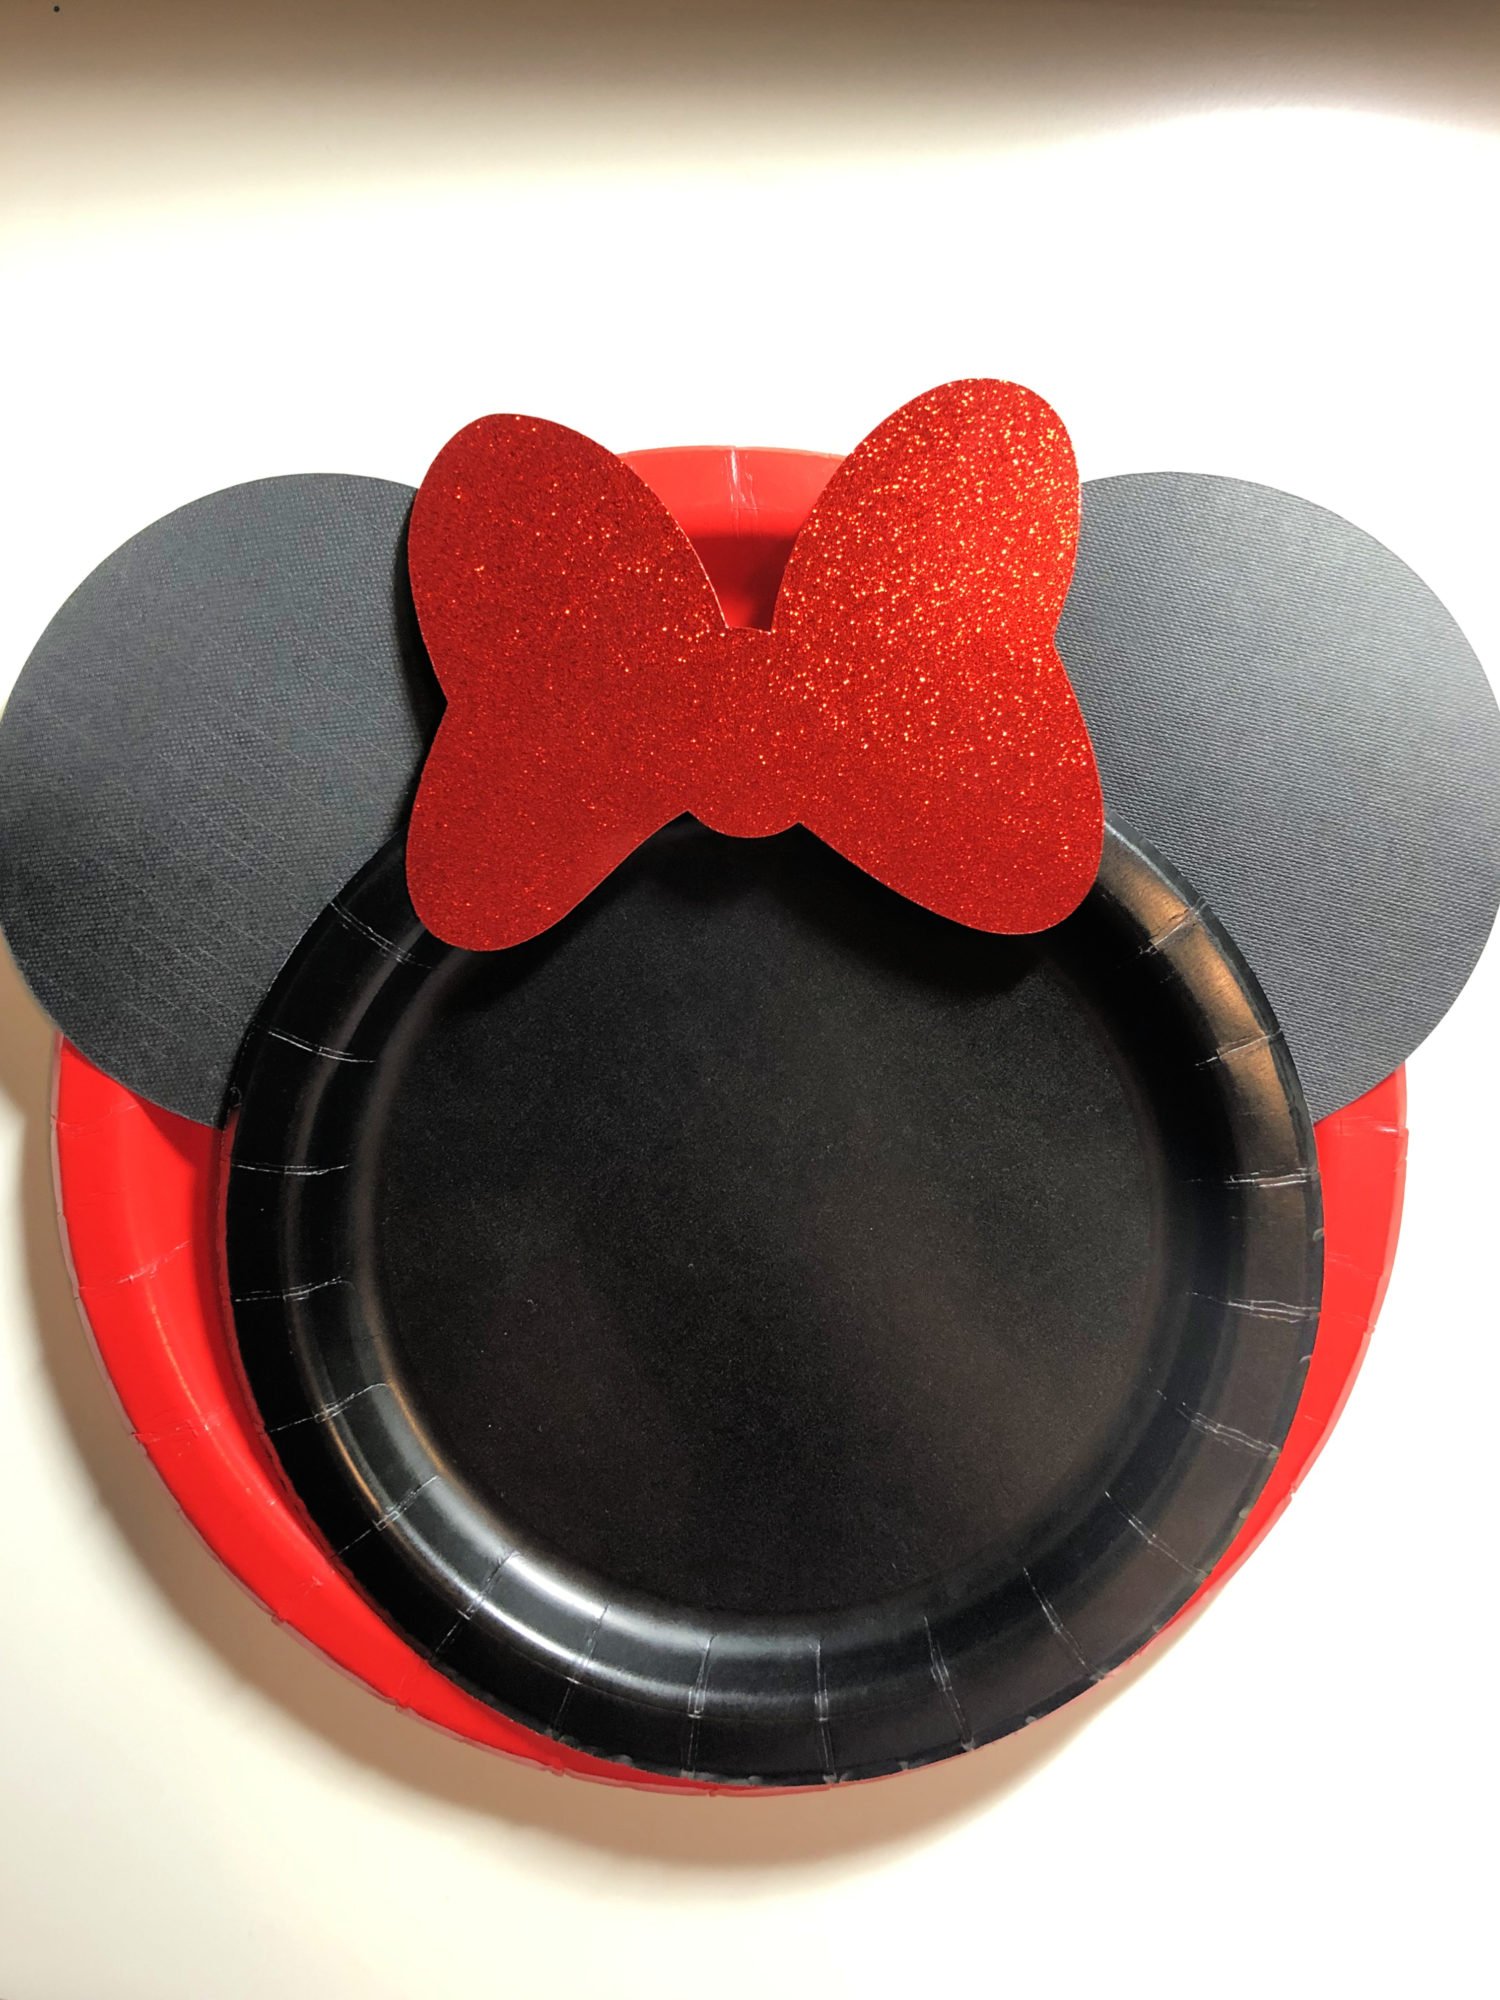
    Here is the finished product! I loved how these turned out!

    DIY Minnie Mouse Paper Plates Supplies

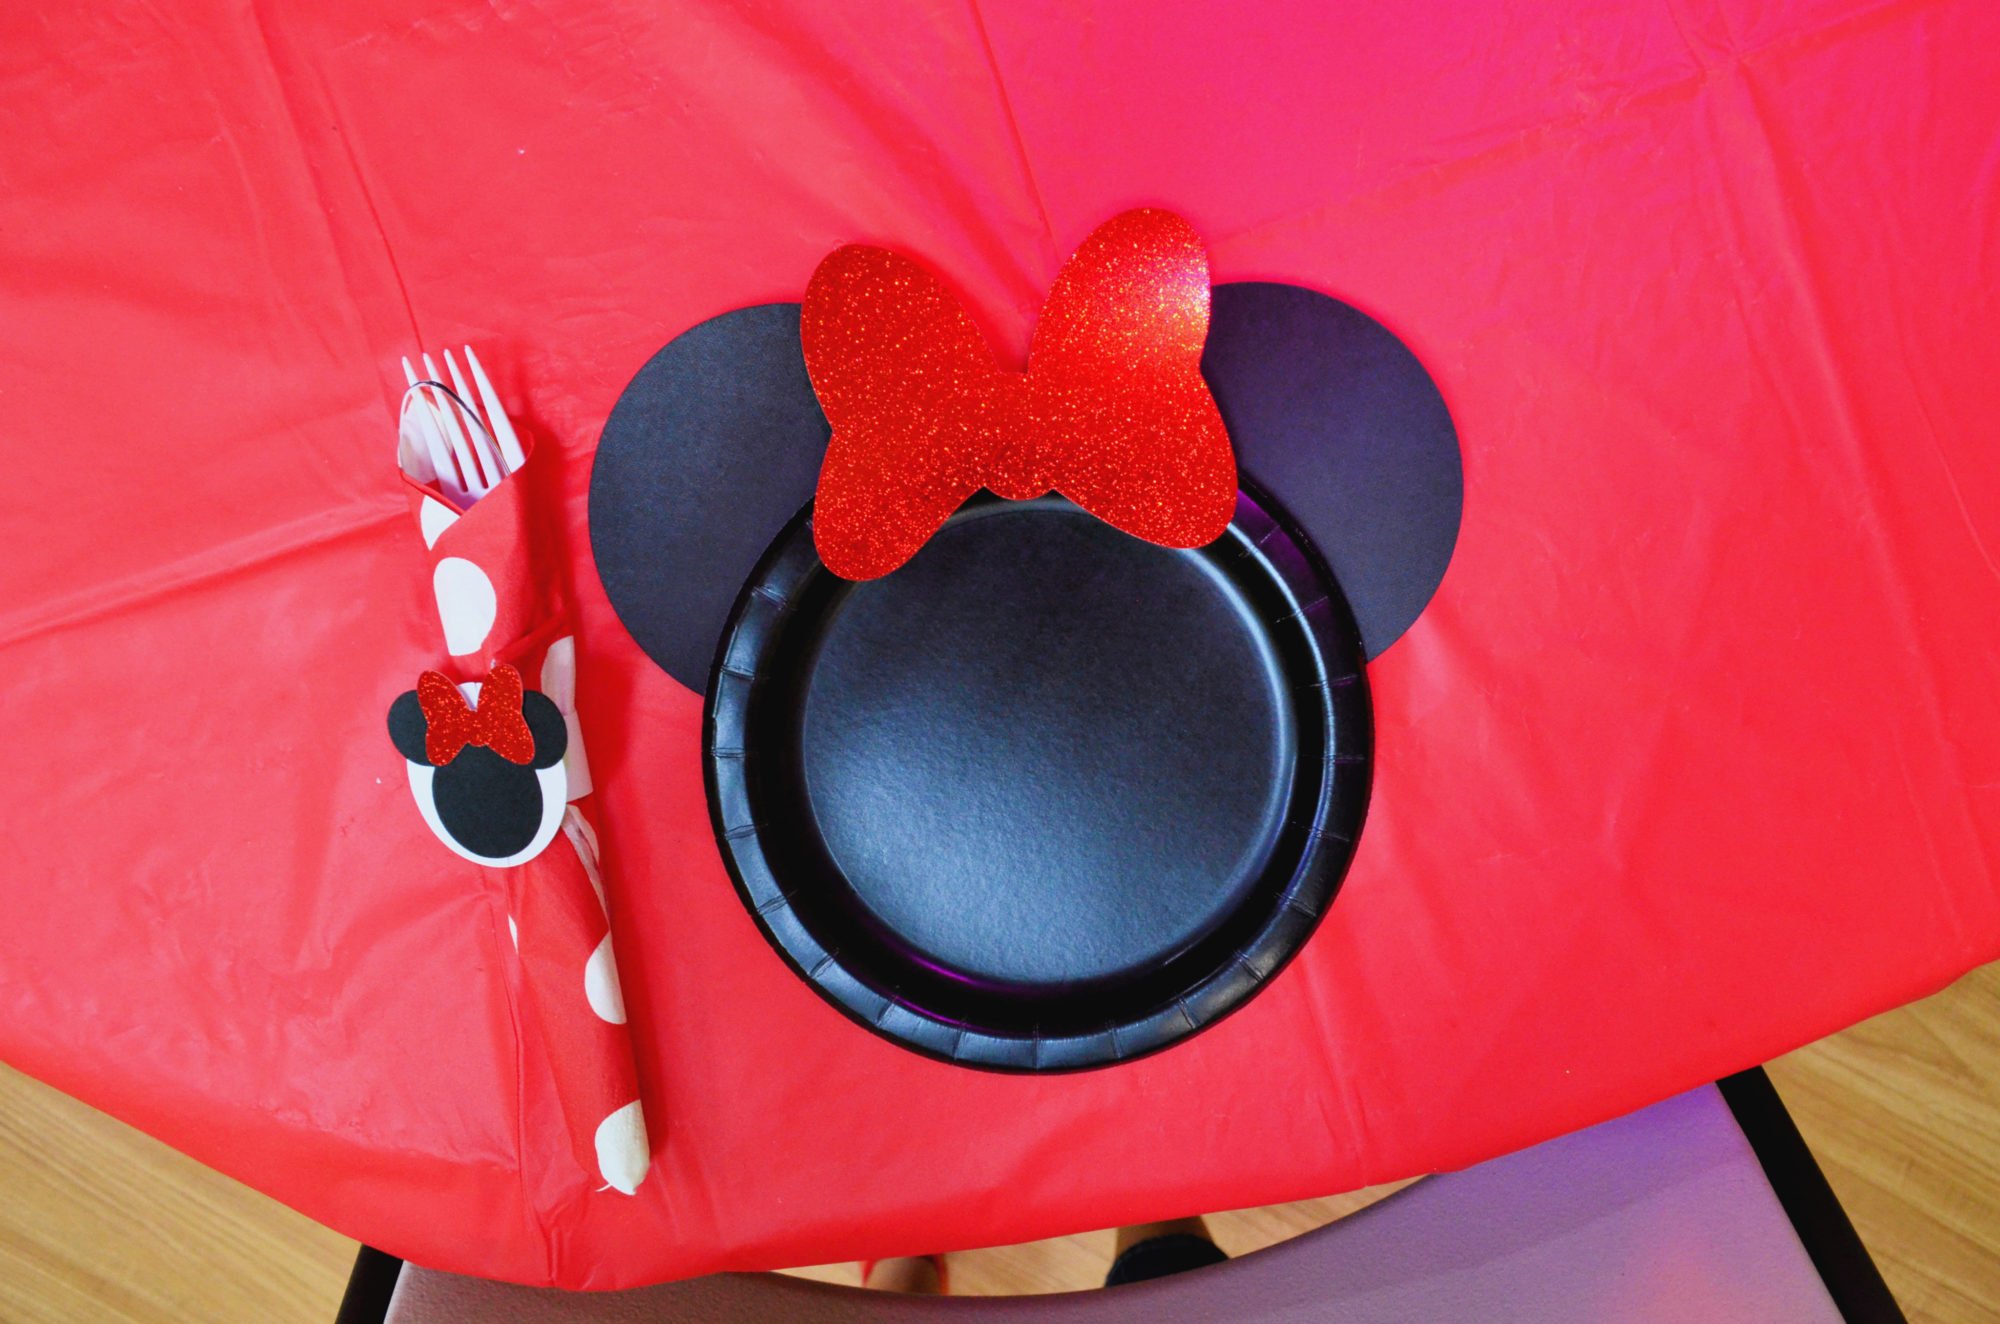
    Because I used a red table cloth I opted to not use a red plate underneath the Minnie Mouse table cloth!

    Minnie Mouse DIY Paper Plates

    If you love how these plates turned out make sure you grab the Cricut Design Space file for DIY Minnie Mouse Paper Plates here!

    Looking for more Minnie Mouse themed Birthday party ideas?

    • Minnie Mouse Birthday Party Ideas
    • DIY Minnie and Mickey Mouse Party Hats
    • DIY Mickey & Minnie Mouse Favor Bags
    « Steak-Cation Weekend Getaway at The Epicurean Hotel, Tampa!
    Inside the new The LEGO® MOVIE™ World »

    Reader Interactions

    Leave a Reply Cancel reply

    Your email address will not be published. Required fields are marked *

    Primary Sidebar

    • Facebook
    • Instagram
    • Pinterest
    • RSS
    • Twitter
    • YouTube
    Male and female hugging on each other in the woods.

    Hi, we're Katie & Jon! Welcome to our home away from home!

    Sew Woodsy is a lifestyle blog focusing on crafts, home DIY projects, family, travel and all things life. Get comfy and join us on our adventure!

    More About Us →

    Featured On

    9 different logos from various media outlets where Sew Woodsy has been featured on.

    Patriotic Projects

    • 30+ Patriotic Crafts
    • Patriotic Coloring Pages
    • “Home of the Brave” Patriotic Cake Topper
    • USA Mini Bunting Banner

    Trending

    • How To Grow Green Onions
    • How to Host a Baby Shower at Work
    • Tips & Tricks on Installing Butcher Block Countertops
    • How to Create a Natural Log Pathway + Video

    Footer

    ↑ back to top

    9 different logos from various media outlets where Sew Woodsy has been featured on.

    About

    • About Us
    • Privacy Policy
    • Accessibility Statement

    Newsletter

    • Sign Up! for emails and updates

    Contact

    • Contact
    • Work with us
    • Advertise

    Copyright © 2010 - 2022 Sew Woodsy