We live in Florida. So what does that have to do with installing a ceiling fan? It’s a must that every room has a ceiling fan. Most northerners don’t hike up the heat and the winter and the same goes with Southerners we don’t keep our houses ice cold in the summer time. It’s just not cost efficient.
When we started brainstorming about the nursery I looked high and low for the perfect ceiling fan for the nursery. That’s when I stumbled across the Cool Vista Damp Oil-Rubbed Bronze Ceiling Fan from LampsPlus. We’ve partnered with them to share how to install a ceiling fan. Every person I’ve shown teaser photos to says that they LOVE the ceiling fan, and to be honest, I can’t blame them!
Jon is not an electrician. He is a licensed contractor and is very handy, but electrical work is not his thing. The extent of his electrical handiness (and comfort level) is installing fans and lights. Other than that–we have no problem paying an electrician to do the job.
We have been very reluctant to post any types of tutorials that have to do with electric because 1. we don’t want someone burning down their home 2. we don’t want them coming after us and suing us. So I’ve put the disclaimer out… he is not a licensed electrician. But does that you mean you need a licensed electrician to install a ceiling fan? No, you just need to know the basics of installing a fan and be smart when installing.
A few tips before you get started.
- Always read the directions before you start any project. This especially goes with electrical work. Even if this is your 100th fan you’ve installed. Every fan and light fixture works differently.
- To avoid electric shock, it’s always best to turn off the main power box before touching any wires.
- Make sure your ceiling is high enough to accommodate your fan. The last thing you want is to decapitate someone because your fan is too low.
- Always attach blades to the motor housing after the motor housing has been installed.
- After you make all your electrical connections, the spliced conductors should be turned upward and pushed carefully up into outlet box.
- The wires should be spread apart with the grounded conductor and the equipment grounding conductor on one side of the outlet box and the “HOT” wires on the other side.
- Invest in a non-contact voltage tester. It will give you peace at mind when your messing with electricity. Click the link–it’s similar to what he uses. Best $20 investment!
 Before Jon ever starts installing a fan he unpacks the fan and confirms that he has all the pieces that are listed in the directions. Then he turns off the power at the breaker box to avoid possible electrical shock. Jon, like everyone else (or at least what everyone else should do) always reads the directions first.

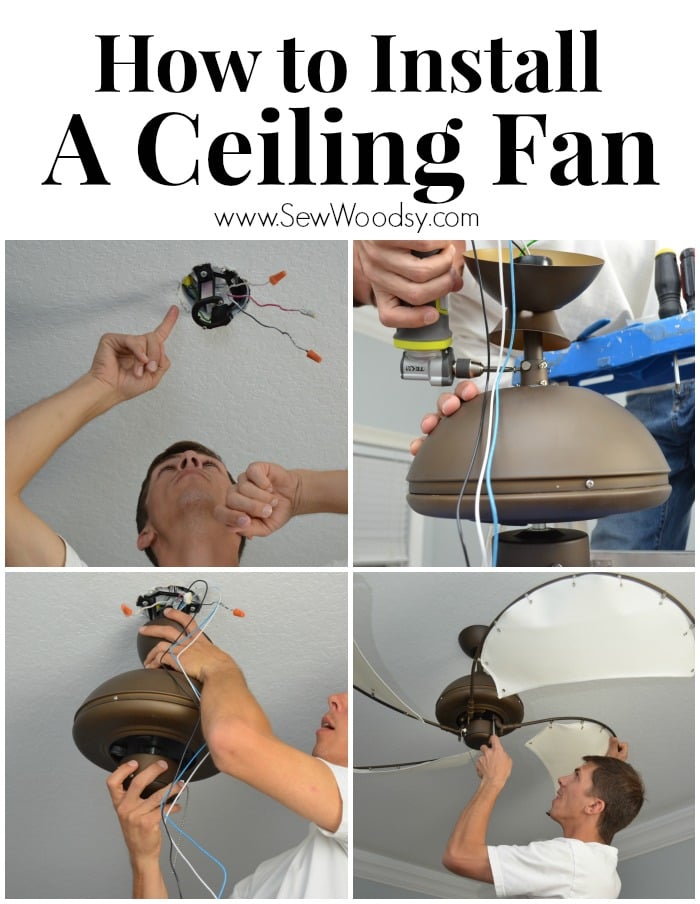
First, make sure all the power is off to the area you are installing the fan. Jon always turns the power off and then uses his non-contact voltage tester to ensure that the electricity is off. If it’s on it will start giving a high pitch sound. Install mounting bracket to outlet box in ceiling using washer and the mounting screws provided with the outlet box. For this fan, and most fans, you will want to replace the mounting bracket with the one the fan came from. Jon loves using the RYOBI 18v Right Angle Drill to take on projects that have screws in small places. 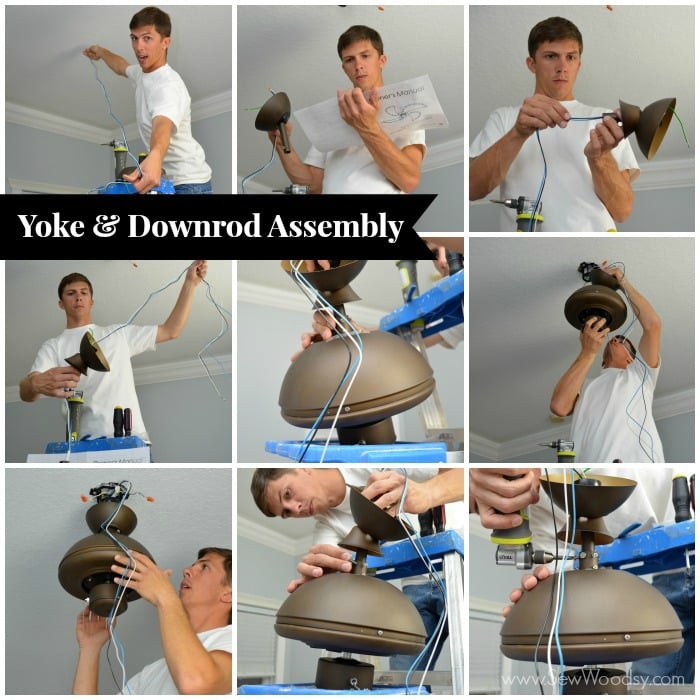
Read the directions. Every fan and light fixture is different and may have requirements that you aren’t aware of. For this fan you’ll want to feed the motor wires through yoke cover, canopy and downrod assembly and insert downrod into yoke.
Then, insert the cross pin through yoke & downrod and secure with cotter pin.
Tighten both downrod set screws to further secure downrod, then pull down the yoke cover–to cover yoke. 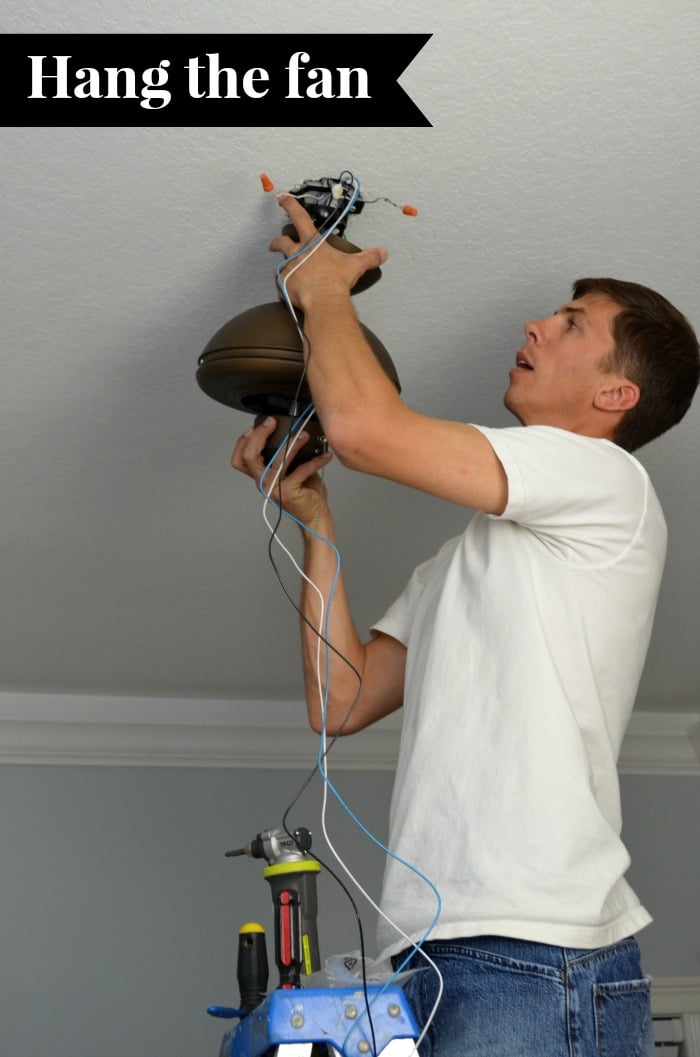
Once you’ve assembled the yoke and downrod it’s time to hang the fan! Most fans can be on the heavy side. If you have a second set of hands this is when you want to have them help out. You’ll want to lift the fan assembly on to the mounting bracket. Rotate the fan so that the groove on the ball engages the ridge in the mounting bracket.
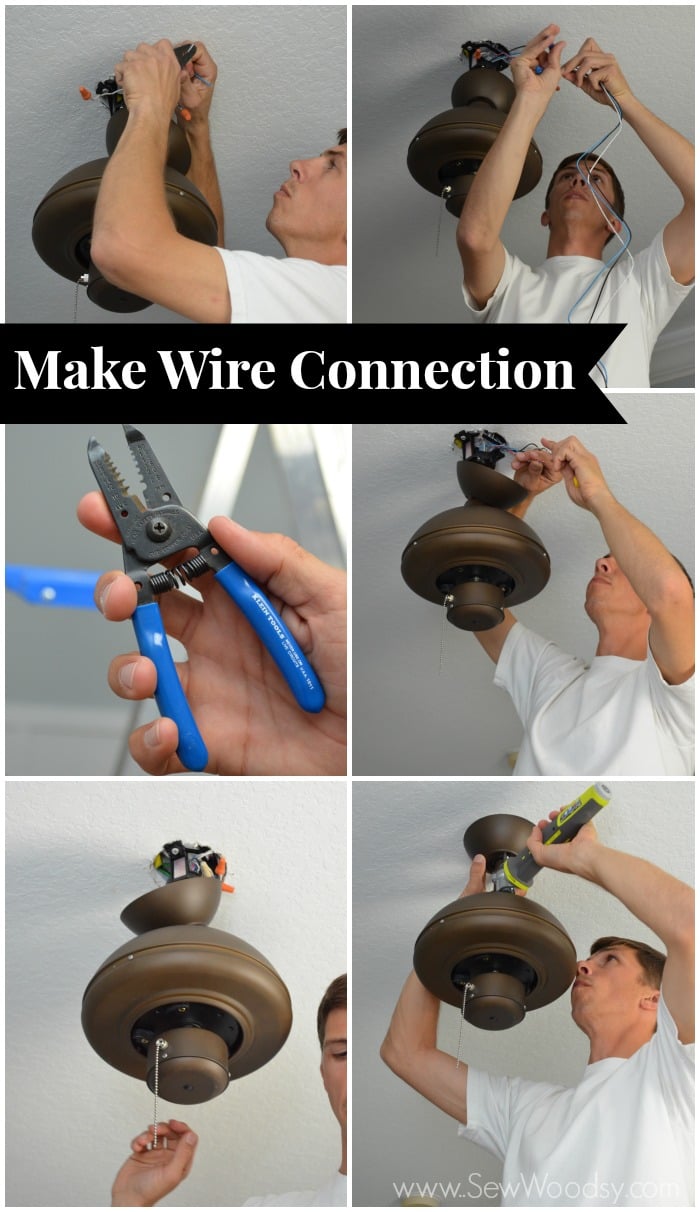
Now, it’s time to make the wire connection. You’ll want to read your directions and follow the diagram they provide. Make sure that all exposed wires are secured inside wire nuts. Most fans/houses will have these wires and will go something like this. Match the white wire from the house to the white wire from the fan. Using wire cutters slide off some of the plastic wire to expose the metal, twist together and lock wire nut. You’ll also want to cut the excess wire. This fan came with lots of extra wire so Jon had plenty to cut! Always cut a little long in case you need more. If you cut it too short you can never get that back.
Then match black from the house with black and blue from the fan (if you only have one switch). BUT we have a second switch that has a red wire. In our case we hook the red wire to the blue wire, and that will make it the light on one switch and the fan on the second switch. Followed by green on green. Easy as that! Once your wires have been connected, you can stuff the wires in the ceiling and install the canopy. For this fan you’ll want to push up the canopy until the two screws on the mounting bracket are engaged with key holes in the canopy. Rotate the canopy slightly until the two screw heads are in the small end of the key holes. Then tighten both with screws.
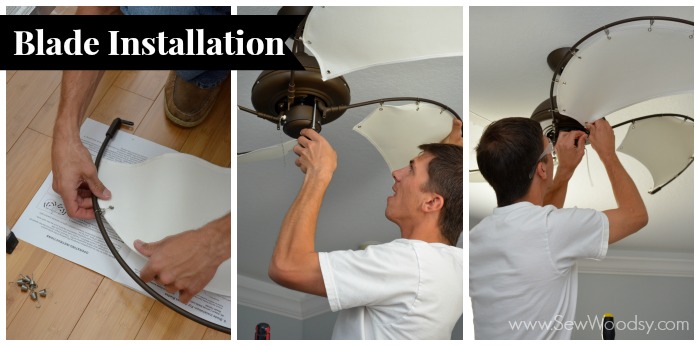 Next, move on to installing the blades. Because these blades are canvas and have springs I requested that Jon wear safety glasses. The last thing I wanted was a spring to snap off and poke his eye out. He laughed and then once he saw / felt the tension and then tried pulling on it he realized it was a smart plan.
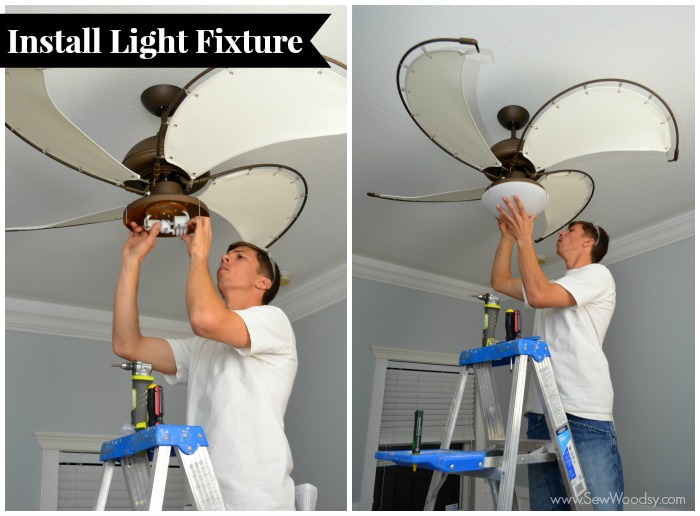 Last up, install the light fixture if your fan has a light fixture. This fan had two pieces to it and it was super simple to install.
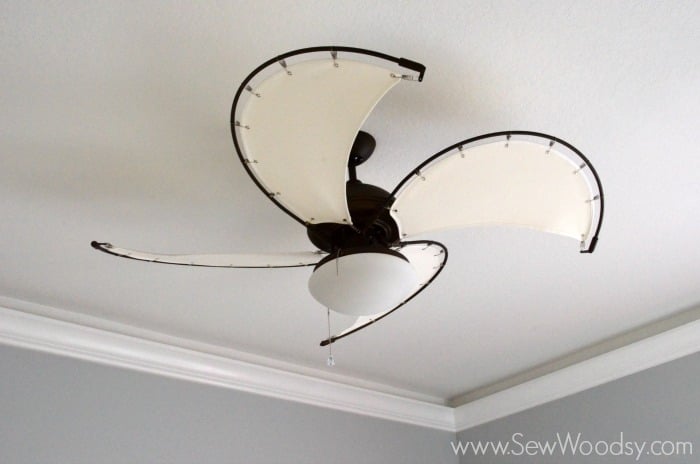
So in a nutshell, I hope you got the gist of how easy it is to install a fan. With a little elbow grease and patience you can install a fan too!
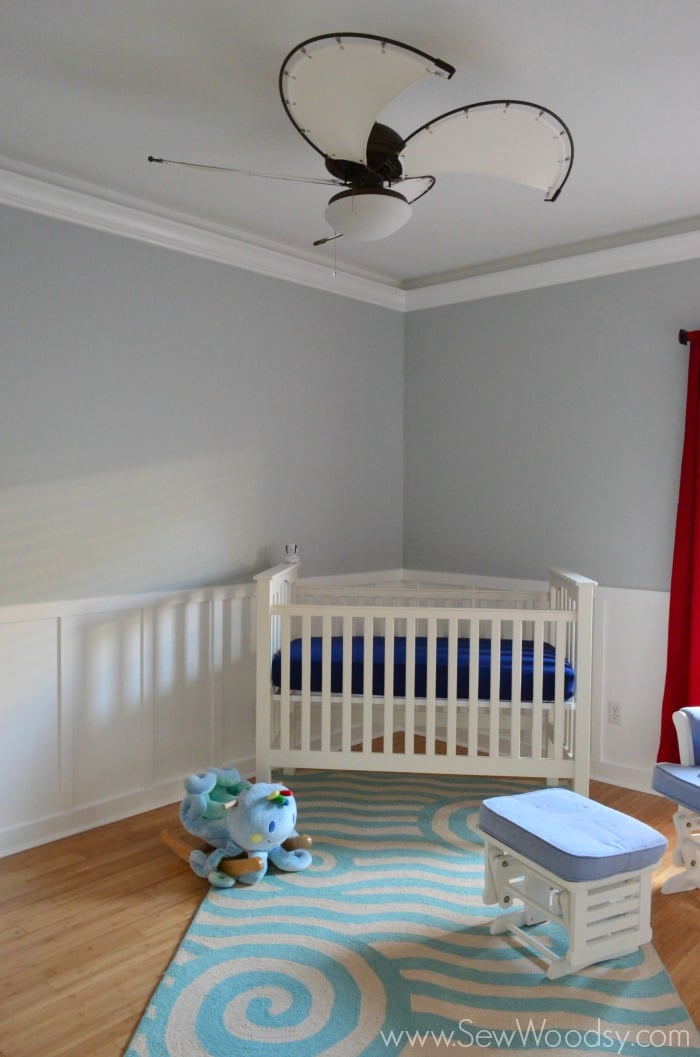
As you can tell the nursery is still pretty bare. This is the extent of what we’ve done so far. If you missed it, check out our video and tutorial on how to install board and batten. Good thing our little guy isn’t here yet and won’t be spending his first few months of life in the room! Hoping to sew the bed skirt this weekend and start decorating the walls!
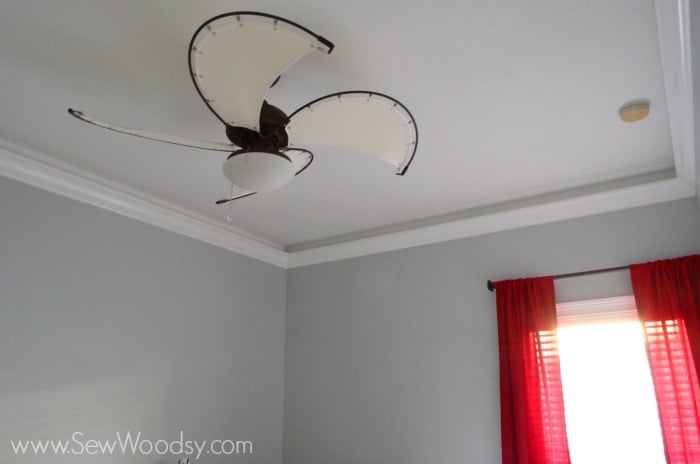
You might notice our crown molding is recessed… we have a really cool tutorial for that coming soon.
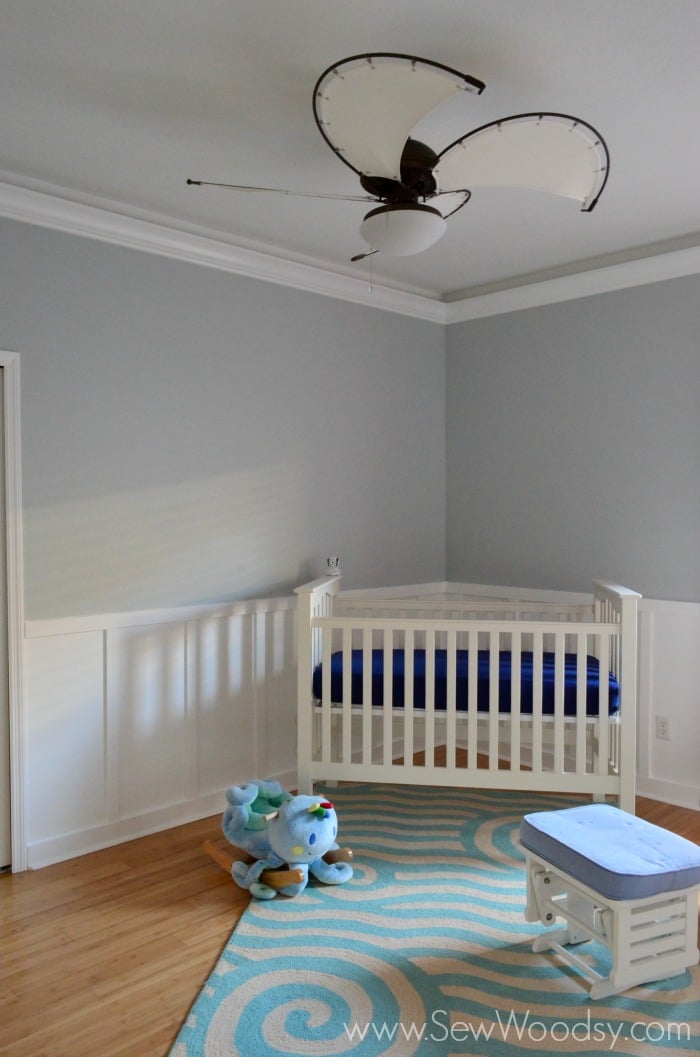
The rug is also from Lamps Plus. I was looking for a modern yet ocean-themed like rug and the Resort Yala Blue Area rug was just what I needed to complete this nursery!
Disclaimer: We received the fan and rug from Lamps Plus. We were not required to share a tutorial, but wanted to share with our readers how easy it is to install a fan and of course show off the beauty of our new fan! As always all opinions are our own.