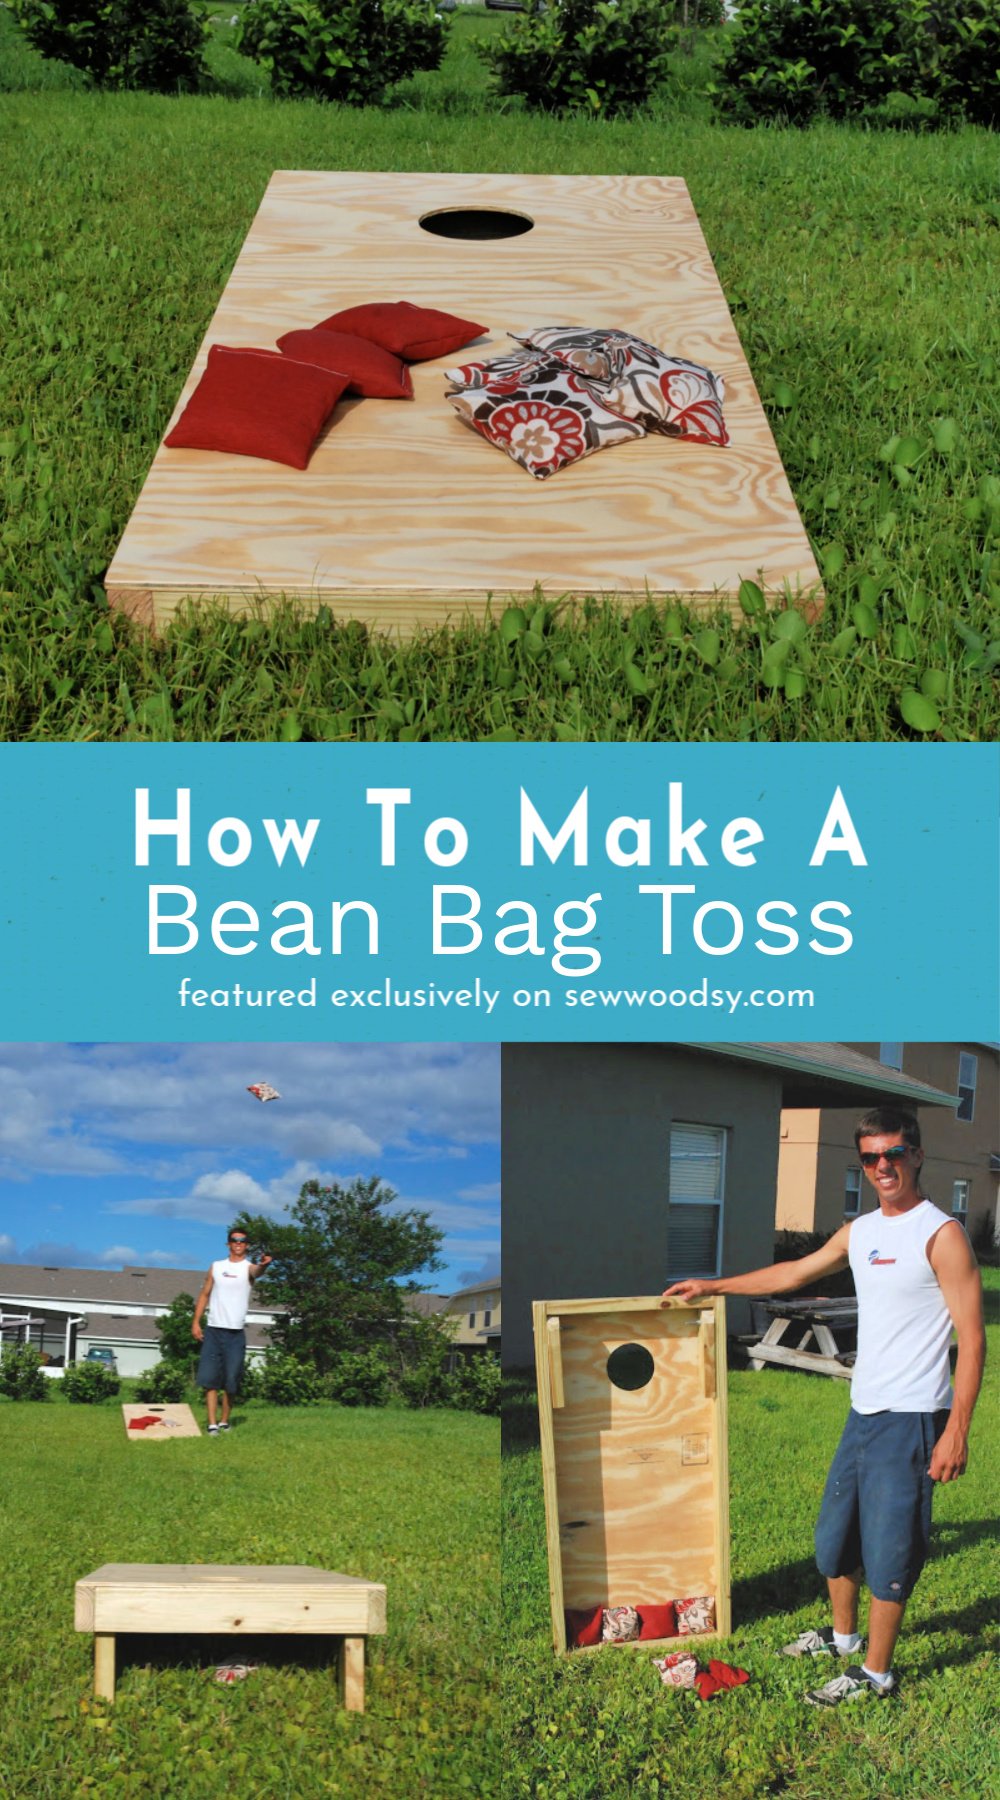
Looking for a fun and competitive outdoor family game? Learn how to make a wood Bean Bag Toss and the cloth bean bags in this complete tutorial.

Last week we guest blogged over at Sawdust Girl for Handmade Christmas in July. In case you missed our post over there we wanted to make sure you would see it here! This bean bag toss tutorial was an awesome outdoor game project to work on.
We called it a “Bean Bag Toss” for appropriate reasons; however, in the south we call this game cornhole toss. This project incorporated both sewing and wood working and because of that it was the perfect project for us to make.
I will preface that this is not an inexpensive project to make. In the end I want to say we spent roughly $40 (and that’s with scrap wood we had on hand). Granted a few of the supplies we had to buy in “bulk”, so now we have them for future bean bag toss projects.
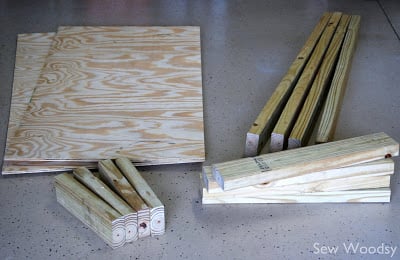
Materials Needed for Bean Bag Toss Tables
- Two pieces of ½ inch thick plywood cut to 2-foot x 4-foot
- Four, 8-foot 2×4’s
- Four, 4½ – inch long, 3/8-inch long carriage bolts
- Four, 3/8-inch flat washers
- Four, 3/8-inch wing nuts
- 1 box of 2½-inch wood screws
- wood filler
- 1-quart polycrylic
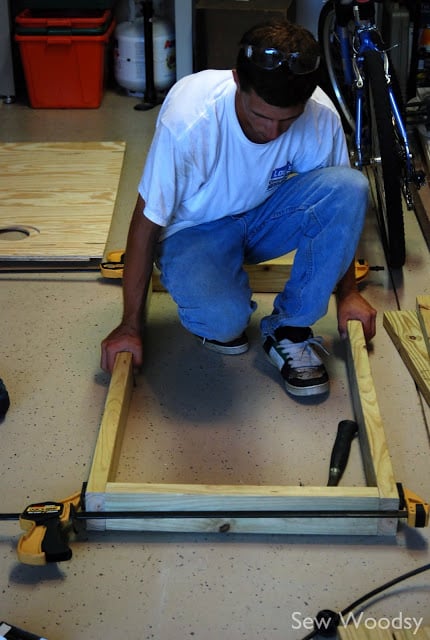
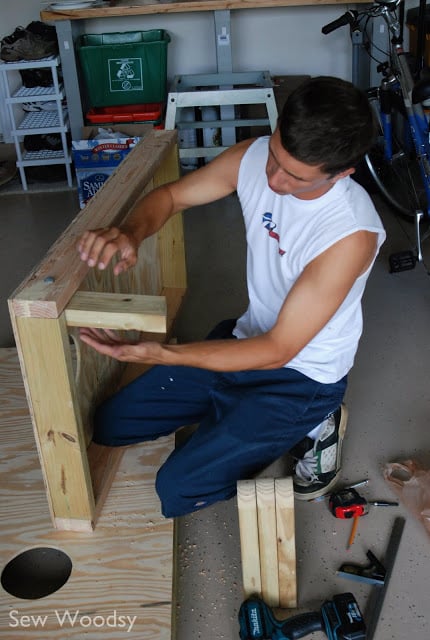
Cut the 2×4’s. You will need 4 pieces at 21-inches each and 4 pieces at 4-feet each. Using the 4-foot and 21-inch pieces, construct the tables’ frames with wood screws.
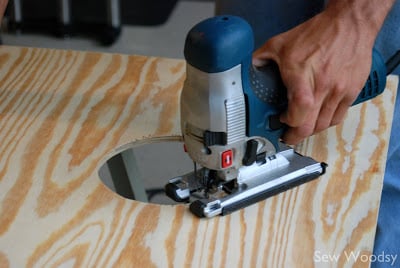
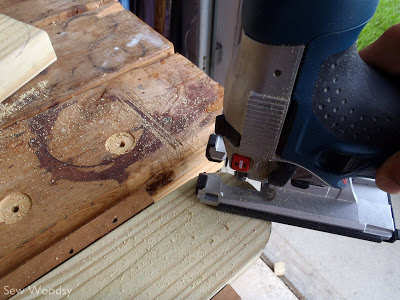
Measure 9-inches from the top of the plywood pieces and 12-inches from the sides and mark a center point for the hole. Use a compass to draw a circle 6-inches in diameter. Cut the hole with a jigsaw.
Place the plywood surface on the frame and screw in place.
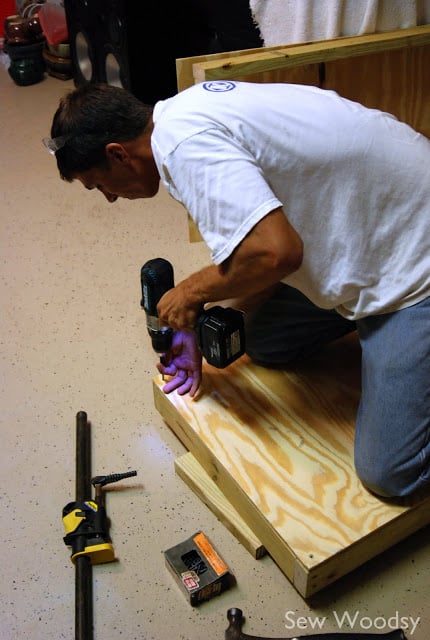
Using the remaining 2×4 pieces cut 4 pieces for the legs of your tables. They will need to be 11-5/8 inches long with one end cut to a 99-degree angle. You want to round the opposite ends of the legs, so you can fold them away for storage.
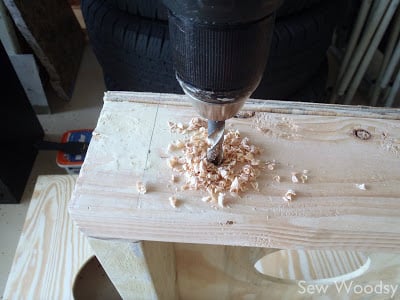
Drill a hole in the frame.
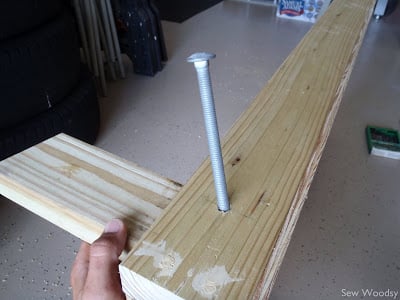
Attach the rounded edge of the leg with the carriage bolts.
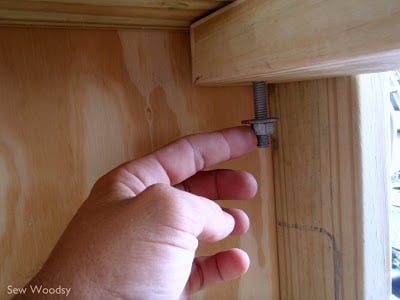
*Screw the flat washer and wing nut onto the carriage bolt.
Mr. Woodsy hard at work putting on the legs!
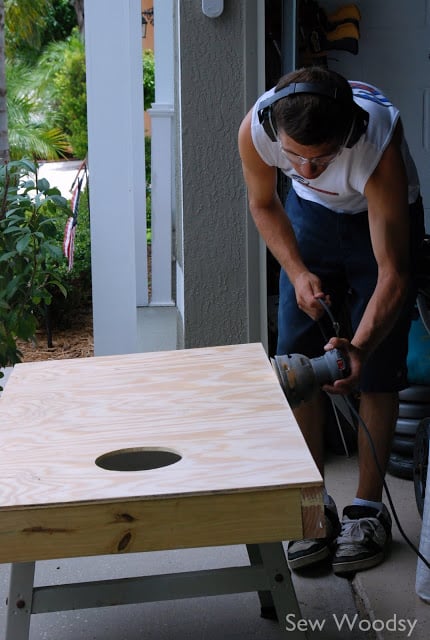
Fill all holes and blemishes with the wood filler, allow time to dry and sand your tables smooth. *Remember to sand along with the edges, too.
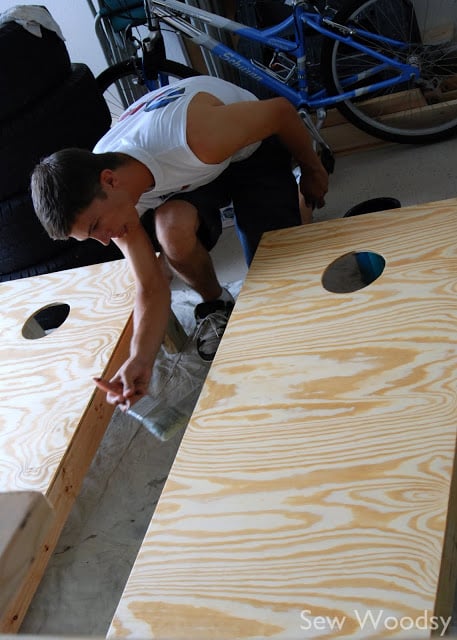
If keeping the natural look, dust your tables then paint with polycrylic. *If painting dust and prime them. Allow time to dry before painting with a semi or high-gloss latex paint.
Materials for the Bean Bags
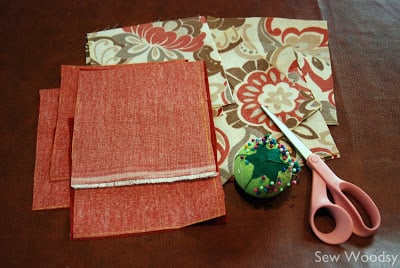
- Sixteen, 7-inch by 7-inch squares of duck or outdoor cloth (2 colors, 8 per color)
- Thread
- Scissors
- Straight Pins
- 8 pounds of feed corn
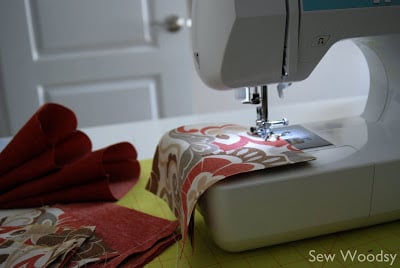
Place two squares of cloth together face-to-face and sew a double-stitch with a ½-inch in-seam. Only sew three of the four sides.
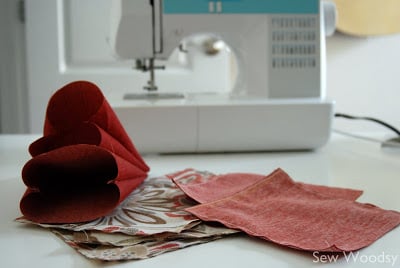
Once your squares are sewn, turn each bag inside out (poke the corners out with a pencil). The bag will be 6-inches square.
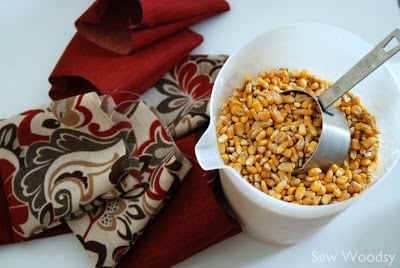
Fill bag with 2 cups of feed corn. (Hence why this game is called Cornhole in the south) Bag should weigh approximately 1-pound when finished.
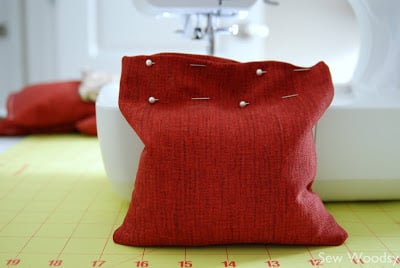
Fold the open ends of fabric inward 1/2 –inch, pin in place to keep corn in while you sew and double-stitch the seam.
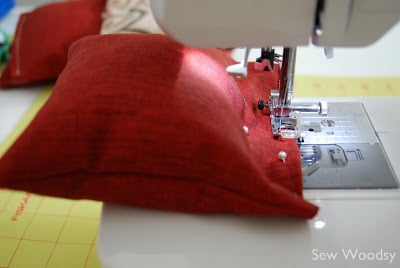
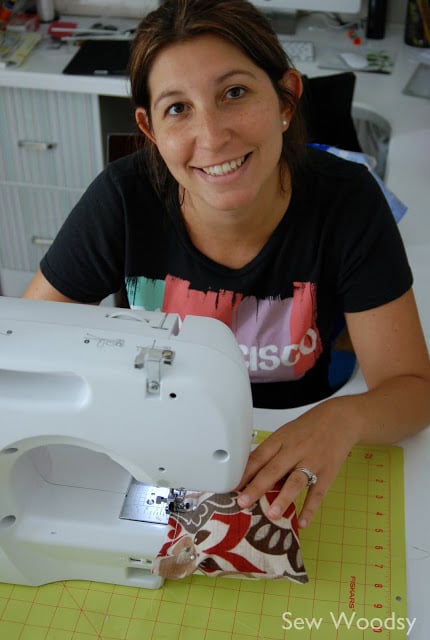
Here is what it will look like when it’s on the machine. I bent 2 needles while sewing 8 bean bags. Make sure you are using a heavy-duty needle, and sewing slowly. It is extremely important that no corn go near the presser foot and needle! I wanted to top stitch around the entire bean bag, but after bending multiple needles I decided to not chance any more fatalities and just top stitch what needed to be stitch up (and move on)!
Repeat with remaining bags, until all 8 bags are completed.
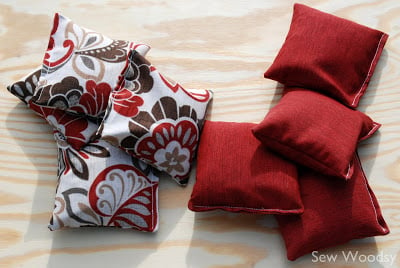
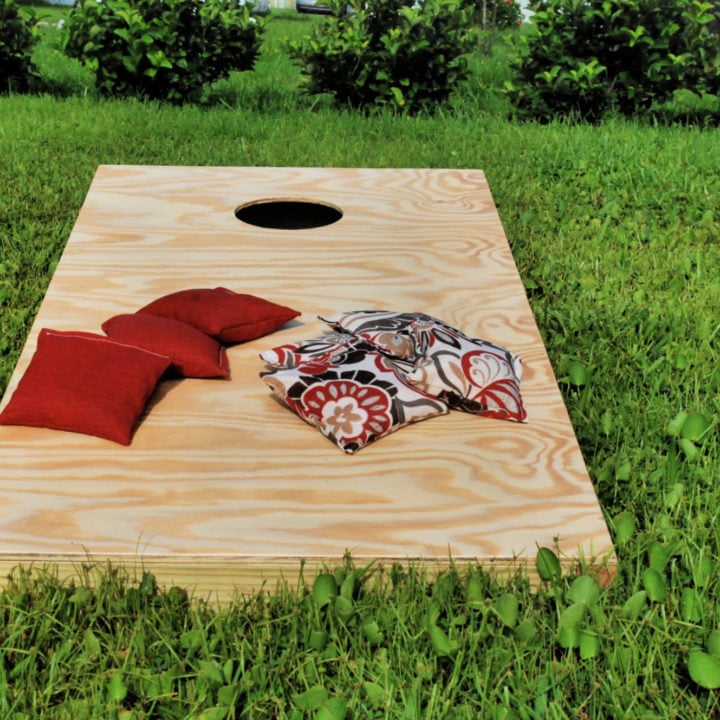
Here is what the finished beanbags looked like.
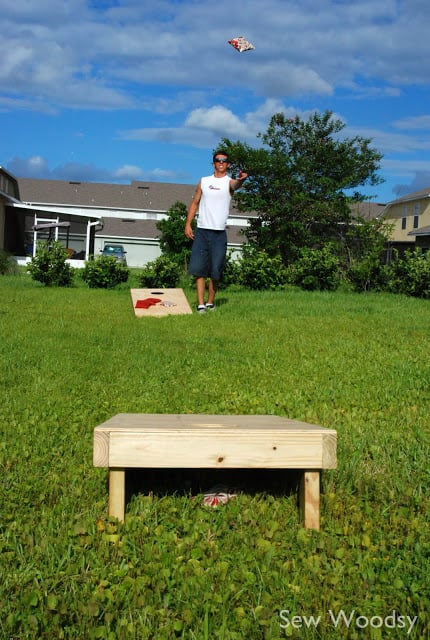
Here is Mr. Woodsy testing out our new game!
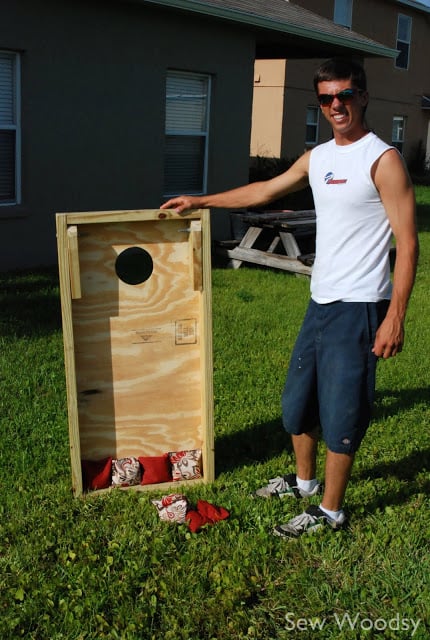
Mr. Woodsy posing with his latest woodworking creation– demonstrating how easy it is to store (the legs fold in).
Bean Bag Toss
Looking for a fun and competitive outdoor family game? Learn how to make a wood Bean Bag Toss and the cloth bean bags in this complete tutorial.
Materials
Materials Needed for Bean Bag Toss Tables
- Two pieces of ½ inch thick plywood cut to 2-foot x 4-foot
- 1 box of 2½-inch wood screws
- Four, 3/8-inch wing nuts
- Four, 8-foot 2×4’s
- Four, 4½ – inch long, 3/8-inch long carriage bolts
- Four, 3/8-inch flat washers
- Wood Filler
- 1-quart Minwax Polycrylic
Materials for the Bean Bags
- Sixteen, 7-inch by 7-inch squares of duck or outdoor cloth (2 colors, 8 per color)
- Scissors
- Thread
- Straight Pins
- 8 pounds of feed corn
Tools
- Jigsaw
- Drill
- Paint Brush
- Router
- Sander
- Sewing Machine
Instructions
Directions for Bean Bag Toss Tables
- Cut the 2×4’s. You will need 4 pieces at 21-inches each and 4 pieces at 4-feet each. Using the 4-foot and 21-inch pieces, construct the tables frames with wood screws.
- Measure 9-inches from the top of the plywood pieces and 12-inches from the sides and mark a center point for the hole. Use a compass to draw a circle 6-inches in diameter. Cut the hole with a jigsaw.
- Place the plywood surface on the frame and screw in place.
- Using the remaining 2×4 pieces cut 4 pieces for the legs of your tables. They will need to be 11-5/8 inches long with one end cut to a 99-degree angle. You want to round the opposite ends of the legs, so you can fold them away for storage.
- Drill a hole in the frame.
- Attach the rounded edge of the leg with the carriage bolts.
- Screw the flat washer and wing nut onto the carriage bolt.
- Fill all holes and blemishes with the wood filler, allow time to dry and sand your tables smooth. *Remember to sand along with the edges, too.
- If keeping the natural look, dust your tables then paint with polycrylic. *If painting, dust and prime them. Allow time to dry before painting with a semi or high-gloss latex paint. Then seal with a polycrylic.
Directions for Sewing Bean Bags
- Place two squares of cloth together face-to-face and sew a double-stitch with a ½-inch in-seam. Only sew three of the four sides.
- Once your squares are sewn, turn each bag inside out (poke the corners out with a pencil). The bag will be 6-inches square.
- Fill bag with 2 cups of feed corn. (Hence why this game is called Cornhole in the south) Bag should weigh approximately 1-pound when finished.
- Fold the open ends of fabric inward 1/2 –inch, pin in place to keep corn in while you sew and double-stitch the seam.
- Repeat with remaining bags, until all 8 bags are completed.
Notes
You can paint the boards, stain them, or leave them natural as pictured.
Recommended Products
As an Amazon Associate and member of other affiliate programs, I earn from qualifying purchases.
We hope you enjoyed reading about creating your very own bean bag toss. Last weekend while scalloping in North-West Florida we brought this set to our friends. They love it! We even personalized it with some vinyl cut from the Cricut. Stay tuned for a vinyl 101 tutorial!
Originally published July 29, 2011 // Updated with new text and photos on April 15, 2020.
