Want to transform your boring concrete patio into something spectacular for under $100? Grab a few rolls of painters tape, exterior paint, and paint brushes and within a few hours time your outdoor space will be transformed.
Two months ago, right before Katie was due to have the baby, ScotchBlue.com reached out to us and asked us to create an outdoor DIY project for under $100. I was super excited since I’ve been chomping at the bit to paint our back patio floor. Katie has been fighting me on this project for a while, and this was the perfect opportunity to let me do this project. And that I did—it came out amazing. I think Katie felt slightly bad that she resisted the painted patio for so long.
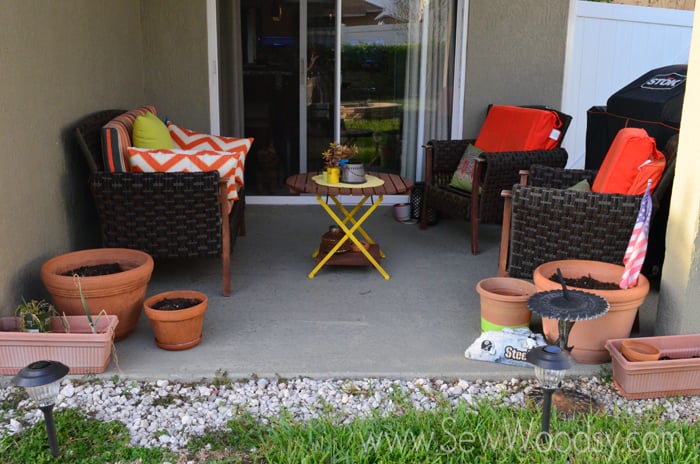
We live in Florida and have a cozy little back patio that we love to sit out on 80% of the year. The one problem we have had over the past few years is keeping rugs that don’t fade and/or fall apart. That is where my solution of painting the patio floor came into play. I figured if we painted it with a fun pattern we won’t need a rug—thus saving us money year after year on new outdoor rugs. This is what our patio looked like before we made any changes.
Table of contents
Supplies
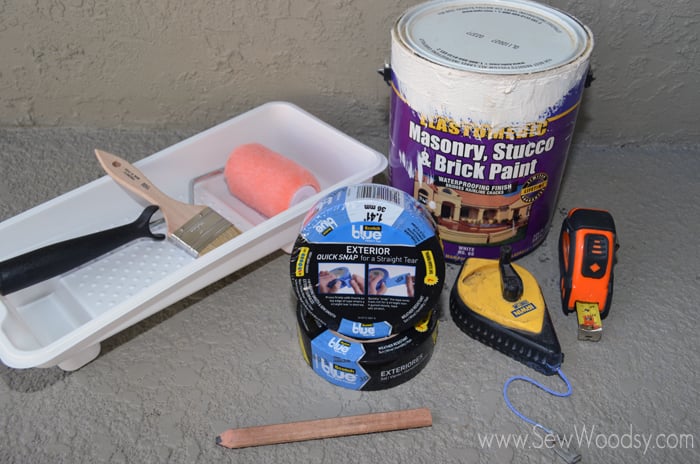
- Chalk Reel
- Measuring Tape
- 2 rolls of ScotchBlue™ Painter’s Tape for Exterior Surfaces (2097)
- Exterior Paint
- Paint Brush
- Paint Roller
- Paint Tray
How to Paint a Concrete Patio
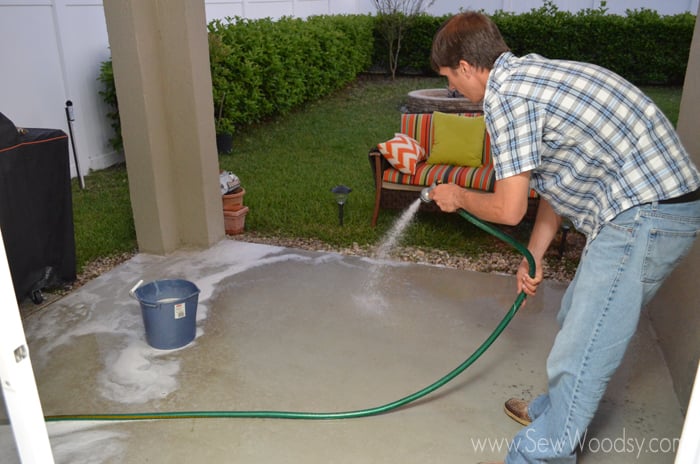
First, clean your patio surface very well. If you have a pressure washer—use it. If not, go the old fashion route like Jon did and scrub the floor with soapy water and a scrub brush. Make sure you let the surface dry completely before you start the project.
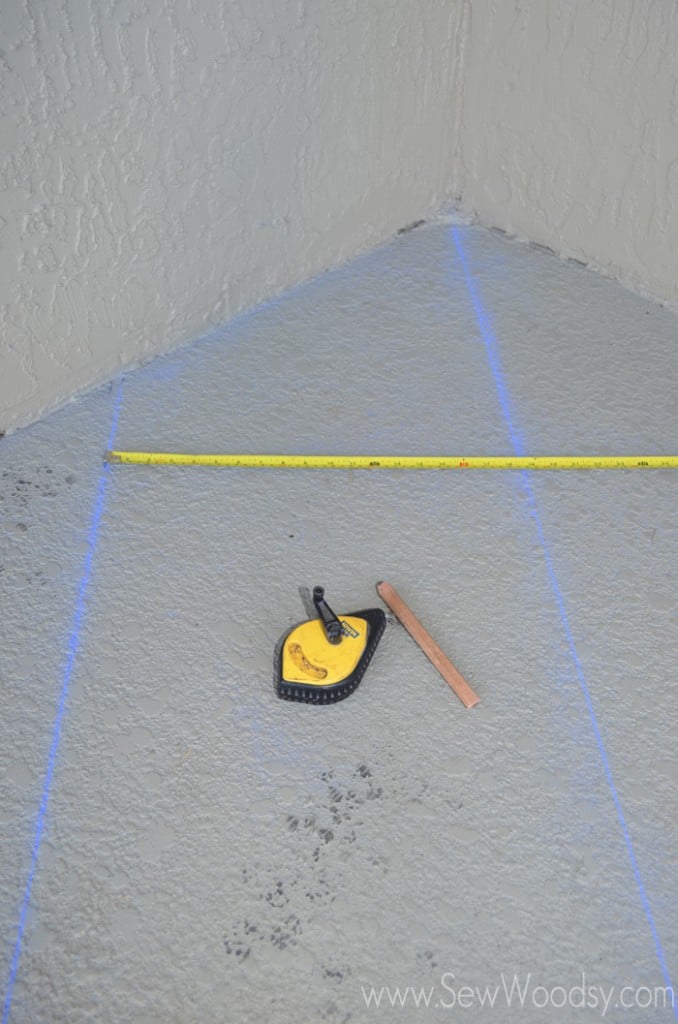
Once your surface is dry, using a measuring tape mark the floor with a chalk line, evenly space out your design.
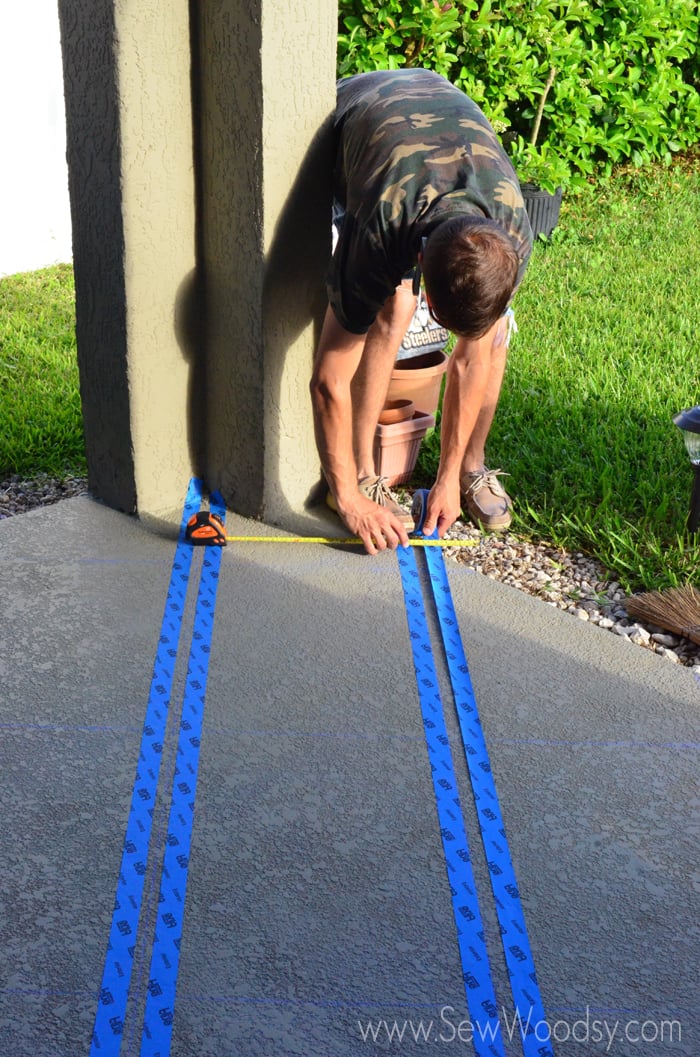
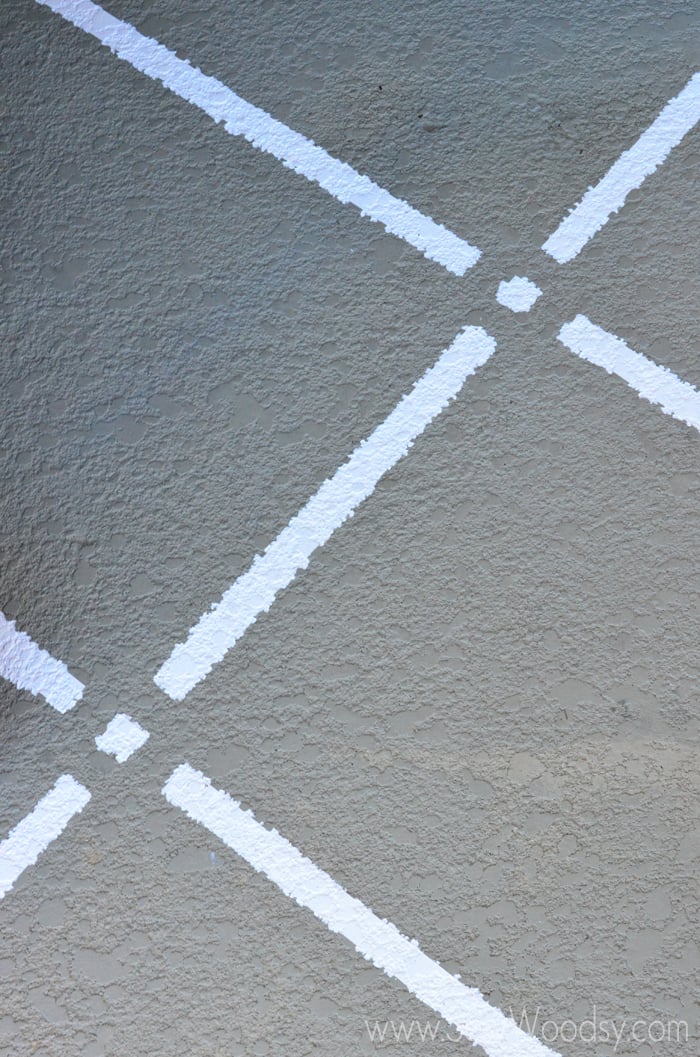
Once the surface is measured and marked, begin applying ScotchBlue™ Painter’s Tape for Exterior Surfaces (2097). We decided to let the tape overlap to allow for the square design in the middle of the lines. We love the look it gave, but of course you can decide to do whatever design tickles your fancy.
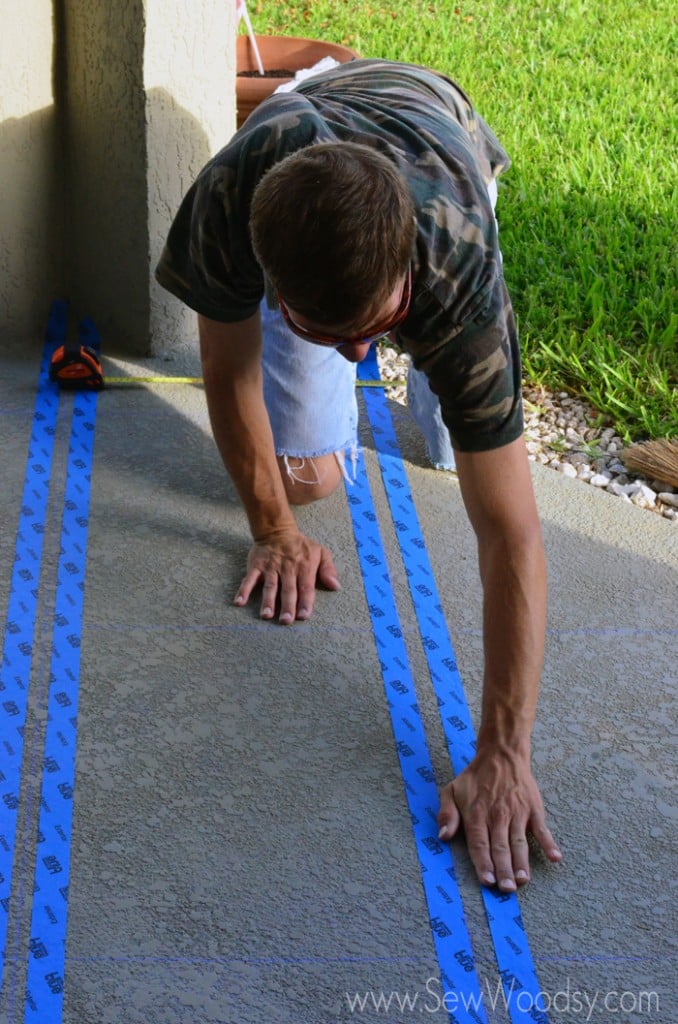
Make sure you smooth out the tape as best as you can. Especially on textured surfaces this helps.
Once all the tape is applied give one last sweep. After all you are working outside dirt does blow around.
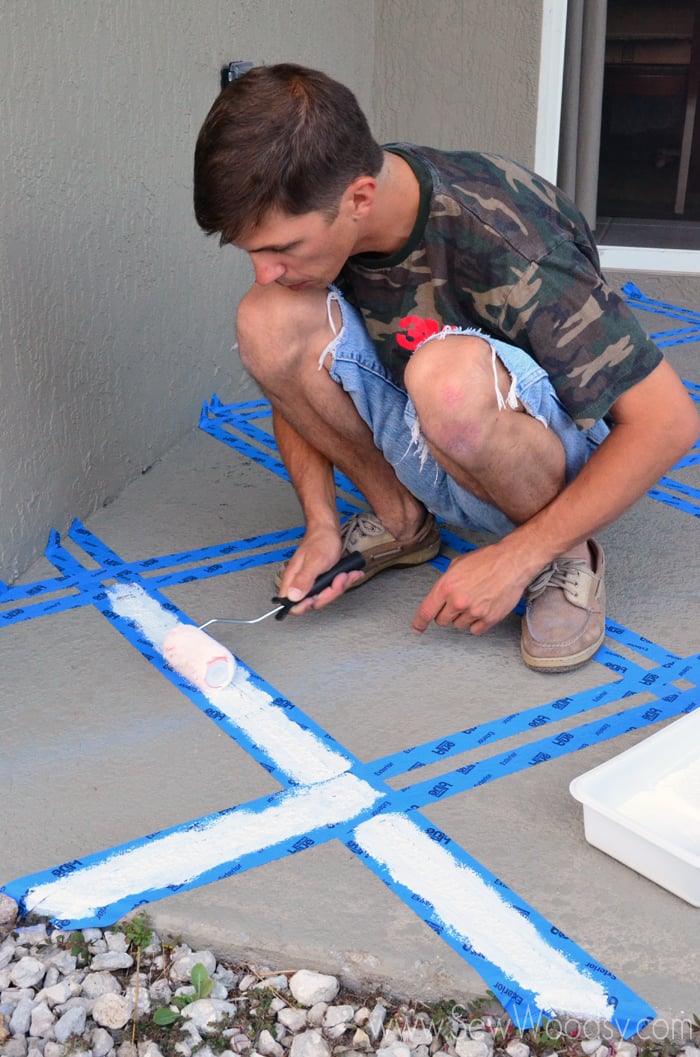
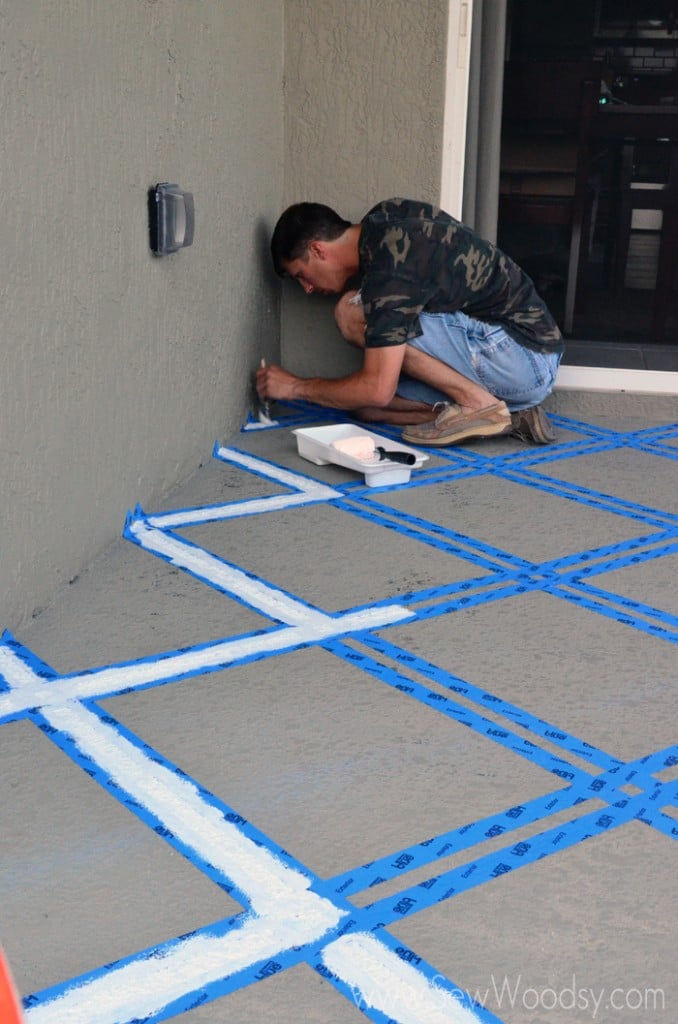
Now it’s time to paint. Using a roller or paint brush begin painting inside the lines of the tape.
I found that I liked using the paint brush better. I had more control over the paint. Since our floor is textured I had some seepage when I used the roller (or at least more so with the roller than the paint brush). I knew this would most likely happen and I was totally ok with it.
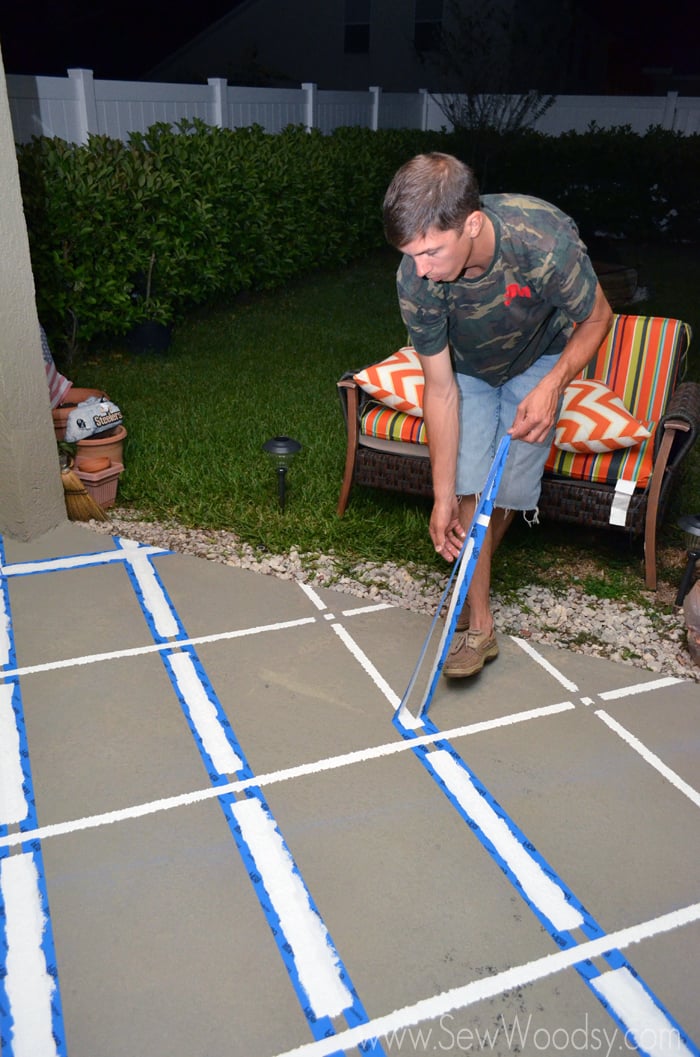
After painting the patio I removed the ScotchBlue™ Painter’s Tape the same night so this way I didn’t get any tear up from the freshly painted floor.
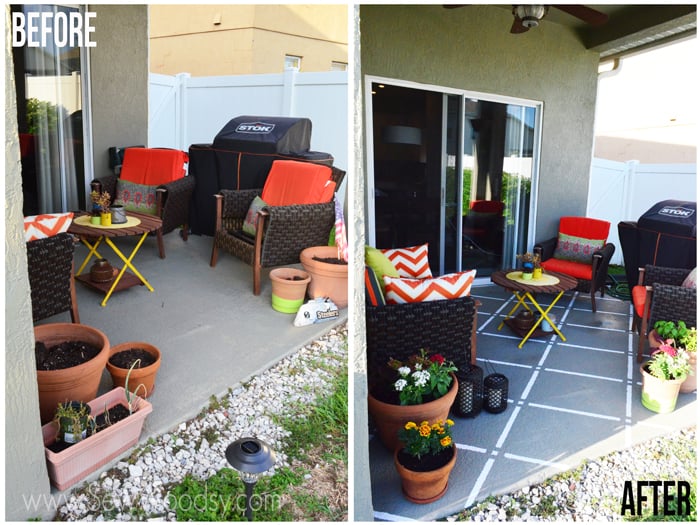
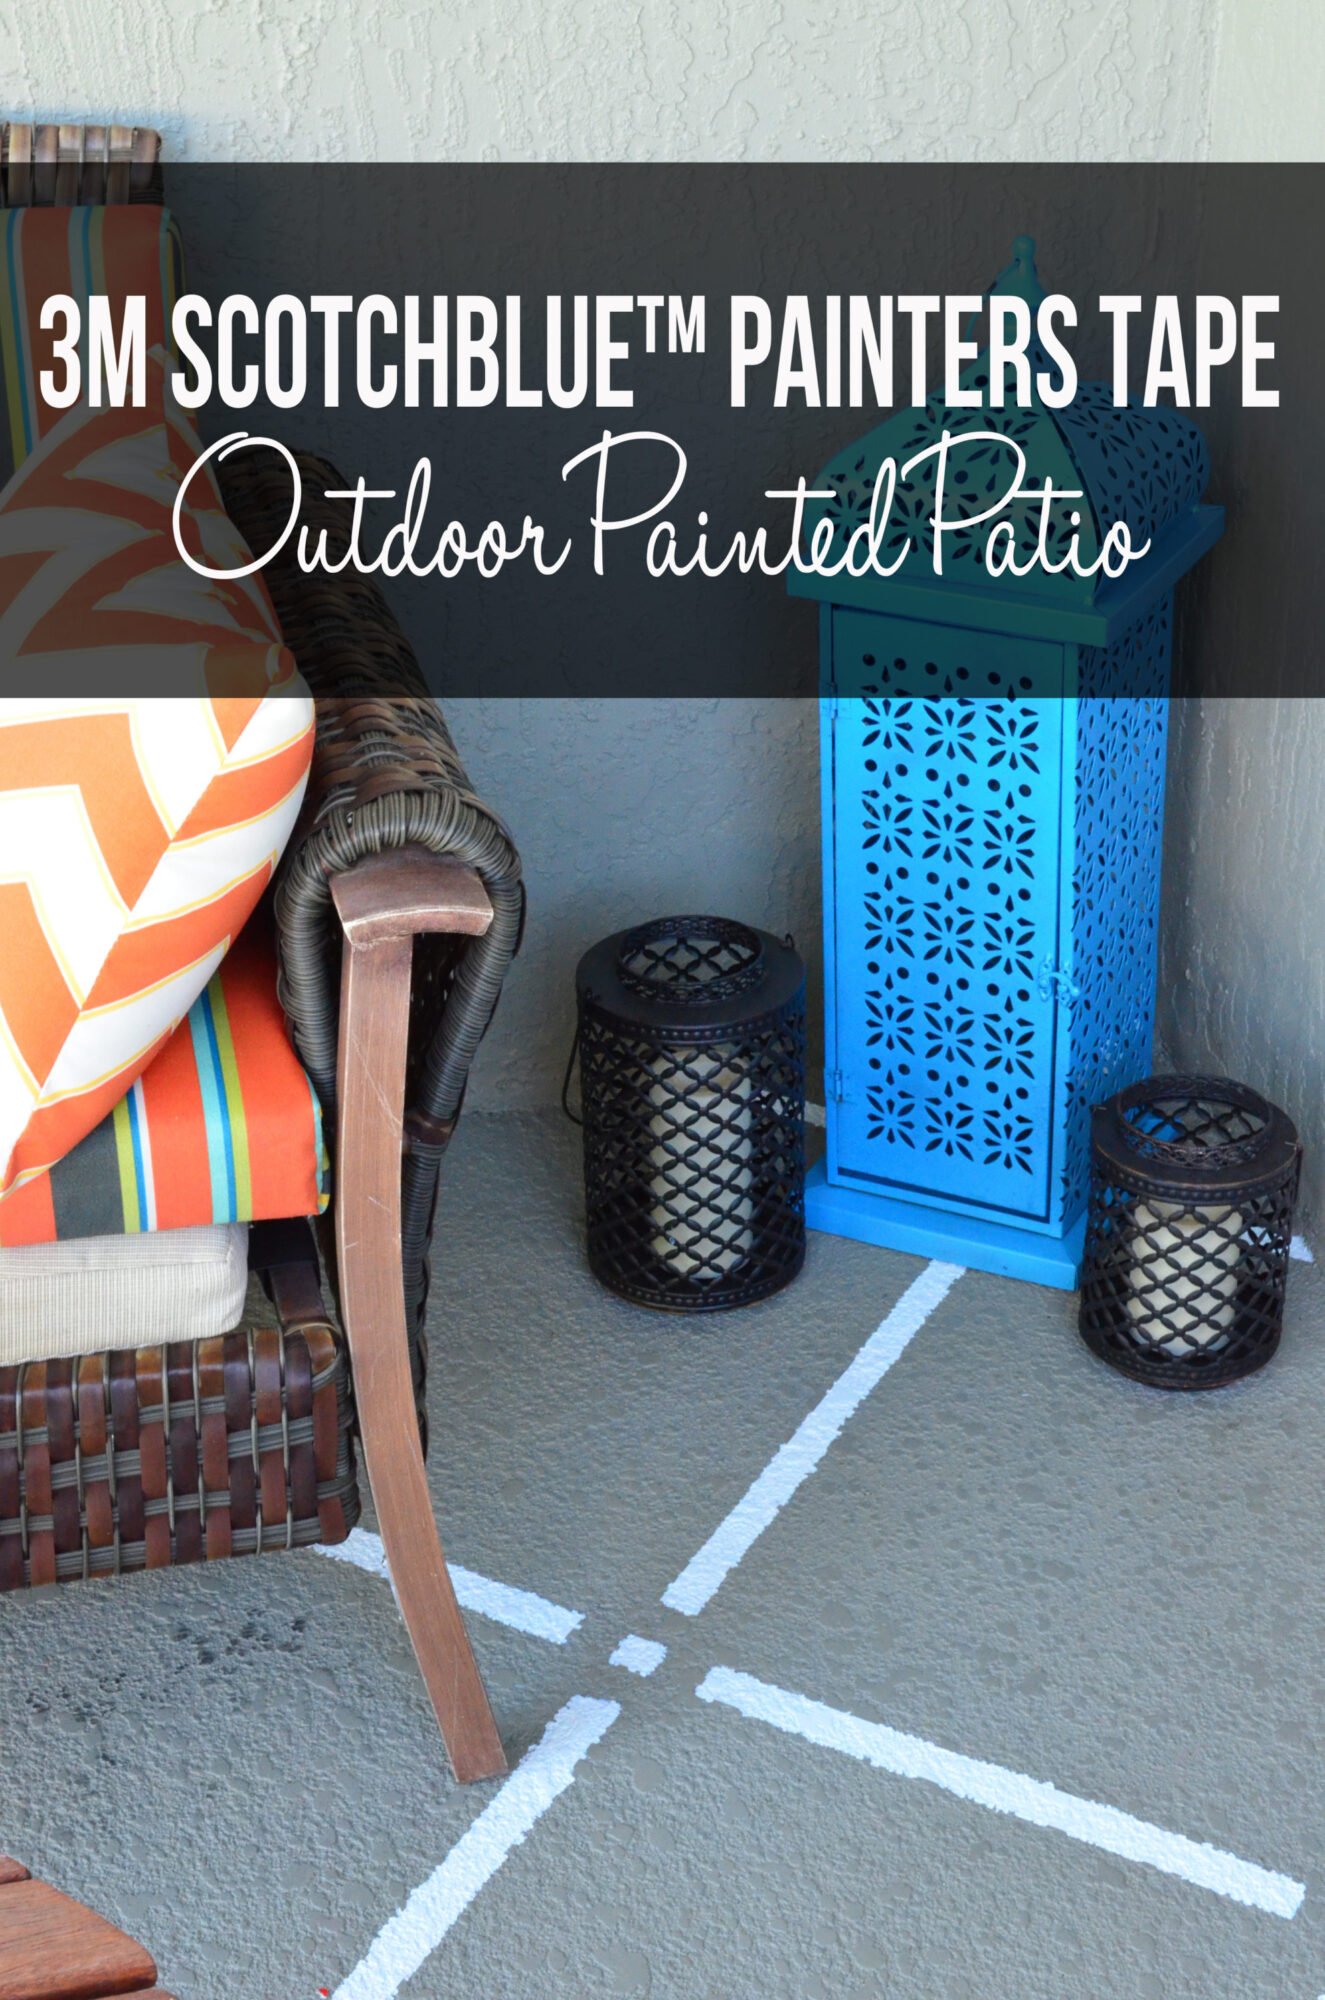
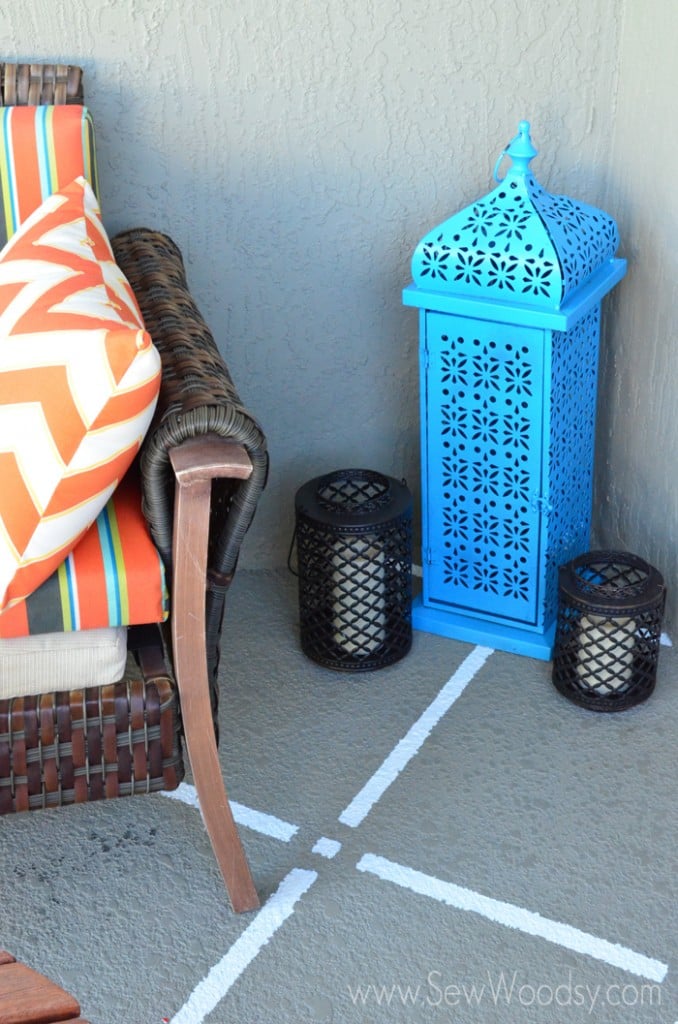
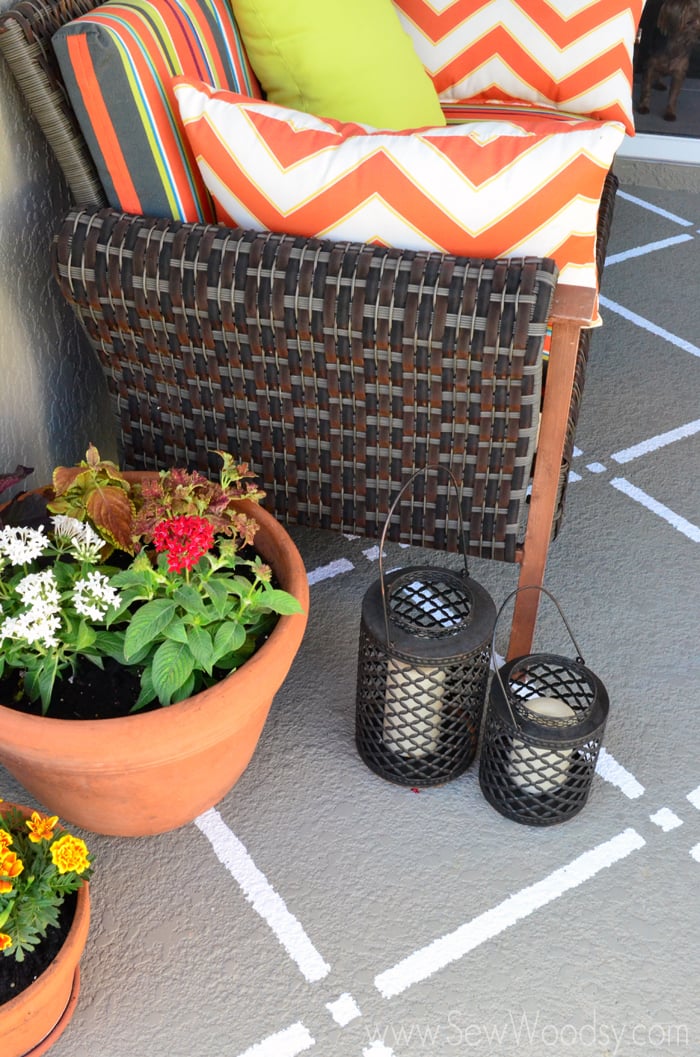
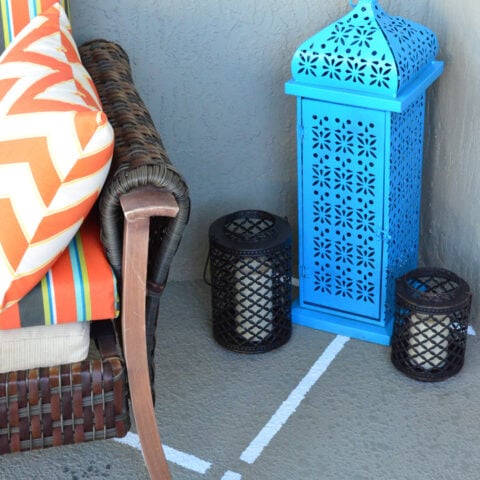
The next day once the patio dried, we moved the furniture back in and enjoyed our new patio. What an amazing difference the painted design makes on our patio!
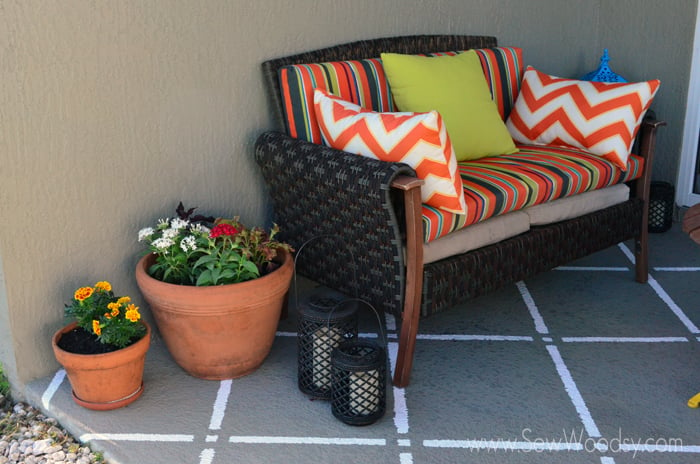
We love the way the pattern pops with our bright furniture.
We hope we’ve inspired you to spruce up your patio.
Project FAQs
It’s recommended to use a concrete or masonry paint that is specifically designed for outdoor use. Look for paints labeled as “porch and patio paint” or “concrete paint.” These paints are formulated to withstand the elements and adhere well to concrete surfaces.
Yes, proper preparation is essential for a successful paint job. Clean the surface thoroughly by pressure washing or scrubbing with a mild detergent and water. Repair any cracks or imperfections, and consider using a concrete primer to improve paint adhesion.
Yes, you can paint a pattern directly onto the concrete. However, it’s a good idea to plan and outline your pattern before you start painting. You can use painter’s tape to mark off the edges of your pattern and create clean lines.
Yes, stencils can be a great way to create complex patterns on your concrete patio. They come in various designs and sizes. Just make sure the concrete is clean and dry before applying the stencil, and use a stencil brush or sponge to apply the paint evenly.
Use a measuring tape and a straight edge or ruler to mark guidelines for your pattern before you start painting. Painter’s tape can help you create sharp, clean lines and prevent the paint from bleeding into unwanted areas.
Drying times can vary depending on factors like temperature and humidity as well as how much surface you painted. In general, you should wait at least 24-48 hours before walking on the painted surface. Check the manufacturer’s instructions on the paint can for specific drying times. For these thin lines 24 hours worked fine for us.
Regular maintenance includes cleaning the surface with a mild detergent and water, avoiding harsh chemicals that could damage the paint, and reapplying a clear sealer every couple of years to maintain the pattern’s appearance.
Yes, you can repaint the pattern if needed. Just make sure to clean the surface thoroughly, sand any rough spots, and follow the same steps you did when you initially painted the pattern.
Easy Home Projects
If you paint your outdoor patio, I would be honored and love for you to take the time to leave a star rating and comment! I spend hours developing and testing these projects, and always love to hear feedback and user experience!
Don’t forget to FOLLOW ME on Facebook, Pinterest, and Instagram, and subscribe to my email list!
Outdoor Painted Patio
Want to transform your boring concrete patio into something spectacular for under $100? Grab a few rolls of painters tape, exterior paint, and paint brushes and within a few hours time your outdoor space will be transformed.
Materials
- Exterior Paint
Tools
- Measuring Tape
- Chalk Reel
- 2 rolls of ScotchBlue™ Painter’s Tape for Exterior Surfaces (2097)
- Paint Brush
- Paint Roller
- Paint Tray
Instructions
- Clean your patio surface very well. If you have a pressure washer—use it. If not, go the old fashion route like Jon did and scrub the floor with soapy water and a scrub brush. Make sure you let the surface dry completely before you start the project.
- Once your surface is dry, using a measuring tape mark the floor with a chalk line, evenly space out your design.
- Once the surface is measured and marked, begin applying ScotchBlue™ Painter’s Tape for Exterior Surfaces (2097). We decided to let the tape overlap to allow for the square design in the middle of the lines. We love the look it gave, but of course you can decide to do whatever design tickles your fancy.
- Once all the tape is applied give one last sweep. After all you are working outside dirt does blow around.
- Now it’s time to paint. Using a roller or paint brush begin painting inside the lines of the tape.
- After painting the patio I removed the ScotchBlue™ Painter’s Tape the same night so this way I didn’t get any tear up from the freshly painted floor.
- The next day once it was light out, we moved the furniture back in and enjoyed our new patio. What an amazing difference the painted design makes on our patio!
Notes
- Smooth out Tape - Make sure you smooth out the tape as best as you can. Especially on textured surfaces this helps.
- Paint Brush vs Roller - I found that I liked using the
paint brush better. I had more control over the paint. Since our floor
is textured I had some seepage when I used the roller (or at least more
so with the roller than the paint brush). I knew this would most likely
happen and I was totally ok with it.
Recommended Products
As an Amazon Associate and member of other affiliate programs, I earn from qualifying purchases.