• Skip to primary navigation
  • Skip to main content
  • Skip to primary sidebar

Sew Woodsy logo

  • DIY
  • Crafts
  • Cricut
  • Travel
  • About
menu icon
go to homepage
search icon
Homepage link
  • Home
  • Thanksgiving
  • DIY
  • Cricut
  • Travel
  • About Us
    • Email
    • Facebook
    • Instagram
    • Pinterest
    • Twitter
    • YouTube
  • ×

    Sew Woodsy » Holiday

    Published: Dec 7, 2018 · Modified: Jan 29, 2019 by Katie · This post may contain affiliate links.

    DIY Personalized Santa T-Shirt

    Sharing is caring!

    7 shares
    • Facebook
    • Twitter

    Learn how to make a DIY Personalized Santa T-Shirt using your Cricut Maker, Cricut BrightPad, and Cricut EasyPress in under 30 minutes!

    DIY Personalized Santa T-Shirt

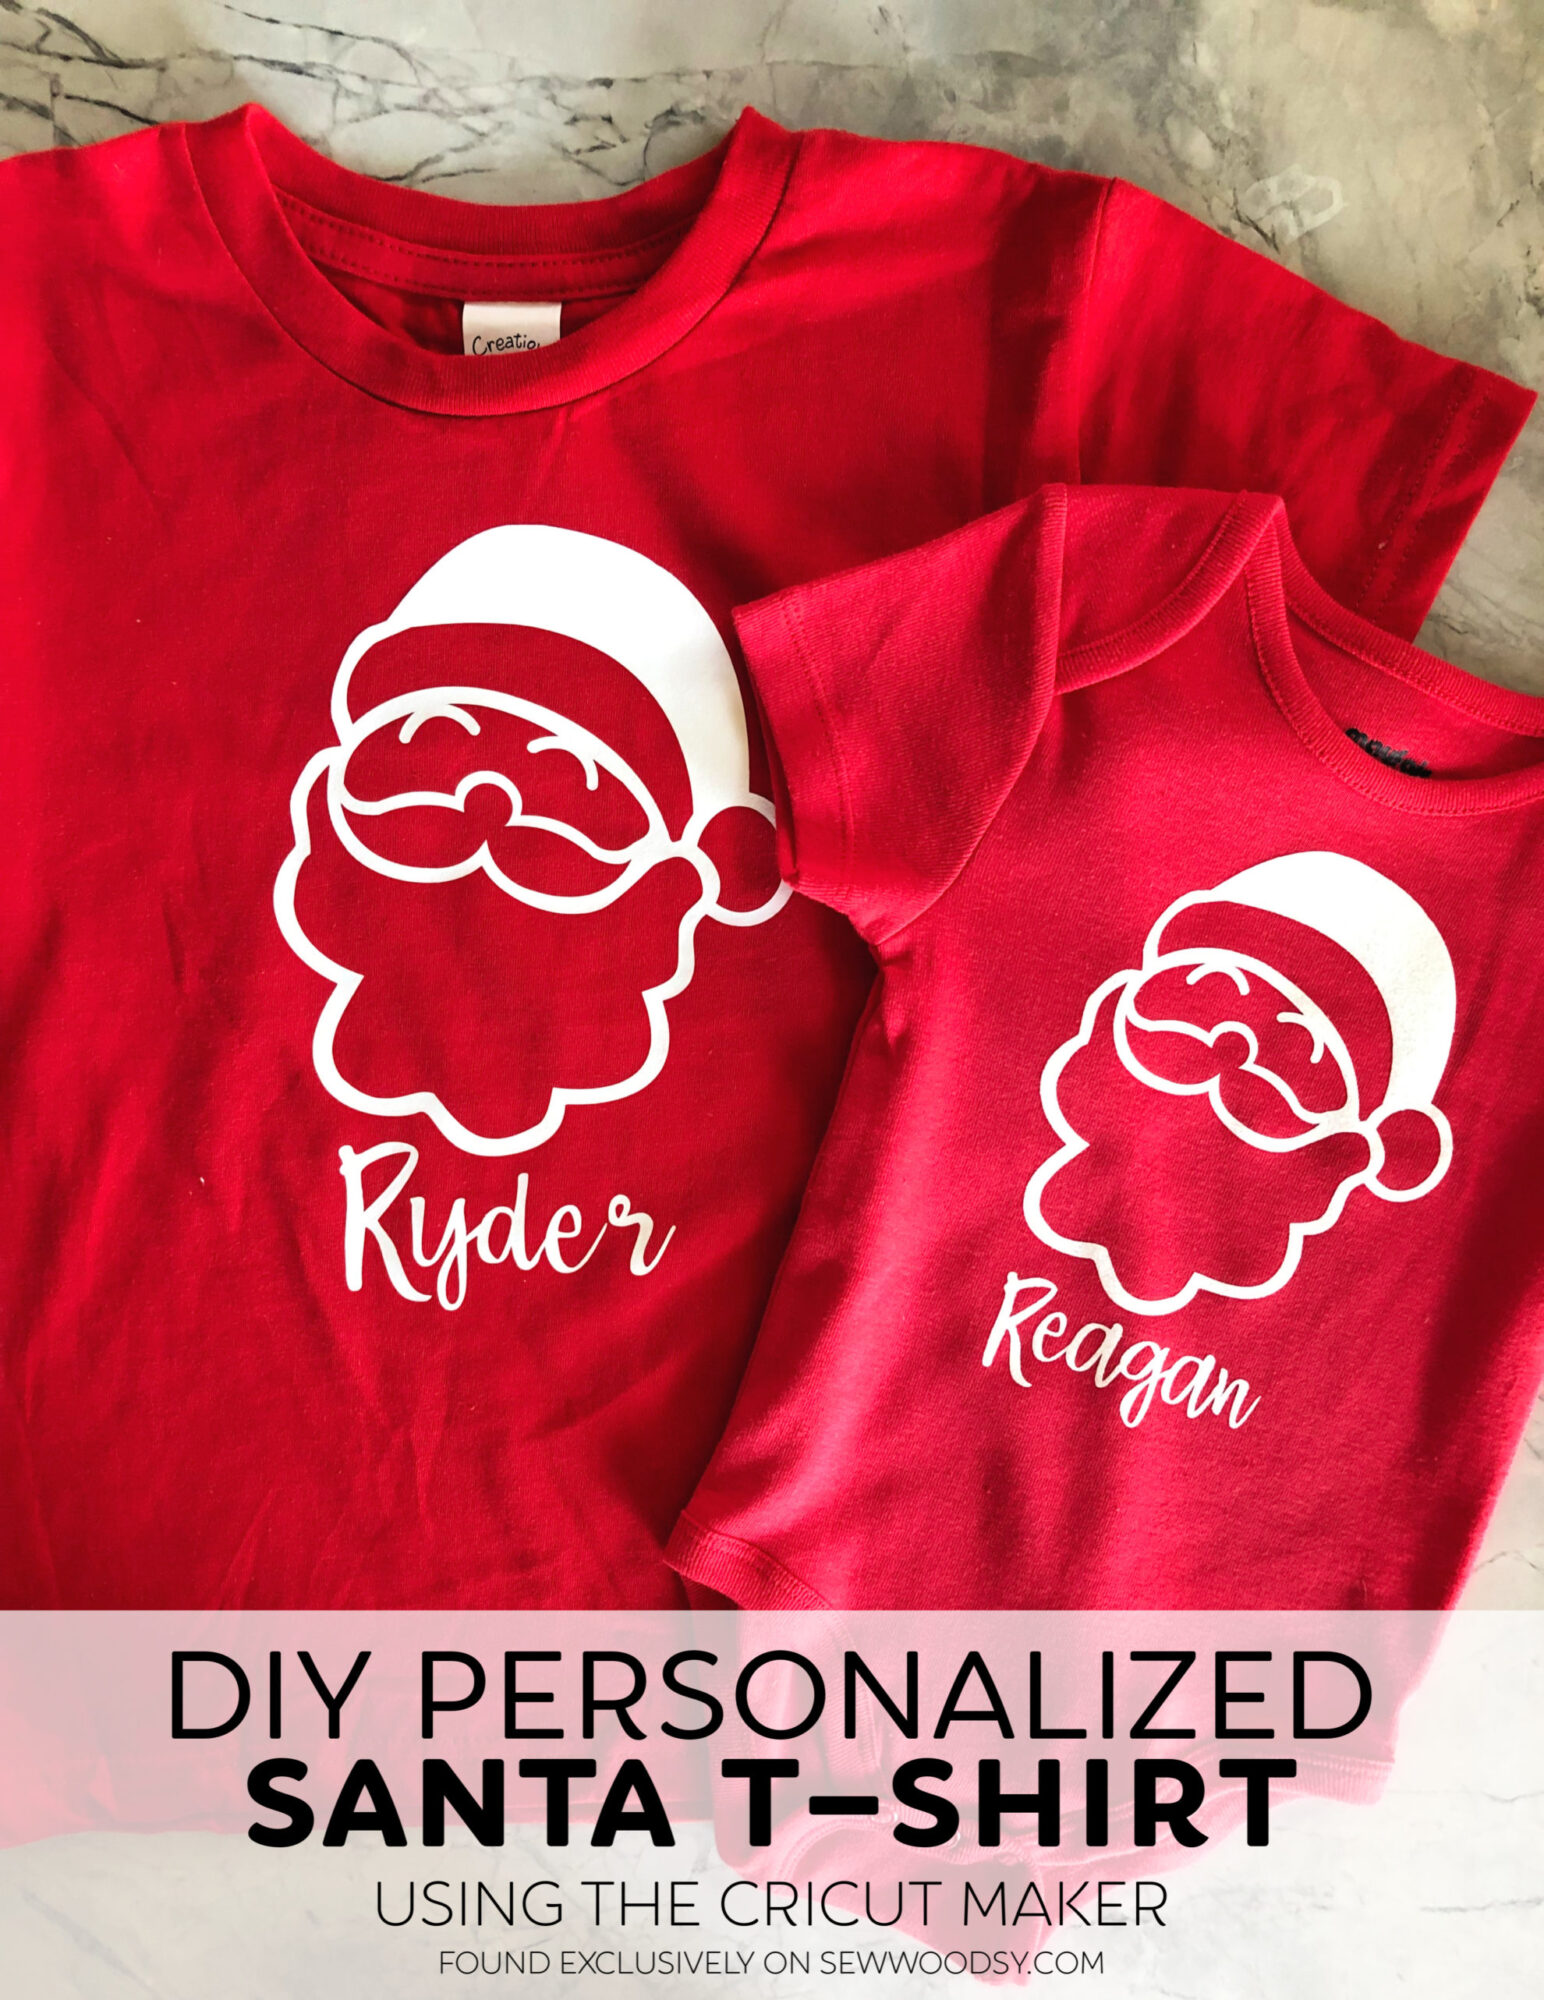
    My number one use for my Cricut Maker is to make t-shirts! I absolutely LOVE making shirts, and I make my children shirts for just about every holiday! I just can’t help myself. Every year I make at least 1 personalized Christmas themed shirt. This year, I choose a silhouette of Santa and I absolutely love them! I’ve also made them for friends who just had babies, as well. They make for the perfect festive gift or treat for your child to wear!

    We were invited to LEGOLAND Florida’s Christmas Bricktacular at the beginning of the month. As soon as I got the invite, I knew they would wear these shirts! For once, I was ahead of myself and made these shirts before Thanksgiving.

    Supplies to make a DIY Personalized Santa T-Shirt

    • Cricut Maker
    • DIY Personalized Santa T-Shirt File on Cricut Design Space
    • Cricut Mat
    • Cricut Iron-On Vinyl; white
    • Cricut Tools
    • Cricut BrightPad
    • Red T-shirt and/or Onepiece
    • Cricut EasyPress 2 6×7
    • Cricut EasyPress™ Mat (optional)
    • Cricut Iron On Protective Sheet (optional) or Muslin Cloth

    DIY Personalized Santa T-Shirt

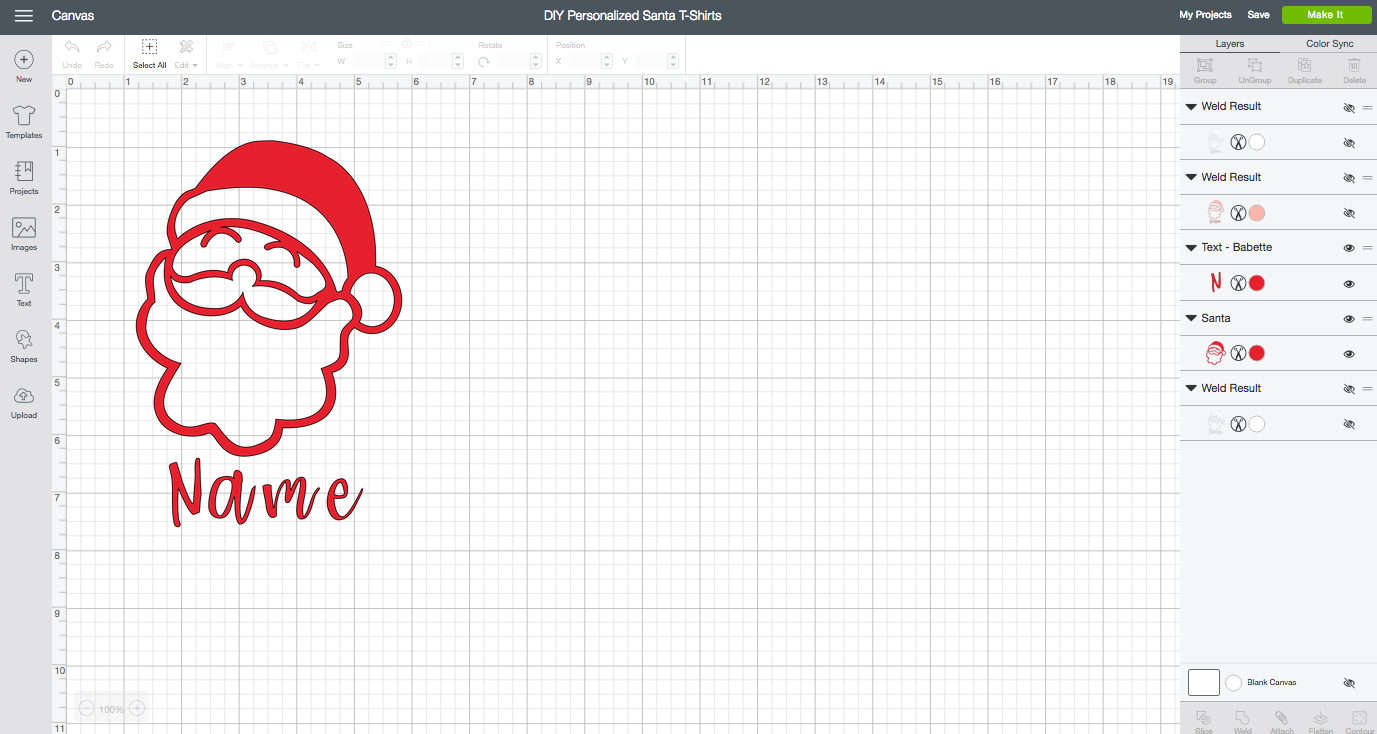
    First up, you’ll want to open the DIY Personalized Santa T-Shirt File on Cricut Design Space. Then, click on what reads “name” and type in the name you want on the shirt. Next, “ungroup” the letters and move each letter to touch one another. Once you have your letters together select all the letters, then select “attach” then “weld”. That will give you the fluent cursive look you want!

    Pro Tip: if you want the name centered with the image and don’t want to have to worry about trying to guess when it’s time to iron on you can just select both image and text. Then, select “attach” and both the name and santa will cut as one image.

    Cricut Maker with Iron On StrongBond

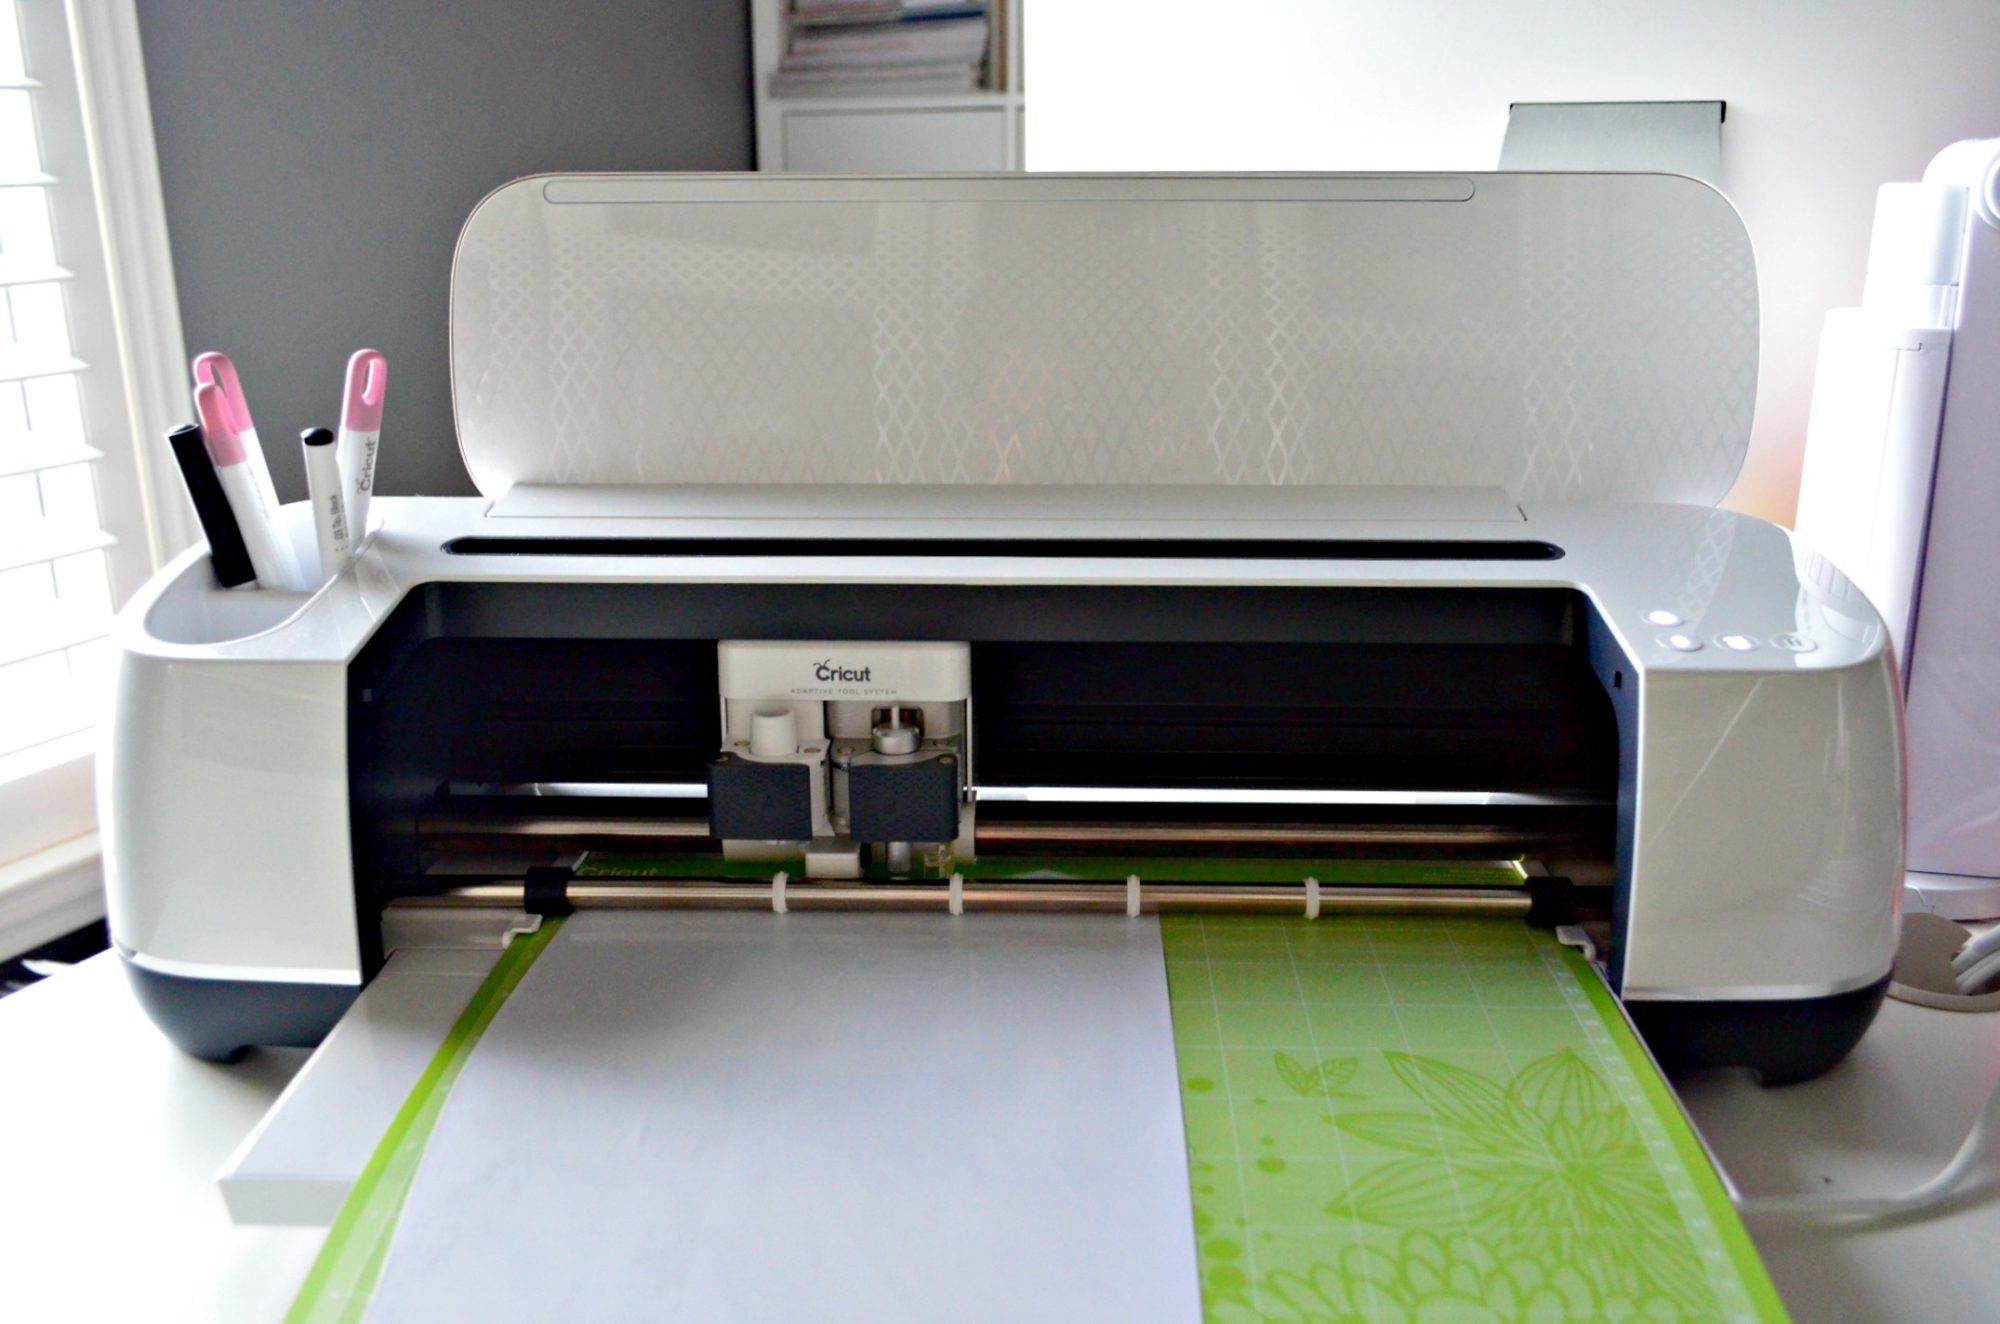
    Next, it’s time to cut on your Cricut Maker. Make sure you mirror your image before cutting. Select “Iron On-Vinyl” and cut!

    Once your design is cut, it’s time to weed! Grab your Cricut BrightPad and Cricut Tools.

    DIY Personalized Santa T-Shirt

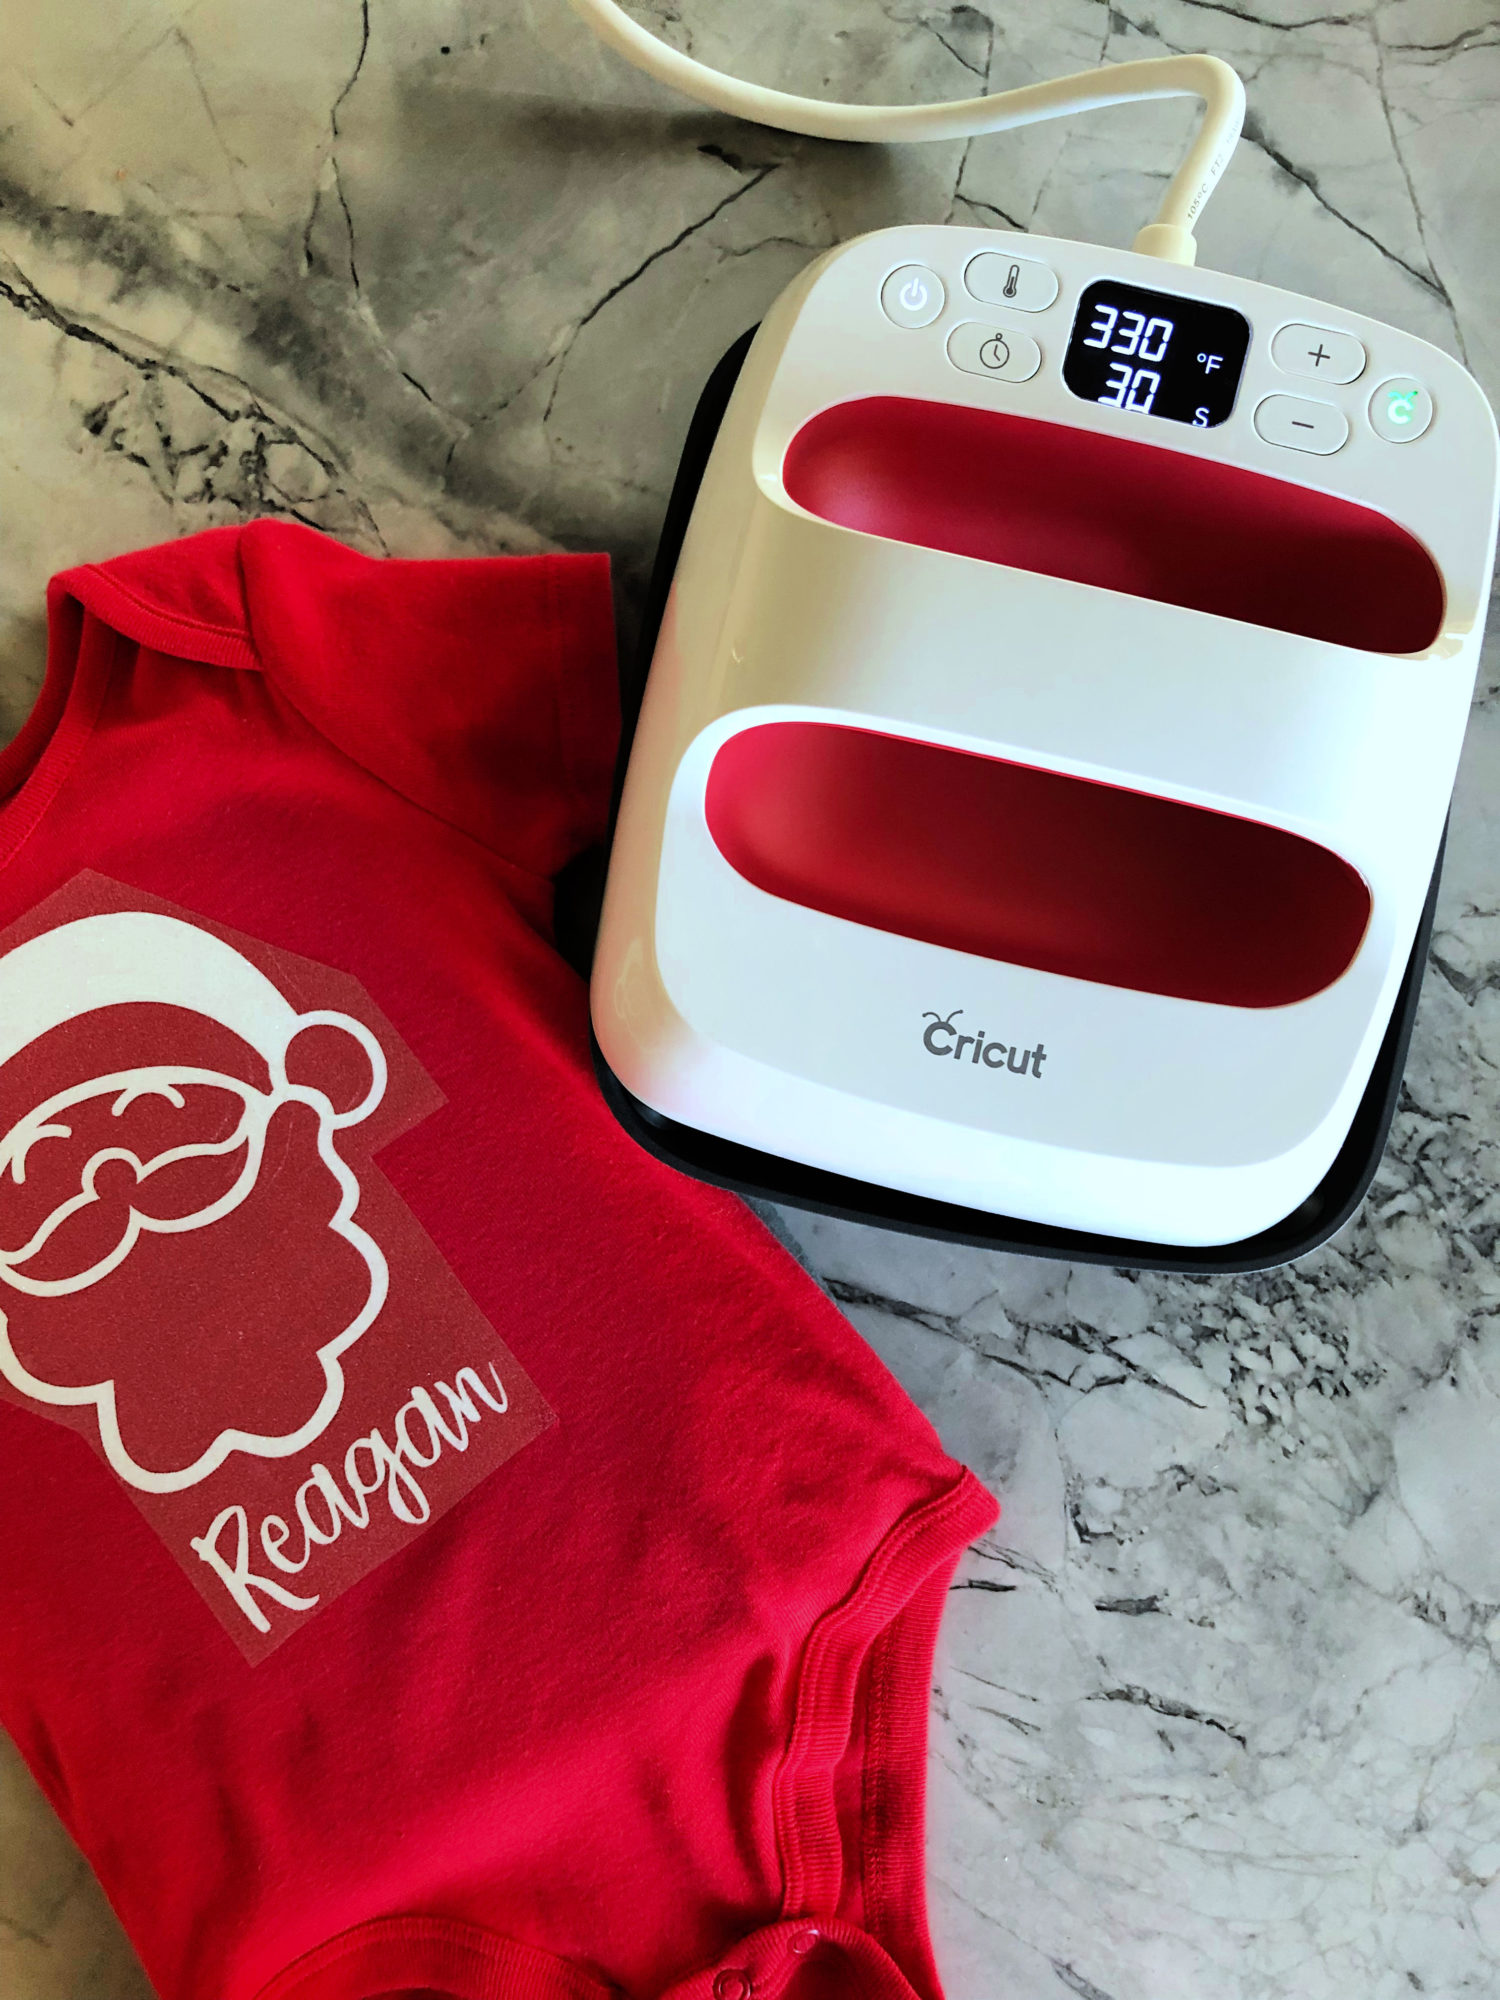
    Next up, it’s time to fire up the Cricut EasyPress 2 6×7.

    DIY Personalized Santa T-Shirt
    Place your design on your shirt or onesie in the case of this photo.

    DIY Personalized Santa T-Shirt

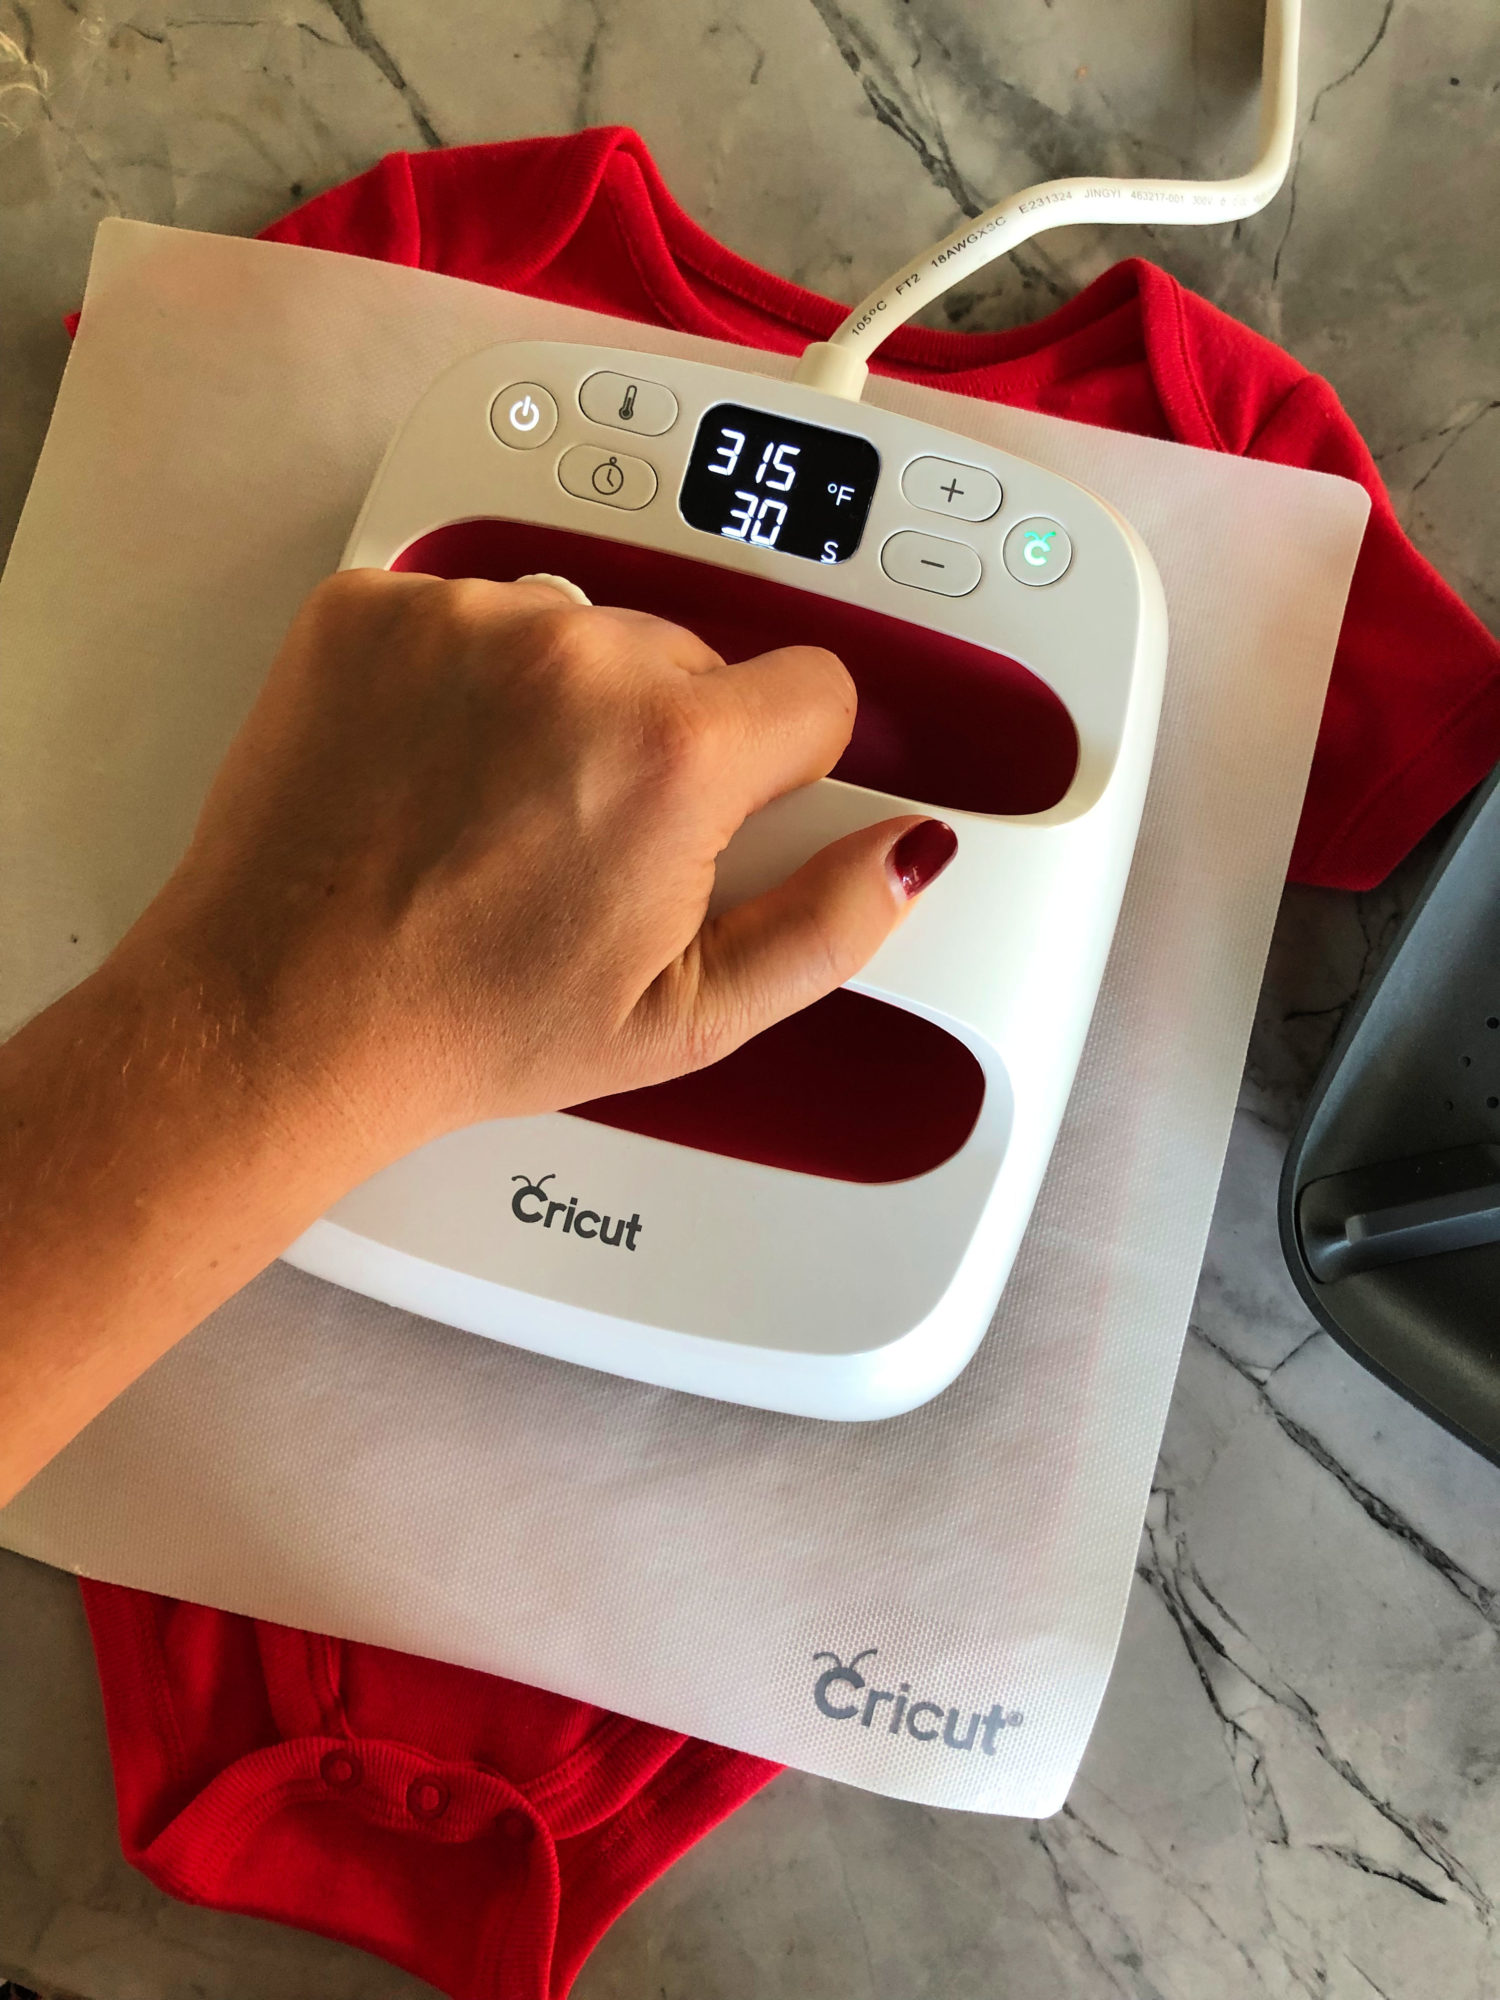
    Always follow the recommended heat settings. This is cotton so that’s 330 degrees for 30 seconds. Then, flip over, and heat for an additional 15 seconds.

    DIY Personalized Santa T-Shirt

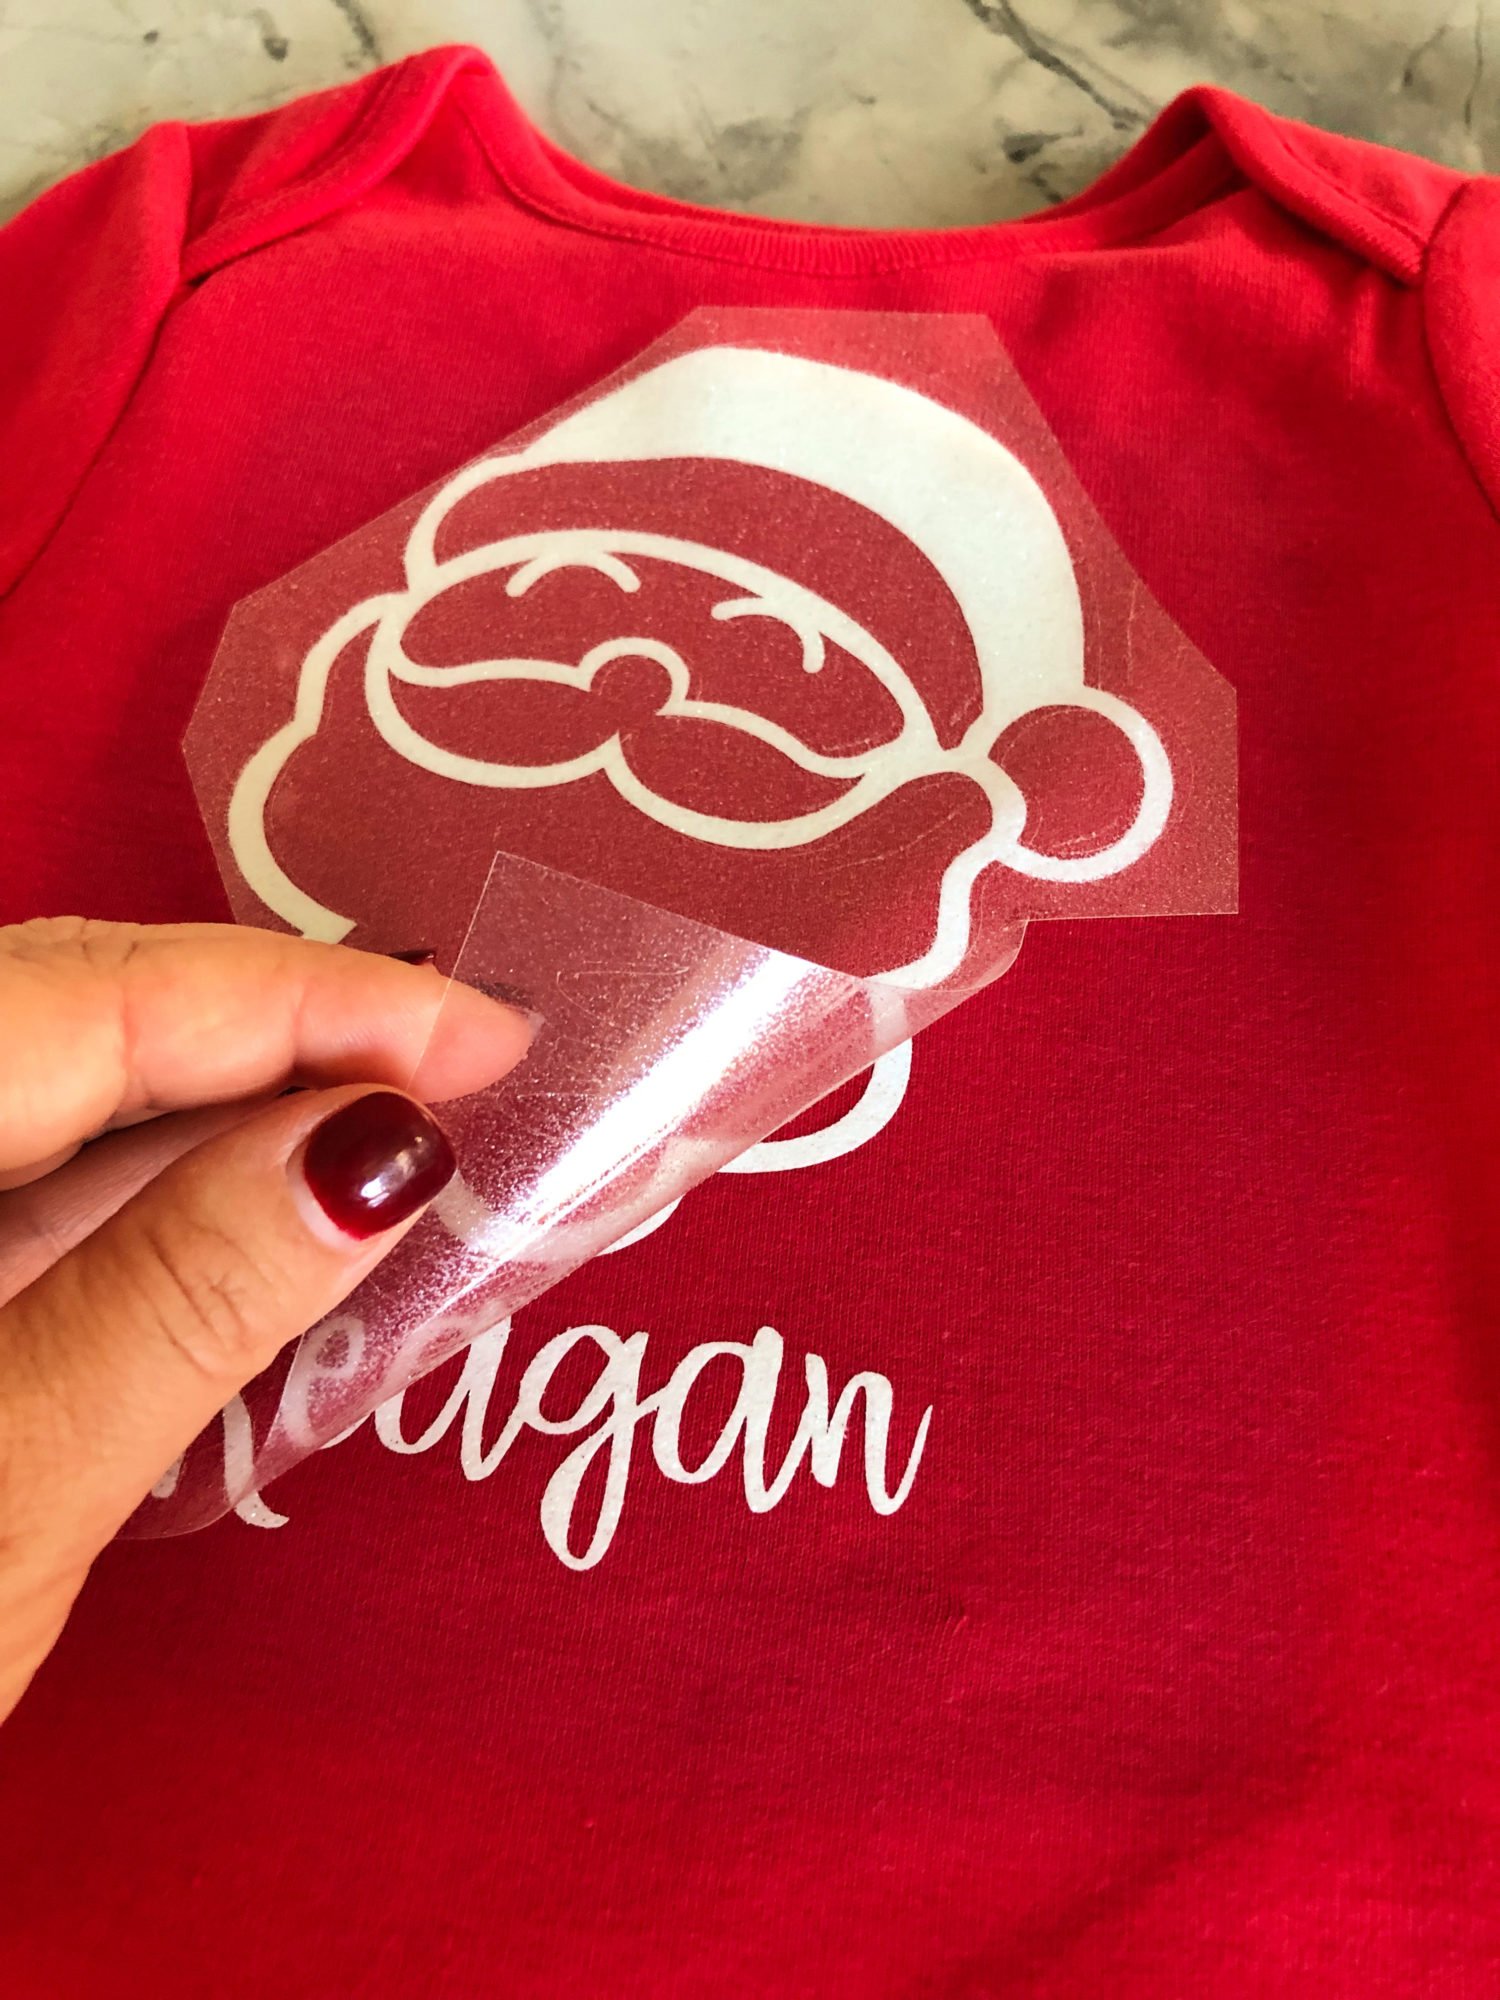
    Then, remove the plastic while it’s still warm. This is called a “warm peel”.

    DIY Personalized Santa T-Shirt

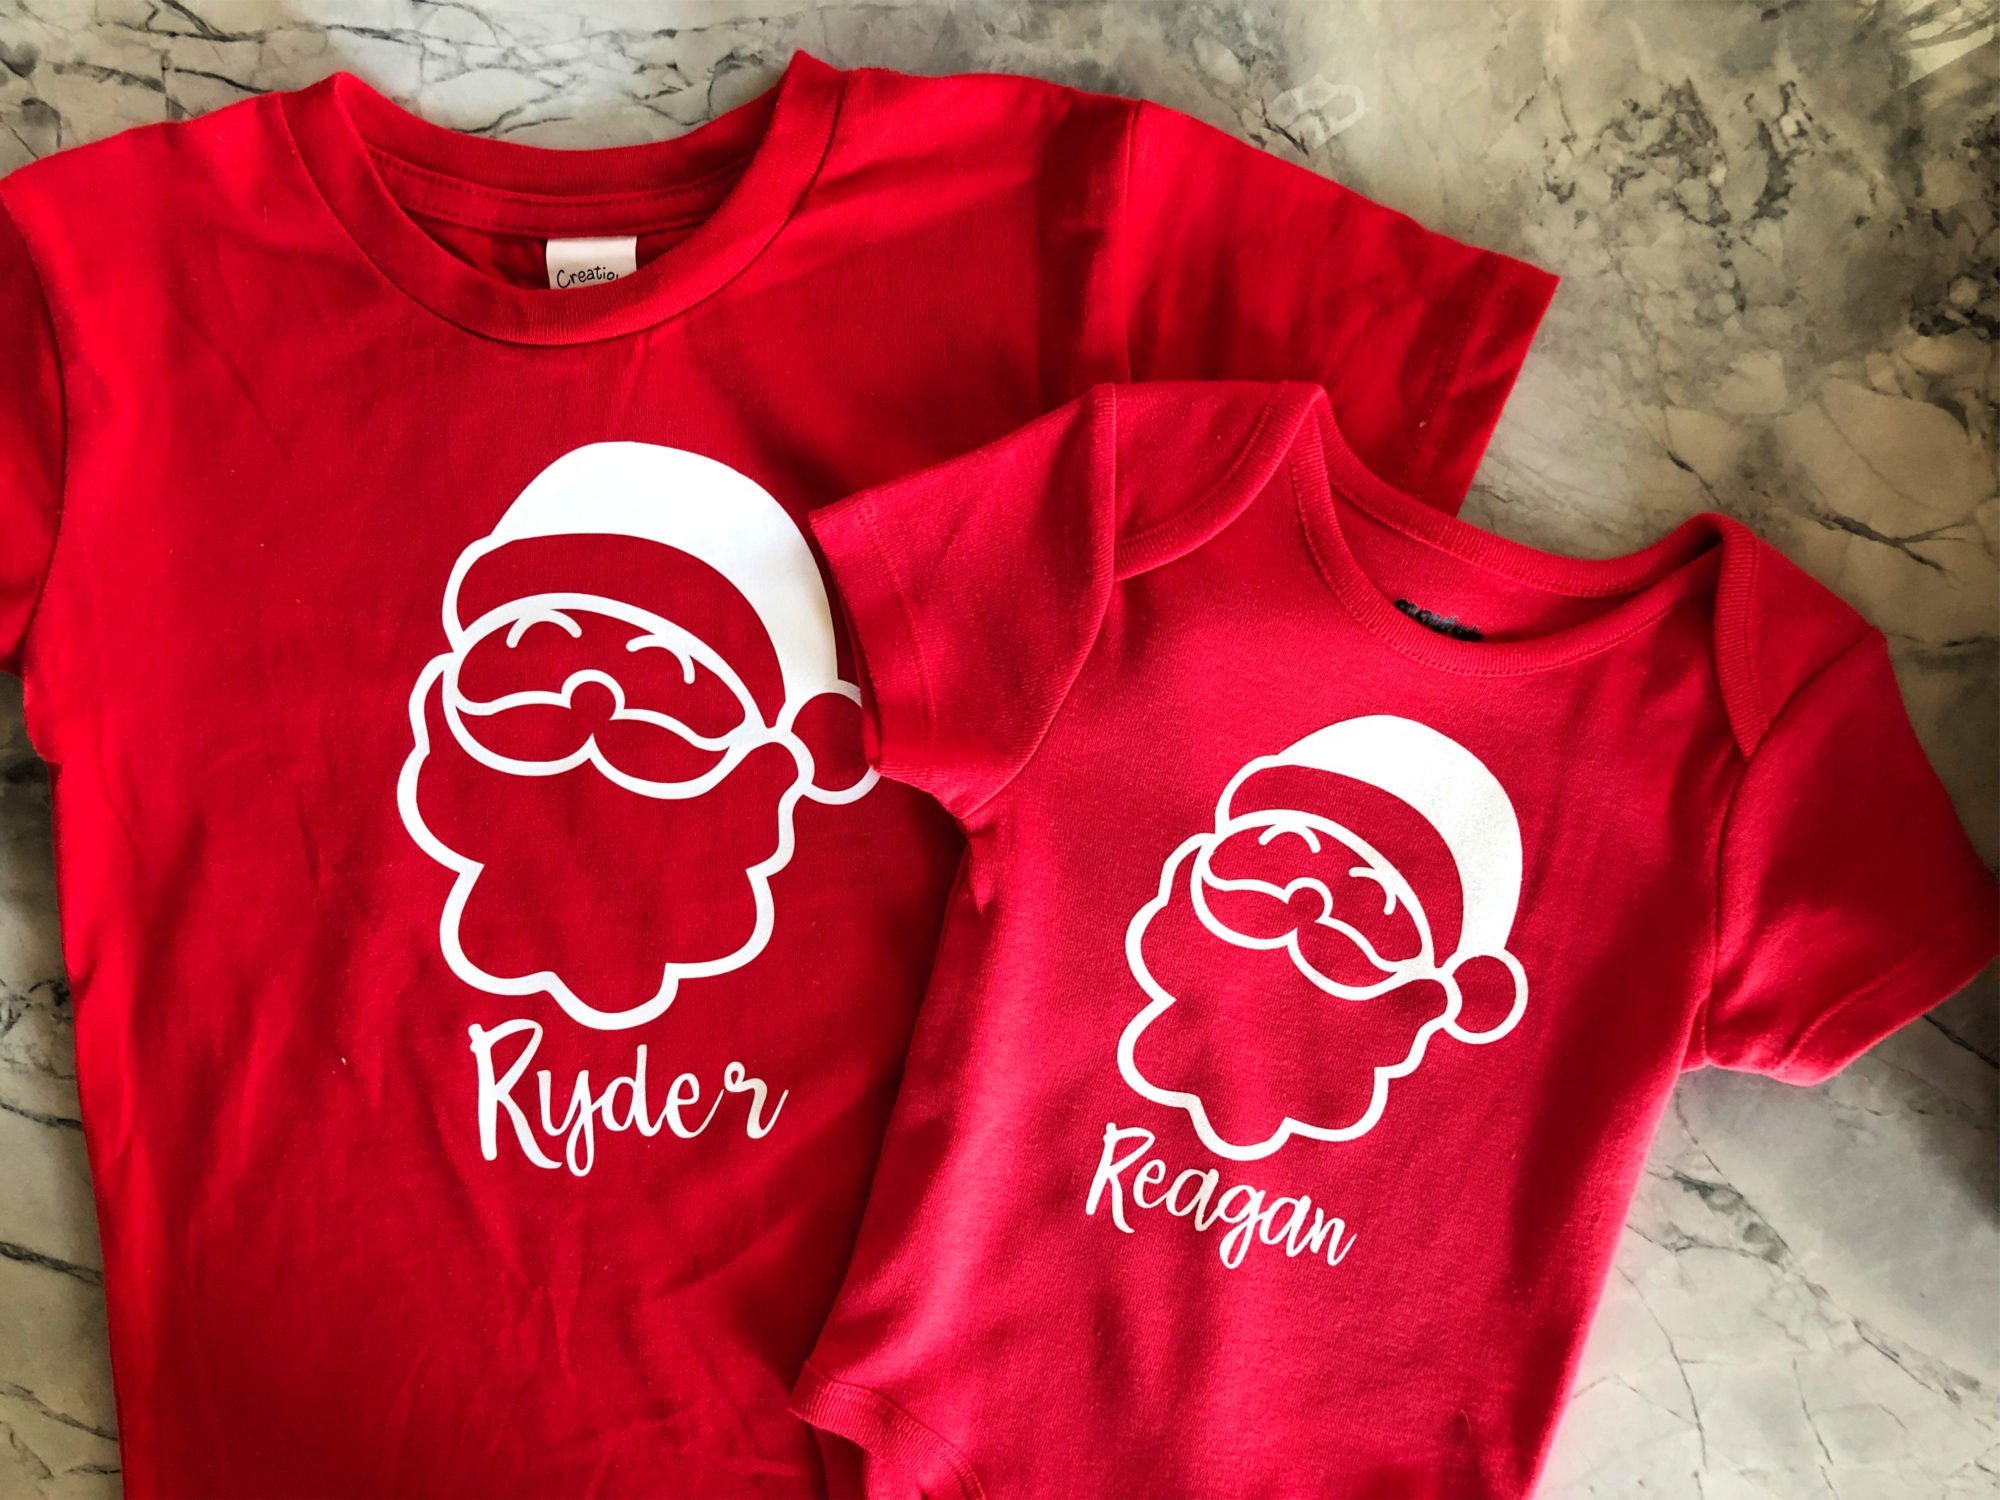
    Repeat until you’ve made all the shirts you want!

    DIY Personalized Santa T-Shirt

    Love this font, too!

    DIY Personalized Santa T-Shirt

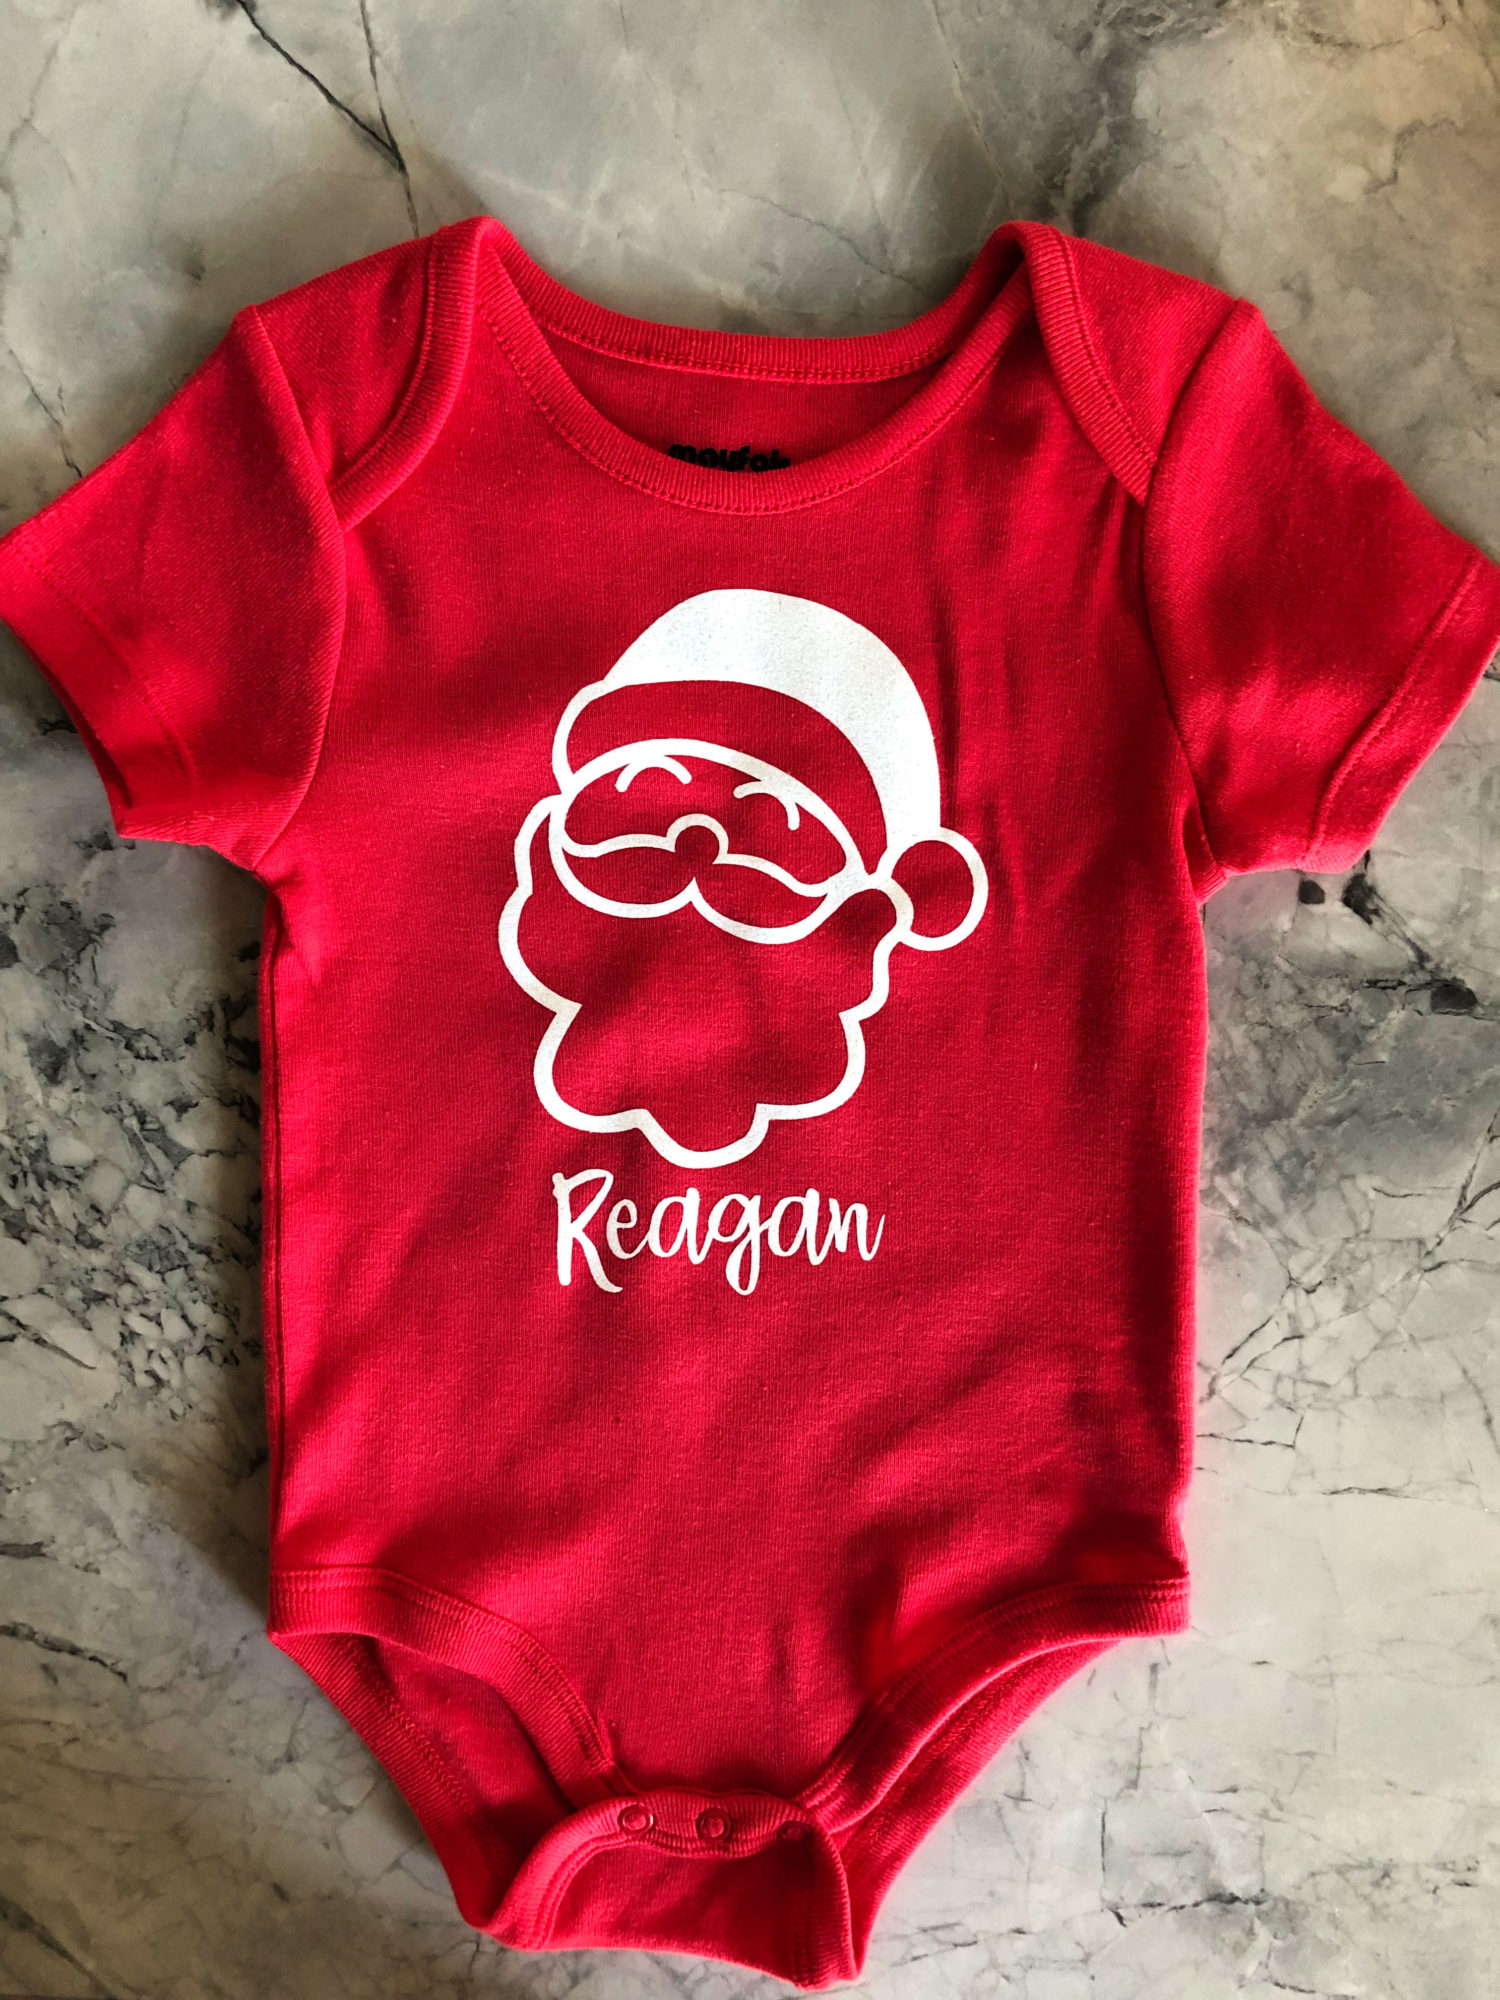
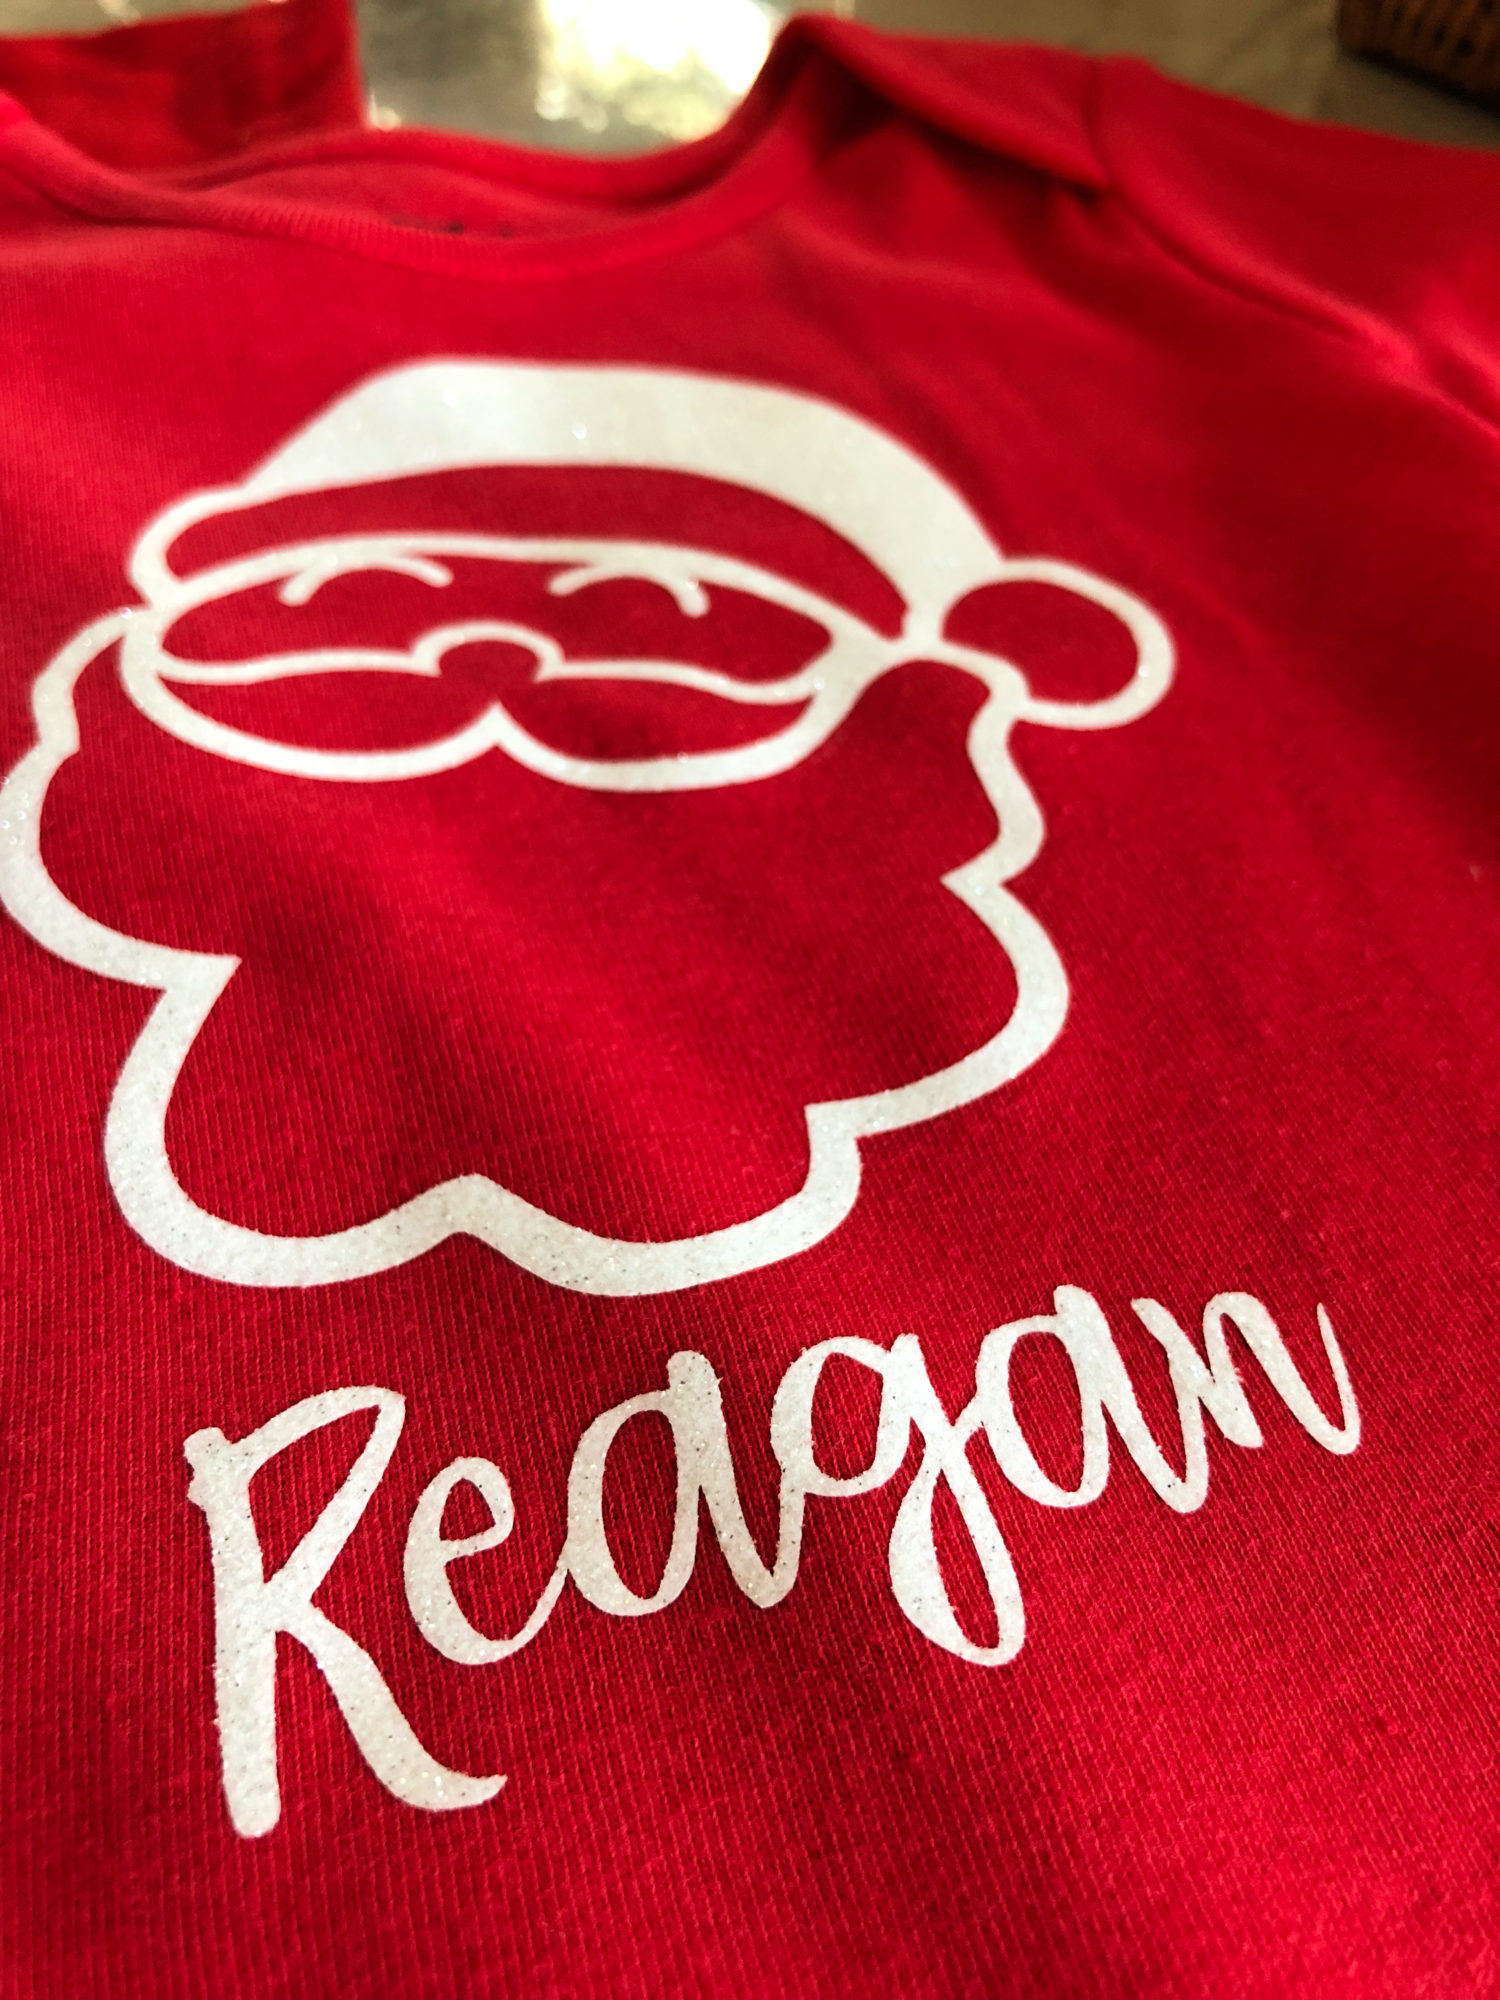
    Such a cute little onesie for my Christmas cutie!

    DIY Personalized Santa T-Shirt for Toddlers

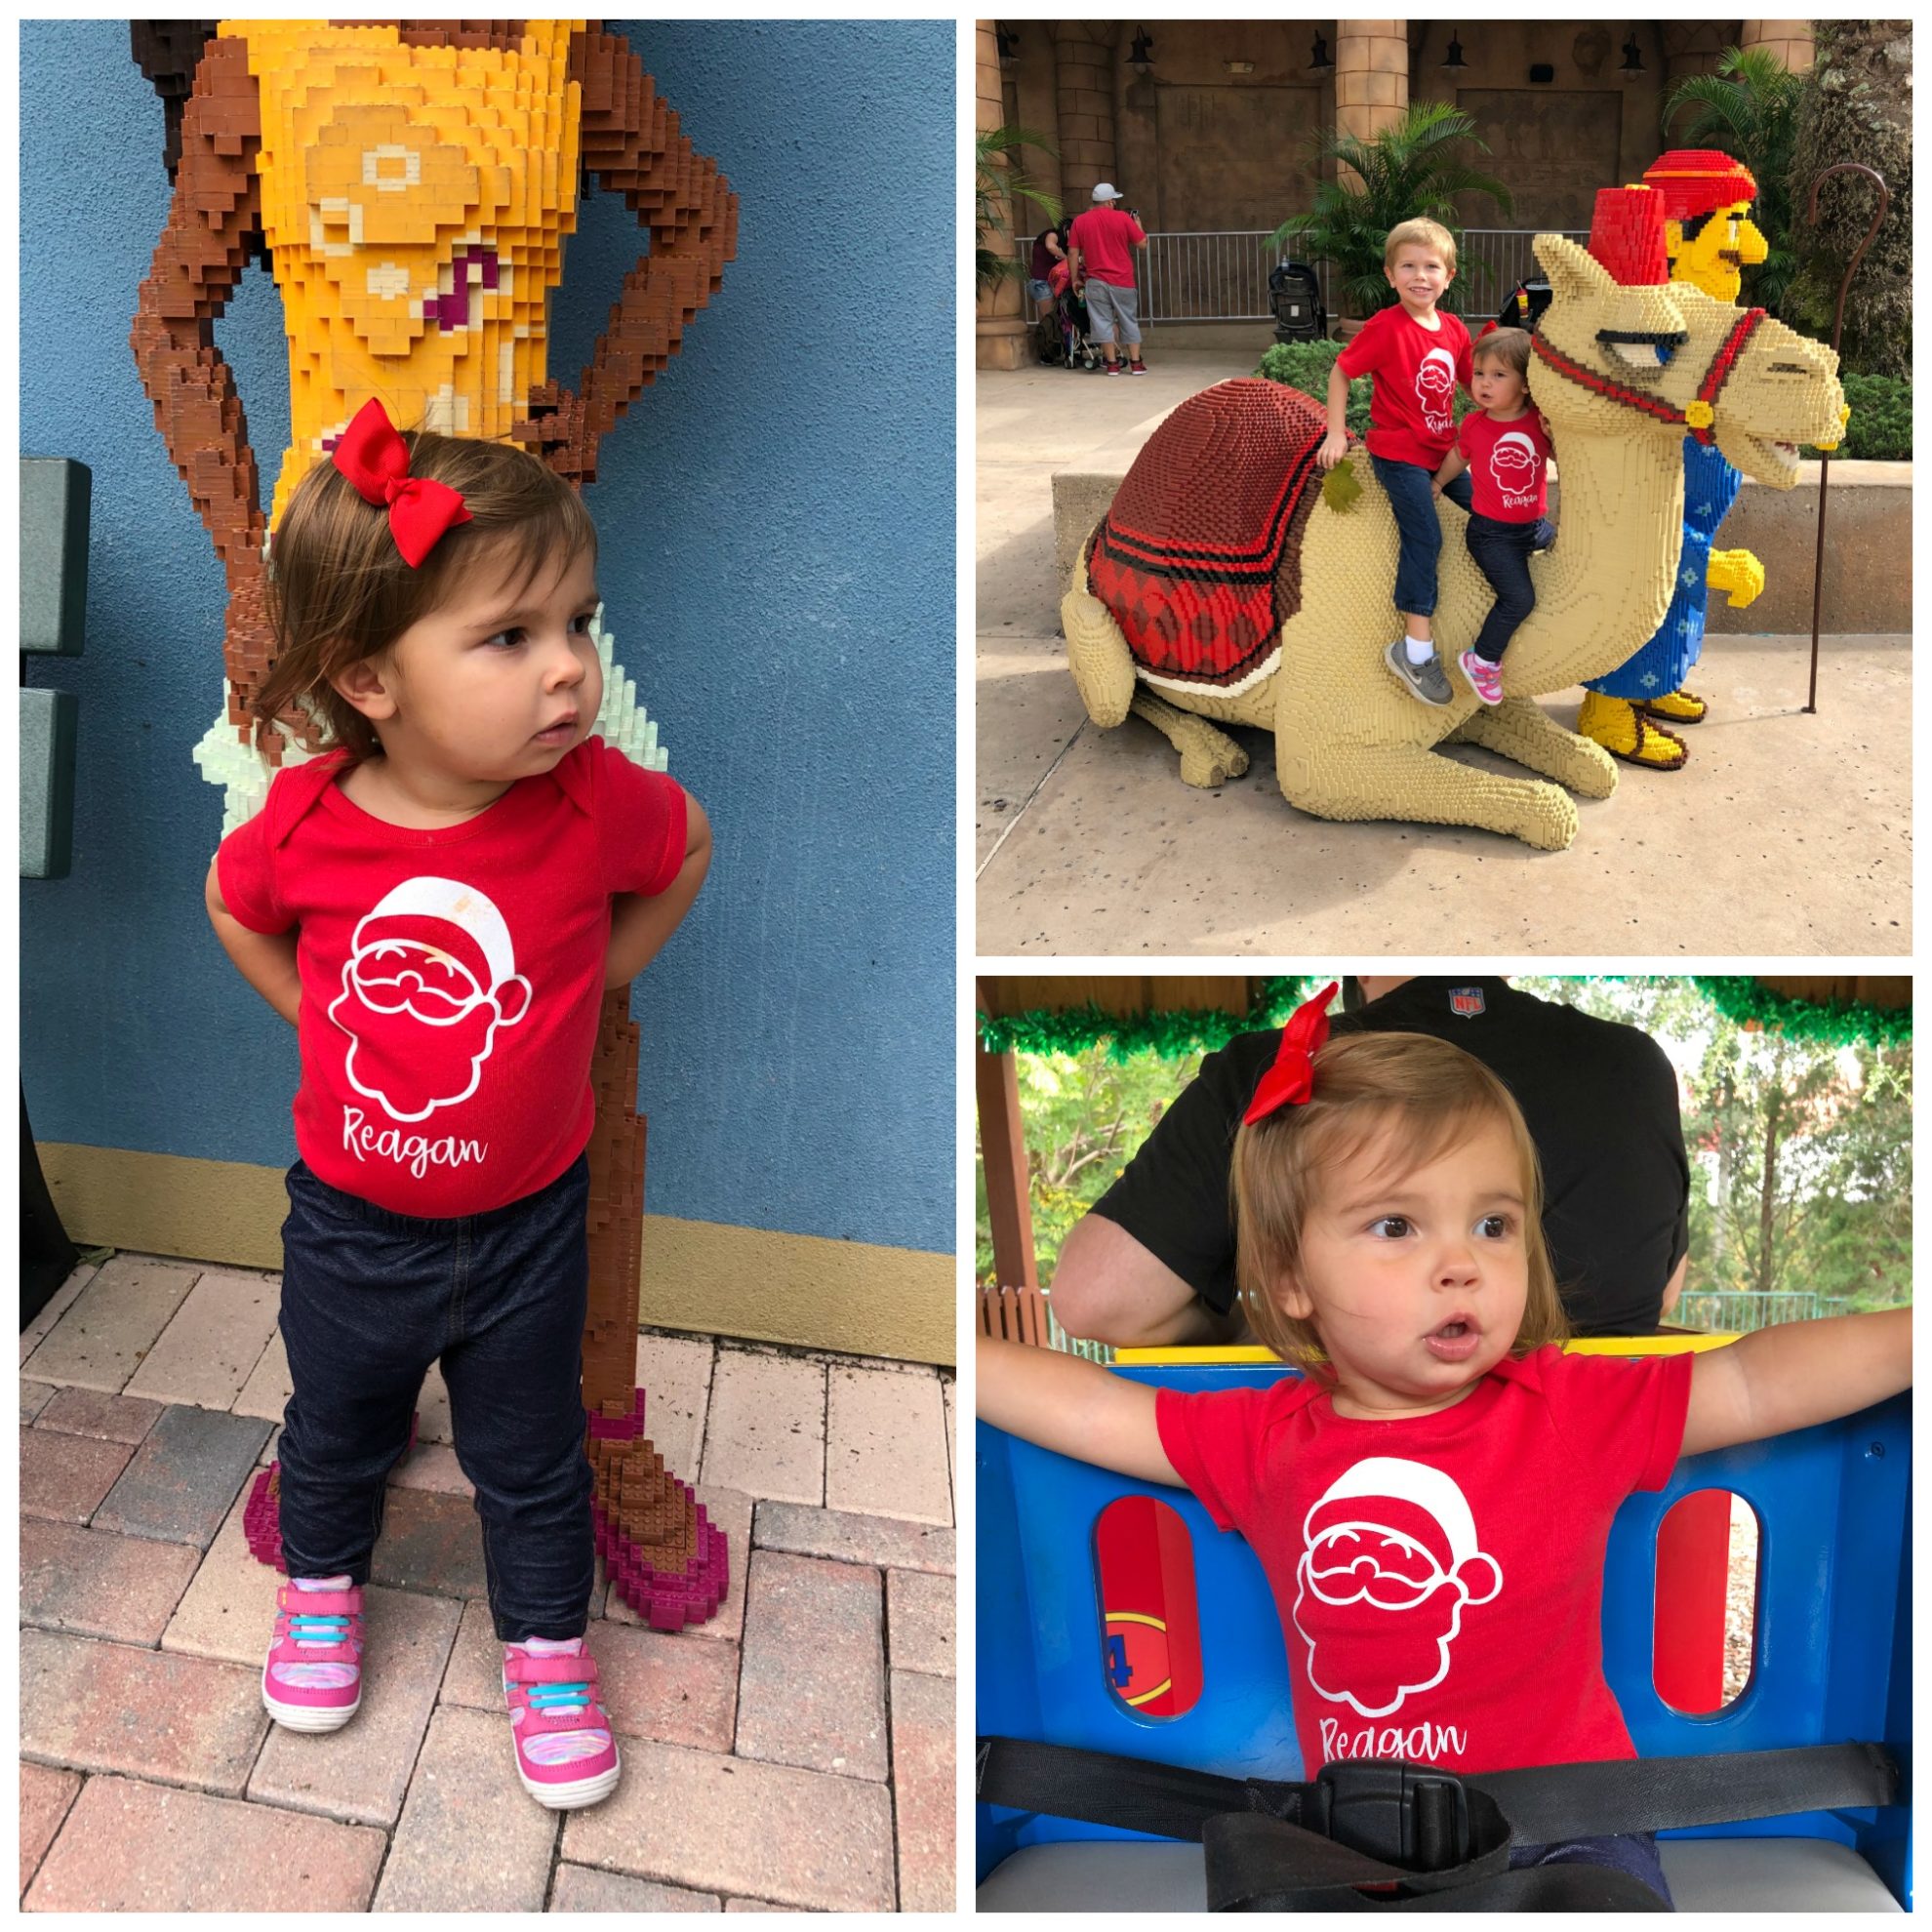
    Here are my cuties modeling their shirts while we were at LEGOLAND the other week.

    Shop new arrivals from Cricut!


    Disclaimer: Comments submitted may be displayed on other websites owned by the sponsoring brand. There are affiliate links in this post. That means, if you click on a link and purchase something from it we will receive a small percentage of the sale at no additional cost to you.
    « Christmas Bricktacular 2018 at LEGOLAND® Florida
    Dinosaur Valentines »

    Reader Interactions

    Leave a Reply Cancel reply

    Your email address will not be published. Required fields are marked *

    Primary Sidebar

    • Email
    • Facebook
    • Instagram
    • Pinterest
    • Twitter
    • YouTube
    Male and female hugging on each other in the woods.

    Hi, we're Katie & Jon! Welcome to our home away from home!

    Sew Woodsy is a lifestyle blog focusing on crafts, home DIY projects, family, travel and all things life. Get comfy and join us on our adventure!

    More About Us →

    9 different logos from various media outlets where Sew Woodsy has been featured on.

    Easter Projects

    • Kids Easter Basket Ideas
    • 25 Easter Basket Ideas for Toddlers
    • Free Easter Coloring Pages
    • 17 Easter Craft Ideas

    Trending

    • How to Create a Natural Log Pathway + Video
    • Tips & Tricks on Installing Butcher Block Countertops
    • How to Host a Baby Shower at Work
    • How to Use Heat n Bond

    Male and female hugging on each other in the woods.

    Hi, we're Katie & Jon! Welcome to our home away from home!

    Sew Woodsy is a lifestyle blog focusing on crafts, home DIY projects, family, travel and all things life. Get comfy and join us on our adventure!

    More About Us →

    9 different logos from various media outlets where Sew Woodsy has been featured on.

    Easter Projects

    • DIY Follow the Bunny Pillow Cover
    • Bunny Kisses & Easter Wishes Burlap Garden Flag
    • Easter Bunny Family Pillow
    • DIY Easter Bunny Onesie with Name

    Trending

    • How to Create a Natural Log Pathway + Video
    • Tips & Tricks on Installing Butcher Block Countertops
    • How to Host a Baby Shower at Work
    • How to Use Heat n Bond

    Footer

    ↑ back to top

    9 different logos from various media outlets where Sew Woodsy has been featured on.

    About

    • About Us
    • Privacy Policy
    • Accessibility Statement

    Newsletter

    • Sign Up! for emails and updates

    Contact

    • Contact
    • Work with us
    • Advertise

    Copyright © 2010 - 2022 Sew Woodsy