This is a sponsored conversation written by me on behalf of Cricut. The opinions and text are all mine.
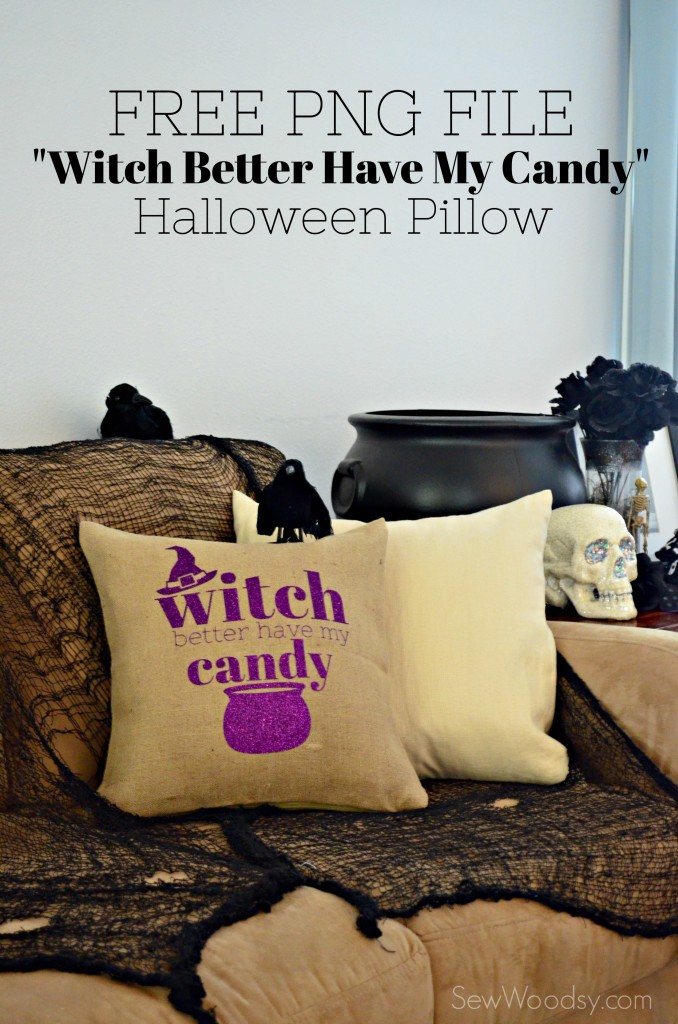
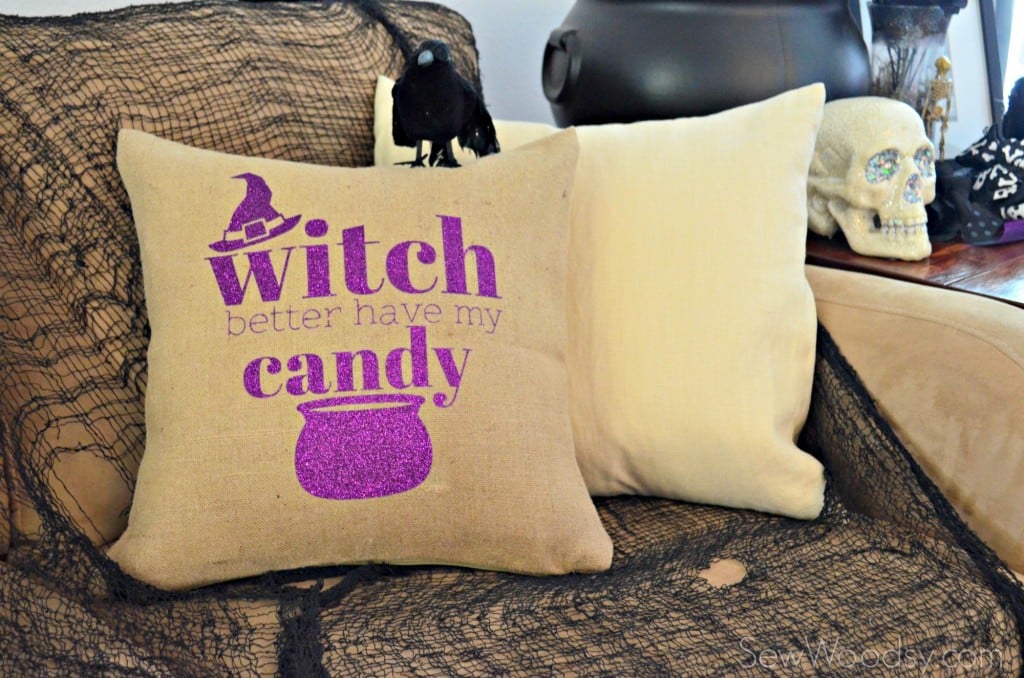
Learn how I make this “Witch Better Have My Candy” Halloween Pillow and get my free PNG file to make your own!
Eek! I’m so excited for today’s awesome Halloween project. It’s a quick 30 minute craft that I whipped up while BOTH kids were napping. Even better I have a FREE PNG file for you if you want to make one too. Even more special about this project is that I finally got to break in my Cricut EasyPress! It’s ammmaaazzzinngggg (read in singing voice)! Seriously, I’m in love and I know what your thinking–I was in love last year when I bought my heat press. However, this fine piece of machinery is just as good (if not better) then my big bulky heat press. So let’s get to work and make this wicked cool Halloween pillow. Y’all know I love a funny pillow, and that’s exactly what I created!
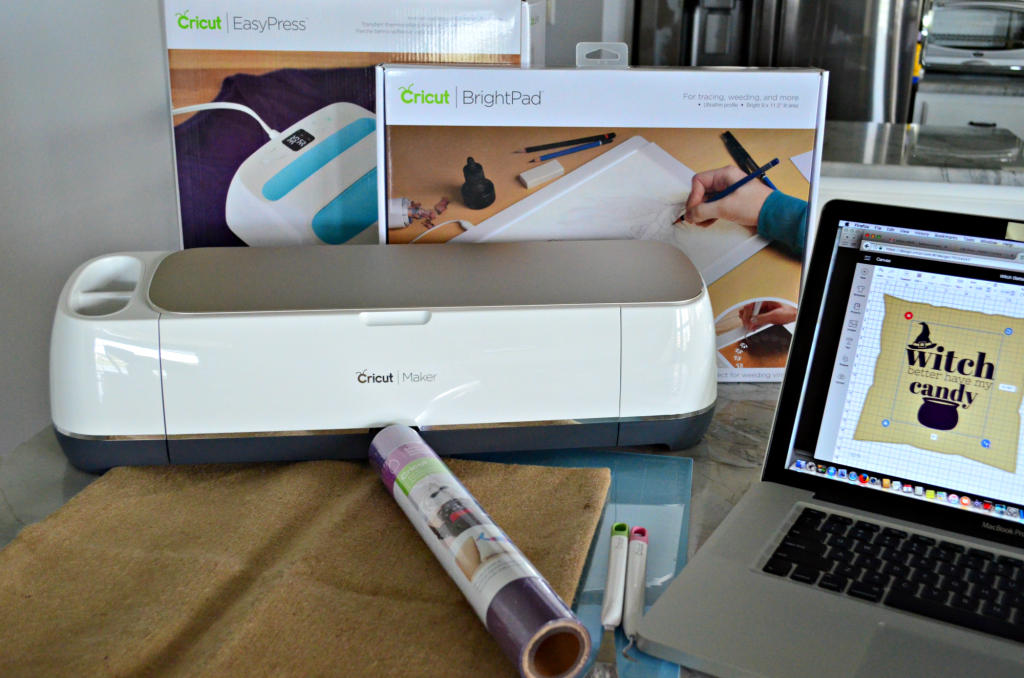
Supplies for the “Witch Better Have My Candy” Halloween Pillow:
- Cricut Maker
- Cricut Design Space™
- FREE PNG File – Witch Better Have My Candy
- Cricut Mat
- Cricut Glitter Iron-On Vinyl; purple
- Cricut Tools
- Cricut BrightPad
- 16 x 16 Pillow Cover
- Cricut EasyPress
- Linen Cloth
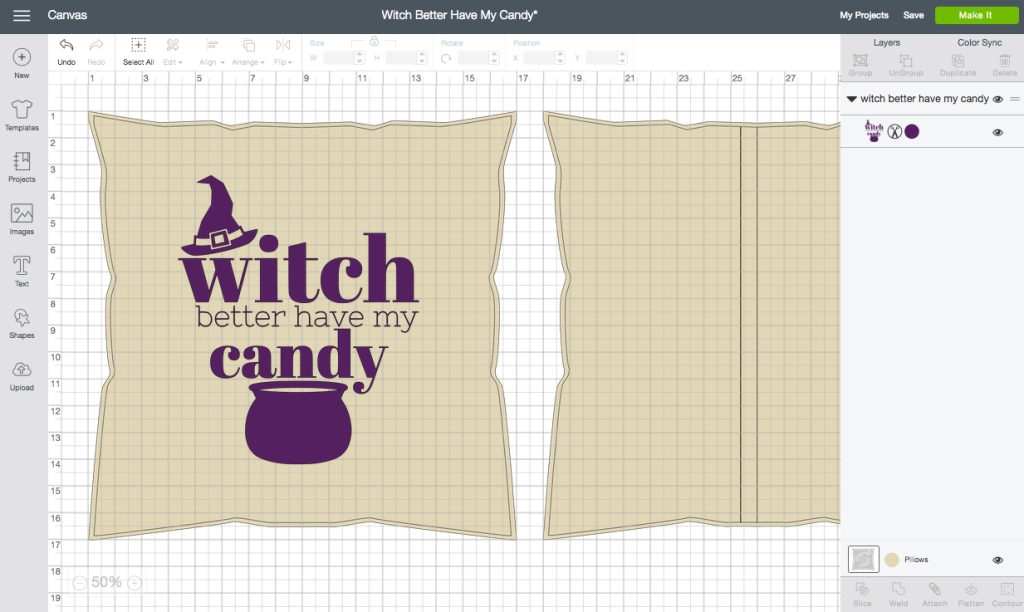
First up, I uploaded my FREE PNG File – Witch Better Have My Candy into Cricut Design Space™. If you haven’t noticed–they brought the templates back into Design Space. So I placed the PNG file onto a template for a medium size throw pillow.
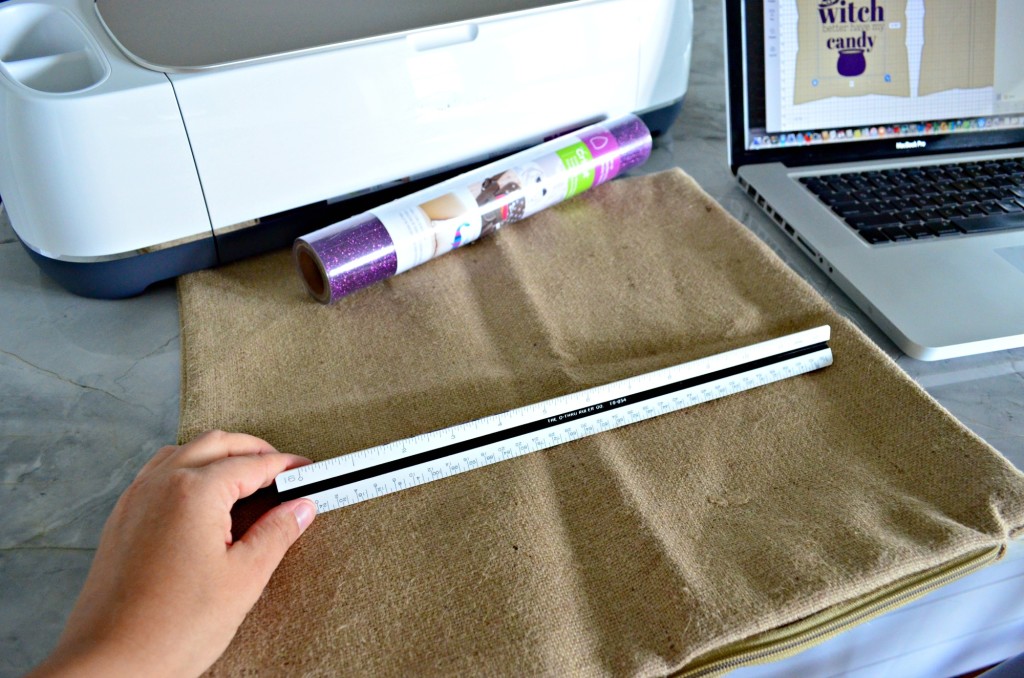
Pro Tip: Take a ruler and physically measure out your design. You can find the measurements on the top of the Design Space Screen. This will ensure your design fits exactly how you want it.
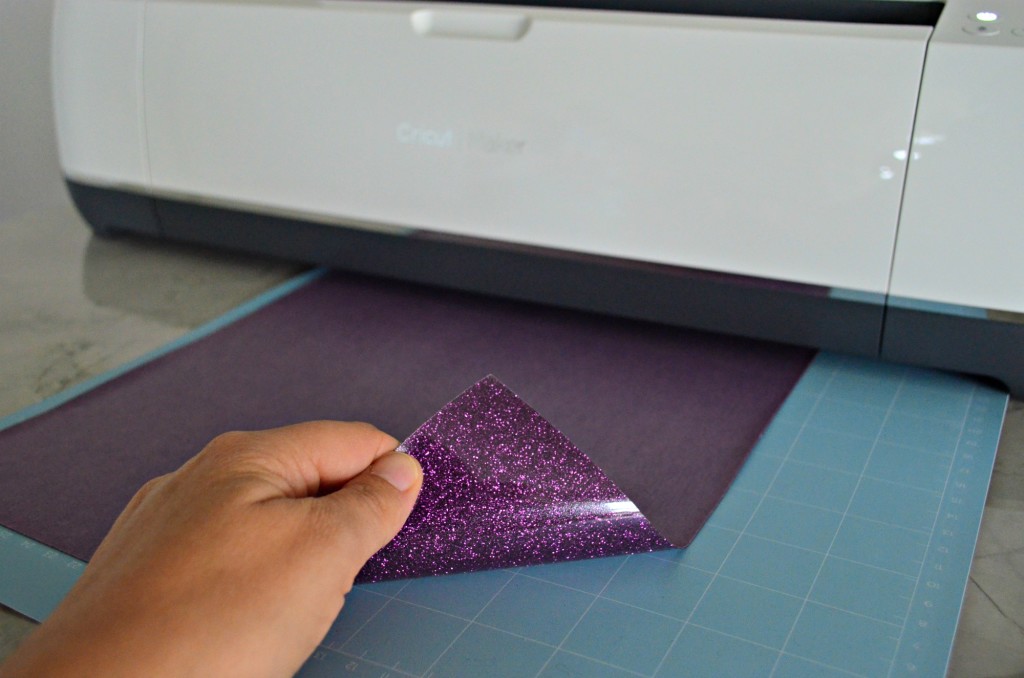
Another PRO Tip: When your dealing with Iron-On Vinyl you want to place the shiny sparkly side, DOWN on the mat. And remember to “mirror image” since that shiny side will be the side you’ll be seeing on your pillow.

Once you’ve adhered your Glitter Iron-On vinyl (or any Iron-On Vinyl) it’s time to let the Cricut Maker do it’s job! Make sure you MIRROR your image and select Glitter for Iron-On Vinyl. The pressure is stronger to ensure that the blade will cut through the thick vinyl.
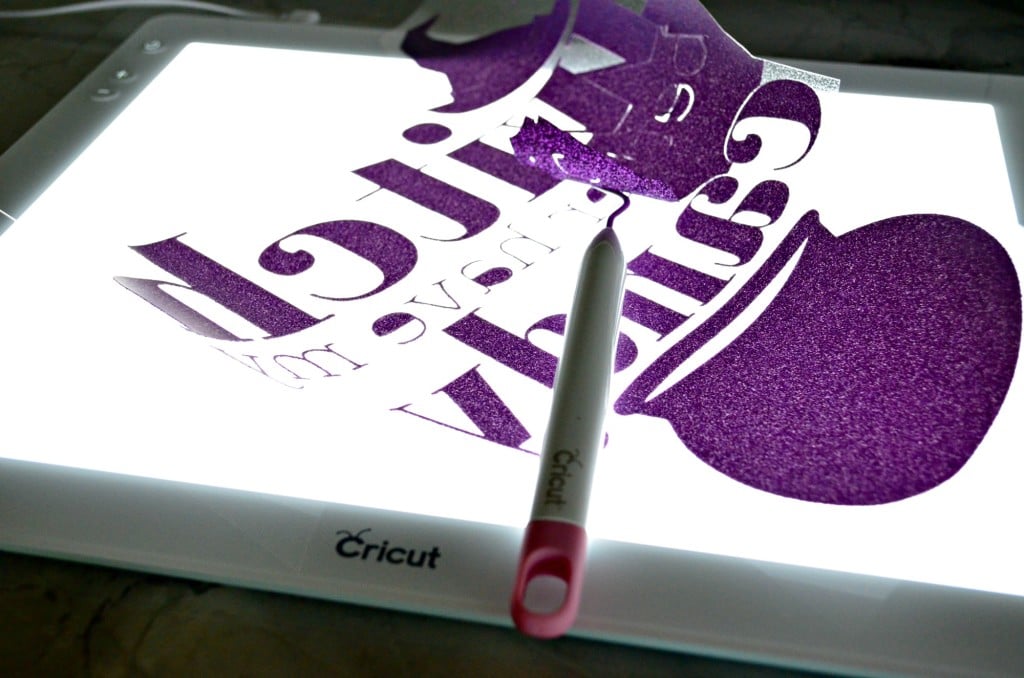
Next up, my least favorite part (some people love it–I don’t). It’s time to weed your image. I’ll be honest, I stayed far away from glitter Iron-On vinyl in years past because it was always a PITA to weed. But thanks to the new Cricut BrightPad, I can actually see what I’m doing!
I like to cut the excess Iron-On vinyl away from the design. Then begin to weed out the negative. If it’s a larger image, like this one, I like to cut parts of it away as I go. It helps ensure I’m not missing anything.
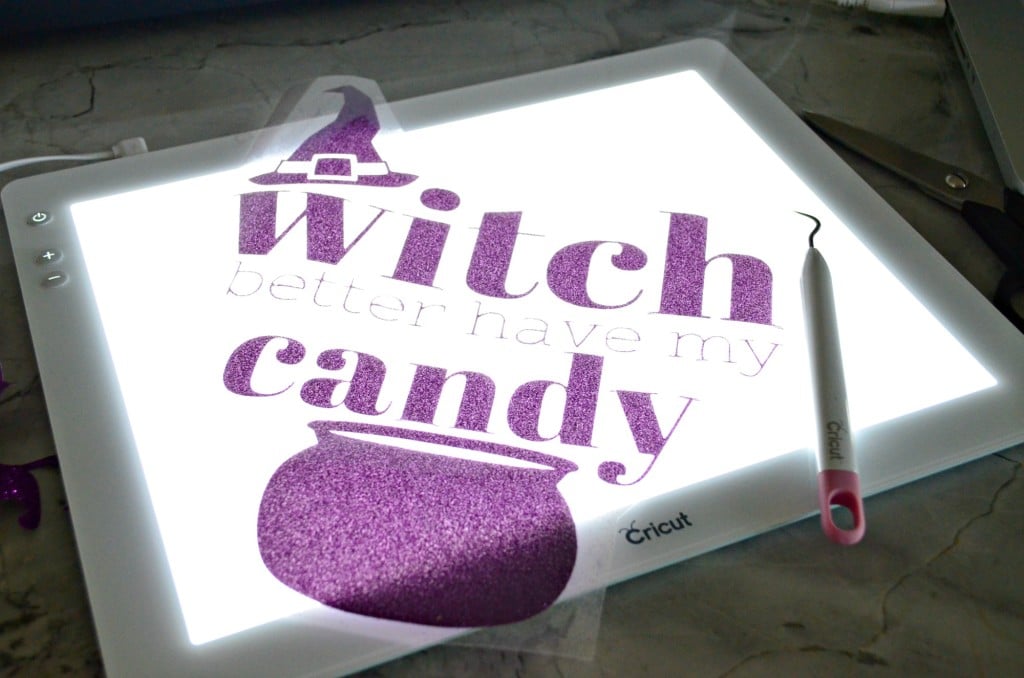
This is what it looked like after I was done weeding!
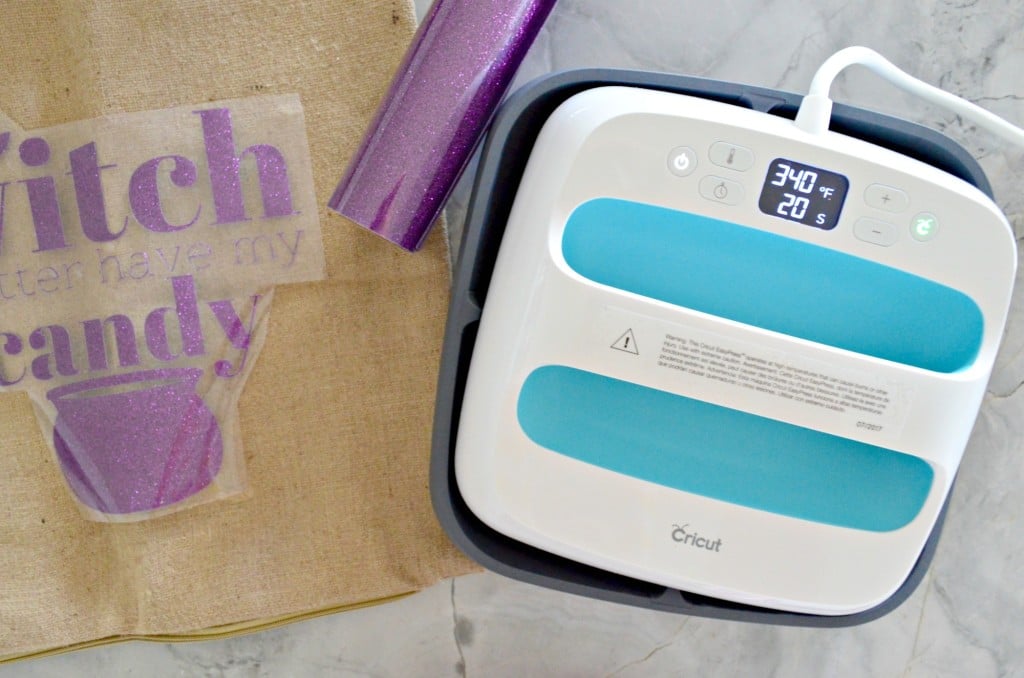
Next up, fire up the new Cricut EasyPress. Why, what is the Cricut EasyPress? You can get professional iron-on results in 60 seconds or less. An evenly heated plate and simple controls make EasyPress™ the foolproof way to get flawless transfers that really last!
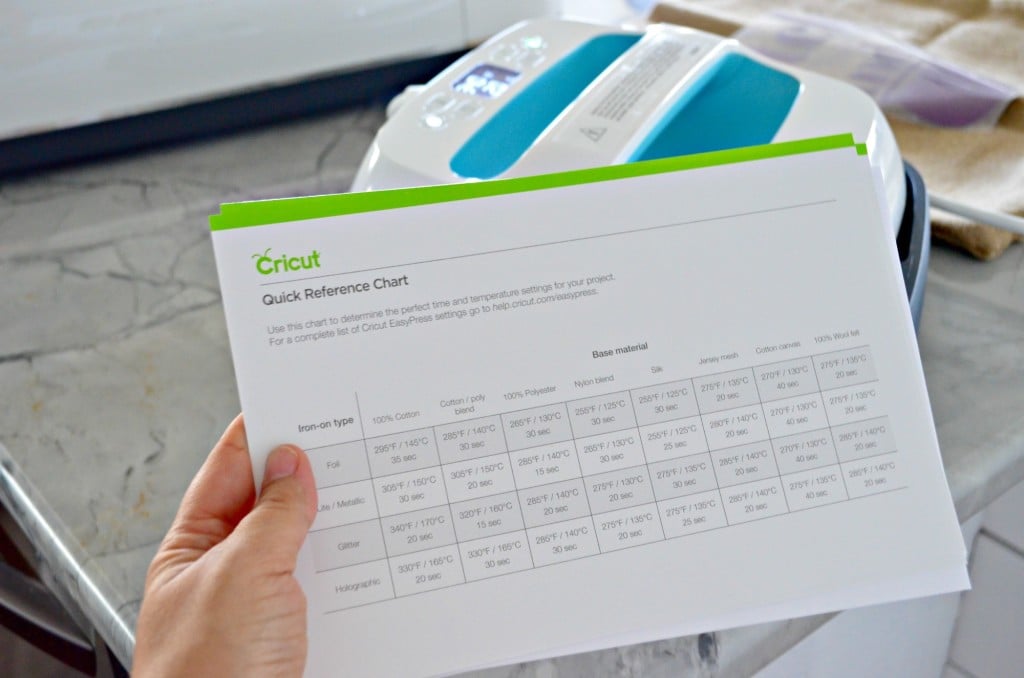
The Cricut EasyPress comes with a Quick Reference Chart so you know exactly what temperature and time your design will need. I have to be honest with you–I own a heat press and was skeptical but I’m in love with the new EasyPress! I’ll post a review about the Cricut EasyPress soon, I promise!
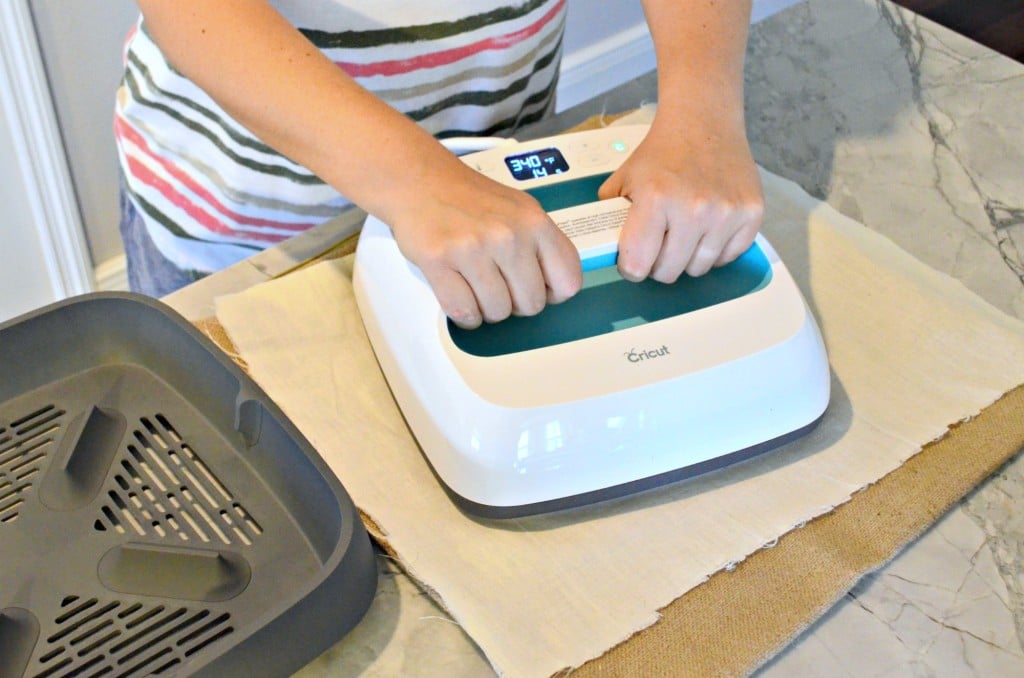
I followed the guild lines for Glitter Iron-On Vinyl and went with a temperature of 320 degrees Farenehit for 20 seconds. I did this twice to ensure that my entire design was adhered down.
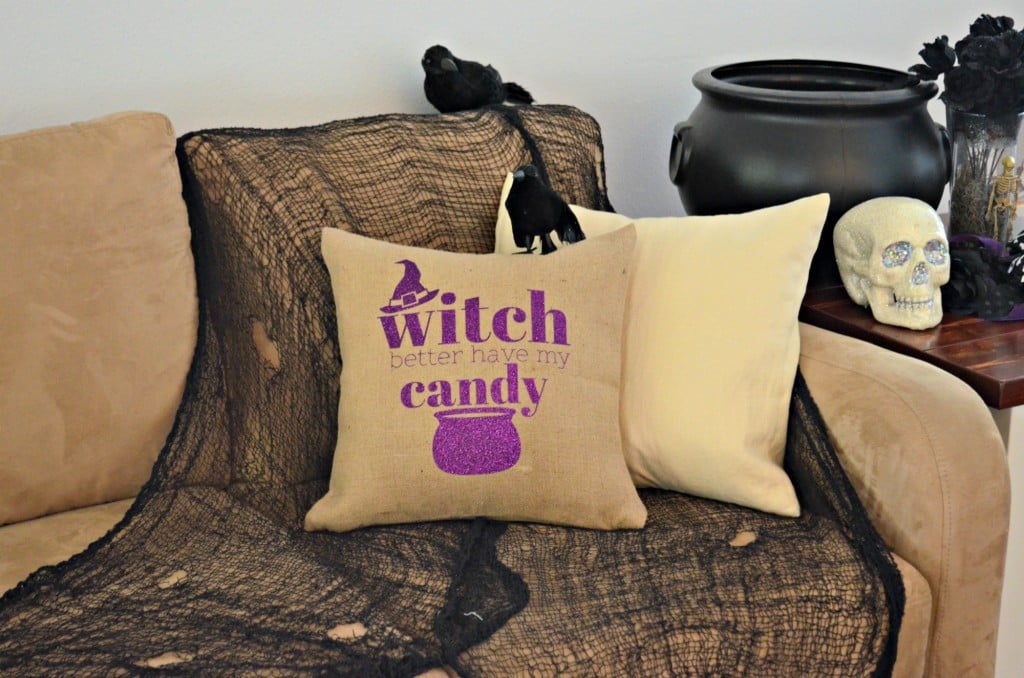
Next– take your pillow cover and stuff a pillow inside. Decorate and enjoy that awesome pillow you just made.

Make sure you download my FREE PNG File – Witch Better Have My Candy.
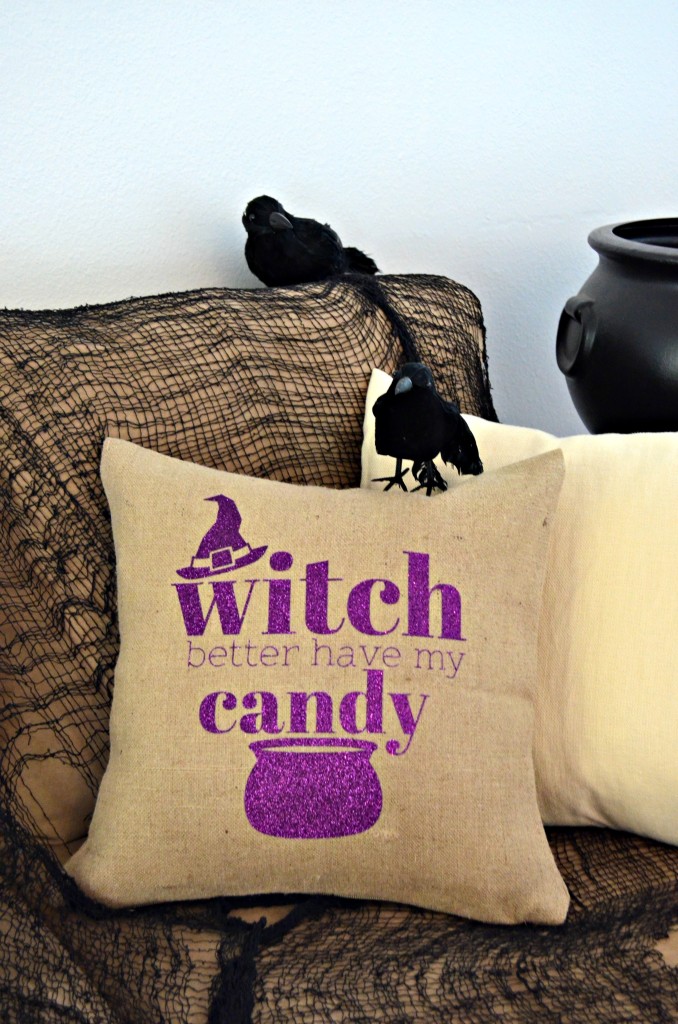
I’m in love with this pillow and the saying just cracks me up!

Disclaimer: There are affiliate links in this post. That means, if you click on a link and purchase from my links we will receive a portion of the sale at no additional cost to you.
