• About
  • Contact

Sew Woodsy

Husband & Wife DIY Team

  • Crafts
  • Cricut
  • DIY
  • Travel
  • Holiday

DIY Painted Drink Dispenser

Crafts

DIY Painted Drink Dispenser from SewWoodsy.com

Last month, right before we left for Haven I received my July box from the 12 Months of Martha campaign. Because we traveled to Haven right after I did not get to film my haul video that I do for each box. So instead I’ll tell you a little bit about it. This month, I received an assortment of adhesive silkscreens, glass paints, and stencils. The Martha Stewart Crafts Glass Paint program has 120 colors in seven distinctive finishes. The unique adhesive silkscreens are a simple way to transform ordinary glassware and ceramics into decorator accessories. These flexible stencils adhere to curved surfaces, which makes embellishing just about anything simple and easy! 

I used the adhesive silkscreens to transform a drink dispenser and glasses. Now, I’m going to preface right from the start that I did not use the product on glass. I used it on plastic, therefor it’s not dishwasher safe and I do not recommend you scrubbing the paint when cleaning the glasses and dispenser. The paint may come off. So you need to be aware of this right from the start! I also found my BPA-free beverage dispenser at my local Wal-Mart on clearance for just $5 and I got each of the ombre plastic cups for .90 each! Since the product was free my project cost just under $10! Perfect for hosting a picnic or barbecue or maybe even giving this to a friend for a housewarming gift!
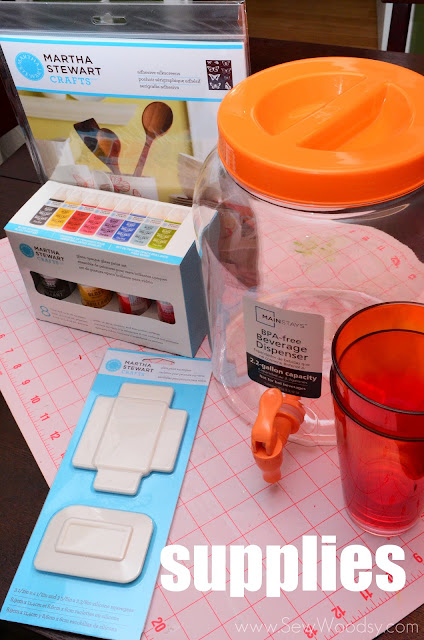
Supplies:

  • Martha Stewart Crafts™ Glass Silkscreen – Butterflies
  • Martha Stewart Crafts™ Glass Paint Squeegee Set
  • Martha Stewart Crafts™ 2oz Gloss Opaque Glass Paint – Yellow Jacket
  • Martha Stewart Crafts™ 2oz Gloss Opaque Glass Paint – Geranium
  • Drink Dispenser
  • Ombre Plastic Glasses
  • Damp Paper towels

DIY Painted Drink Dispenser from SewWoodsy.com

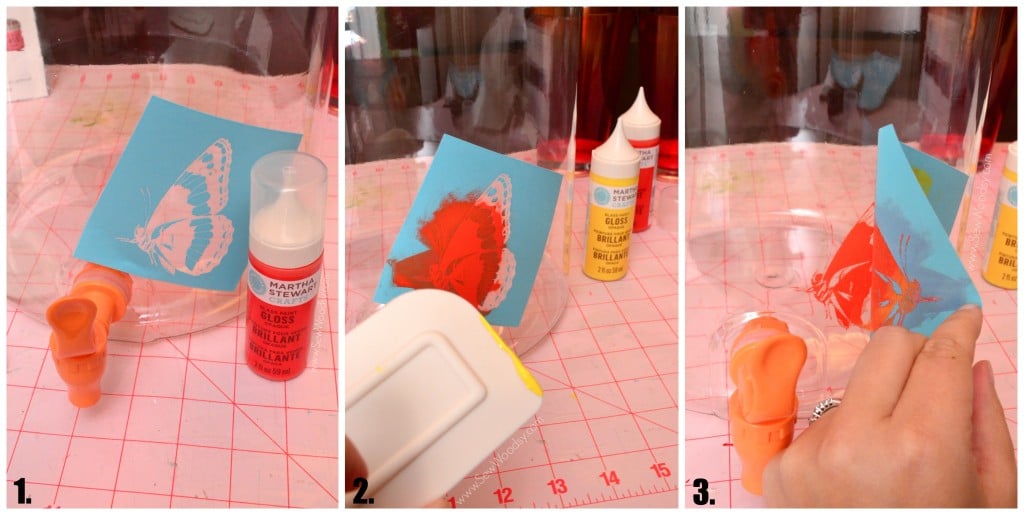
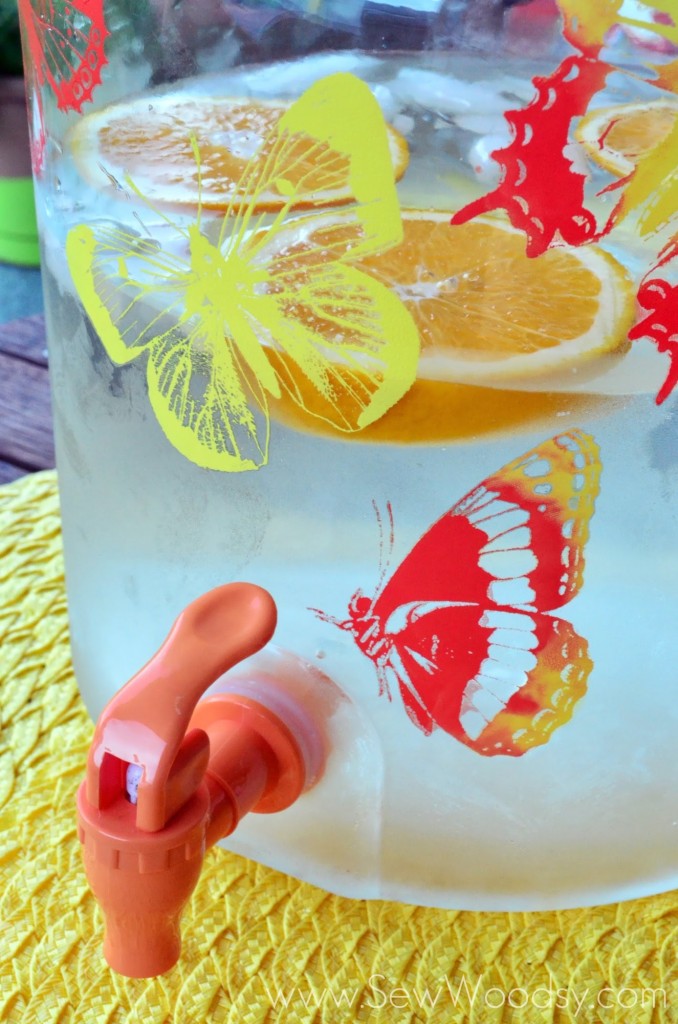
  1. Clean drink dispenser surface, then place adhesive silkscreen where desired.
  2. Using the glass paint squeegee place a little bit of paint on the tip and carefully spread in one direction. To get a two-toned effect place a second color of paint on the tip of the paint squeegee and spread to the rest of the silkscreen that does not have any paint.
  3. Carefully remove the silkscreen from the dispenser. Clean up edges if needed with a damp paper towel.

DIY Painted Drink Dispenser

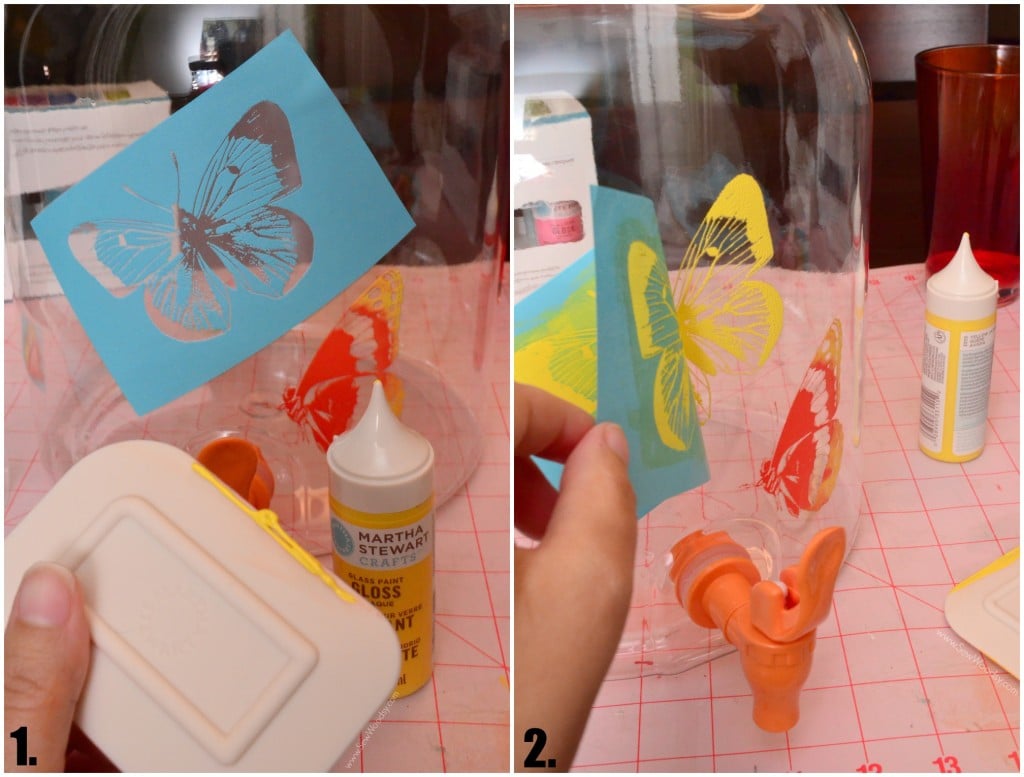
  1. Repeat the steps above on the next silkscreen adhesive. Place paint on the edge of the squeege and spread in one direction.
  2. Remove silkscreen adhesive from the drink dispenser.

DIY Painted Drink Dispenser from SewWoodsy.com

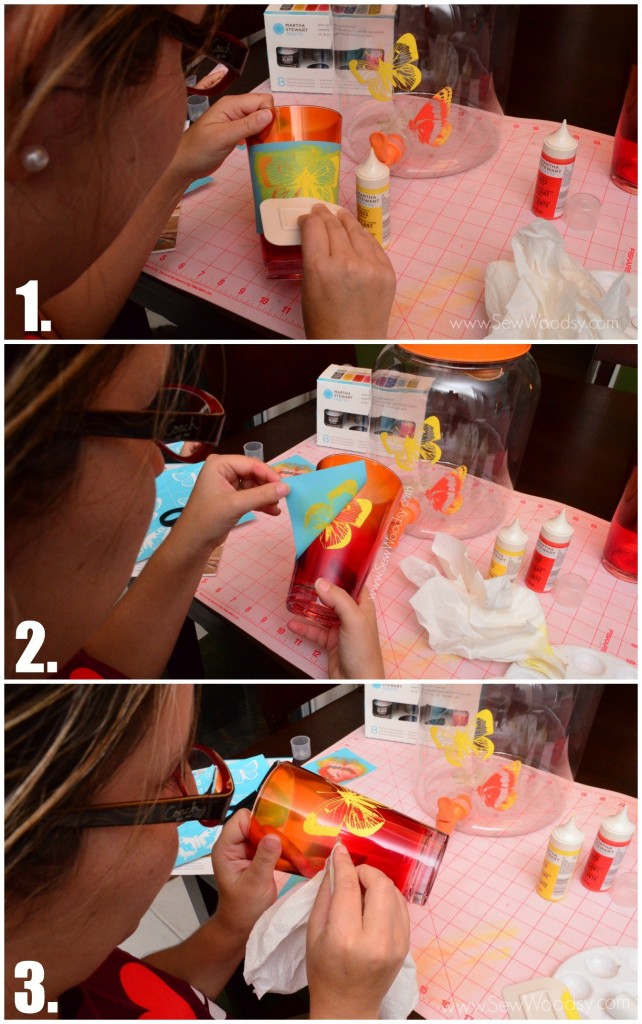
  1. For the cup, place the adhesive silkscreen to the cup. Place paint on the edge of the squeege and spread in one direction.
  2. Remove silkscreen adhesive from the cup.
  3. Using a paper towel clean the edges.

DIY Painted Drink Dispenser from SewWoodsy.com


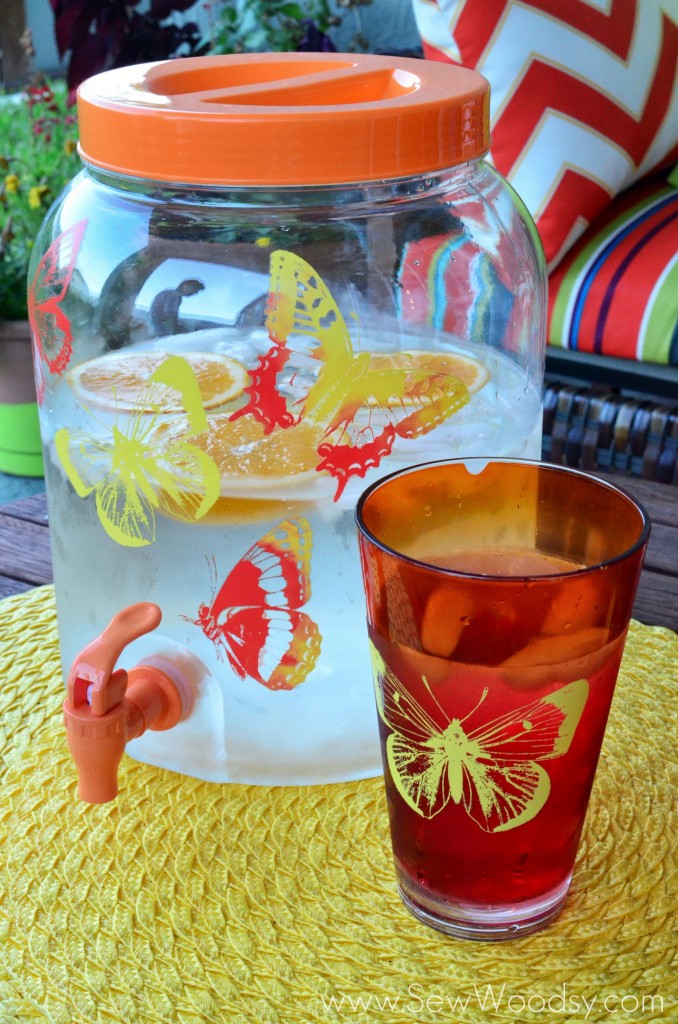
Let your drink dispenser and cups dry over night and then they are ready to be used!

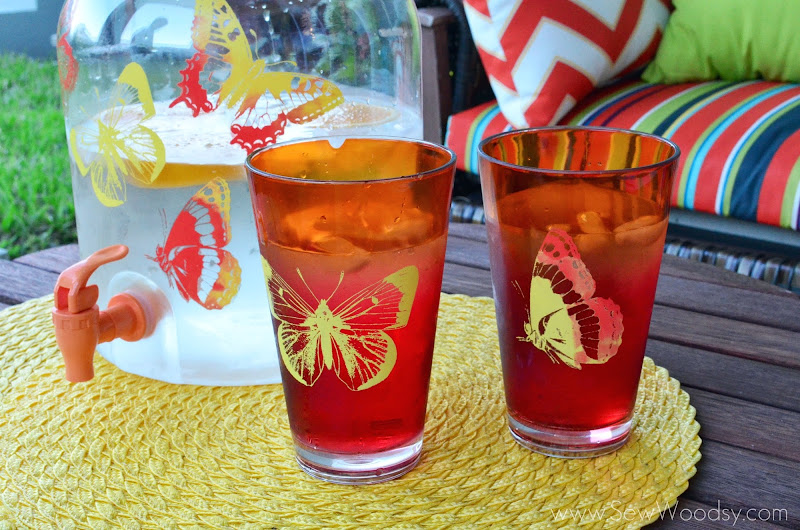
I love how everything turned out! Especially the cups!!!

DIY Painted Drink Dispenser from SewWoodsy.com

Disclaimer: I received the products for free as part of the 12 Months of Martha Campaign. I was not compensated to publish this post. As always all opinions are my own. There are affiliate links in this post.

Share
August 9, 2013

Comments

  1. cassie says

    August 9, 2013 at 12:14 pm

    love this! you did a beautiful job with the painting and love the butterflies!

    Reply
    • Katie says

      August 9, 2013 at 12:26 pm

      Thanks Cassie! I love how this project turned out!

      Reply
  2. Angie | Big Bear's Wife says

    August 9, 2013 at 12:45 pm

    It’s beautiful!!! I love it so much! I always buy these drink dispensers during the summer. They’re so fun and now I’m totally going to make some of my own!

    Reply
    • Katie says

      August 9, 2013 at 4:09 pm

      Thanks Angie! I love how you could customize these for any holiday… I’m already dreaming up a Halloween version… lol!

      Reply
  3. malia says

    August 10, 2013 at 11:39 pm

    What a great project Katie. i love how you used different colors on the butterflies.

    Reply
    • Katie says

      August 12, 2013 at 4:07 pm

      Thanks Malia! Jon was really impressed by my two-toned butterflies, too!

      Reply
  4. Paula@SweetPea says

    August 11, 2013 at 11:42 am

    Great project! This would be perfect to take to a picnic or to serve guests on your deck.

    Reply
    • Katie says

      August 12, 2013 at 4:08 pm

      Thanks Paula! I know–this drink dispenser screams summer!

      Reply
  5. Kelly @ Eclectically Vintage says

    August 12, 2013 at 4:36 pm

    Love the way you did the two-tone butterflies! Cheers!
    Kelly

    Reply
    • Katie says

      August 13, 2013 at 10:39 am

      Thanks Kelly! I’m all for the two-toned butterflies and two-toned everything!

      Reply
  6. Stacey Paul says

    October 21, 2013 at 12:19 pm

    WOW!!! i am in love with those butterflies.. Cant wait to try them myself. Got a whole load of unique and inexpensive drink dispensers at Classic Hostess. http://www.classichostess.com, I am thinking of presenting personalized drink dispensers as a Holiday Gift.

    Reply
    • Katie says

      October 23, 2013 at 7:47 am

      Thanks Stacey! Yes this will make a perfect holiday gift!

      Reply

Trackbacks

  1. Life Inspired Link Party #6 + Features says:
    August 14, 2013 at 1:02 am

    […] C’s Designs: DIY Faux Milk Glass Pumpkins / 3. While They Snooze: DIY Duck Tape Wallet / 4. Sew Woodsy: DIY Painted Drink Dispenser  / 5. Poofy Cheeks: Microwaved Brown Sugar Acorn […]

    Reply
  2. Life Inspired Link Party #4 - Sweet C's Designs says:
    August 14, 2013 at 1:39 pm

    […] Sweet C’s Designs: DIY Faux Milk Glass Pumpkins / 3. While They Snooze: DIY Duck Tape Wallet / 4. Sew Woodsy: DIY Painted Drink Dispenser  / 5. Poofy Cheeks: Microwaved Brown Sugar Acorn […]

    Reply
  3. 35 Creative Drink Dispensers for Home Decoration - Hative says:
    February 27, 2014 at 8:01 pm

    […] Source […]

    Reply
  4. Unique DIY Drink Dispensers says:
    November 30, 2016 at 2:18 am

    […] Source […]

    Reply
  5. 35 Kreative Getränkeautomaten für Hauptdekoration 2017 – Viele Kreative Ideen says:
    September 18, 2017 at 11:11 am

    […] Quelle […]

    Reply

Leave a Reply Cancel reply

Your email address will not be published. Required fields are marked *

This site uses Akismet to reduce spam. Learn how your comment data is processed.

Hi! Welcome to our home away from home. Sew Woodsy is a lifestyle blog focusing on crafts, home diy projects, family, travel and all things life. Get comfy and join us on our adventure!

Subscribe To Our Monthly Newsletter

Search The Blog


Browse

Sew Woodsy
  • you're my main squeeze You’re My Main...
  • How To Upload an Image in Cricut Design Space from SewWoodsy.com How To Upload an Ima...
  • How to Build an Extra Wide Simple Dresser (knockoff PBK Kendall Dresser) How to Build an Extr...
  • Ad Whats for breakfast tomorrow morning? Why not give my
  • Indulge in my Cajun shrimp and andouille sausage skillet Quick
  • You guys seemed to love the breakfast recipe I posted
  • Last weekend I made a huge southern breakfast for my
  • Interrupting all the food post with a family post Happy
  • ad Raise your hand if you are in need of
  • Facebook
  • Twitter
  • Instagram
  • Pinterest
  • YouTube
  • Subscribe
  • Feed

© 2019 Sew Woodsy | Privacy Policy | Designed & Developed by Jelly Design Studio