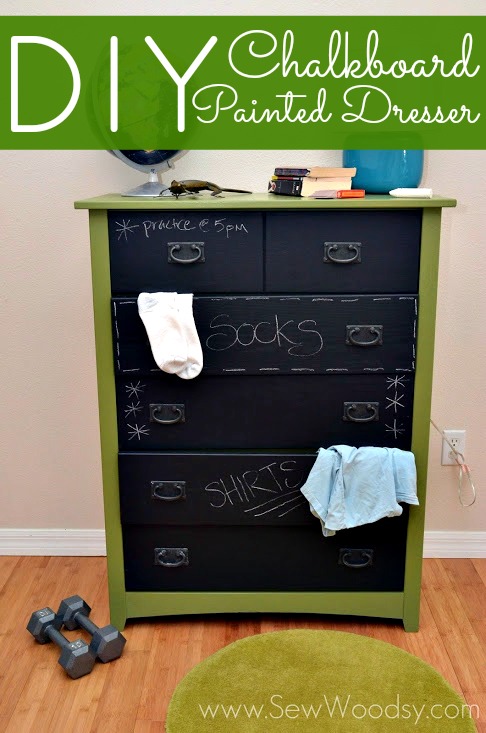
Last year, I was contacted by DecoArt Paint during the same week Martha Stewart Living contacted us to work on the Deck the Halls project. When it rains it pours, right? That is the saying. We had been asked to contribute a project to the 2013 catalog. The first thing that came to mind was the dresser that had been sitting in our garage for over two years. You see… Mr. Woodsy dad found it on the side of the road for us, put it in his truck, and hauled it to our house. We weren’t sure if we would keep it but we figured we would at least have some fun with it. In the mean time it acted as storage for car wash towels and painters drop cloths during its stay in our garage. My cousin had just recently moved into his own place and was in need of a dresser. I brainstormed with him via text message and a few phone calls to make sure he was ok with our plan. He was, and thats how the DIY Chalkboard Painted Dresser began to come to life!
 When I started browsing through the DecoArt website the first thing that hit me was the Chalkboard Paint! I thought it would be cool to paint at least a portion of the dresser with this paint. My cousin is very artistic and I knew he would love to draw on his furniture! Before we started the project Mr. Woodsy also updated the dresser and gave it new drawer slides.
Supplies
- Old Dresser
- Orbital Sander
- DIY Chalk Paint
- Paint Roller/Brush
- Drill
- DecoArt Chalkboard Paint
- Roller Applicator
- Chalk
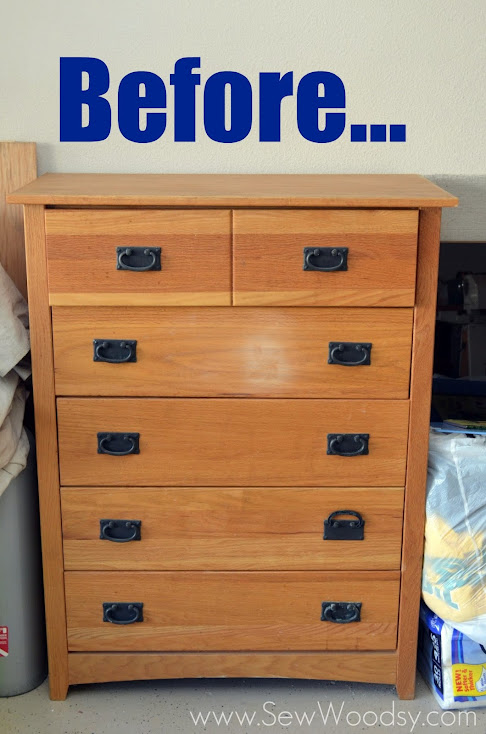
This is what the dresser looking like before hand… plain jane–nothing special. (Don’t mind the dive tanks to the left and toilet paper and donation bag to the right. I told you this was used for storage for the past 2 years.
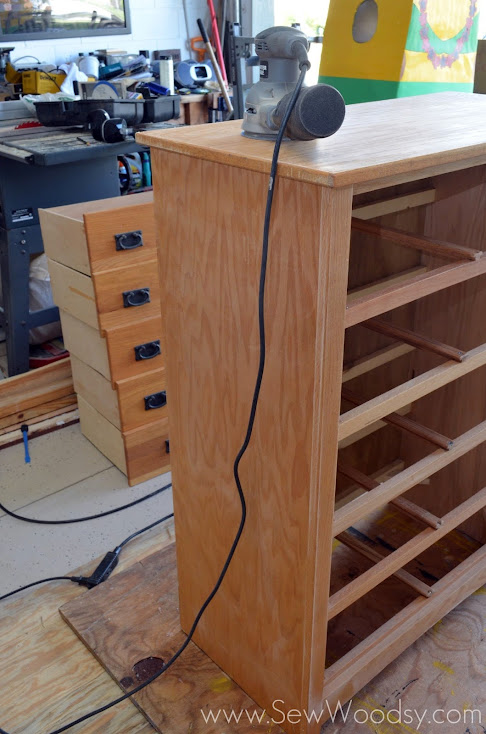
Once Mr. Woodsy tackled modifying the drawer slides I gave the dresser a light sanding.
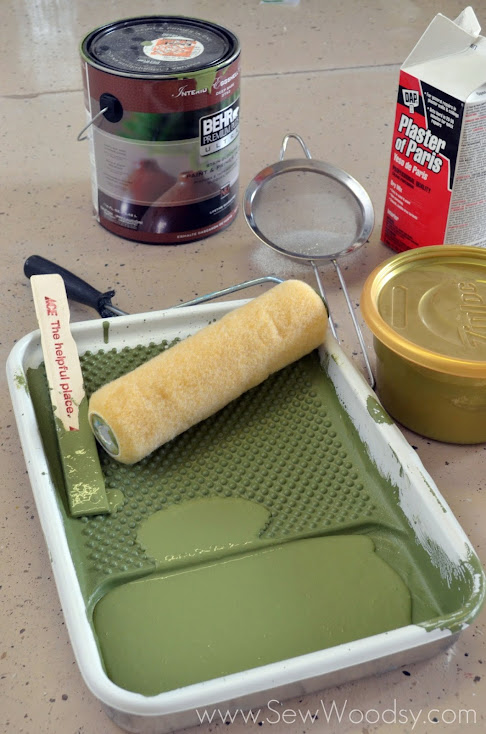
Then I mixed up a batch of Chalk Paint using BEHR Ultra Grape Vine 410F-6. You might remember this color from a past post. This is the color we painted our living room.
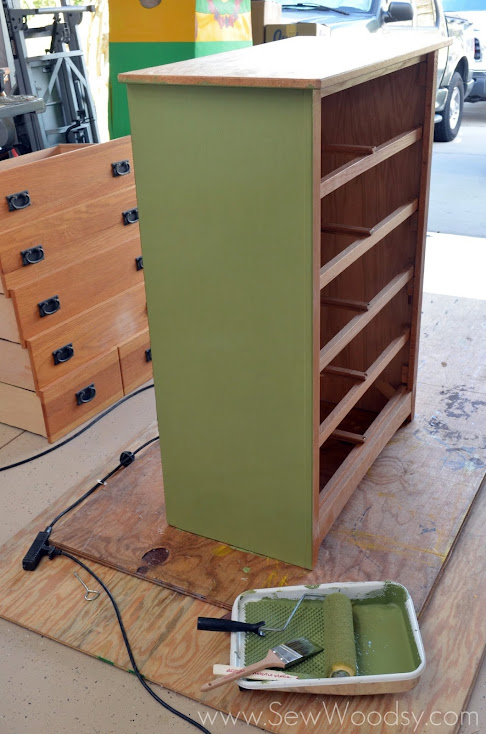
I did one coat of paint. Let it dry. Then lightly sanded and repeated with a second coat of paint and a light sanding.
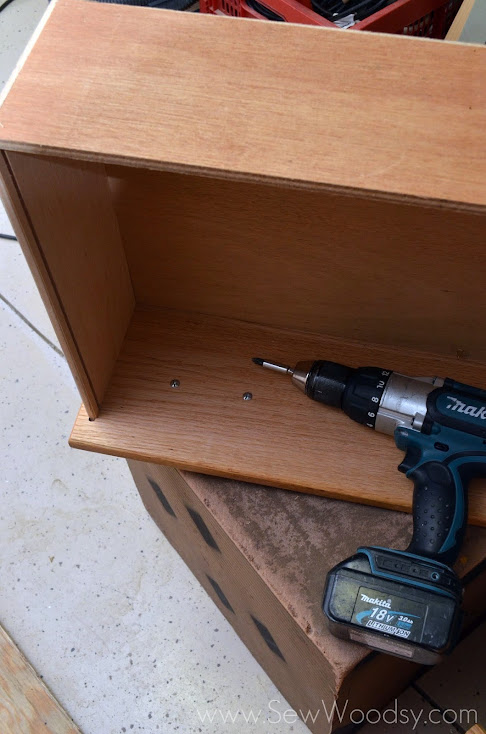
While the dresser was drying and began to unscrew the draw pulls from the drawers.
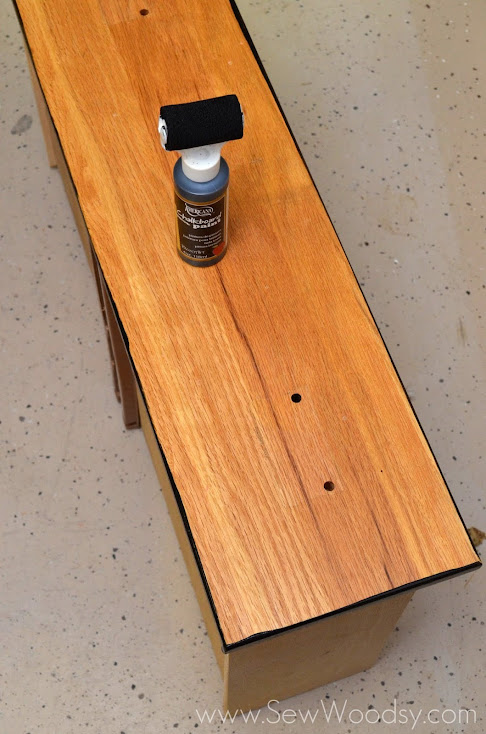
Next up, it was time to paint the drawer fronts with Chalkboard Paint.The first thing I did was paint around the edges of the drawer.
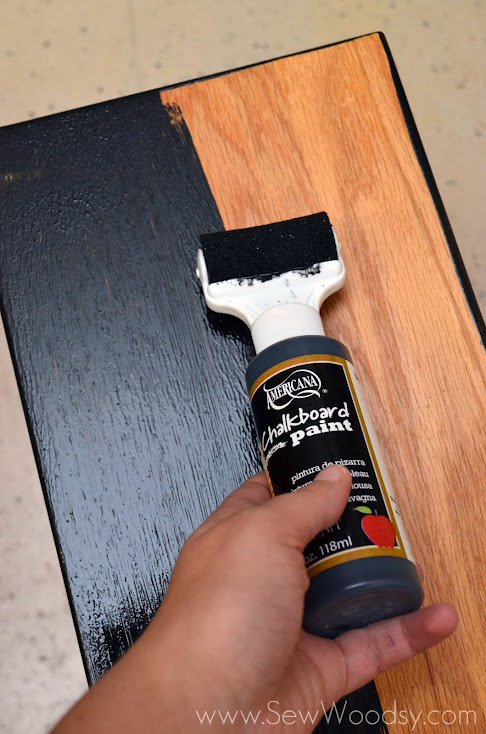
Then I painted a line of vertical stripes and allowed it to dry for one hour.
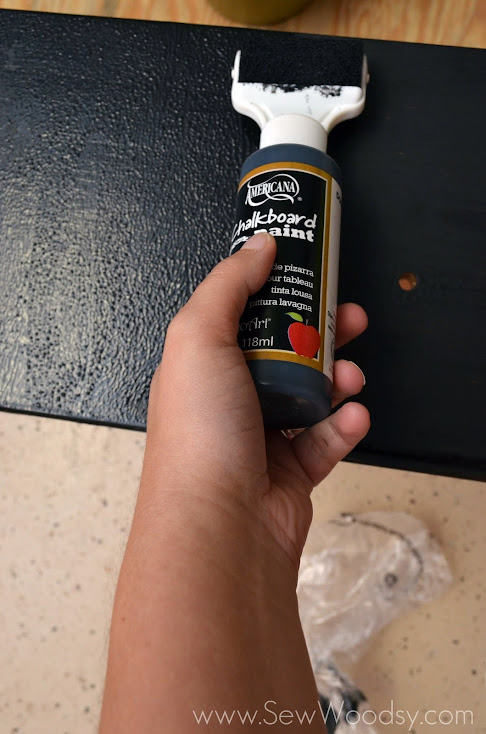
Once it was dry I then painted rows of horizontal stripes over the vertical stripes. This also needed another hour to dry. The directions on the bottle say one vertical and one horizontal; however, I noticed that it was a little splotchy. So I decided to repeat the two steps again. Allowing them each to dry one hour in between.
Once the paint had dried I allowed it to “cure” for 24 hours. Then I lightly rubbed chalk over the surface to “condition” it.
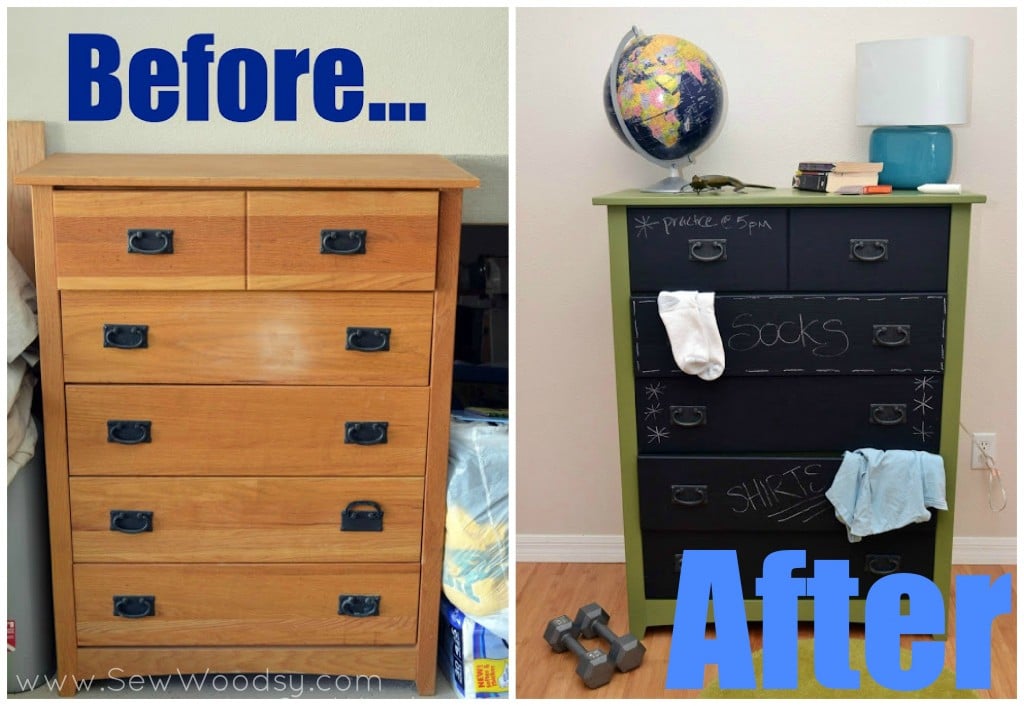
Easy that within 2 days we had a DIY Chalkboard Painted Dresser. A dresser that went from drab to fab literally over night.  This dresser is perfect for all ages. Kids love to write on stuff… let them write on their dresser! Teens and young adults can write on their dresser to remind them about an appointment.
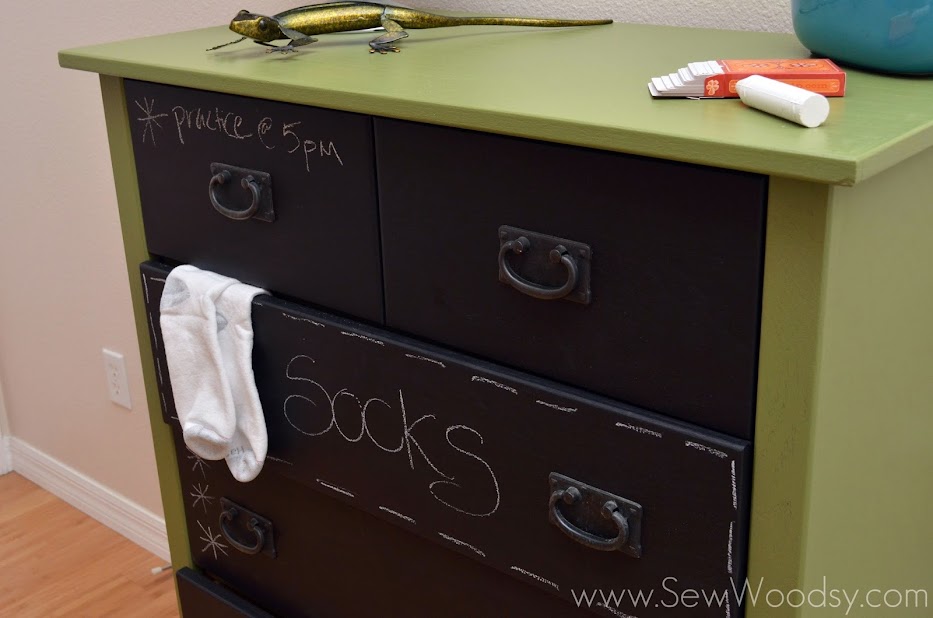
I did test the product multiple times… wrote on the dresser the erased then wrote on it again. Looked like it was holding up great!
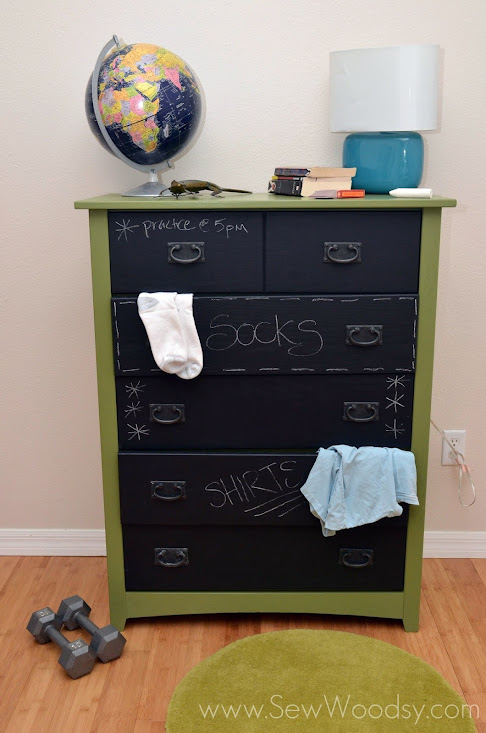
The next time you see a dresser on the side of the road… don’t hesitate to pick it up! You could transform it into something amazing like this!
Disclaimer: I received paint for free from DecoArt paint to create a project for their 2013 catalog. I was not compensated to write this post. There are affiliate links in this post. All opinions are my own.
