Transform ordinary toilet paper rolls into charming fall decorations with our DIY Toilet Paper Pumpkins craft tutorial.
Looking for a delightful and budget-friendly way to usher in the fall season? Look no further than these charming Toilet Paper Pumpkins! With just a few supplies and a dash of creativity, you can transform ordinary toilet paper rolls into adorable pumpkin decorations that will add a touch of autumnal charm to your home. Plus, it’s a fantastic craft project for the whole family to enjoy together. So, let’s roll up our sleeves and get crafting!
Table of contents
Supplies
- Toilet Paper Rolls
- Scissors
- Fat Quarters of Fabric (or fabric scraps)
- Tissue Paper
- Sticks for stems
- Ribbons
- Glue Gun
- optional: acorn, sweet gum tree ball, other natural elements
How to Make Toilet Paper Pumpkins
Now I’ll show you how to create these fun toilet paper pumpkins that take about 5 minutes or less to make! You’ll spend more time gathering the supplies than you will creating it.
Step 1: Lay out your fabric, and set your roll of toilet paper in the middle.
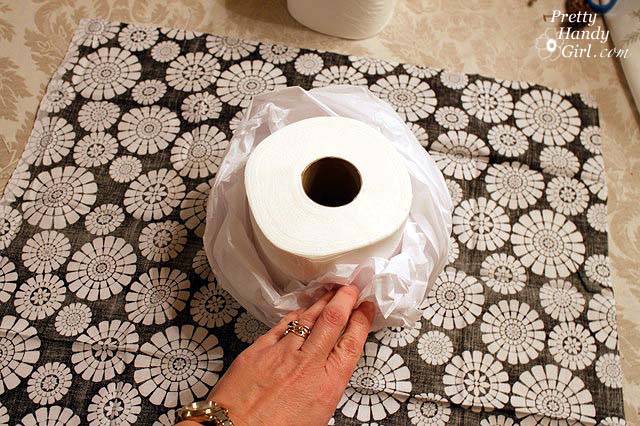
Wrap 1-2 sheets of tissue paper around the sides.
Step 2: Tuck one corner into the center of the toilet paper.
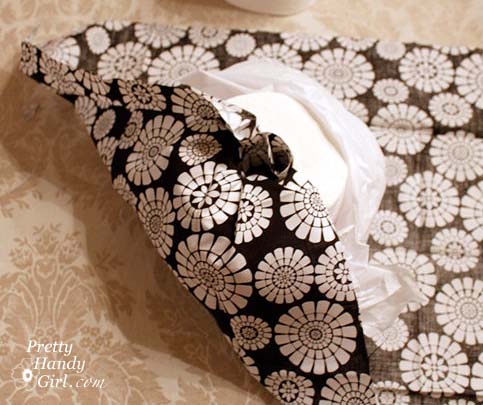
Step 3: Continue tucking in the fabric, folding any fabric under that won’t quite meet the center of the toilet paper.
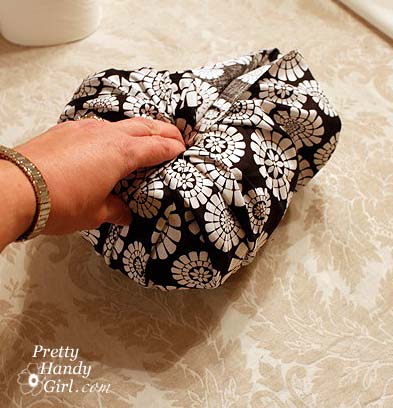
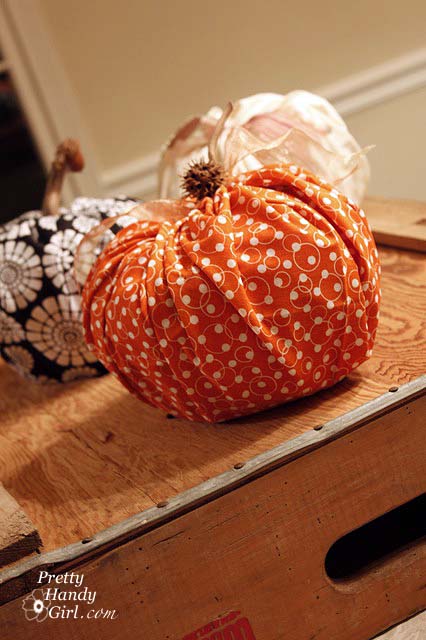
Step 4: Fluff your pumpkin sides and work with the fabric until you have a nice round pumpkin shape.
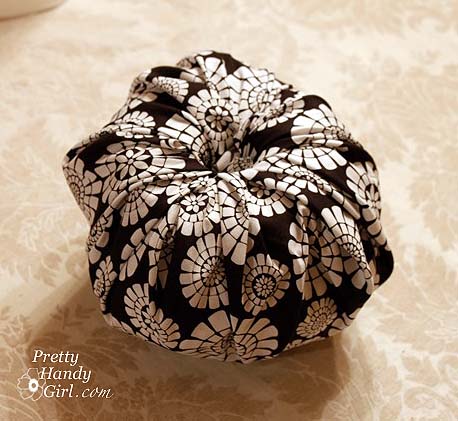
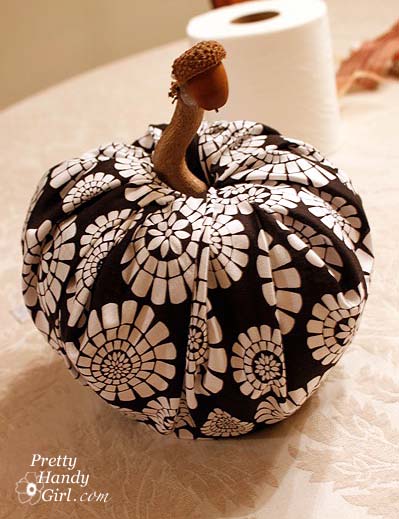
Step 5: Add your stick to the center. You can glue an acorn to the top, or tie your natural elements on using your ribbon.
Add ribbons or other embellishments if you wish.
Step 7: Enjoy! But don’t tell your prim and proper friend that you have toilet paper on your dining room table! It will be our little secret.
FAQs

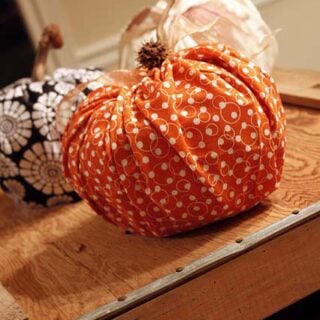
Absolutely! Mixing and matching fabrics can add a fun and eclectic vibe to your toilet paper pumpkins.
You can also use twigs, cinnamon sticks, or even craft foam shaped like stems.
Adjust the amount of tissue paper and the size of the fabric you use to create pumpkins of different sizes.
Tips & Tricks
Here are a few of my favorite tips and tricks when making these
- Experiment with various fabric textures and patterns to create a diverse set of pumpkins.
- For a rustic look, fray the fabric edges or distress them with sandpaper.
- Use a hot glue gun with caution, especially when working with children. Adult supervision is recommended.
- These pumpkins make fantastic table centerpieces or mantel decorations for fall and Thanksgiving gatherings.
Now that you know how to make these charming Toilet Paper Pumpkins, it’s time to get creative and add a touch of autumnal warmth to your home. Gather your supplies, involve the whole family, and have a fantastic time crafting these adorable decorations. Happy crafting and happy fall!
If you make these toilet paper pumpkins craft, I would be honored and love for you to take the time to leave a star rating and comment! I spend hours developing and testing these projects, and always love to hear feedback and user experience!
Don’t forget to FOLLOW ME on Facebook, Pinterest, and Instagram, and subscribe to my email list!
Toilet Paper Pumpkins
Transform ordinary toilet paper rolls into charming fall decorations with our DIY Toilet Paper Pumpkins craft tutorial.
Materials
- Toilet Paper Rolls
- Fat Quarters of Fabric (or fabric scraps)
- Sticks for stems
- Ribbons
- Tissue Paper
Tools
- Scissors
- Hot Glue Gun
- Hot Glue Sticks
Instructions
- Lay out your fabric, and set your roll of toilet paper in the middle.
- Wrap 1-2 sheets of tissue paper around the sides.
- Tuck one corner into the center of the toilet paper. Continue tucking in the fabric, folding any fabric under that won’t quite meet the center of the toilet paper.
- Fluff your pumpkin sides and work with the fabric until you have a nice round pumpkin shape.
- Add your stick to the center. You can glue an acorn to the top, or tie your natural elements on using your ribbon. Add ribbons or other embellishments if you wish.
Notes
Optional Natural Elements - If you want to add a touch of nature to your pumpkins, consider gluing acorns, sweet gum tree balls, or other natural elements around the base of the pumpkin using hot glue.
Make Multiple Fabric Pumpkins - You can easily make multiple pumpkins by using additional pieces of fabric.
Recommended Products
As an Amazon Associate and member of other affiliate programs, I earn from qualifying purchases.