Looking to make your yard look extra spooky for Halloween? Learn how to make a Halloween Wood Pallet Fence for just about free thanks to free pallets found in the trash!

Years ago, I begged my husband to make a spooky fence for our front yard. After quite a bit of convincing and brainstorming together he decided he would tackle this project for us.
We decided to use pallets to give a rustic feel and to keep the cost of materials down. Essentially this project was free for us other than all the time spent creating the fences. If your like us and want a huge impact on your outdoor Halloween decor you’ll love this tutorial on how to make your very own Halloween Wood Pallet Fence.
Table of contents
Supplies
- Wood Pallets
- Crow Bar
- Hammer
- Safety Protection
- Square (Ruler)
- Chop Saw
- Nail Gun
Directions

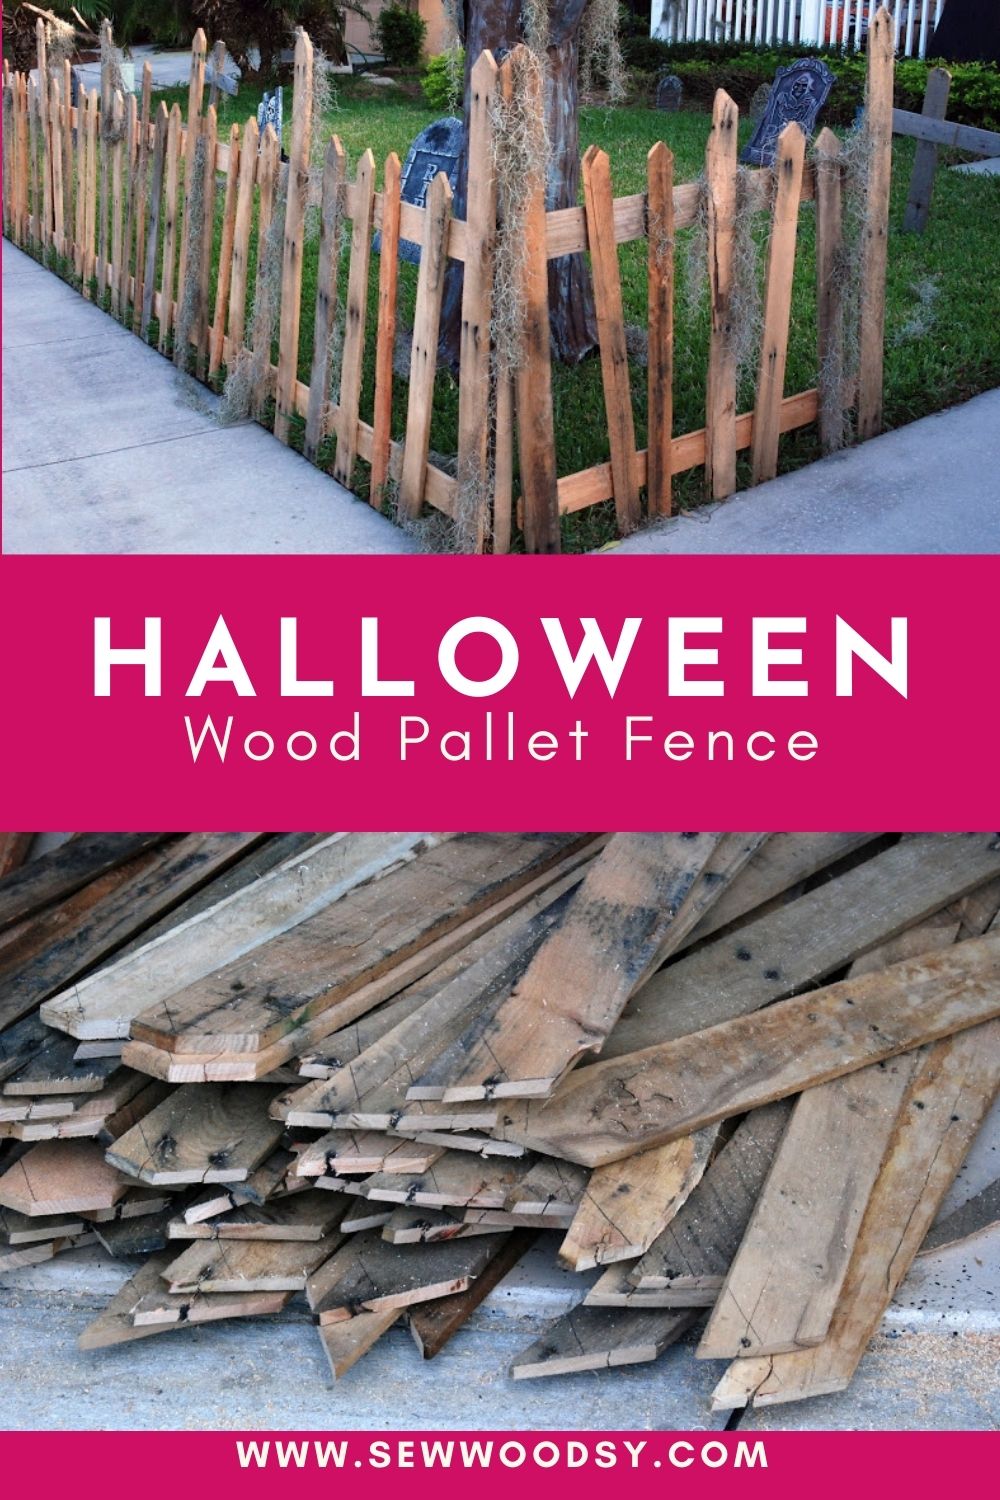
After a little bit of “dumpster diving” we gathered enough wood pallets to make a fence for the front of our home. Mr. Woodsy broke apart 10 pallets trying to keep the wood in as best of shape as possible. This part took the longest.

After a few long hours… the wood was off the pallets and sorted into piles. The long pieces were used as the fence backing. The shorter pieces were used as the crooked fence pieces.

We decided we wanted the edges of the fence to have points. Mr. Woodsy put the square (ruler) on the wood and marked one side of the wood pallet with the 45 degree angle.

He repeated this technique on the other side to create a perfect point.

As you see from the picture above this created an “x” on the end of the individual piece of pallet wood.

Then it was my turn to help… I knew this project was taking longer than expected. Mr. Woodsy cut a few as a template for me to use as I traced the points. I put my gloves on and got to work marking each and every piece of wood.

Mr. Woodsy cut all the pieces of wood at a 45 degree angle, then flipped the saw and cut the other 45 degree angle; creating a point.


He used a 1″ X 4″ x 6′ for the fence panels, making sure to measure and create an equal distance from the top board to the bottom board.

Then space out the pallets on top to create you spooky fence look.

Using a nail gun, at every connection, put a couple of nails to insure stability in your fence.

On the ends of every other fence section Mr. Woodsy had a vertical panel over hang the horizontal boards, so it will receive the next panel and look like one smooth continuous fence. Pictured behind the fence are our spooky trees!

I had asked Mr. Woodsy to keep all the fence spikes short enough to keep in the attict. He insisted we have some tall and some short. Once he made his first fence I asked him to do a “attic check” to make sure we would be able to store these away for years to come.
Sure enough (I was right) these fences were not going to be able to fit in the attic. Even after knowing this he insisted we would have them long this year and then when it was time to store them in the attic he would cut the tall ones to size. Needless to say we have the best neighbor ever and she stored them for us in her garage!

This is what the backs of the fence looks like. Mr. Woodsy numbered each piece so that you can put them together like a puzzle.

Mr. Woodsy laid the 4 fence panels out on the side walk in preparation for being installed.

He drilled the fence panel to a wood stake he created as additional reinforcement for the panel.

Installing the other side of the fence.

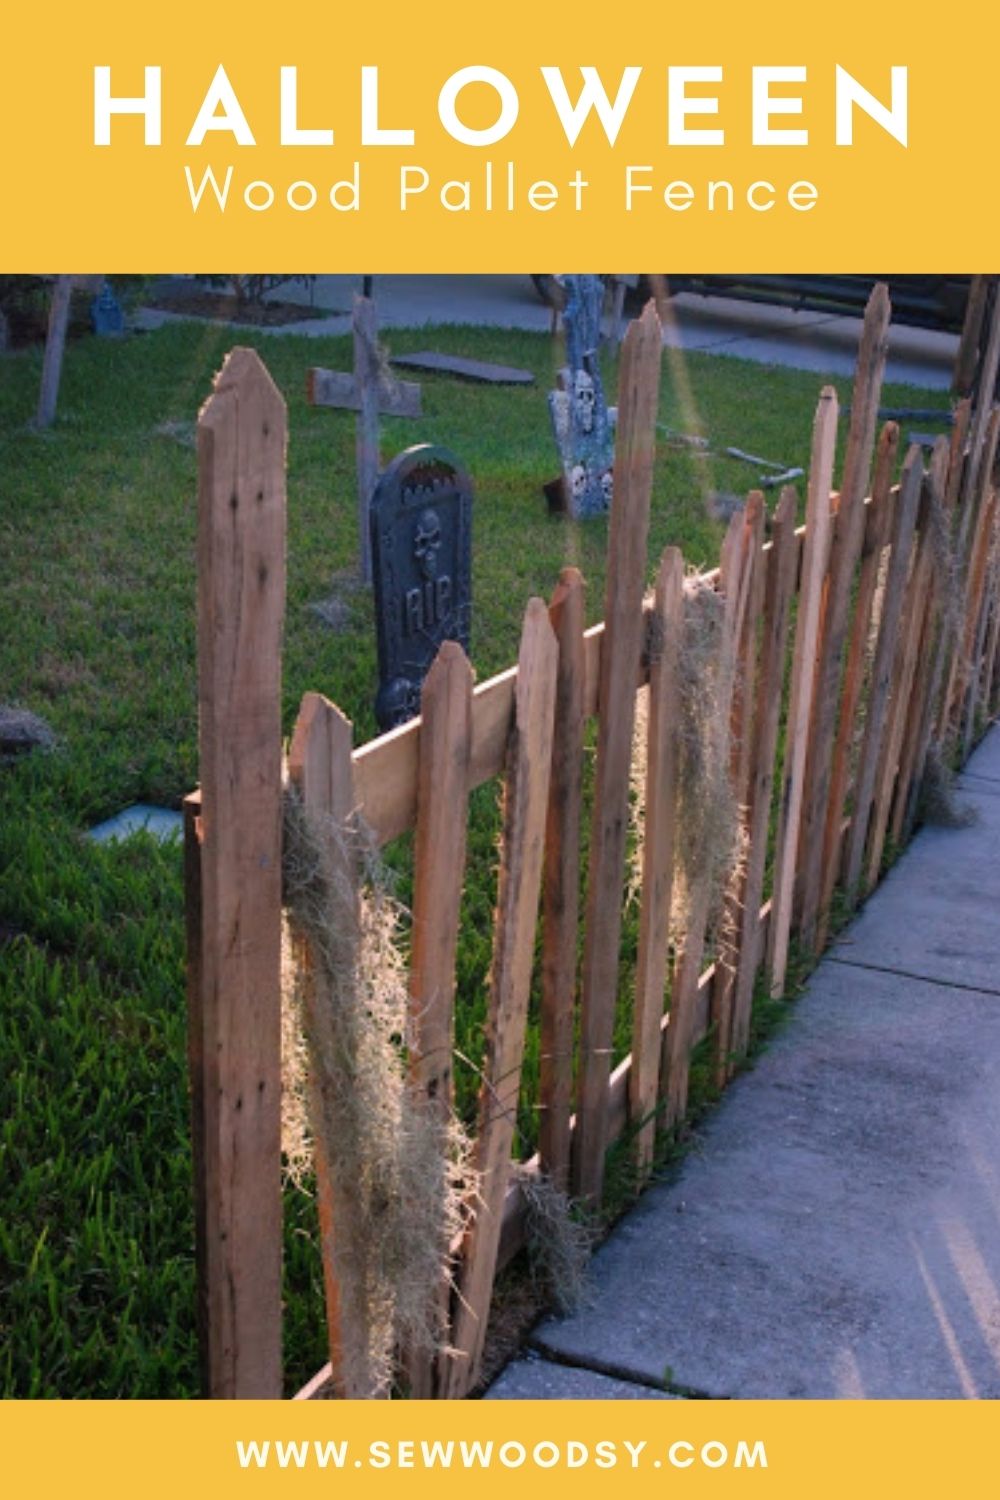
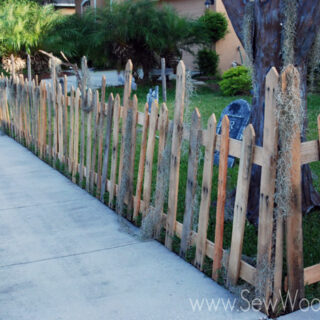
This is what the fence looks like completely assembled. Mr. Woodsy kept it to one panel going up our driveway.

This was the end of our property line. I wanted the fence to go all the way up the side, but I knew that wasn’t going to happen.

Decorate your wood pallet fence with tons of moss. We got ours for free just by walking into the woods near our home.

On Halloween night… this is what our fence looked like in all its glory!
FAQs
Depending on the size of the fence will depend on the time it takes to build the fence. We built about 25 feet of fence in about 4 hours time from start to finish.
We originally built this pallet fence back in 2012. It lasted a good 6 years before we had to do a big overhaul on the slats. We got rid of most of the fence and just built new pieces where needed. We find that we replace a few pieces every year.
We are very lucky to have a warehouse where we can store all of our holiday decor we have made throughout the years. When we first started making Halloween decor we would store it in our attic. We made the fences smaller so we could get them up and into and out of our attic. Always measure your first fence to ensure it will fit in your attic space or where ever you might be storing the fence!
Outdoor DIY Halloween Decor
Love Halloween like us? Here are a few more of our favorite outdoor Halloween DIY projects we have made in the past.
If you make wood pallet fences, I would be honored and love for you to take the time to leave a star rating and comment! I spend hours developing and testing these projects, and always love to hear feedback and user experience!
Don’t forget to FOLLOW ME on Facebook, Pinterest, and Instagram, and subscribe to my email list!
Halloween Wood Pallet Fence
Learn how to make a Halloween Wood Pallet Fence for just about free thanks to free pallets found in the trash!
Materials
- Wood Pallets
Tools
- Crow Bar
- Hammer
- Safety Protection
- Square (Ruler)
- Chop Saw
- Nail Gun
Instructions
- Gather enough wood pallets to make a fence.
- Sort the wood pallets into piles. Long pieces are going to be used as fence backing. The shorter pieces are going to be used as the crooked fence pieces.
- Put the square (ruler) on the wood and mark one side of the wood pallet with a 45-degree angle.
- Repeat this technique on the other side to create a perfect point.
- This will create an “x” on the end of the individual piece of pallet wood.
- Use a 1″ X 4″ x 6′ for the fence panels to measure and create an equal distance from the top board to the bottom board.
- Then space out the pallets on top to create your spooky fence look.
- Using a nail gun, at every connection, put a couple of nails to insure stability in your fence.
- On the ends of every other fence section, have a vertical panel overhang the horizontal boards, so it will receive the next panel and look like one smooth continuous fence.
- Lay out your fence panels ready to be installed.
- Drill the fence panel to a wood stake to create an additional reinforcement for the panel.
- Install the other side of the fence.
- Decorate your wood pallet fence with tons of moss or other decorations.
Notes
Wood Pallet Construction Time - Depending on the size of the fence will depend on the time it takes to build the fence. We built about 25 feet of fence in about 4 hours' time from start to finish.
Wood Pallet Fence Duration - We originally built this pallet fence back in 2012. It lasted a good 6 years before we had to do a big overhaul on the slats. We got rid of most of the fence and just built new pieces where needed. We find that we replace a few pieces every year.
Where to Store When Not In Use - We are very lucky to have a warehouse where we can store all of the holiday decor we have made throughout the years. When we first started making Halloween decor we would store it in our attic. We made the fences smaller so we could get them up and into and out of our attic. Always measure your first fence to ensure it will fit in your attic space or where ever you might be storing the fence!
Recommended Products
As an Amazon Associate and member of other affiliate programs, I earn from qualifying purchases.

Disclaimer: There are affiliate links in this post. That means if you purchase from a link I make a small percentage at no additional cost to you. Thank you for supporting Sew Woodsy!
