• Skip to primary navigation
  • Skip to main content
  • Skip to primary sidebar

Sew Woodsy logo

  • About
  • Crafts
  • Cricut
  • Home
  • Beauty
  • Holiday
    • Valentine’s Day
    • St. Patrick’s Day
    • Easter
    • Patriotic
    • Halloween
    • Thanksgiving
    • Christmas
  • Travel
menu icon
go to homepage
search icon
Homepage link
  • Home
  • About Us
  • Cricut
  • Travel
  • Holiday
    • Email
    • Facebook
    • Instagram
    • Pinterest
    • RSS
    • Twitter
    • YouTube
  • ×

    Home » Home » Gardening

    Published: Jun 24, 2013 | Modified: Sep 21, 2021 | Posted Under: Gardening

    How to Create a Natural Log Pathway + Video

    Sharing is caring!

    553 shares
    • Facebook159
    • Twitter

    This is a sponsored post for Homes.com. As always all opinions are our own. 
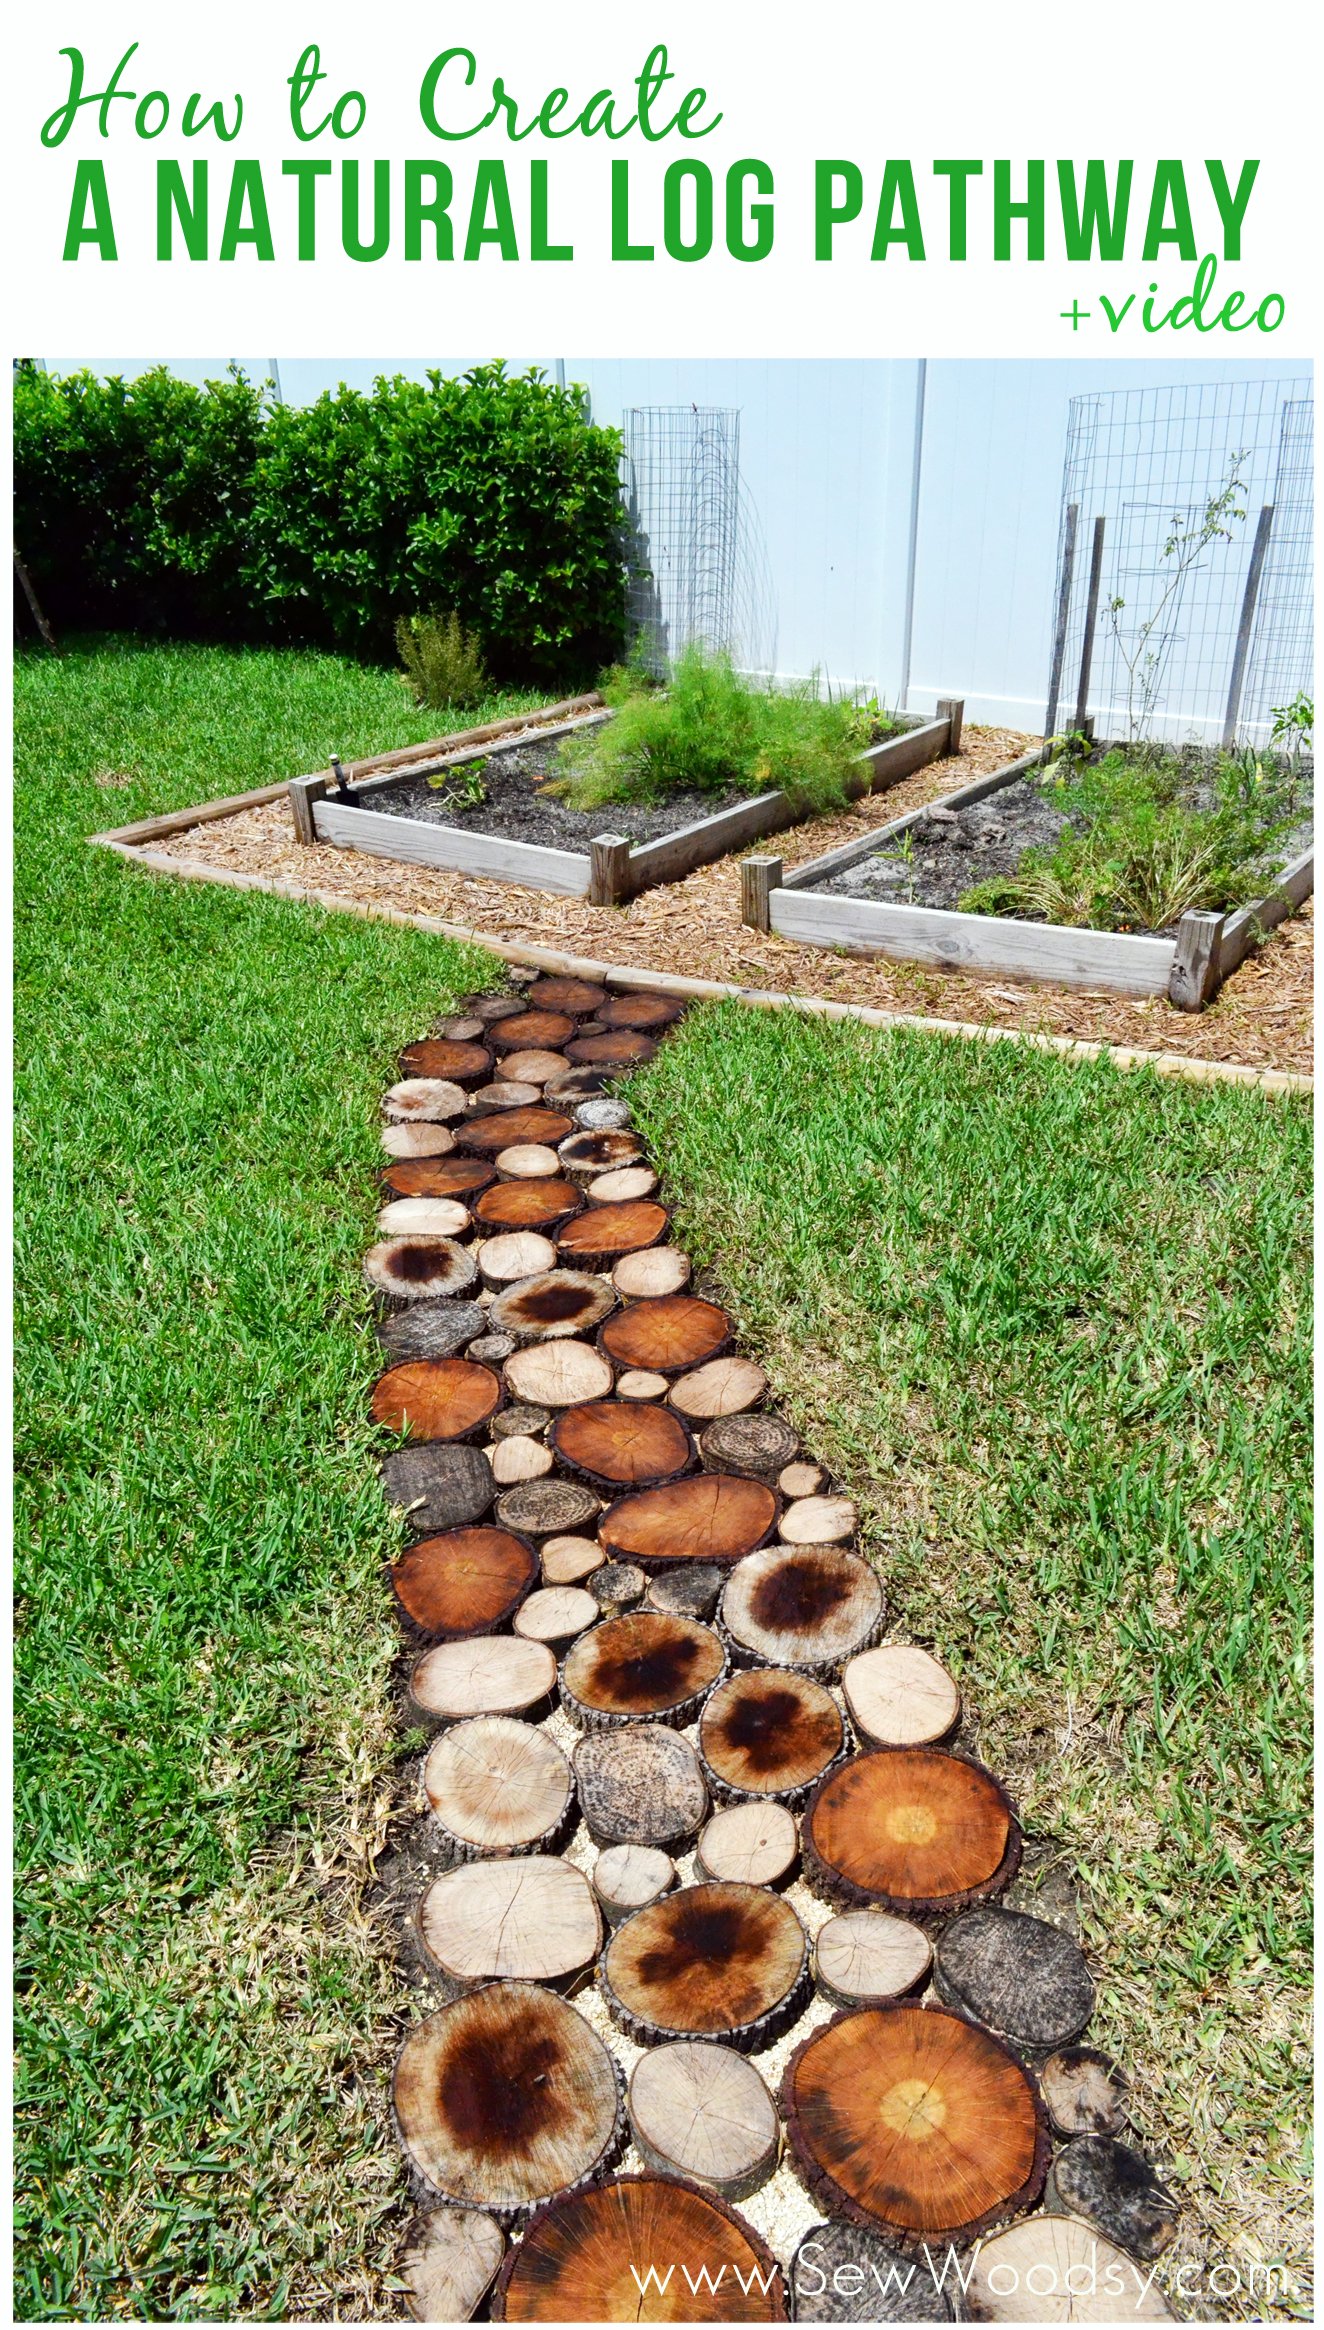
    How to Create a Natural Log Pathway + Video via SewWoodsy.com
    We like (what we like to call) “free projects” or in this case very inexpensive projects that make a HUGE impact on our living space. It all started with quite a few collected logs that Mr. Woodsy had been hoarding collecting over the past month. We partnered with our friends at Homes.com to create yet another fun and creative DIY video. This time we share how to create a natural outdoor pathway!

    Watch our video to learn just how we created this natural log pathway for $20!

    How to Create a Natural Log Pathway + Video via SewWoodsy.com

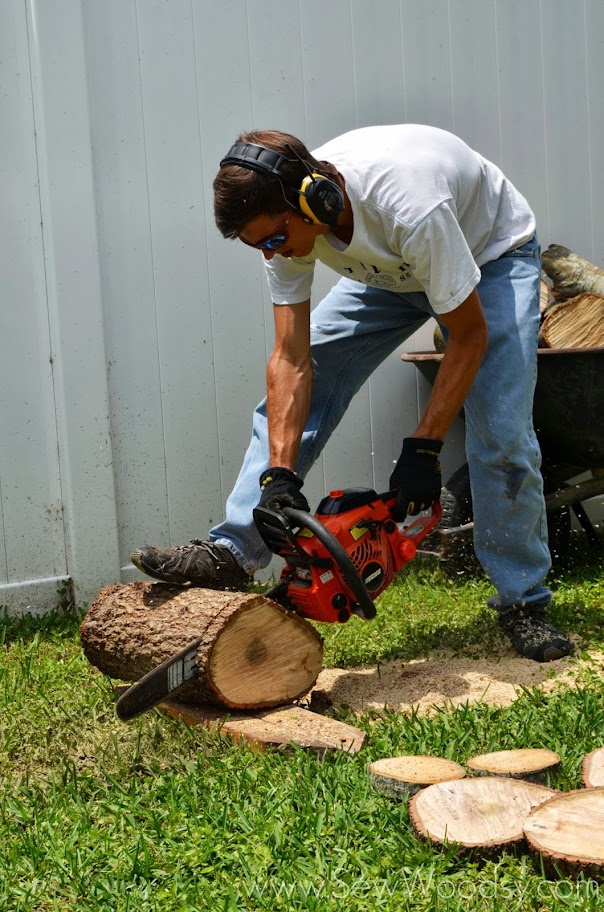
    From the video you saw we needed a lot of logs to make this pathway.

    Wheel barrels full of logs…
    How to Create a Natural Log Pathway + Video via SewWoodsy.com

    He spent a good 2-3 hours cutting logs with the chain saw. If their is one tool that I would prefer to never learn how to use it would be the chain saw. Not sure if it’s because of scary movies or because they simply scare the mess out of me.

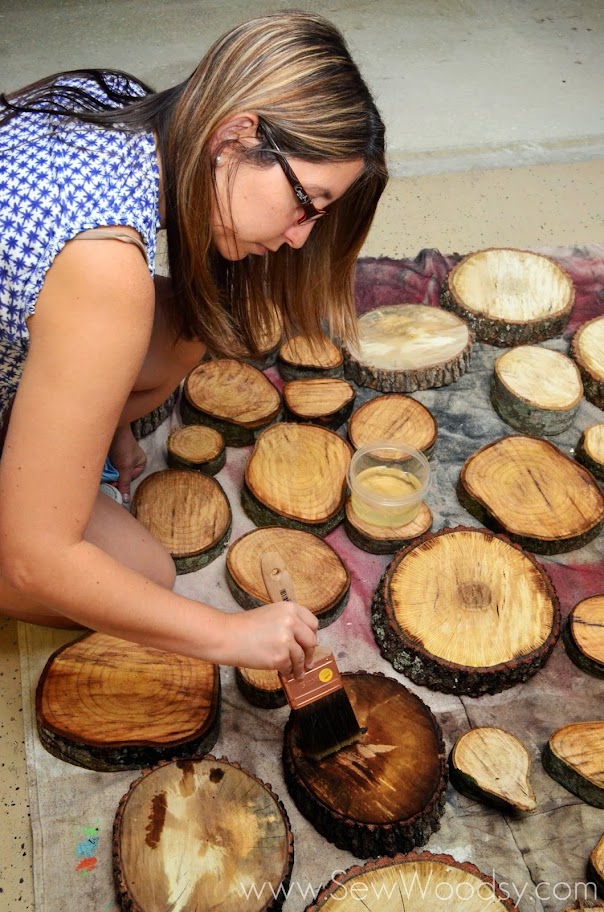
    How to Create a Natural Log Pathway + Video via SewWoodsy.com I spent an hour one evening sealing wood logs. Not a glamourous job but someone had to do it (and let’s face it I had no desire to start digging the pathway in the dark).
    How to Create a Natural Log Pathway + Video via SewWoodsy.com

    How to Create a Natural Log Pathway + Video via SewWoodsy.com
    And I had to share this photo since this is how we tend to get towards the middle-to-end-of filming… a little goofy. I snapped the photo and told Jon this would make the blog… he said “whatever”. It’s Jon really being himself. lol.

    How to Create a Natural Log Pathway + Video via SewWoodsy.com
    And then he proceeded to do the rain dance on video… did anyone catch that? With a serious face might I add. I on the other hand was silently laughing… like in tears laughing. After we stopped recording I ask him if he wanted to do another retake and he said “no–why what’s wrong with doing the rain dance”?

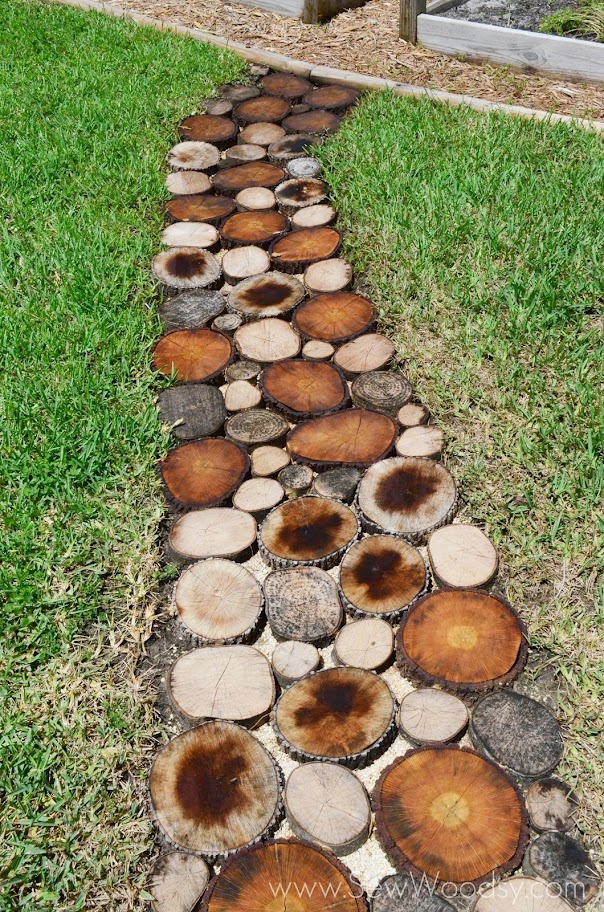
    As Jon noted in the video he used 5 bags of Sand Paver Base (its not really sand its like little stones). We bought it for $4 a bag.

    It didn’t take us too long to actually lay down the logs.
    How to Create a Natural Log Pathway + Video via SewWoodsy.com

    We both love the beautiful transformation we made to our backyard garden area. I love our timber I of course love that I no longer have to walk through the grass to get to the garden!
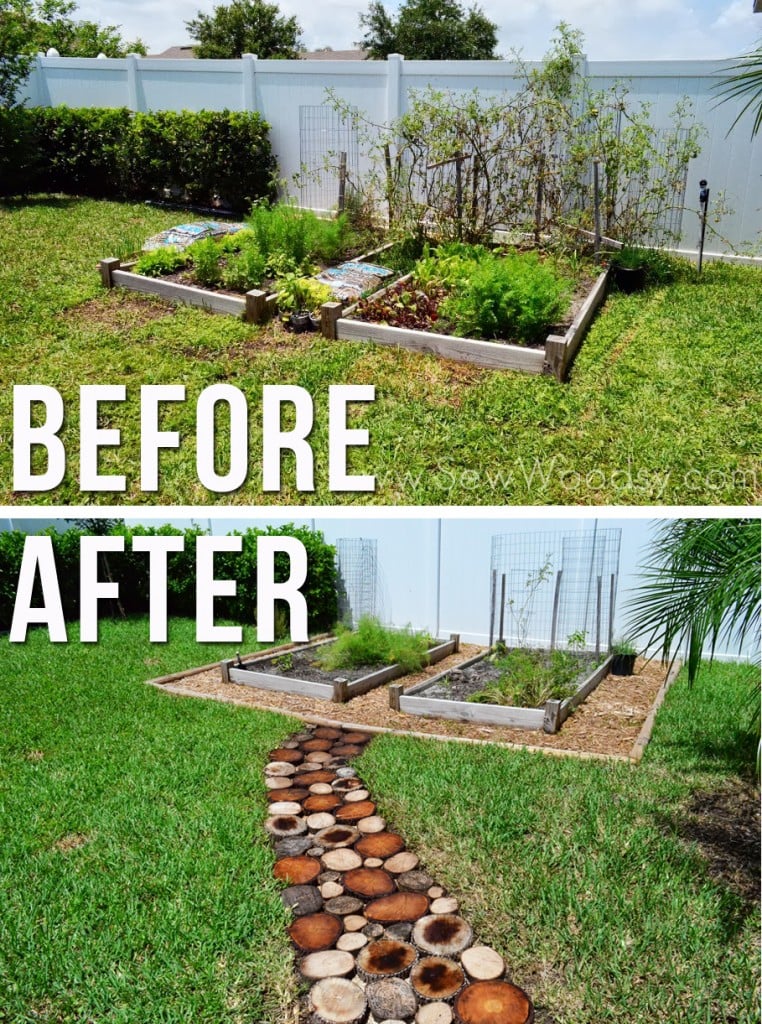
    How to Create a Natural Log Pathway + Video via SewWoodsy.com

    I love adding natural elements to bring texture and added design to our backyard. How to Create a Natural Log Pathway + Video via SewWoodsy.com
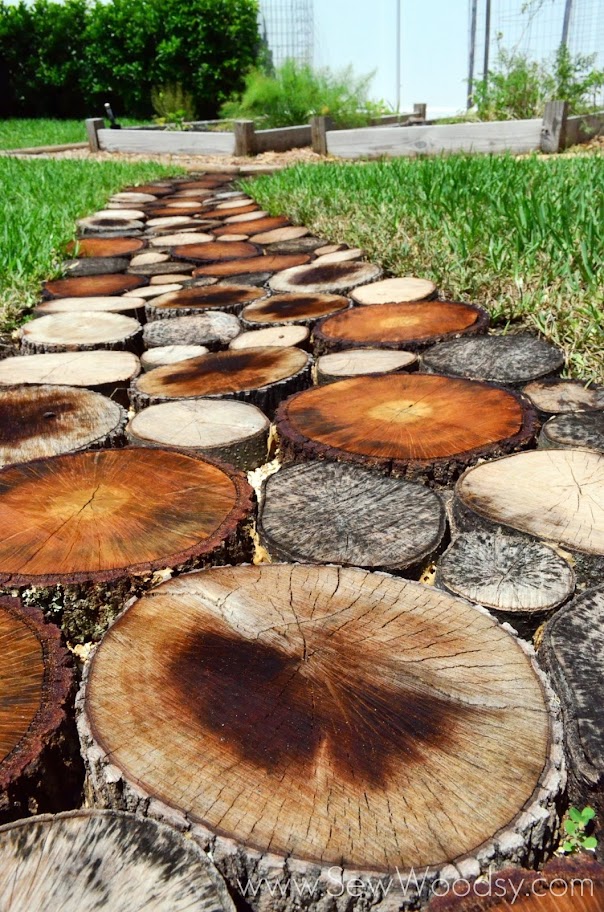
    What outdoor projects have you been working on lately?

    Disclosure: We have a working relationship with Homes.com and are video brand ambassadors for 2013 (thus we are compensated). As always all opinions are our own.

    « 5 years and counting…
    {World Market} Summer Patio Refresh + Video »

    Reader Interactions

    Comments

    1. Heather says

      July 03, 2013 at 9:05 pm

      WOW, I love this pathway!!

      Reply
      • Katie says

        July 09, 2013 at 7:28 am

        Thanks Heather! Somehow I knew you would love it! You guys can make one–you just need to start collecting logs!

        Reply
    2. Lynn says

      July 17, 2013 at 9:47 am

      I love this. We have lots of wood to do this pathway. One question… is it hot to walk on in bare feet?

      Reply
      • Katie says

        July 18, 2013 at 3:29 pm

        Hi Lynn. Thanks for the kind compliments! To be honest I’ve never walked on it with bare feet. However, I just went outside and tested it for you and it’s not hot at all (however it’s an overcast day out). I was leery I would get a splinter, though. Good luck and hopefully you guys make one! If you do please send a picture over I’d love to share it on our blog!

        Reply
    3. Courtney O'Dell says

      July 17, 2013 at 11:57 am

      This is such a fun pathway, Katie! I love it and you did an awesome job showing how to do it!

      Reply
      • Katie says

        July 18, 2013 at 3:30 pm

        Thanks Courtney! We love it–it adds so much character to our backyard!

        Reply
    4. jennabows75 says

      May 10, 2014 at 7:17 am

      very informative. loved the rain dance!!!!!!!!!!!

      Reply
      • Katie says

        May 13, 2014 at 6:02 pm

        Lol thanks! 🙂

        Reply
    5. Jonathan says

      June 11, 2014 at 6:01 pm

      I’m going to be doing this but for a front side walk. Also I’m going to sand the logs smooth and use a simi transparent stain with 3 different tints. I’ll def take pics

      Reply
      • Katie says

        June 14, 2014 at 7:54 am

        Jonathan–thanks for stopping by. We would love to see pictures and feature your project on our blog. Now that our log pathway has been in for the past year it has held up pretty well. Excited to see how yours turns out.

        Reply
      • Connie says

        June 14, 2014 at 2:26 pm

        Will the stain protect the wood from rotting? Really looking forward to seeing your photos; I’m doing a similar project for my front walkway. Think I will fill in gaps with moss though.

        Reply
        • Katie says

          June 22, 2014 at 10:37 am

          Connie–we put water sealer on the logs. It’s like any wood–you always need to reapply and refinish every so often. It won’t last forever, but the good thing is that the wood is free so you can just replace the pieces that are rotting.

          Reply
    6. Jessica says

      March 20, 2015 at 9:00 am

      Hi! I love this idea! We recently (like 2 days ago) had to cut a tree down. I have been looking for ideas to use all the wood. This seems perfect! My husband thinks that we would have to let the wood dry out for a long time (he said a yr) before we could do this. Of course I don’t think it should be that long. So my question is, did you use fresh cut logs or logs that had “dried” awhile?

      Reply
      • Katie says

        April 14, 2015 at 11:37 am

        Hi Jessica. We used freshly cut logs… and we live in Florida (high humidity and lots of moisture). This pathway lasted us a good 2 years. For being a free project we are happy with how long it lasted. Probably could have lasted longer but the area that the path was at would flood often because of the dip in our property! Good luck and send photos if you decide to make one!

        Reply
      • Mindy says

        March 19, 2017 at 3:17 am

        Hi, Jessica!

        You can use fresh cut wood, but if you want it to last longer it must be dried first. You can use a wood preservative on it right away. This is very similar to what is on pressure treated wood, except it isn’t green. You can get it in quart sizes. https://www.rustoleum.com/product-catalog/consumer-brands/wolman/woodlife-classic
        Then after that is dry apply a stain if you want or use Rainguard Advanced Waterproofer & Sealer ECO POD Concentrate after the preservative. This stuff is AMAZING! It keeps it looking wet and shiny. The best part is that it works. With the Woodlife Classic preservative and the Rainguard, those slices of wood will last until you get rid of them. You can get both of these products on Amazon. For Rainguard go here: https://www.amazon.com/Rainguard-Advanced-Waterproofer-Concentrate-Driveways/dp/B00ENIMPR6/ For Woodlife Classic go here: https://www.amazon.com/s/ref=nb_sb_noss?url=search-alias%3Dtools&field-keywords=woodlife-classic The gallon size is the better deal from buying a quart. Plus you can use it on any new wood projects.

        Reply
        • Abi says

          January 02, 2021 at 11:34 pm

          Wondering if I could use just one – either woodlife classic or rainguard . Are they not similar products . Would appreciate your expertise.

          Reply
          • Katie says

            January 14, 2021 at 1:41 pm

            Hi Abi, any type of wood sealer should work on the log slices.

            Reply
    7. Cathy says

      April 02, 2015 at 2:36 pm

      I love it but I think I will do a front walk with glow in the dark spray. That way guest can see to walk at night.

      Reply
      • Katie says

        April 14, 2015 at 11:30 am

        Cathy awesome idea!!! This lasted a good 2 years before we just ripped it up. For it being a “free project” we are very happy with how long it lasted. We probably could have kept it longer but we are prepping our house to sell! 🙂

        Reply
    8. Brenda says

      May 15, 2016 at 11:33 pm

      Love this walkway and want to do this! How long do you think it would have lasted? What kind of weather do you have? I am from WI, so we get all sorts of weather. Thank you and I look forward to your reply!

      Reply
      • Katie says

        May 23, 2016 at 4:52 pm

        We live in Florida where it rains almost daily. It lasted a good 2 years before we pulled it up before listing our house. We wanted to keep it but our realtor felt it didn’t do our backyard justice any more!

        Reply
    9. Angela says

      June 28, 2016 at 3:09 pm

      Were these slick when wet? I also have an abundance of logs and would like to do something creative with them.

      Reply
      • Katie says

        July 05, 2016 at 11:30 am

        Hi Angela, I do not recall that they were slippery when wet.

        Reply
    10. Tammy Johnson says

      September 16, 2017 at 5:06 pm

      We are totally gonna do this in our back yard. Does it matter if it’s pine logs or not? We’ve got some pine and sweet gum. I think I’d like to integrate both.

      Reply
      • Katie says

        September 19, 2017 at 12:41 pm

        Hi Tammy, I don’t think it matters what type of wood although the aging might vary.

        Reply
    11. Mel says

      October 10, 2018 at 12:17 pm

      I just figured out our new walk way! My great grandparents used 2x4s and they all need to be replaced. Ourr anch is covered in Juniper so wood will be free! Thanks for the idea! Did I miss where you tell us what you sealed the wood cuttings with? Is it in the video?

      Reply
      • Katie says

        October 24, 2018 at 9:28 pm

        Hi Mel, glad we could give you a little inspiration. I believe we used Thompson’s Waterseal. They lasted for a good 2 years but we live in Florida and get a lot of rain!

        Reply
    12. Tracy says

      April 17, 2020 at 8:11 am

      Love this idea!
      Did you glue the pieces to the ground?

      Reply
      • Katie says

        May 01, 2020 at 3:09 pm

        Hi Tracy, no just laid them in the dirt!

        Reply
    13. DuWayne Layton says

      October 25, 2020 at 2:00 am

      Question: Do the wood pieces get slippery when wet? It rains a lot where I live. I know some logs get really slippery.

      Reply
      • Katie says

        November 09, 2020 at 8:51 am

        Hi DuWayne, from what I remember they did not.

        Reply
    14. Christina says

      May 03, 2021 at 2:09 pm

      Hi there – love your pathway! Now that several years have passed I was wondering how it held up? Also, did you have to let the wood dry before sealing it? Thanks!

      Reply
      • Katie says

        May 03, 2021 at 10:36 pm

        Hi Christina, we made this pathway many years ago. We have since moved from that house; however, it held up for a solid 5 years while we were in the house. Yes, it’s best to let the wood dry if you can before sealing it. Good luck!

        Reply

    Leave a Reply Cancel reply

    Your email address will not be published. Required fields are marked *

    Primary Sidebar

    • Email
    • Facebook
    • Instagram
    • Pinterest
    • RSS
    • Twitter
    • YouTube
    Male and female hugging on each other in the woods.

    Hi, we're Katie & Jon! Welcome to our home away from home!

    Sew Woodsy is a lifestyle blog focusing on crafts, home diy projects, family, travel and all things life. Get comfy and join us on our adventure!

    More about us →

    Father's Day

    • Father’s Day Printable
    • DIY Toddler Painted Father’s Day Card
    • DIY Father’s Day Journal
    • DIY “I’m A Proud Father” T-Shirt

    Trending

    • How To Grow Green Onions
    • How to Host a Baby Shower at Work
    • Tips & Tricks on Installing Butcher Block Countertops
    • How to Build an Extra Wide Simple Dresser

    Search The Blog

    Browse

    Footer

    ↑ back to top

    About

    • About Us
    • Privacy Policy
    • Accessibility Statement

    Newsletter

    • Sign Up! for emails and updates

    Contact

    • Contact
    • Work with us
    • Advertise

    Copyright © 2010 - 2022 Sew Woodsy