• Skip to primary navigation
  • Skip to main content
  • Skip to primary sidebar

Sew Woodsy logo

  • DIY
  • Crafts
  • Cricut
  • Travel
  • About
menu icon
go to homepage
search icon
Homepage link
  • Home
  • Thanksgiving
  • DIY
  • Cricut
  • Travel
  • About Us
    • Email
    • Facebook
    • Instagram
    • Pinterest
    • Twitter
    • YouTube
  • ×

    Sew Woodsy » Woodworking

    Published: Jan 7, 2013 · Modified: Feb 5, 2013 by Katie · This post may contain affiliate links.

    {Tutorial} Vintage Coca-Cola Crate Turned Dog Bowl Holder

    Sharing is caring!

    7 shares
    • Facebook
    • Twitter

    Creating with the Stars


    vintage coca-cola crate turned dog bowl #vintage #DIY #woodworking #tutorial

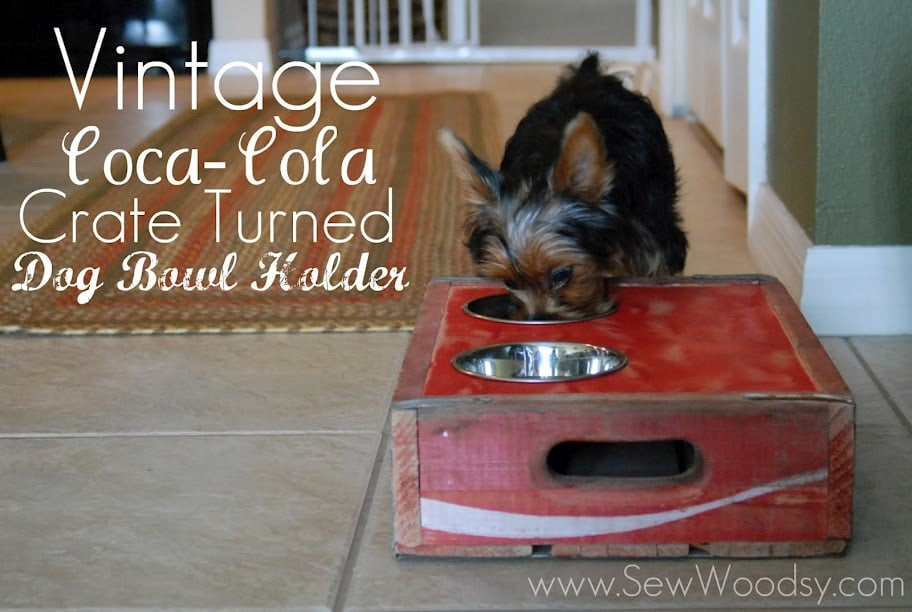
    Last summer, our neighbor (and good friend) came to us and asked if we could drill holes in an old Coca-Cola crate to make a dog bowl holder for her 5 month old yorkie. She was hoping this would solve the problem of him picking up his bowl and running around the house with it once he was finished! Our neighbor just wanted us to flip the crate over and drill holes. If we did this, the Coca-Cola writing would be upside down. Mr. Woodsy decided to take it to the next level without our neighbor knowing! This vintage Coca-Cola crate turned dog bowl holder was made within 30 minutes. Follow our step-by-step tutorial to make your own.

    *This post was previously published over at Pretty Handy Girl.

    Supplies:

    • Vintage Coca Cola Wood Crate
    • ¾ inch plywood
    • Table Saw
    • Drill
    • Fostner bit
    • Jigsaw
    • Nail Gun & Compressor
    • Tape measure
    • Compass
    • Center punch
    • Hammer
    • Red Spray Paint
    • Orbital Sander
    • Sand Paper

    vintage coca cola dog bowl

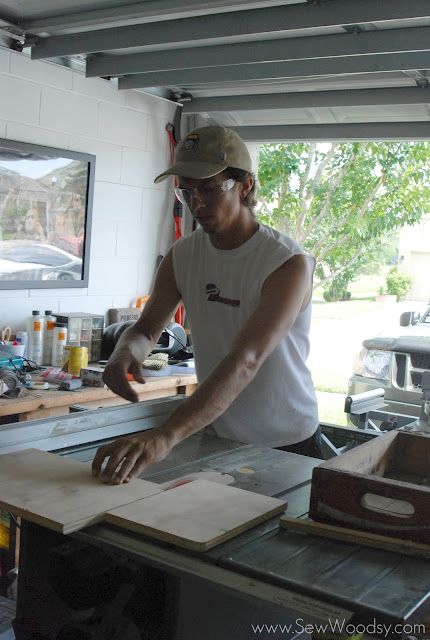
    1. Cut the ¾ inch piece of plywood to the size of the vintage coca cola crate opening. Our crate opening was 14 inches by 10 inches.

    Vintage Coca Cola Crate Turned Dog Bowl

    *I like to check that my blade is square with my fence on my table saw.

    Vintage Coca Cola Crate Turned Dog Bowl

    2. After his first cut he checked the size of the piece of plywood to make sure it fit in the crate. You will want your piece of wood to fit in the crate snug.

    Vintage Coca Cola Crate Turned Dog Bowl Holder

    *At this point he trimmed up the piece of wood to create the snug fit.

    Vintage Coca Cola Crate Turned Dog Bowl Holder

    3. Measure the diameter of the dog bowl. *For this tutorial to work for you your dog bowl you will need to have a slight lip on the edge for it to rest on top of the wood.

    vintage coca cola crate turned dog bowl holder4. Now that we know what the diameter is of the bowl, measure for placement on the plywood. *Because this is for a small dog we didn’t want to center the bowls. We wanted to ensure he would be able to eat from the bowls.

    Vintage Coca Cola Crate Turned Dog Bowl Holder

    5. Now divide the diameter of the dog bowl in half to get the radius. In this case, the dog bowl was 5 inches across. We had a 2.5 inch radius.

    Vintage Coca Cola Crate Turned Dog Bowl Holder

    6. Using a tape measure,  set the placement for the two bowls lengthwise so that they are evenly spaced out.

    drawing a circle

    7. Using a compass begin drawing the circles for your two dog bowls.

    Vintage Coca Cola Crate Turned Dog Bowl Holder

    *This is what your piece of plywood should look like after you done drawing your circles.

    Vintage Coca Cola Crate Turned Dog Bowl Holder

    8. Next, you’ll want to drill a small hole large enough to fit the blade of a jigsaw in the wood.

    Vintage Coca Cola Crate Turned Dog Bowl Holder

    *We used a half-inch fostner bit.

    Vintage Coca Cola Crate Turned Dog Bowl Holder

    *This is what my piece of plywood looked like after I drilled the two holes in the board.

    Vintage Coca Cola Crate Turned Dog Bowl Holder

    9. Using a jigsaw: carefully cut out the first circle.

    Vintage Coca Cola Crate Turned Dog Bowl Holder

    *Make sure you cut along the inside of your markings so that your dog bowl doesn’t slip through.

    Vintage Coca Cola Crate Turned Dog Bowl Holder

    *We double checked to make sure the dog bowl would fit in the hole snug after it was cut.

    Vintage Coca Cola Crate Turned Dog Bowl Holder

    10. Using a piece of sandpaper, sand down the edges and clean up the inside of the hole so that the dog bowl fits better!

    Vintage Coca Cola Crate Turned Dog Bowl Holder

    *Then, double check again to make sure that the placement of the hole would be acceptable distance for the dog to reach the food bowl.

    Vintage Coca Cola Crate Turned Dog Bowl Holder

    *You’ll also want to double check that the dog bowl doesn’t bottom out on the crate.

    Vintage Coca Cola Crate Turned Dog Bowl Holder

    11. Next up, grab a can of spray paint, and begin lightly spray painting the piece of cut-out plywood.

    Vintage Coca Cola Crate Turned Dog Bowl Holder

    12. Grab the orbital sander and give it a light sanding to distress the red spray painted surface.You’ll want it to match the vintage crate as best as possible.

    Vintage Coca Cola Crate Turned Dog Bowl Holder

    Your vintage Coca Cola crate turned dog bowl holder is almost complete!

    Vintage Coca Cola Crate Turned Dog Bowl Holder

    Vintage Coca Cola Crate Turned Dog Bowl Holder

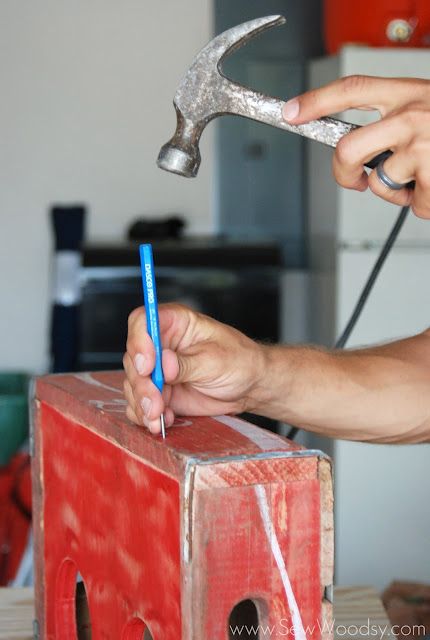
    13. Using a pneumatic nail gun (and air compressor) shoot a few nails along the sides of the crate to hold the plywood in place.
    Vintage Coca Cola Crate Turned Dog Bowl Holder

    *If you don’t have a nail gun you can use finish nails and a hammer to secure the top piece of plywood. As pictured above, use a center punch so that you don’t destroy your crate when hammering the nails in .

    Vintage Coca Cola Crate Turned Dog Bowl Holder

    Let your pup test it out!

    Vintage Coca Cola Crate Turned Dog Bowl Holder

    I think he likes it!

    Vintage Coca Cola Crate Turned Dog Bowl Holder

    And he has discovered multiple ways to now eat dinner!
    Linked to: Lil’ Luna, The 36th Avenue, twelveOeight, Home Stories A to Z

    « Organize the Kitchen Island… Build a Shelf!
    {Travel} Pisa, Italy with Video »

    Primary Sidebar

    • Email
    • Facebook
    • Instagram
    • Pinterest
    • Twitter
    • YouTube
    Male and female hugging on each other in the woods.

    Hi, we're Katie & Jon! Welcome to our home away from home!

    Sew Woodsy is a lifestyle blog focusing on crafts, home DIY projects, family, travel and all things life. Get comfy and join us on our adventure!

    More About Us →

    9 different logos from various media outlets where Sew Woodsy has been featured on.

    Easter Projects

    • Kids Easter Basket Ideas
    • 25 Easter Basket Ideas for Toddlers
    • Free Easter Coloring Pages
    • 17 Easter Craft Ideas

    Trending

    • How to Create a Natural Log Pathway + Video
    • Tips & Tricks on Installing Butcher Block Countertops
    • How to Host a Baby Shower at Work
    • How to Use Heat n Bond

    Male and female hugging on each other in the woods.

    Hi, we're Katie & Jon! Welcome to our home away from home!

    Sew Woodsy is a lifestyle blog focusing on crafts, home DIY projects, family, travel and all things life. Get comfy and join us on our adventure!

    More About Us →

    9 different logos from various media outlets where Sew Woodsy has been featured on.

    Easter Projects

    • DIY Follow the Bunny Pillow Cover
    • Bunny Kisses & Easter Wishes Burlap Garden Flag
    • Easter Bunny Family Pillow
    • DIY Easter Bunny Onesie with Name

    Trending

    • How to Create a Natural Log Pathway + Video
    • Tips & Tricks on Installing Butcher Block Countertops
    • How to Host a Baby Shower at Work
    • How to Use Heat n Bond

    Footer

    ↑ back to top

    9 different logos from various media outlets where Sew Woodsy has been featured on.

    About

    • About Us
    • Privacy Policy
    • Accessibility Statement

    Newsletter

    • Sign Up! for emails and updates

    Contact

    • Contact
    • Work with us
    • Advertise

    Copyright © 2010 - 2022 Sew Woodsy