• Skip to primary navigation
  • Skip to main content
  • Skip to primary sidebar

Sew Woodsy logo

  • DIY
  • Crafts
  • Cricut
  • Travel
  • About
menu icon
go to homepage
search icon
Homepage link
  • Home
  • Thanksgiving
  • DIY
  • Cricut
  • Travel
  • About Us
    • Email
    • Facebook
    • Instagram
    • Pinterest
    • Twitter
    • YouTube
  • ×

    Sew Woodsy » Woodworking

    Published: Jan 3, 2013 by Katie · This post may contain affiliate links.

    Organize the Kitchen Island… Build a Shelf!

    Sharing is caring!

    0 shares
    • Facebook
    • Twitter

    Organize the Kitchen Island... Build a Shelf! http://SewWoodsy.com #diy #PureBond #Kitchen #Organize

    It is a new year and like most people we all strive to set new goals or what some like to call resolutions. One of the many goals we have for 2013 is to add more storage to our home and get organized! Although we completed this project in 2012 I feel like adding a shelf to our kitchen island helped get us organized and ready for the new year!

    When I’m not working on DIY projects I’m cooking up a storm in the kitchen! You can always visit me over at Katie’s Cucina! Because I blog about cooking as well I get a lot of kitchen gadgets sent to me. Don’t get me wrong–I’m totally blessed and enjoy every minute of it, but I’m seriously running out of storage space. One Sunday morning I asked Mr. Woodsy if he could go out to the garage and cut me a piece of PureBond Hardwood Plywood to fit the inside of our messy disastrous kitchen island. This mini-project took him less than 30 minutes to complete from start to finish! Luckily, we already had cabinet clips and holes drilled for a shelf to sit in the kitchen island, so half of the work was already completed.

    Supplies:

    • ¾ inch thick PureBond Hardwood Plywood
    • Measuring Tape
    • Carpenters Square
    • Pencil
    • Table Saw
    • Safety Glasses, Hearing Protection, Respirator
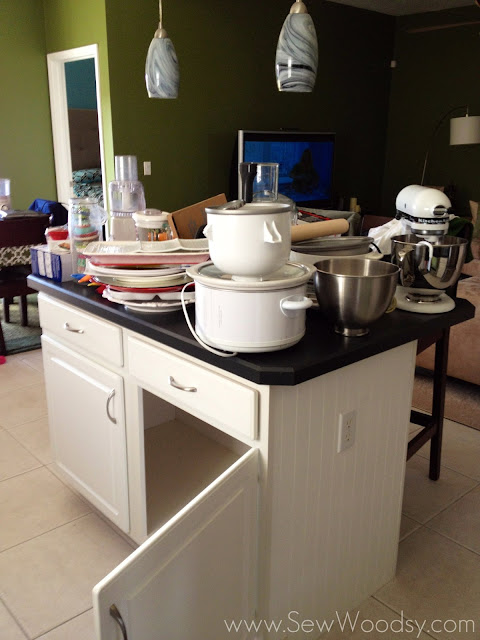
    clean out the kitchen island
    First step, which I think just might be one of the most difficult steps of the project… clean out the kitchen island! To be honest, I think this took longer to do than actually cutting the wood and installing the shelf.

    measuring for the kitchen island shelf

    Once you have cleared out everything from your kitchen island, measure the inside of the kitchen island to get exact measurements for your shelf.

    measuring PureBond Hardwood Plywood for kitchen shelve

    Once you have your measurements begin measuring and marking your plywood.

    measuring PureBond Plywood with a square

    Mr. Woodsy likes to use his square to ensure a straight edge when drawing a line on the plywood.

    Cutting plywood on the table saw for kitchen island shelf

    Next up, its time to fire up the old table saw. Carefully run the piece of wood through the table saw cutting exactly what you need.
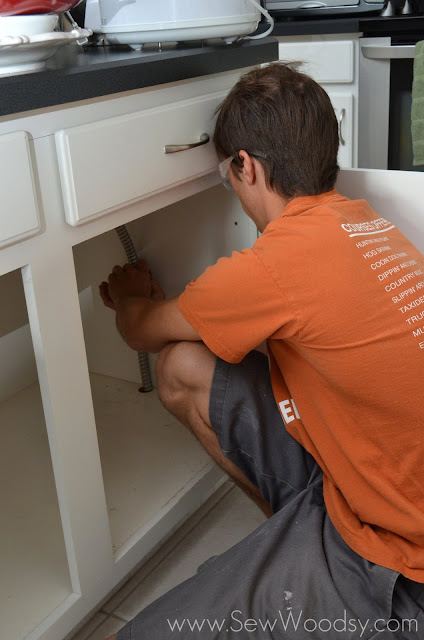
    DIY Kitchen Island Shelf Tutorial

    Once the wood was cut, Mr. Woodsy made sure that the shelf brackets were ready for the wood.

    kitchen island shelf

    He then placed the freshly cut piece of PureBond in the cabinet.

    build a kitchen island shelf

    Here is what the brackets looked like that the plywood was sitting on.

    DIY Kitchen Island Shelf

    Then it was up to me to begin organizing!

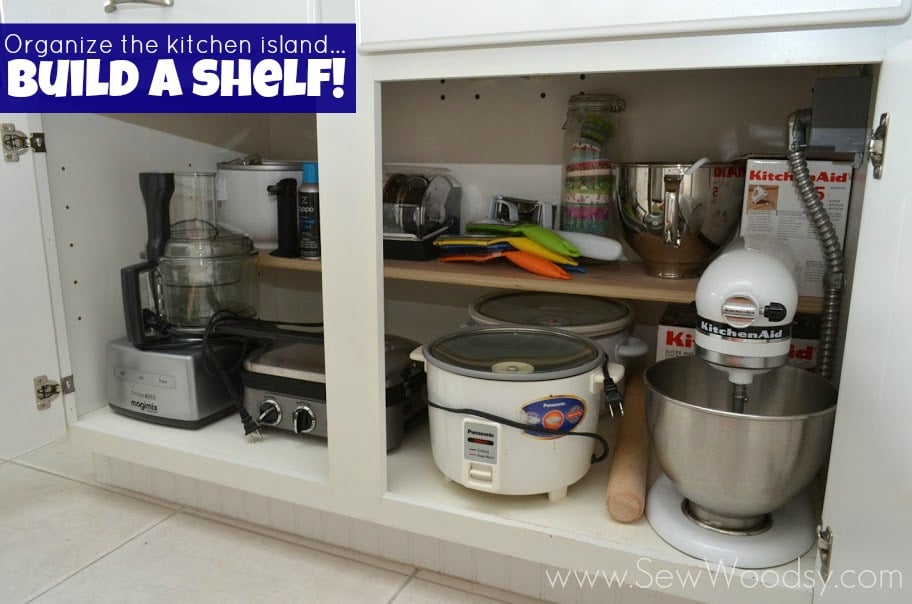
    organize your kitchen island... build a shelf

    This didn’t take long at all and best of all I cannot only easily access all my kitchen appliances but I can see everything! We also didn’t chose to paint the wood nor did we sand it since it is simply being used inside our cabinet. I love the natural wood look and am totally ok with it. But if your not into that look feel free to stain or paint the plywood a different color.

    This quick and easy fix is something that anyone can do to make a big impact and get organized sooner than later! You can visit PureBond Hardwood Plywood for more information about their product or connect with them on Facebook, Twitter, or Pinterest

    Disclaimer: I have a working relationship with PureBond and was not compensated to write this post. I simply love the product. As always all opinions are my own. 
    « Instagram Gift Tags
    {Tutorial} Vintage Coca-Cola Crate Turned Dog Bowl Holder »

    Reader Interactions

    Leave a Reply Cancel reply

    Your email address will not be published. Required fields are marked *

    Primary Sidebar

    • Email
    • Facebook
    • Instagram
    • Pinterest
    • Twitter
    • YouTube
    Male and female hugging on each other in the woods.

    Hi, we're Katie & Jon! Welcome to our home away from home!

    Sew Woodsy is a lifestyle blog focusing on crafts, home DIY projects, family, travel and all things life. Get comfy and join us on our adventure!

    More About Us →

    9 different logos from various media outlets where Sew Woodsy has been featured on.

    Easter Projects

    • Kids Easter Basket Ideas
    • 25 Easter Basket Ideas for Toddlers
    • Free Easter Coloring Pages
    • 17 Easter Craft Ideas

    Trending

    • How to Create a Natural Log Pathway + Video
    • Tips & Tricks on Installing Butcher Block Countertops
    • How to Host a Baby Shower at Work
    • How to Use Heat n Bond

    Male and female hugging on each other in the woods.

    Hi, we're Katie & Jon! Welcome to our home away from home!

    Sew Woodsy is a lifestyle blog focusing on crafts, home DIY projects, family, travel and all things life. Get comfy and join us on our adventure!

    More About Us →

    9 different logos from various media outlets where Sew Woodsy has been featured on.

    Easter Projects

    • DIY Follow the Bunny Pillow Cover
    • Bunny Kisses & Easter Wishes Burlap Garden Flag
    • Easter Bunny Family Pillow
    • DIY Easter Bunny Onesie with Name

    Trending

    • How to Create a Natural Log Pathway + Video
    • Tips & Tricks on Installing Butcher Block Countertops
    • How to Host a Baby Shower at Work
    • How to Use Heat n Bond

    Footer

    ↑ back to top

    9 different logos from various media outlets where Sew Woodsy has been featured on.

    About

    • About Us
    • Privacy Policy
    • Accessibility Statement

    Newsletter

    • Sign Up! for emails and updates

    Contact

    • Contact
    • Work with us
    • Advertise

    Copyright © 2010 - 2022 Sew Woodsy