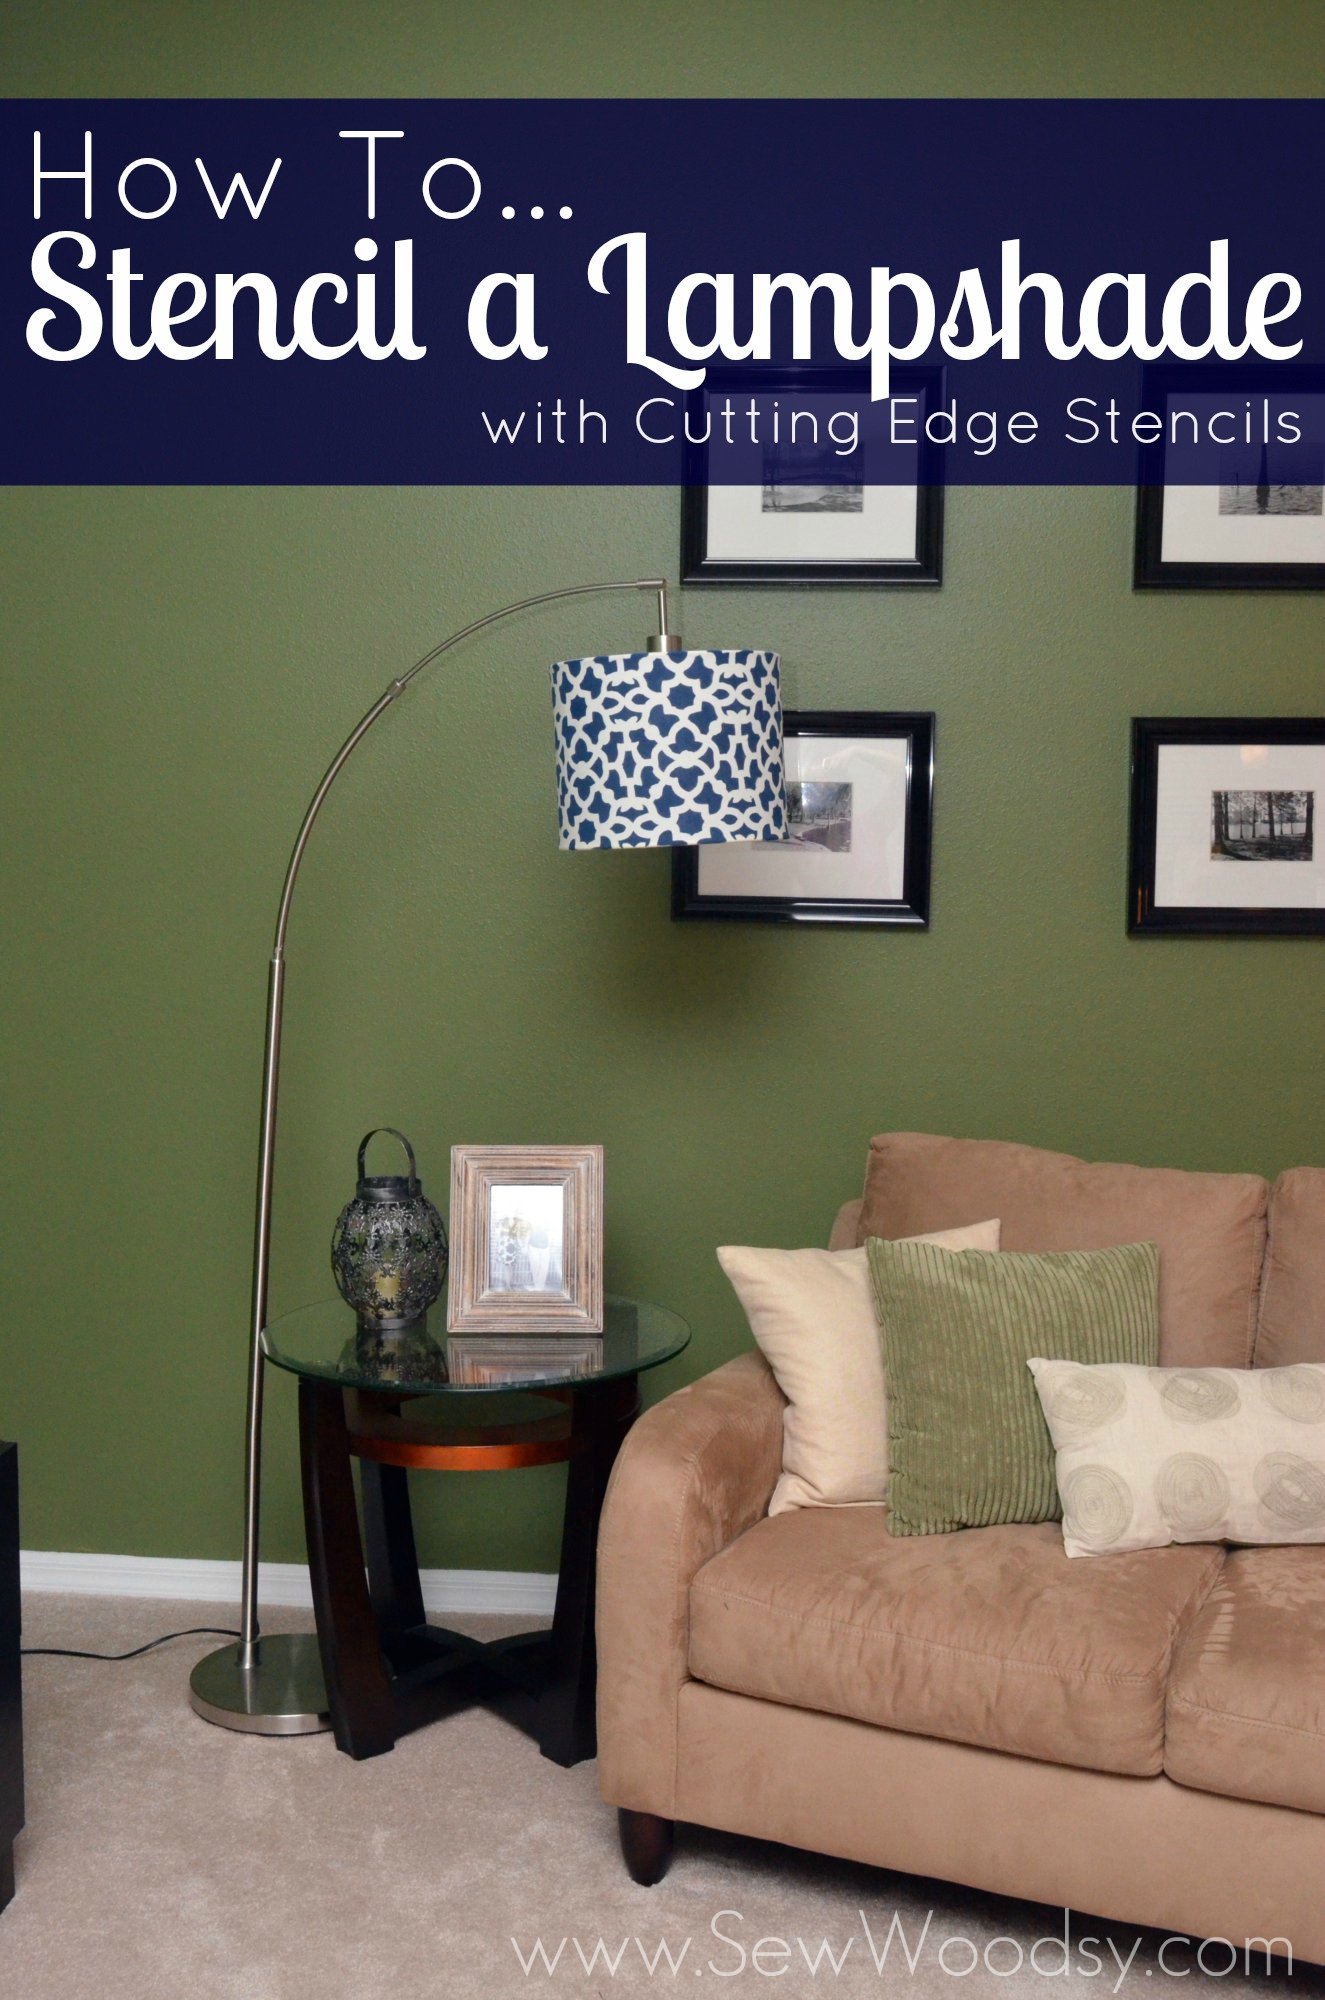
Two months before we left for Europe (last summer) I decided I wanted to give our living room a little makeover. Little did I realize that getting ready for a 2.5 week long trip would take so much time away from DIY projects. I was contacted by Cutting Edge Stencils to do a product review and giveaway. I had all the hopes in the world to get this done before Europe…. well that never happened. And once I got back from Europe I was very much still on vacation mode. I also realized during the trip that I needed to take more breaks away from the computer and to really embrace and enjoy life. Not just be consumed by all things blogging. So… it’s January and I’m just now sharing this project.
Let me just tell you. If you are intimidated by stenciling. Don’t be. Know that you are not a robot nor will anything you do ever be perfect. Mr. Woodsy is a perfectionist and stenciling kind of freaks him out. I on the other hand… just want it to look good!
I love that all the stencils from Cutting Edge Stencils are reusable so you can transform as many things as your heart desires for just one price! This is a much better alternative to wallpaper or vinyl decals especially if you are planning to create a feature wall or transform an entire room. As you know (because of my post) these stencils can be used on just about anything. I would love to stencil one of our floors (but I don’t think Mr. Woodsy would allow me to do that. I have some ideas of my sleeve for transforming place mats as well as making a few new decorative pillows out of a drop-cloth! After your done using the stencil you simply wash it off with warm water! Let it dry and then its ready to be used time after time!
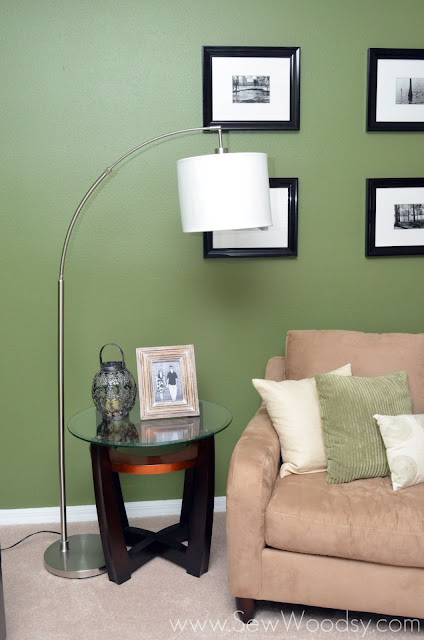
Last year, Mr. Woodsy found a floor length light fixutre on the curb during one of his many walks with our dog. He brought it home. Let it rest for a day or two in a dry area and then plugged it in. Sure enough, it worked! The only problem was that the lampshade its self was a little beat up. I searched high and low for a new lamp shade but none seemed to fit this odd side lamp. So that’s when I got the idea to stencil the lampshade. Let me just tell you that stenciling a lampshade can be a little more difficult because the fabric can flex. I’ve stenciled a table tray, pillows, and a table runner; so I had a little bit of experience. But I hadn’t thought about the non-flat surface and the fact that the fabric would flex. So it is imperative that you use quite a bit of repisitionable spray adhesive to keep the stencil adhered to the surface so it won’t move! This project is not the quickest; however, the time spent makes it all worth it once your lampshade is complete!
Supplies:
- Zamira Allover Craft Stencil
- Dense Foam 4″ Roller with Handle
- Stencil Brush Set, 3 pc, Natural bristle
- Martha Stewart Acrylic Craft Paint, Blueberry
- Paper Plate
- Spray Adhesive
- Paper Towels
- ScotchBlue™ Edge-Lock™ Paint Line Protector Painter’s Tape
First, you’ll want to remove the lampshade from the lamp. I couldn’t figure out how to do this… so left this job up to Mr. Woodsy!
Once your lampshade is down, go outside and spray the back of your stencil with repisitionable spray adhesive. Trust me… go outside. This stuff gets every where. Then bring your stencil back in to your work area and carefully position the sticky side down on to your lamp. Then place some ScotchBlue™ Edge-Lock™ Paint Line Protector Painter’s Tape on each side of the stencil for extra reinforcement.
Next up, on a plate give a generous squirt of acrylic craft paint.
Using the foam roller, begin to coat the roller as evenly as possible.
Lightly begin rolling the paint on to the lamp shade. At this point I contemplated if I just wanted a light dusting of paint or if I wanted to completely paint every single detail in.
And then Mr. Woodsy talked me down from the ledge and requested that I paint in every detail dark. So that’s what I did and this part took some time. My tip for not getting paint underneath the stencil… paint on top of the stencil and into the middle of the design. Essentially, painting away from the edges.
This is what it looked like after I was done painting the first round of stenciling.
And you repeat until you’ve reached the other side of the lampshade.
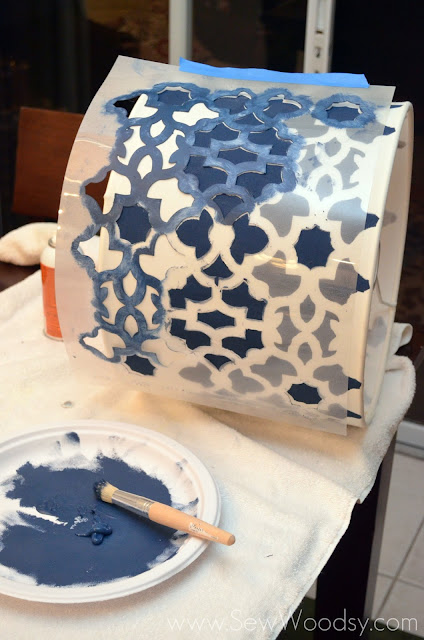
Then this is where it gets fun. You have to “fill in the blanks” as I like to call it. Reposition the stencil so that you finish painting the edges of the lampshade.
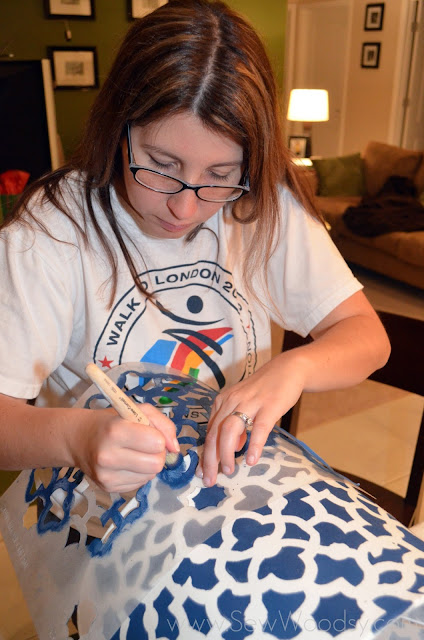
And here is one of the only “action shots” of me painting the lampshade. Don’t mind my clothes… I was in my painters clothing aka lounge clothes.
And because I like to keep it real here… somehow I ended up with my pattern not matching all the way around. I could have omitted this part and said everything was hunky-dory, but that’s not who I am. Mr. Woodsy believes that somewhere along the lines I did something incorreectly. DUH! I could have told you that. So I wanted to share how we fixed this.
First, get someone with a keene eye for detail and who has tons of patience (aka Mr. Woodsy). Then carefully begin filling in the blanks. He did an amazing job and to be honest, unless you really stare at the lamp you would have no idea that I flubbed! Oh and don’t mind the earbuds in his ears. Ever since the holiday break he has become obsessed with audiobooks from the library. Everywhere he goes now he has those damn things in his ears. I think he has reached his maxed limit for check-outs this month from our public library!

Once your lampshade is dry, screw it back on to your lamp, and enjoy its beauty!
So here it is… up close and personal!

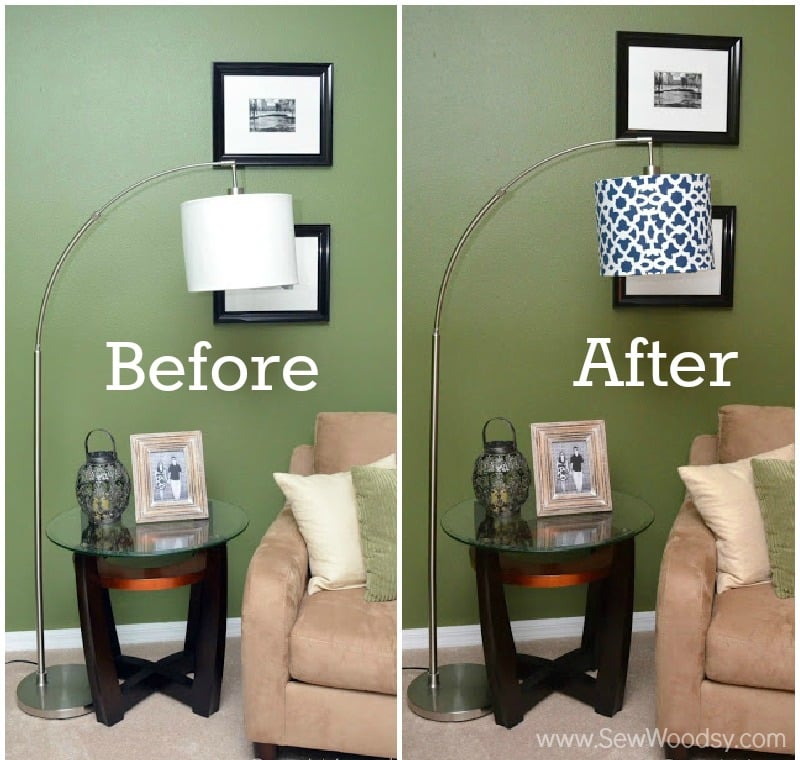
What an amazing before and after transformation? I mean who would have guessed that a little paint, and amazing stencil, and a few hours of your time would transform a boring lampshade into something hip and trendy?
If you want to spruce up something old and transform it into something new go visiting Cutting Edge Stencils to see the wide variety of patterns they have. Or get social with them on Facebook & Twitter.
Disclaimer: I was compensated for this project. I truly love using Cutting Edge Stencils. All opinions as always are my own.