This is a sponsored conversation written by me on behalf of Cricut. The opinions and text are all mine.
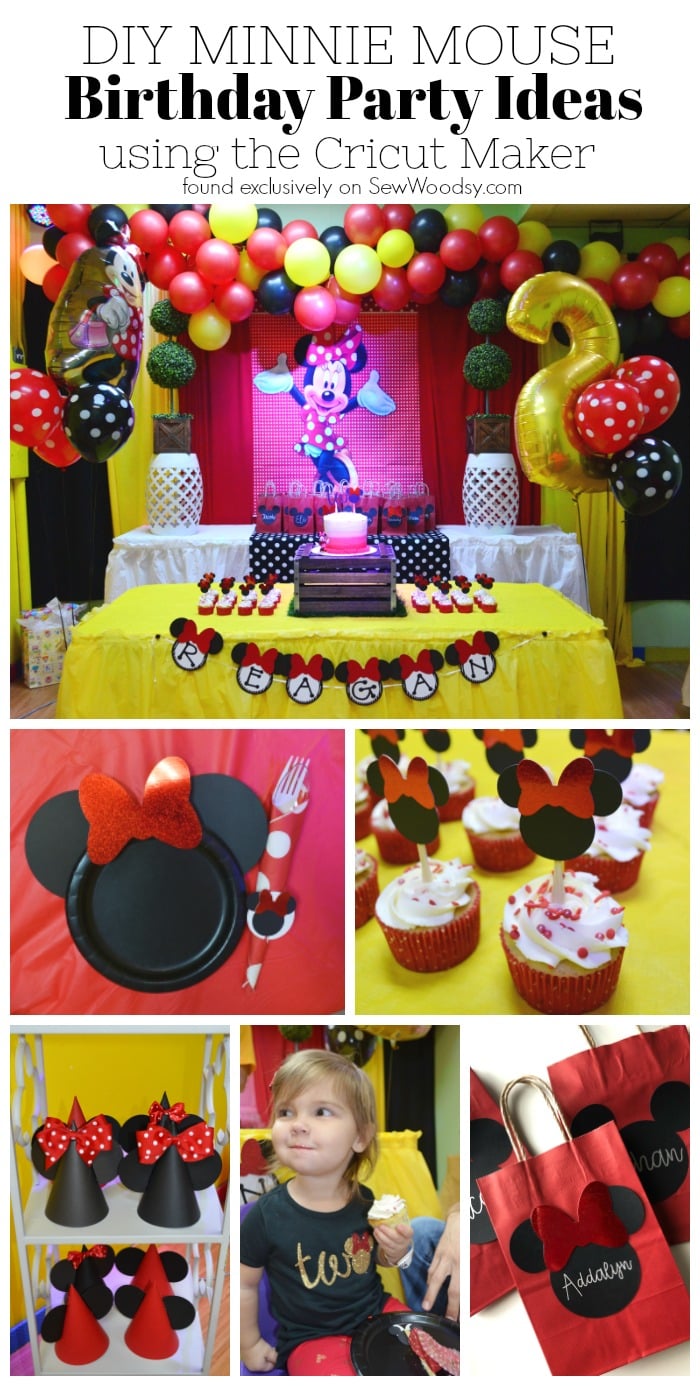
I’m so excited to share today’s blog post on all my DIY Minnie Mouse birthday party ideas. A few weeks ago we celebrated my daughter, Reagan’s 2nd birthday. She is all girl and loves princesses, baby dolls, and of course Minnie Mouse. I went back-and-forth about what theme to use for her second birthday. At the end of the day, I felt like Minnie Mouse was the perfect theme! I’m not sure if I’ll get to make the “birthday theme” call after this year, so I took full advantage of it.
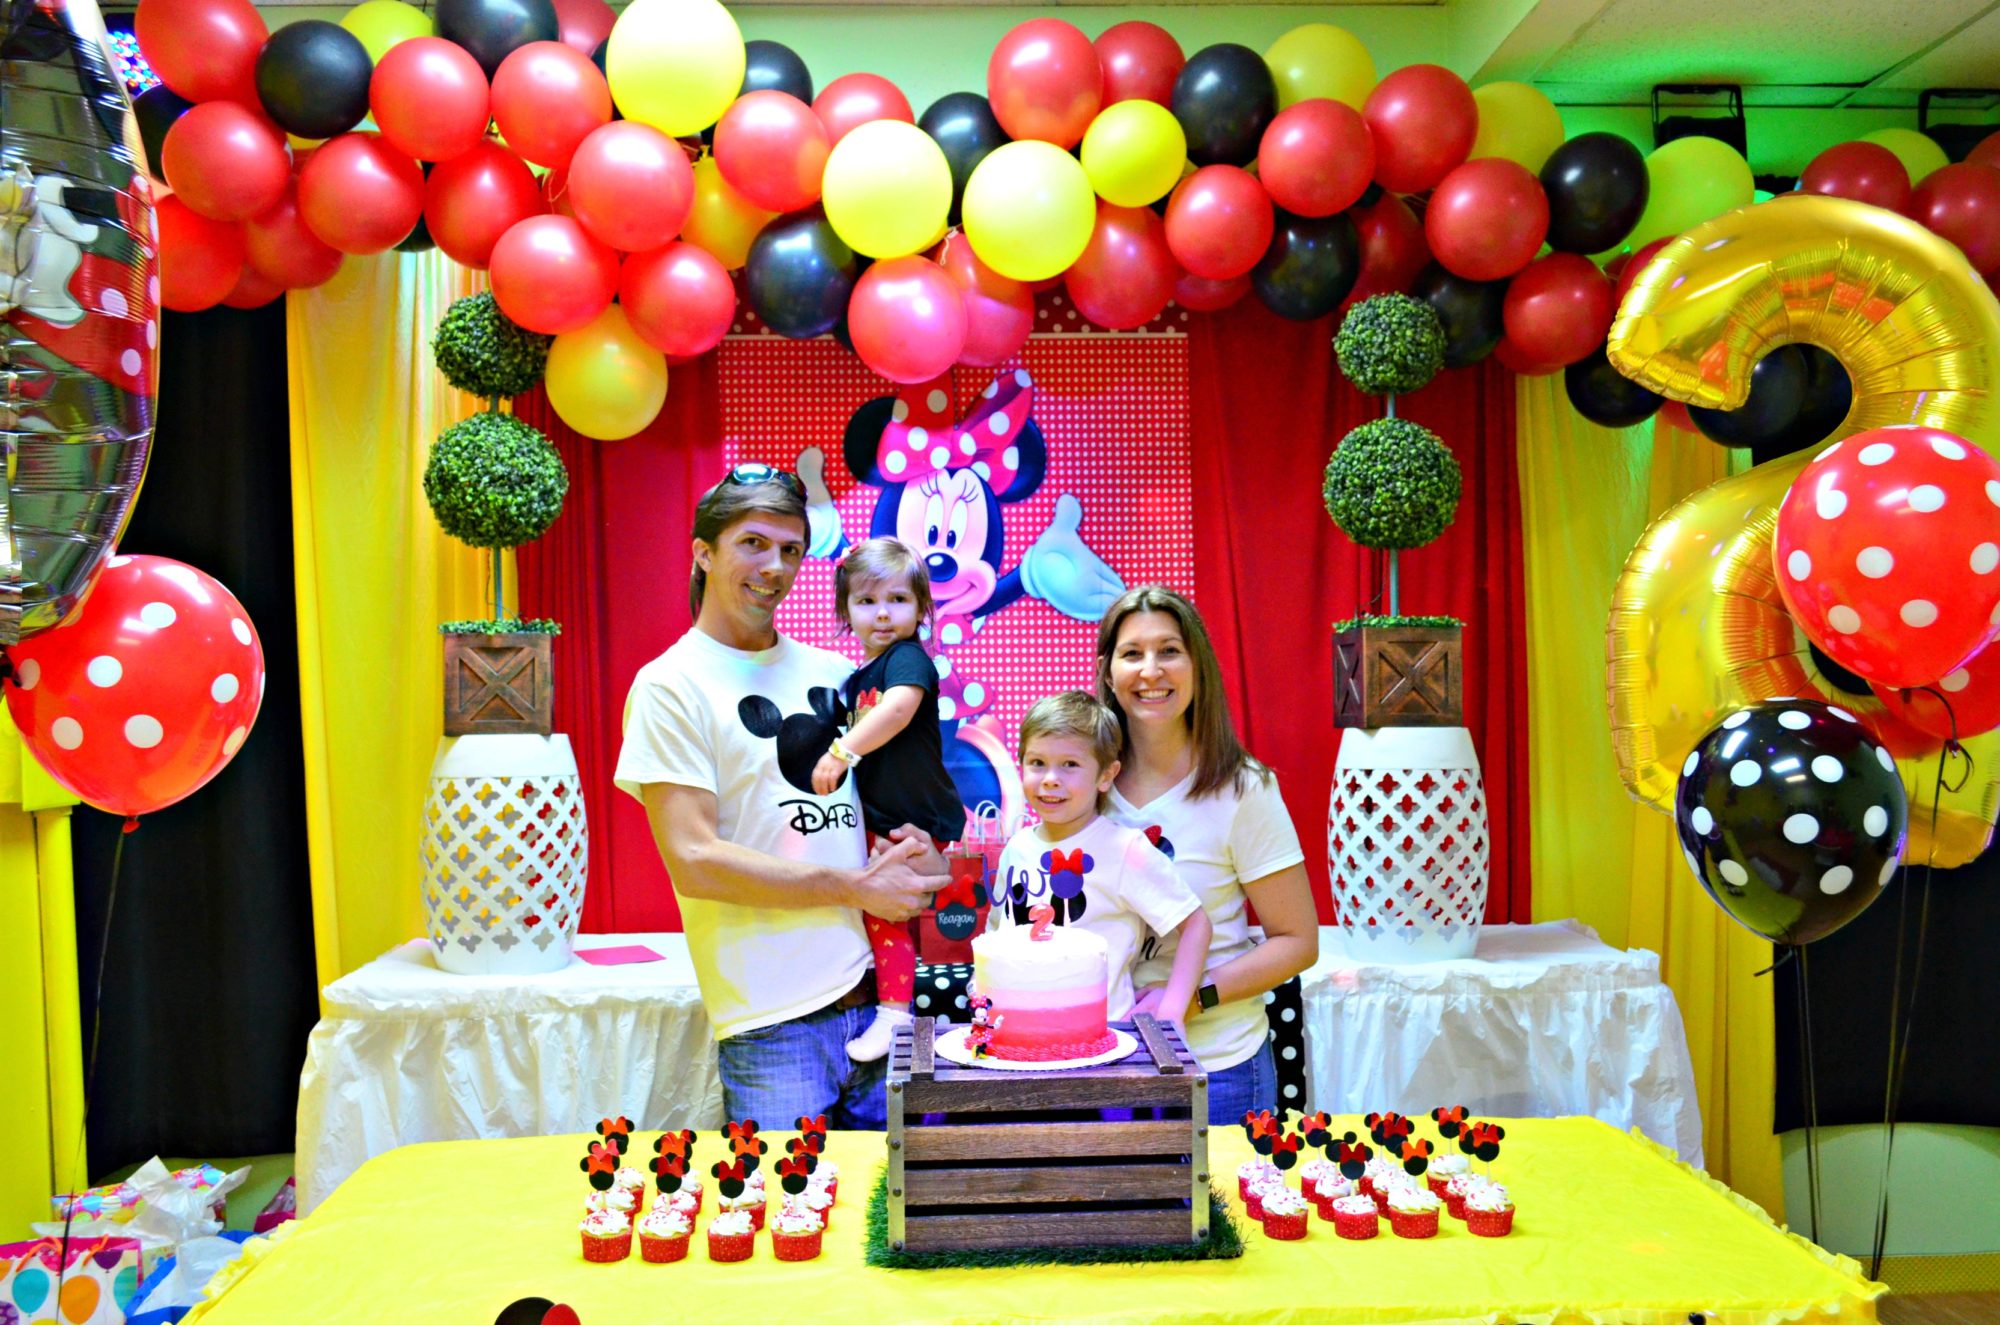
I partnered with my friends at Cricut to put together a wide variety of easy and inexpensive DIY birthday party ideas. I worked on all of the various projects that you’ll see below over the course of a month. I’ll say I would work an evening here and there—I don’t want to scare you off! Because of this, for once I was not crafting until midnight the night before a child’s birthday party! All of the ideas that you’ll find you can you find cut files on Cricut Design Space and use the Cricut Maker. I will link them here in this blog post and share final photos. You’ll have to stop back bye to get the details and the step-by-step instructions on all of the projects I made. I plan to share a series of individual project blog posts on how to execute each and every project I created. Many of the projects you can make into Mickey Mouse instead of Minnie! Super versatile!
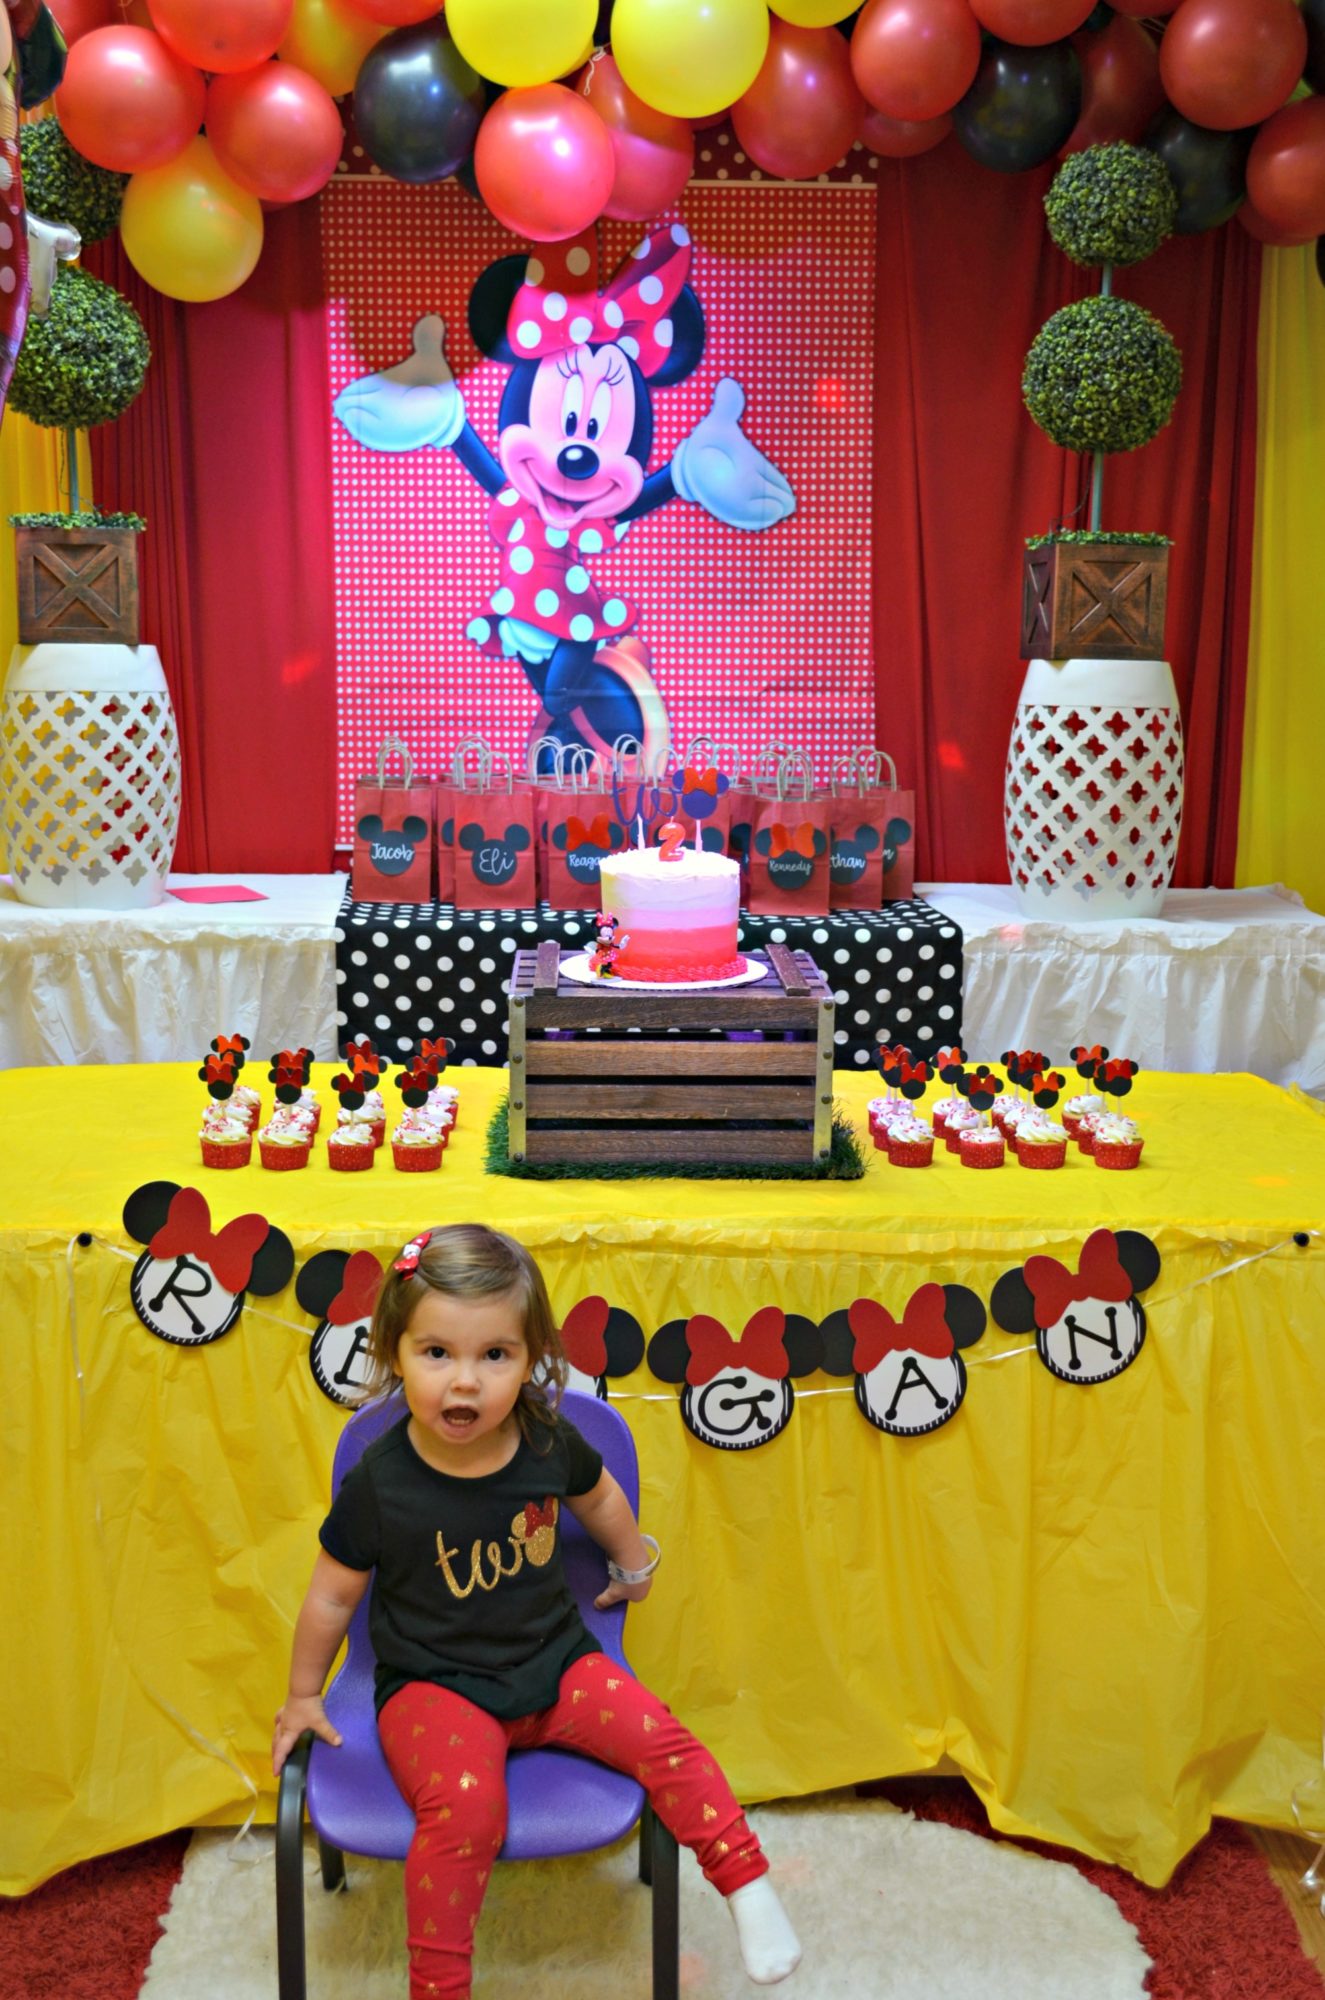
We had Reagan’s birthday party at a kids play place. They automatically decorate to your desired theme! I bought the basic birthday package knowing I would be adding my own items. They charge in upwards of $200 extra dollars to decorate over the top! I mean, don’t get me wrong the decorating is amazing, but I can’t bring myself to spend that much money when can I add my own flare for a fraction of the cost.
Supplies for DIY Minnie Mouse Birthday Party
Here are a few of the supplies I used to create most of the items you’ll find below.
- Cricut Maker
- Cricut Design Space®
- Cricut Mat
- Cricut Scoring Wheel or Scoring Stylus
- Cricut Cardstock
- Cricut Shimmer Paper, bedazzler sampler
- Cricut Iron-On Vinyl; gold glitter and red glitter
- Cricut EasyPress 2 6×7
- Cricut EasyPress™ Mat (optional)
- Cricut Iron On Protective Sheet (optional) or Muslin Cloth
- Double-Sided Tape
- Hot Glue Gun
- Party appetizer picks
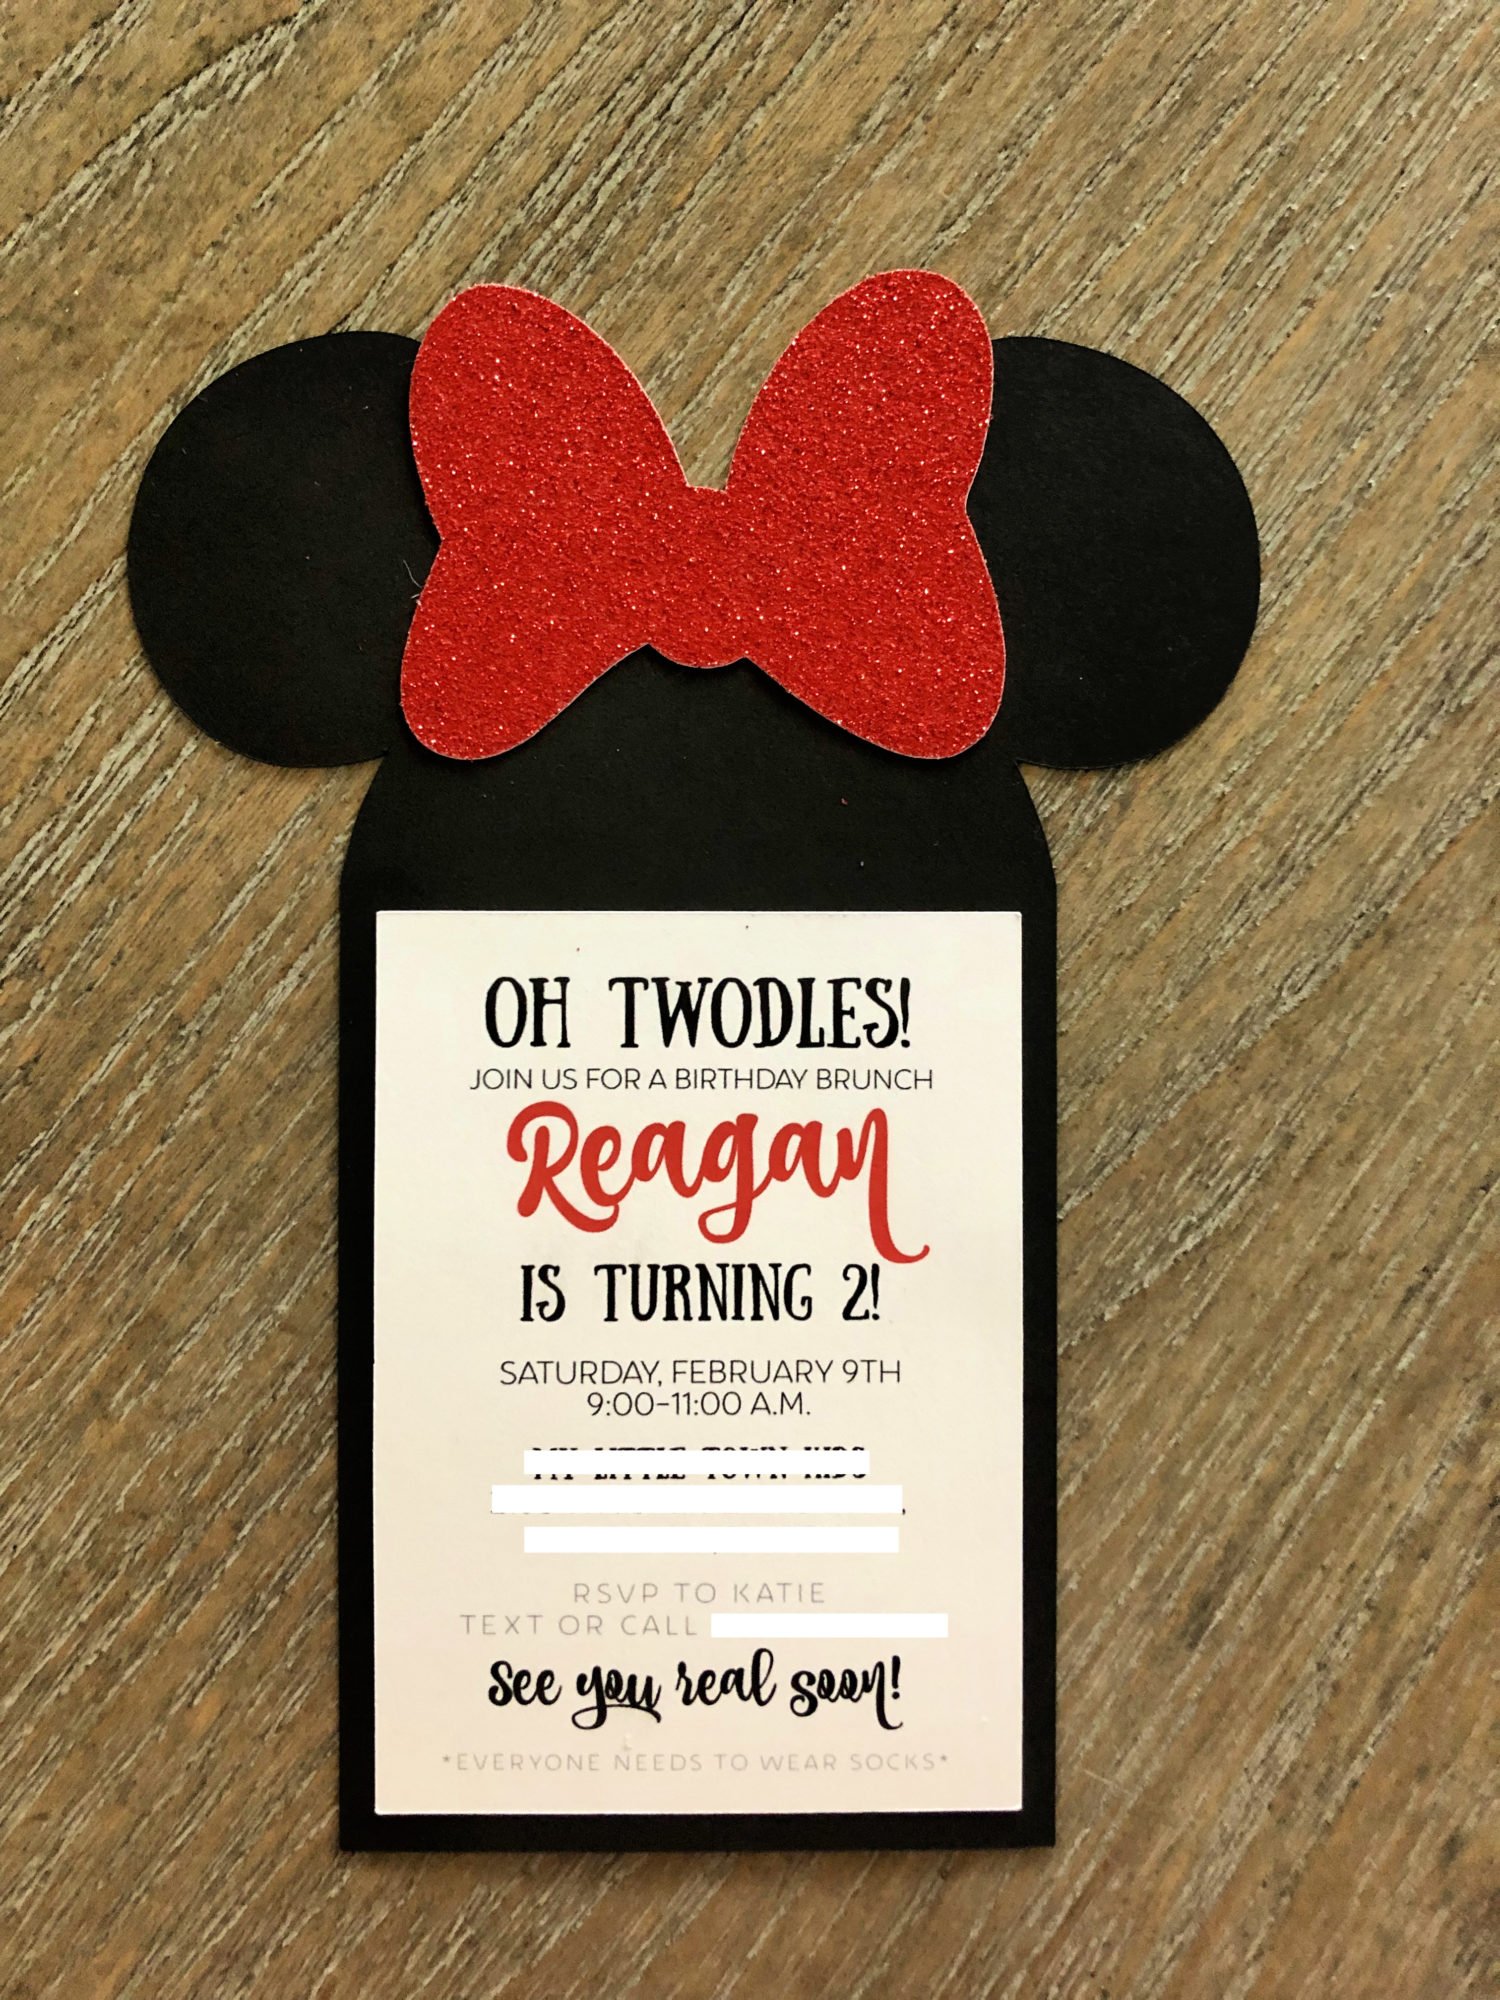
DIY Minnie Mouse Birthday Invitation
First, I made my own invitation this year. Out of the 5 years I have now been throwing children’s Birthday parties I have never attempted to make my own invite. I recently perfected the “print-then-cut” feature in Cricut Design Space®. (I will share more on that for another blog post). Because I now know how to use that feature, I was able to create the cutest custom Birthday invitations. This set the tone for all the other projects I created!
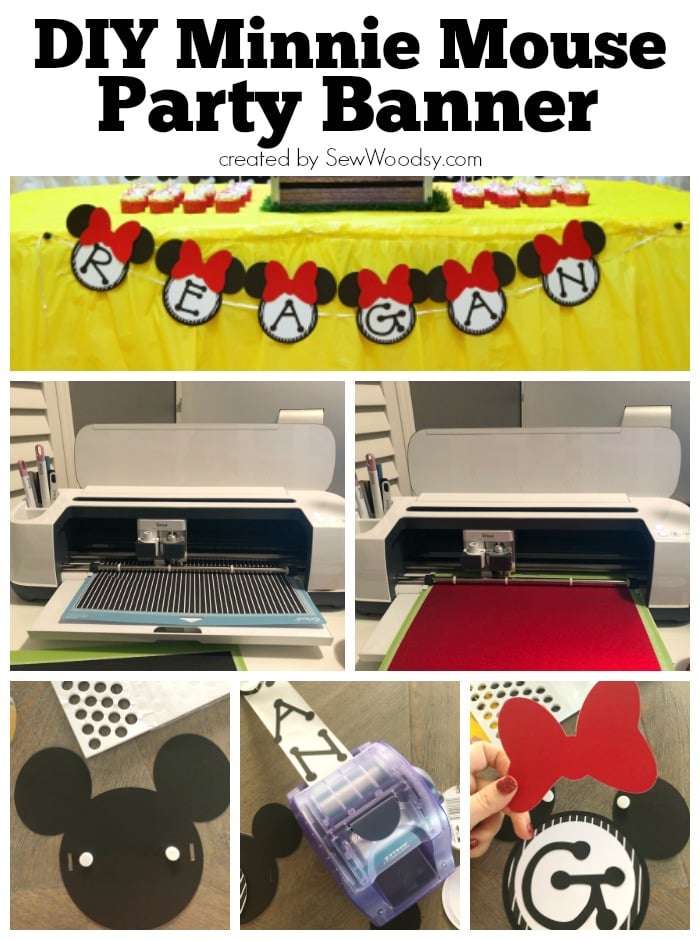
DIY Minnie Mouse Party Banner
First up, a birthday banner! I knew I would have a back drop so I decided to just make Reagan’s name using the Minnie Mouse silhouette. I used Cricut Black and white cardstock, red shimmer, and Disney® Deluxe Paper, Minnie Rocks the Dots (the black and white stripes). I used my Xyron sticker maker and ran the letters through the machine. I layered the banner using 3-dimensional sticker dots.
Grab the Cricut Design Space file for DIY Minnie Mouse Party Banner here.
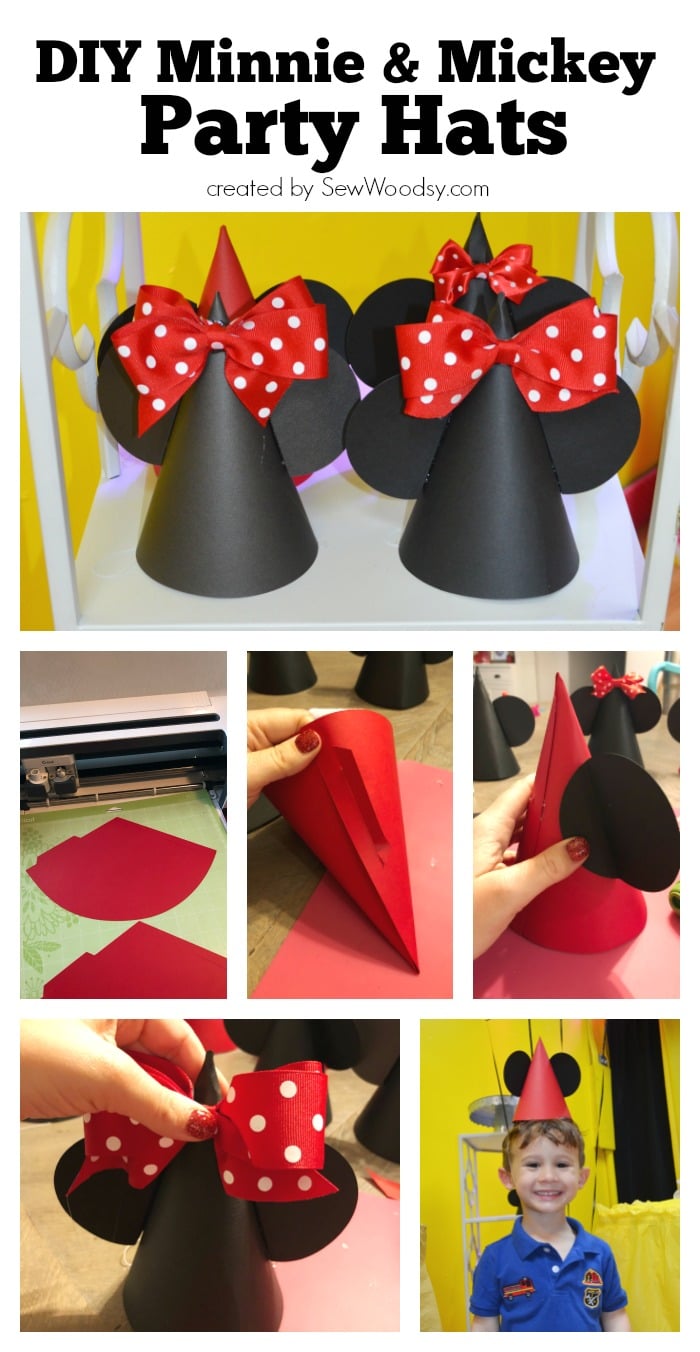
DIY Minnie and Mickey Mouse Party Hats
Next, the party hats! Not one manufacturer on this planet makes solid black party hats. Trust me, I scoured the Internet (and stores)! I made both Mickey and Minnie hats using my Cricut Maker. I will say I had all intentions to add white buttons to the red Mickey hats, but time and memory left me and I never added them. I think they still turned out great! I used black and red Cricut cardstock, a hot glue gun, elastic on a spool, and red and white polka dot fabric for the Minnie bows! I followed this tutorial from my friend Kelsey on how to make boutique style bows. I loved the mix of fabric and paper. Thankfully, I only had 5 little girls at our party, so I only had to make 5 Minnie Mouse party hats.
Grab the Cricut Design Space file for DIY Minnie and Mickey Mouse Party Hats here.
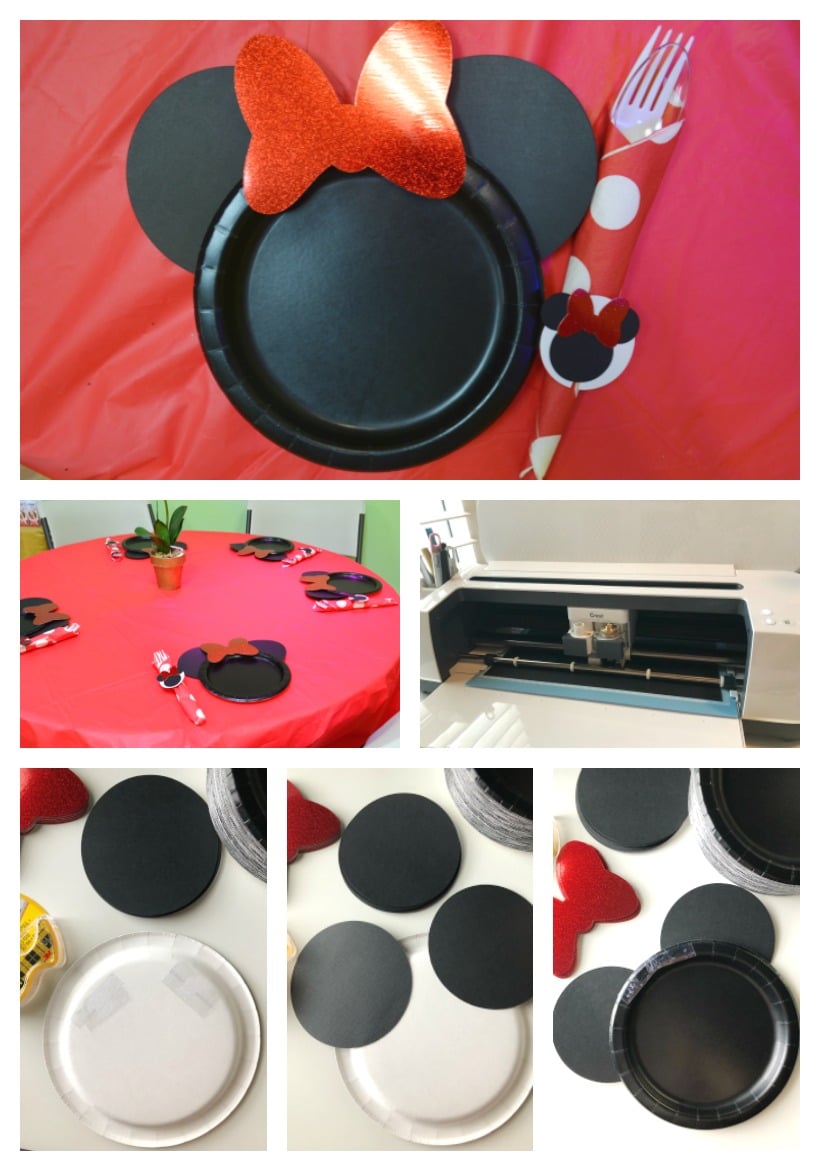
Minnie Mouse DIY Paper Plates
After doing a little “Googling” I saw others who had transformed paper plates. I knew I wanted to do this for the tables in our party room. With the help of the Cricut Maker, Black Paper Plates, Black and Red cardstock, and some Double-Sided Tape I was in business!
Grab the Cricut Design Space file for Minnie Mouse DIY Paper Plates here.
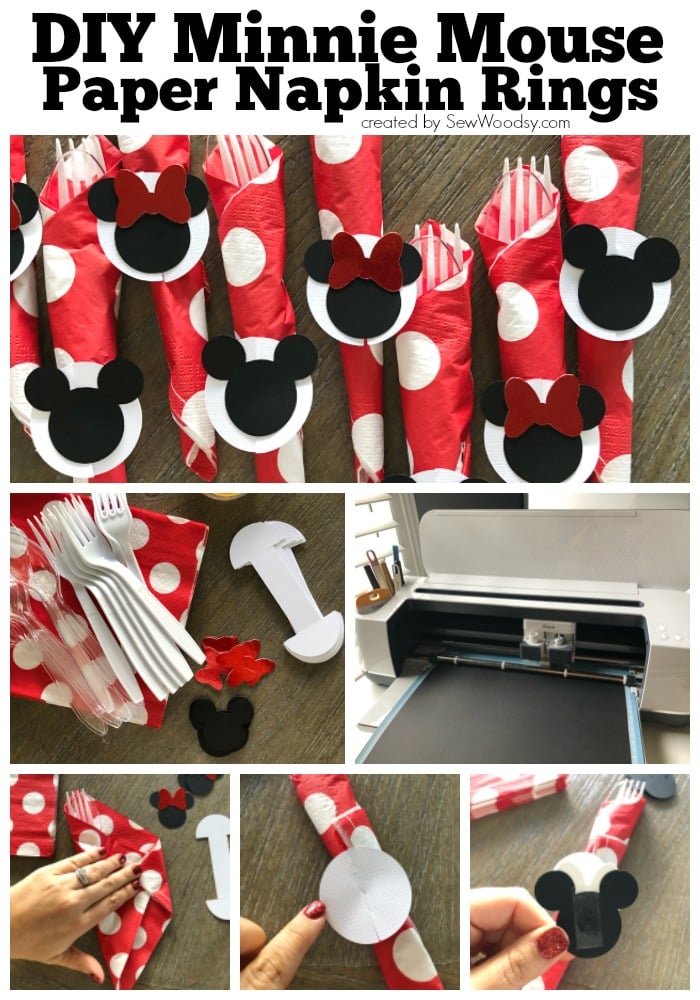
DIY Minnie Mouse Paper Napkin Ring
After I made the Minnie Mouse plates I decided I wanted to wrap some plasticware and make a paper napkin ring to follow with our theme. I found a created my own template on Cricut Design Space®, added a circle followed by the Minnie Mouse silhouette with red shimmery bow. I used double stick tape once again to put it all together! I hate glue, if you haven’t figured that out yet, so whenever I can I use a double-sided adhesive.
Grab the Cricut Design Space file for DIY Minnie Mouse Paper Napkin Ring here.
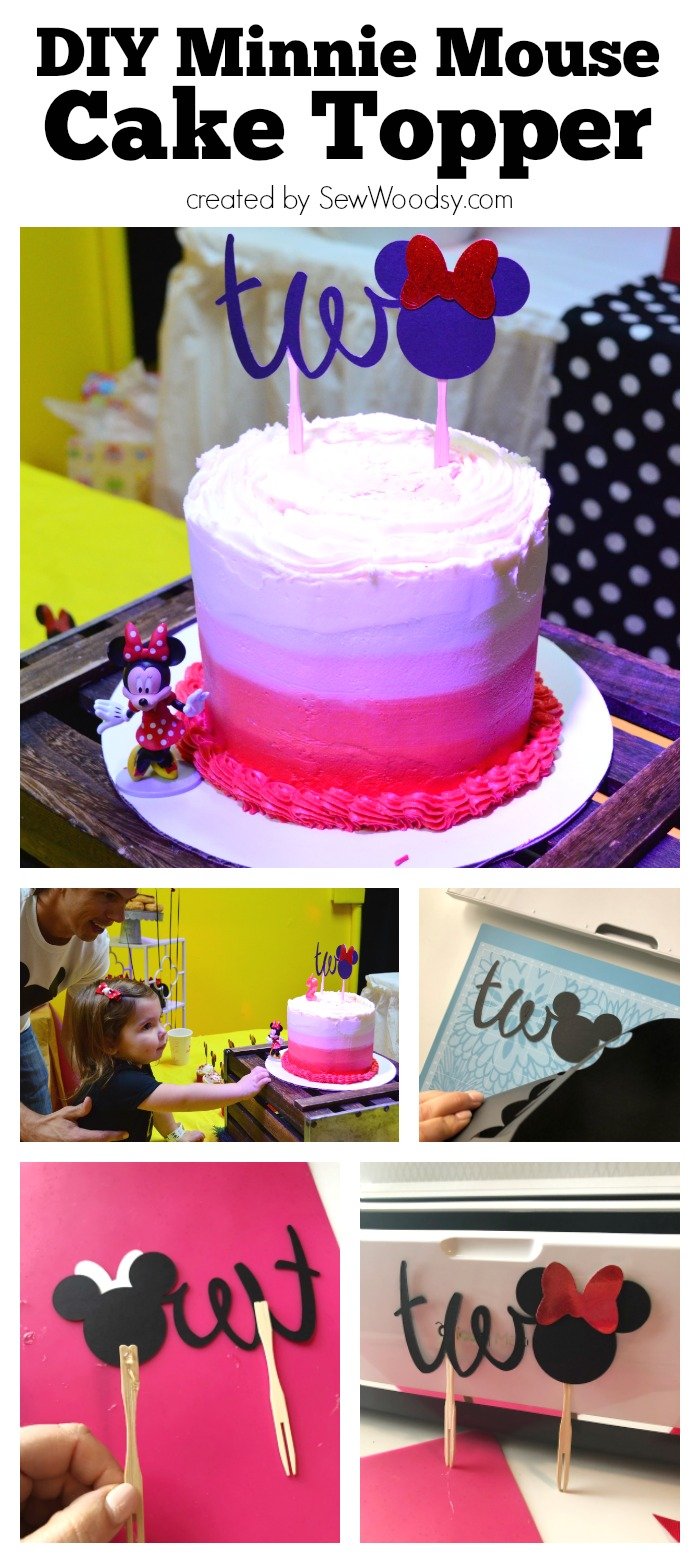
DIY Minnie Mouse Cake Topper
I always love a “show” cake for Birthday parties. A tall cake that all my guest go “wow” over. Jon and I almost always make our childrens’ cakes. We typically feed the cake to the adults and save cupcakes for kids. To make this cake topper I used my Cricut Maker, Kraft Board, Cricut Shimmer Paper, adhesive, and appetizer picks to put this cake topper together.
Grab the Cricut Design Space file for DIY Minnie Mouse Cake Topper here.
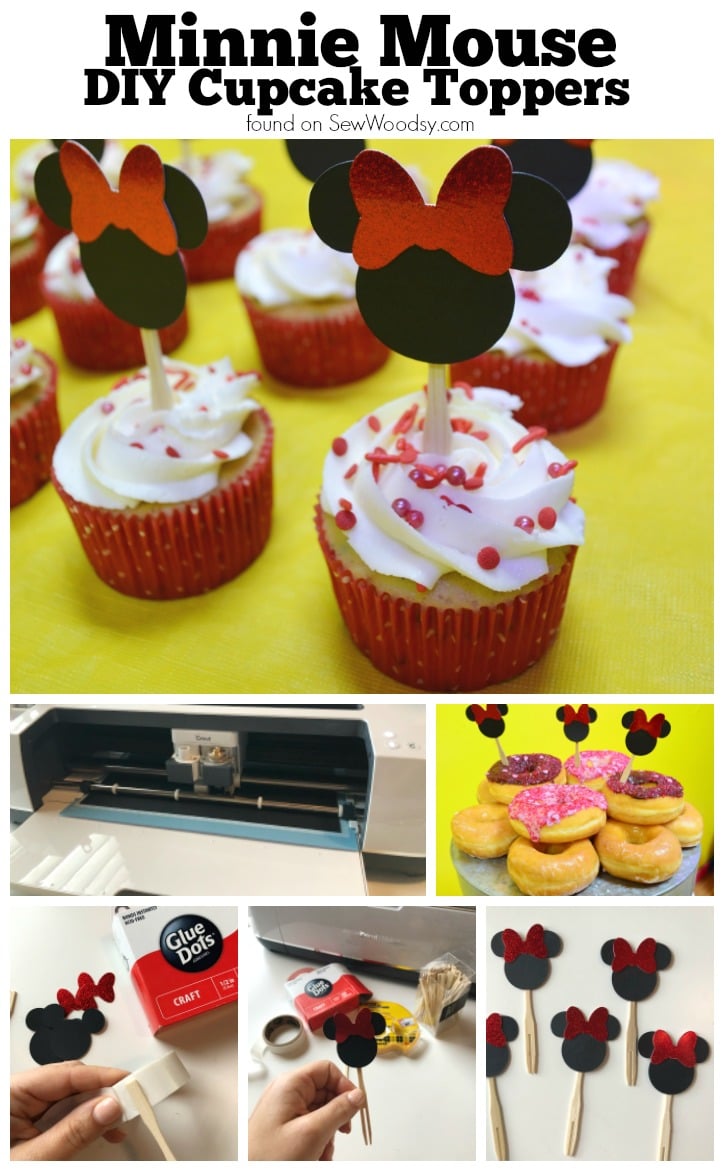
DIY Minnie Mouse Cupcake Toppers
I feel like cupcakes are always the easiest at kid’s birthday parties. Making the cupcake toppers is easy thanks to the Cricut! Simply cut the Mickey Mouse silhouette using theCricut Maker, and then cut the red sparkly bows. I used glue dots and double stick tape to adhere on to the party appetizer picks. These are better then traditional toothpicks since they aren’t as sharp and perfect for little kids.
Grab the Cricut Design Space file for DIY Minnie Mouse Cupcake Toppers here.
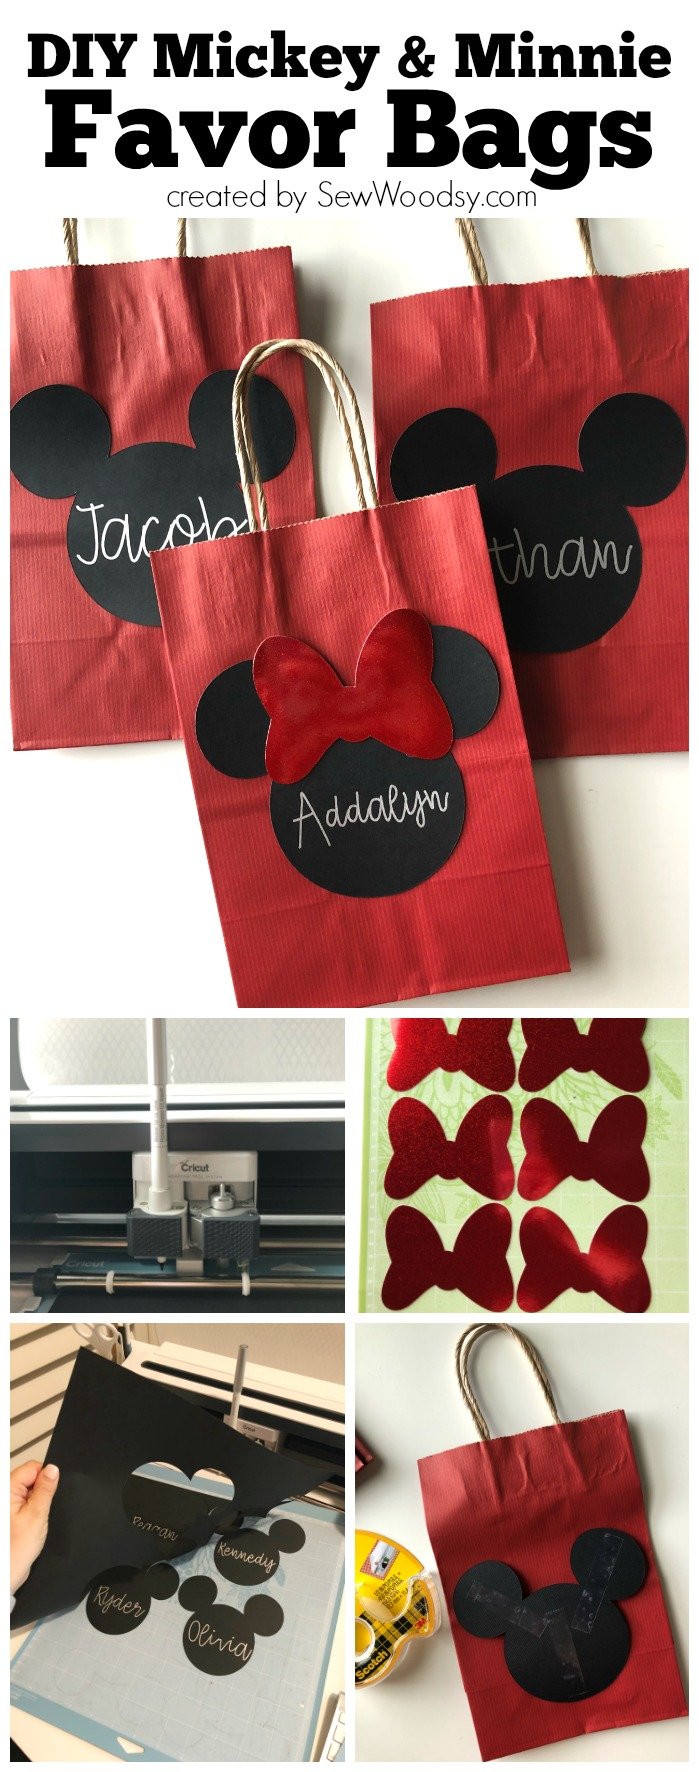
DIY Mickey & Minnie Mouse Favor Bags
I knew I wanted to make my own favor bags. When you look around the internet you have so many options and ways to make a DIY Mickey & Minnie Mouse favor bags. I made both Mickey and Minnie because I had way more boys then girls.
Thanks to the Cricut I was easily able to have a handwritten look and customize each goody-bag with the child’s name using the “write” feature then my Cricut Maker cut out all the Mickey Mouse silhouettes. For the girl bags I added a holographic sparkly red Minnie Mouse Bow (that the Cricut also cut out).
Grab the Cricut Design Space file for DIY Mickey & Minnie Mouse Favor Bags here.
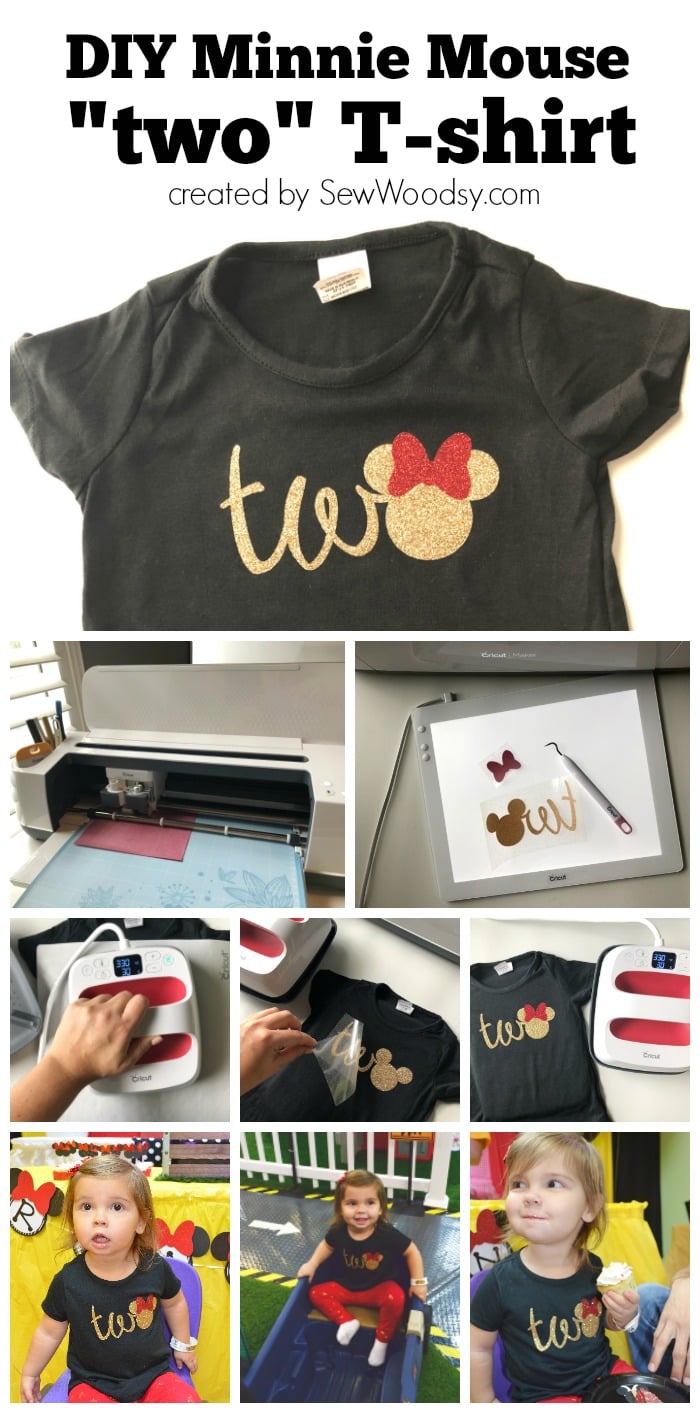
DIY Minnie Mouse “Two” T-shirt
You know I can’t plan a birthday party and not make a coordinating t-shirt! After all, DIY Iron-On Vinyl shirts are my absolute favorite to make! I used the same exact template I created for the cake topper to use for her shirt. So no reinventing the wheel over here. I used a black shirt with gold glitter and red glitter bow. In hind sight–I wish I had used gold glitter for the cake topper too. I used my Cricut EasyPress 2 6×7 to adhere the design onto the shirt. Cute simple shirt that took maybe 20 minutes to make from start to finish.
Grab the Cricut Design Space file for DIY Minnie Mouse “Two” T-shirt here.
Brunch Food Ideas for a Morning Birthday Party
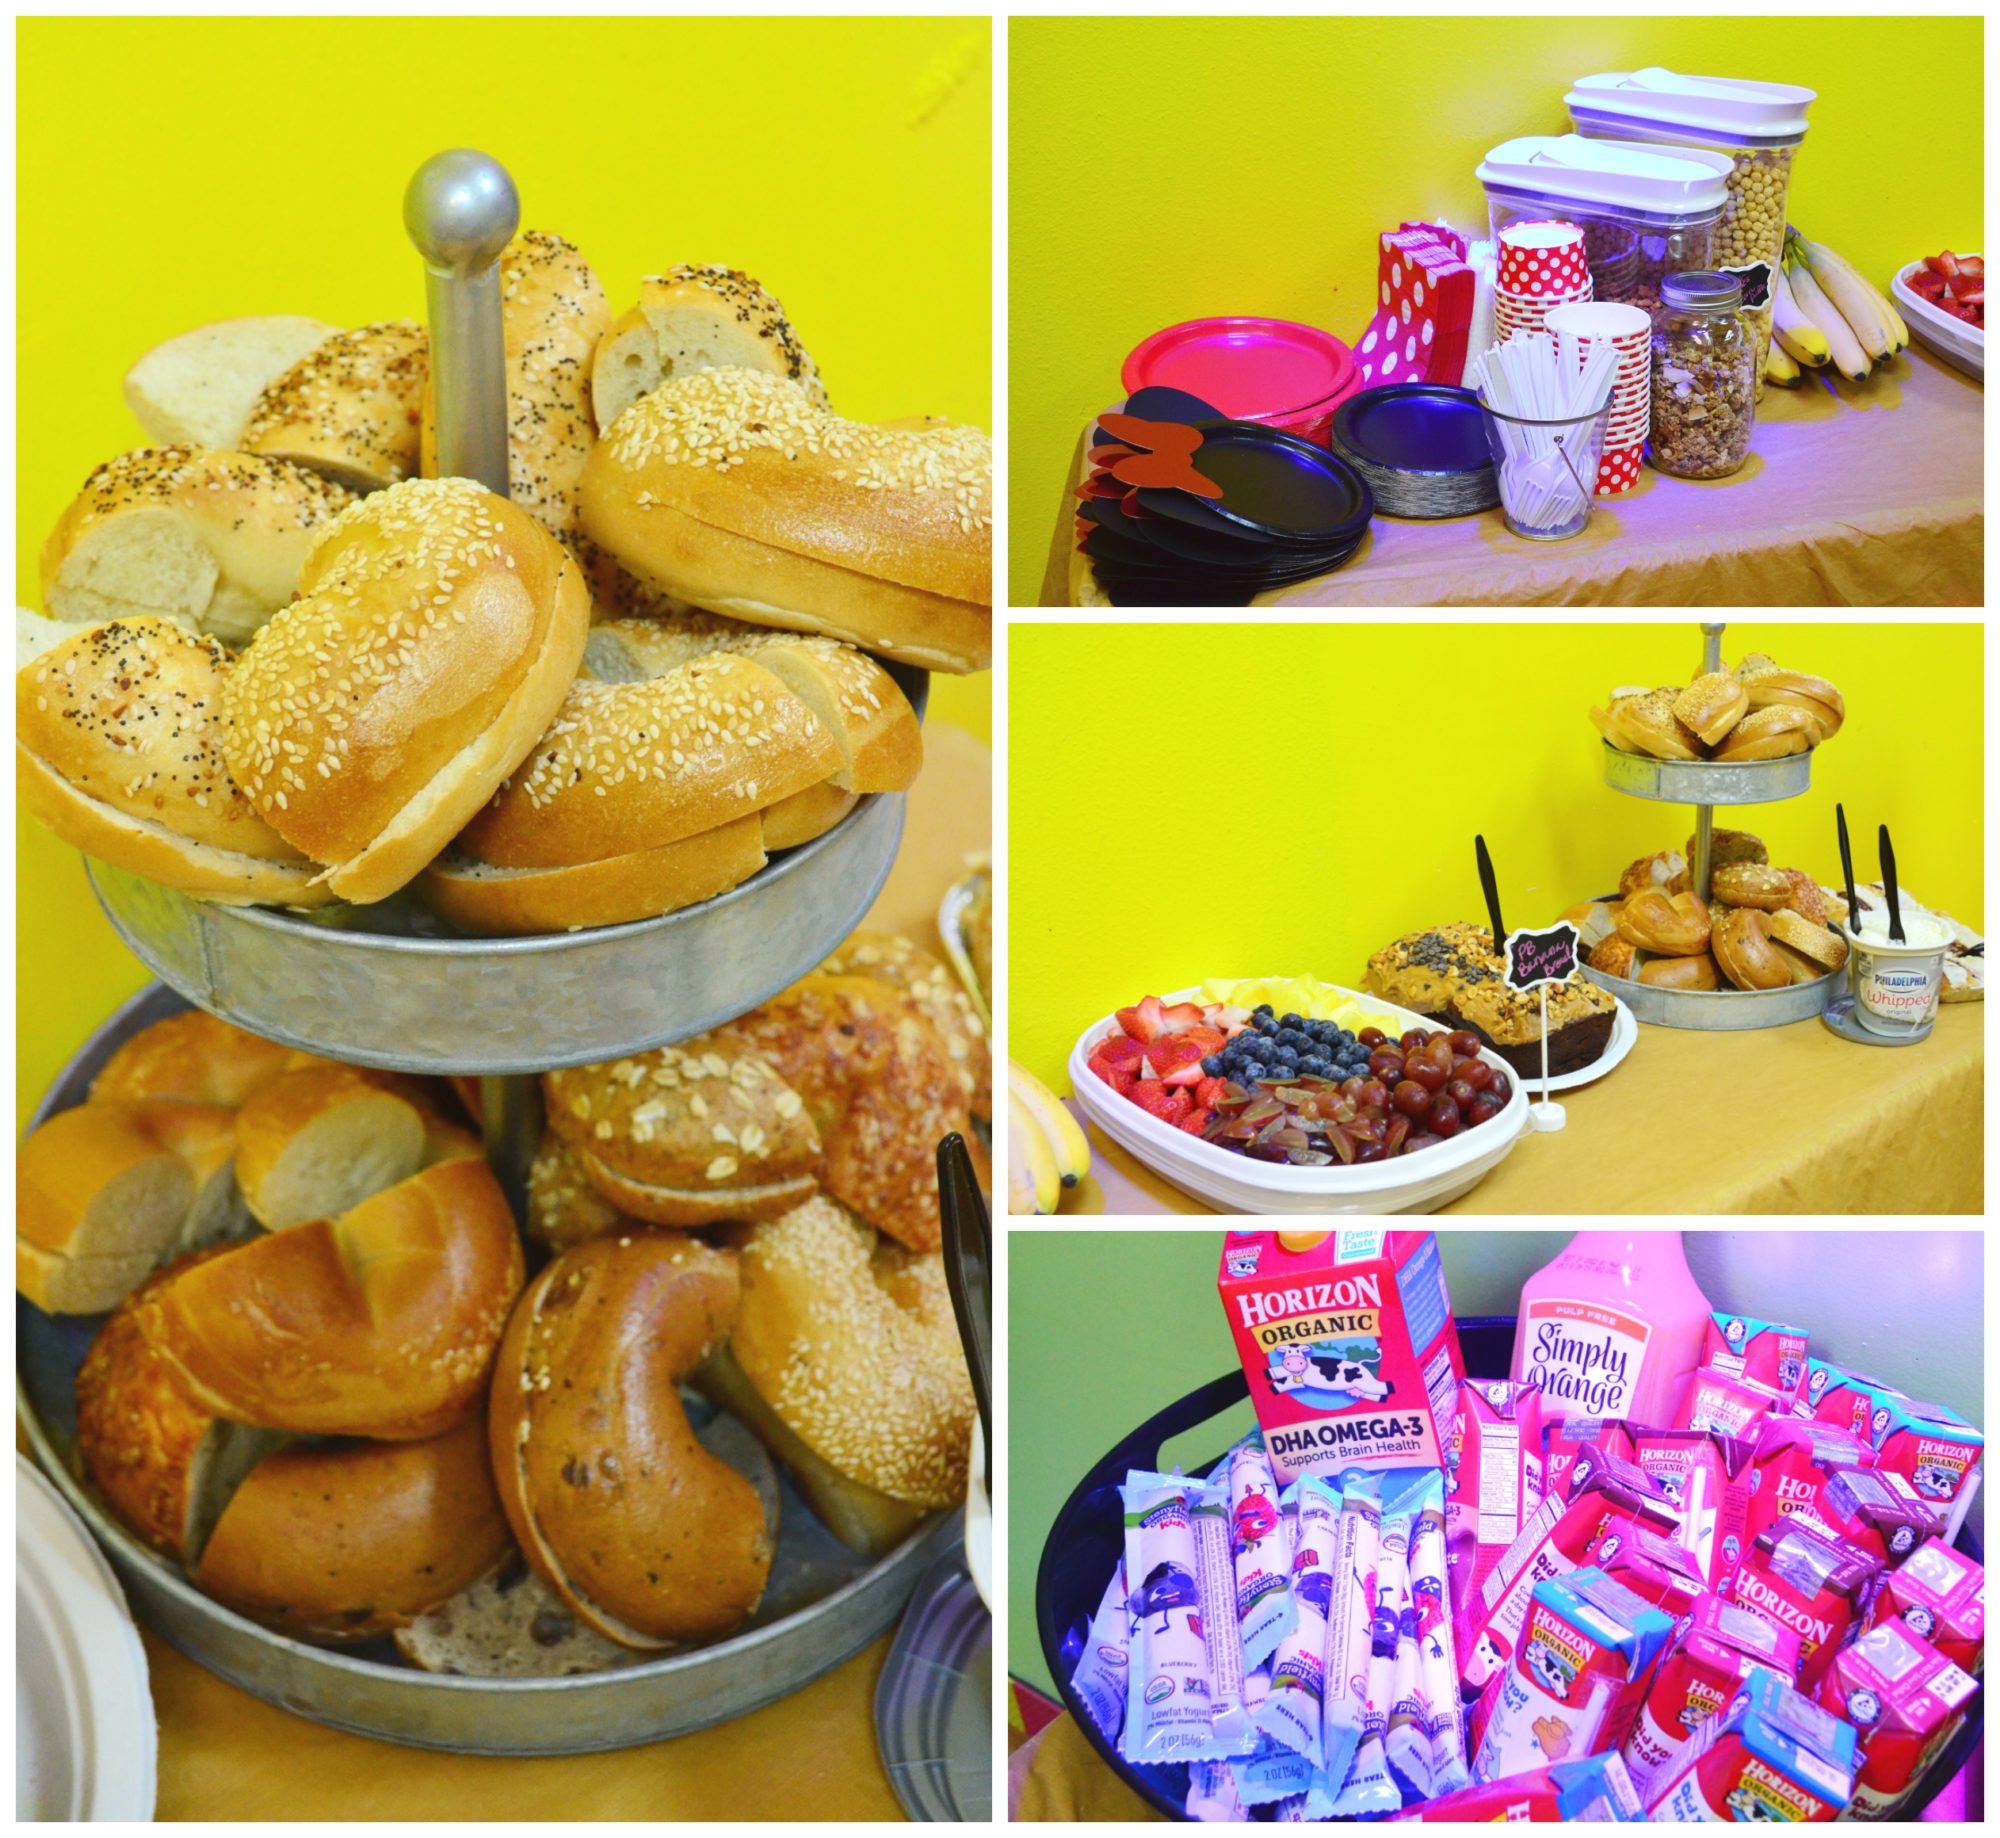
We had Reagan’s party from 9am-11am and knew pizza (which was provided by the place) was not really going to be an option. So, we opted to serve a brunch menu. Here is everything we served at her brunch Birthday party.
- 18 Bagels (sliced and then in half to have enough for everyone) & Cream Cheese (from Panera)
- 1 Dozen Donuts (From Dunkin Donuts)
- Peanut Butter Chocolate Chip Banana Bread
- Raspberry Pastry
- Fruit Tray
- Bananas
- Cereal & Milk Bar
- Yogurt & Granola Bar
- Stonyfield Yogurt Sticks
- Horizon Chocolate, Strawberry, and Plain Milk Boxes
- Juice Boxes
- Orange Juice
- 1 Box of Coffee from Dunkin Donuts (should have bought 2!)
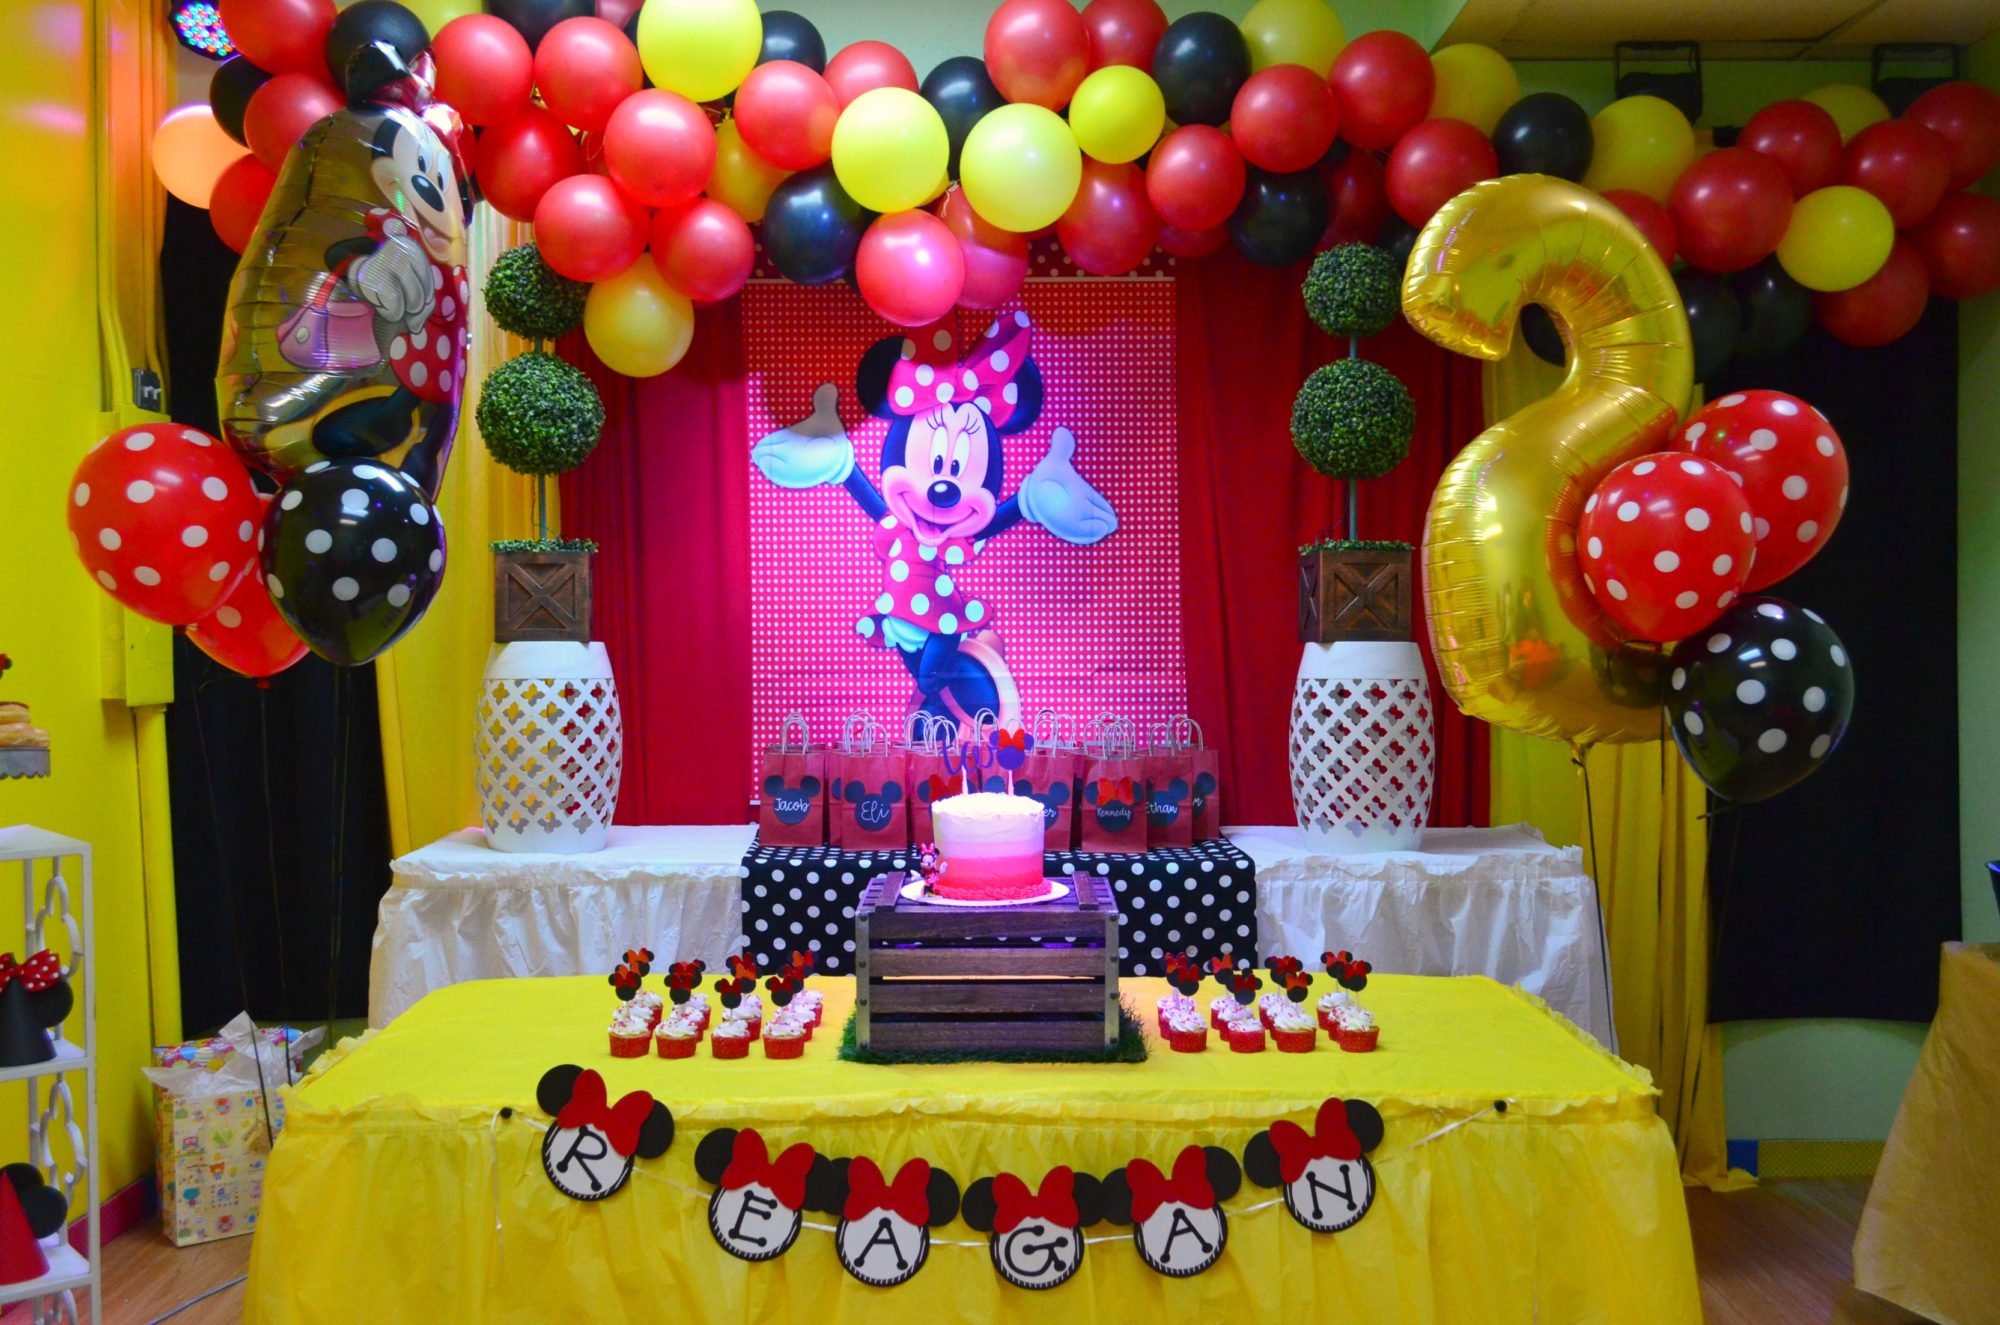
As you can see creating a Birthday Party with Cricut is super simple. You can achieve an amazing DIY Birthday Party with just a few simple materials. My main medium for the majority of my projects was cardstock! My guest were all wowed at the fact that I made a majority of what they saw. There is nothing I love more then creating memorable Birthday parties for my kids.
Comments & Reviews
Melissa Castle says
I’ve been looking for a simple and cute shirt design and this is PERFECT. Thank you so much for sharing! I can’t wait to make mine half as cute as yours!
Katie says
Hi Melissa! Oh perfect! I’m glad I could help!
Christina says
This is all ADORABLE! I am totally using this for my daughter’s upcoming second birthday. I am new to Cricut…thanks for including the designs!!
Katie says
Hi Christina! Thanks! I loved how it all turned out. I still have a few more post to publish before her 3rd birthday! lol Feel free to email me if you have any questions!