One of my goals for 2015 is to finish sharing our kitchen that we re-did in 2013! It’s been over a year and a half since we revamped our kitchen. As most of you know, our kitchen wasn’t in bad shape, it just wasn’t what we liked. We kept the guts of the kitchen; the cabinets and appliances and removed the formica countertops, installed a new deep sink and amazing Moen MotionSence faucet, and tiled the back splash. We also added some extra cabinet space.
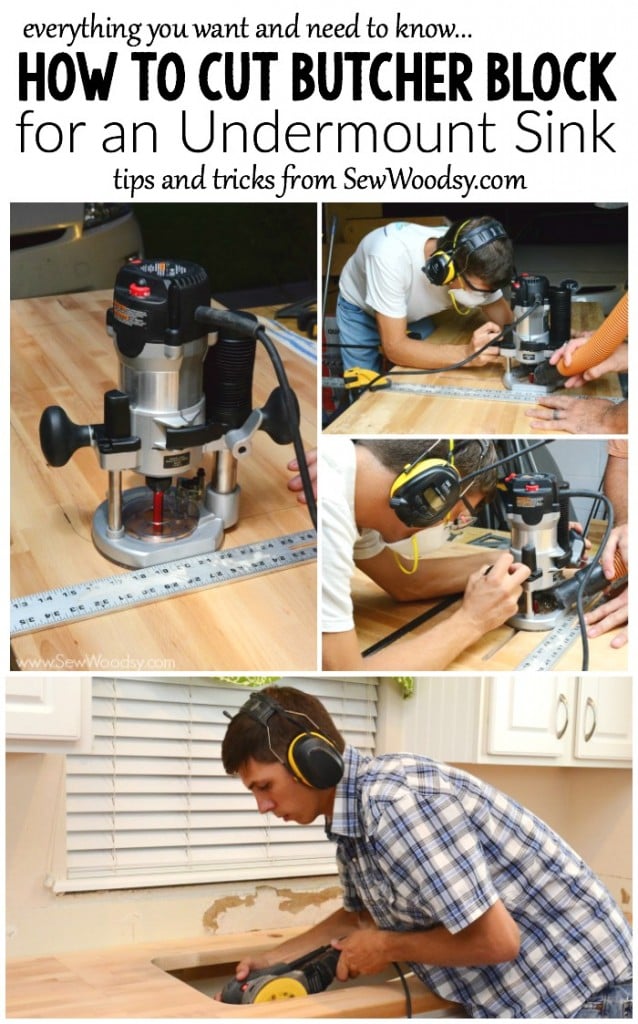
Today, we are sharing a few of the tips and tricks we found useful when we installed our butcher block countertops. We also created a quick video to show the process of cutting out the hole for the sink. Talk about pressure! One mess up and it could have been very costly!
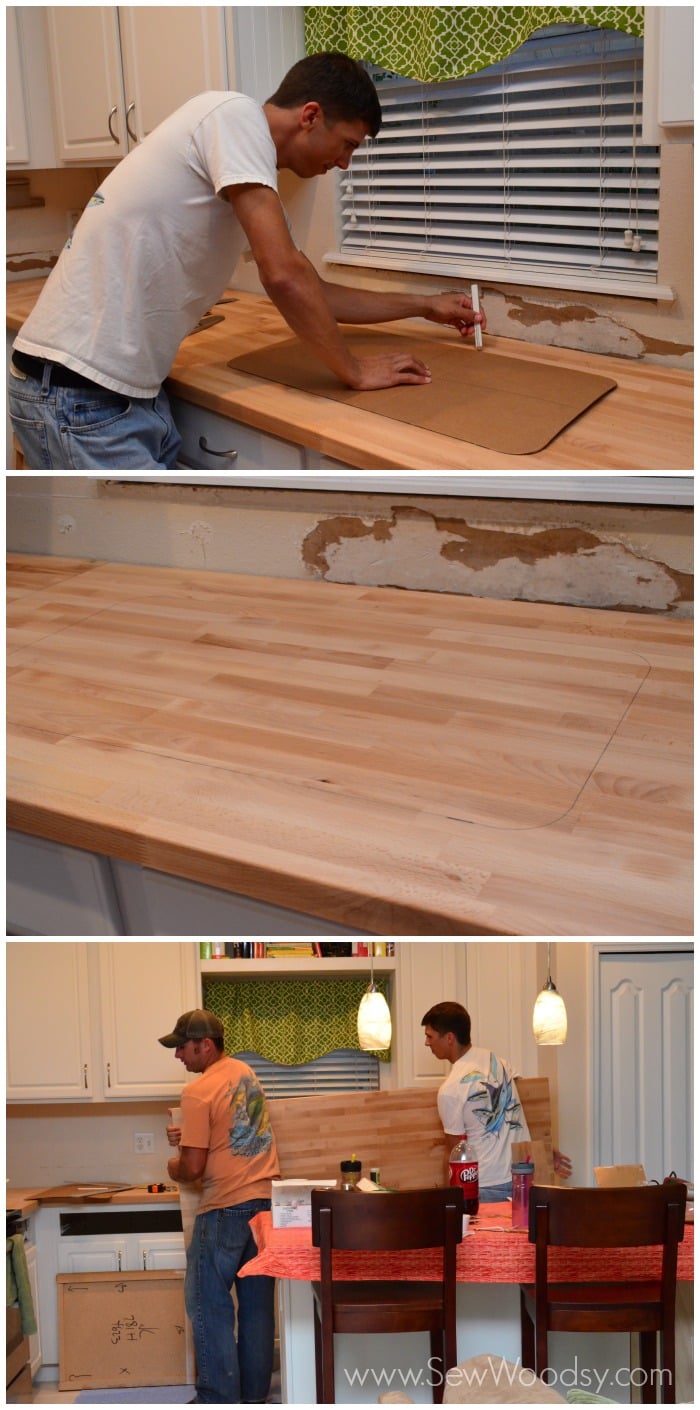
Jon laid out the countertops and then used the sink template that came with our Moen sink and traced the template exactly where we wanted our sink cut. Make sure you account for your front edge and enough space to mount the faucet. The template will not show you this. You’ll also want to make sure you sink is centered with the cabinet under neath so it won’t interfere with the cabinet.
Our friend, John, came over to help during the process. Since at the time I was 12-ish weeks pregnant and was too sick to move (and I wasn’t aloud to pick up anything heavy)!
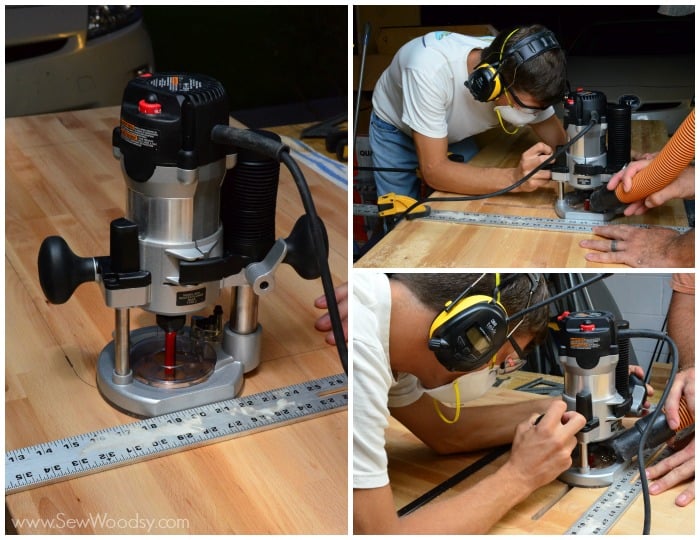
Then once they had the countertop in the garage it was time to get to cutting. Jon used a T-square to ensure that he kept a straight line. He also clamped the T-square to the butcher block so that it wouldn’t move. Jon used a Porter Cable Router with a half-inch straight-cut bit. He went around the template 1/4-inch to 3/8-inch deep each pass. It took about 4-5 passes until he was completely through the butcher block. 
After over an hour and a half of cutting they were done. It’s definitely helpful to have an extra set of hands. Once the sink was cut out, they moved the butcher block back into the kitchen and Jon started to sand the inside of the sink to smooth out the edges. 
And then he began sanding the rest of the countertops. And that my friends is what our kitchen looked like for a while! Our takeaways on cutting butcher block for an undermount sink:
- Trace the sink template in the exact spot you want it cut out in. Make sure you account for your front edge and enough space to mount the faucet. The template will not show you this.
- Use safety equipment when cutting.
- Try to take a practice run on a remnant piece of the countertop before you take the plunge cutting your actual countertop.
- Use a high-power Router with a half-inch straight-cut bit.
- It will take you a few passes (4-5)just to cut through the butcher block. Take your time.
- Use a T-square to ensure you are cutting a straight line.
- Use clamps to secure the T-square.
- Once the sink is cut out sand the inside and edges to ensure a smooth finish.
Looking for more information on cutting butcher block? Check out this great tutorial on cutting the sink hole from our friend Sarah over at The Ugly Duckling House.
Disclaimer: There are affiliate links in this post. As always all opinions are our own.
