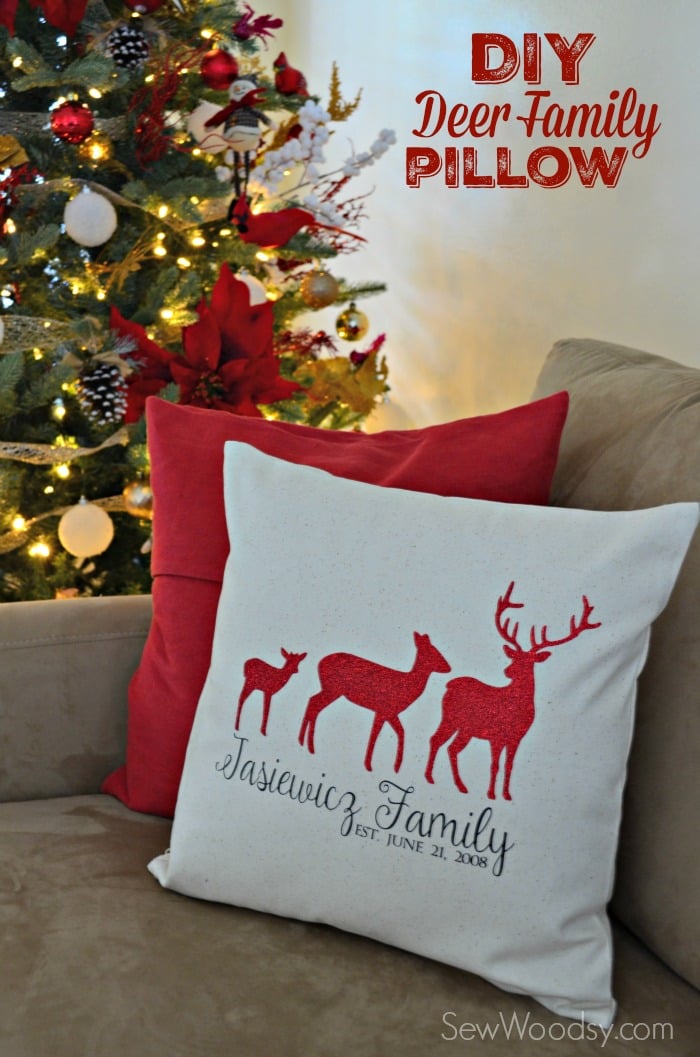
Ahh I’m so excited about today’s post. I made this DIY Deer Family Pillow Cover the other week and instantly fell in love with it. I’m pretty obsessed with deer this Christmas season, and wanted to make a few pillow covers. This is the first of my pillow covers I’m sharing this week. I’m participating in Cricut’s Secret Santa program this year. It’s the first year they are doing this. They have paired various craft and DIY bloggers with a Secret Santa. The ultimate goal is to make a gift and send it to a fellow blogger. To keep my Secret Santa really secret I’m not sharing her pillow today, but I will next week! I racked my brain on what to make her and then after I made this pillow I knew this is what I was going to make her. Since I love it so much I hope she will love it just as much! I don’t know her and just from reading her about page she is really into her family. I felt like this was the most appropriate gift for her!
And I also made a time-lapse video of me creating this pillow so you can see just how easy it is to make my DIY Deer Family Pillow Cover! I haven’t made a video in forever and it felt great to finally make one again!
Supplies:
- Cricut Explore
- Cricut Design Space
- Cricut Mat
- Red Glitter Iron-On Vinyl
- Black Iron-On Lite Vinyl
- Cricut Tools
- Pillow Cover
- Iron & Ironing Board
- Muslin Cloth
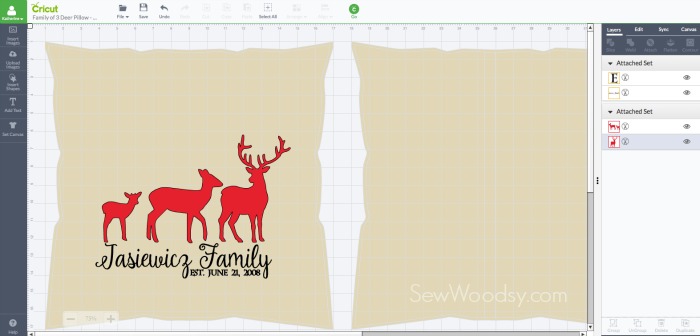
First, I created my design in Cricut Design Space. I choose a 16 x 16 pillow for my canvas and found a cream color that would match my pillow. Next up, I found a royalty free image online of a deer family. I liked the buck in Cricut Design Space better, so I deleted out the buck in the uploaded design and just used the doe and fawn. I attached both the buck and the doe and fawn together (you can do this by selecting all then clicking “attach”. Next up, I added two lines of text. I used Ameilia (a system font) as the script font and a block font for the date. Once I had it the way I wanted it to look I attached the two fonts together so that they would print exactly how it looked in Cricut Design Space.
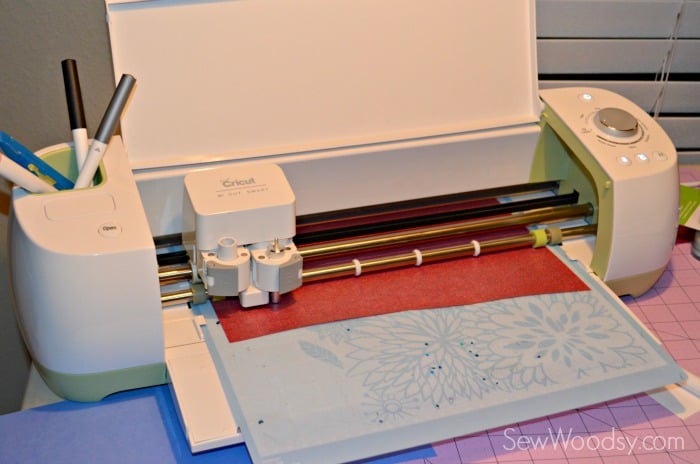
Next, send it to print. DO NOT FORGET to click “mirror image” or else you will have wasted precious Iron-On Vinyl! I selected “Iron-on” for the black and then “custom” setting for the glitter. You can scroll down the list and you’ll find an option for cutting “glitter iron-on”. Trust me–this is the way to go. The machine is smart–it knows exactly how to cut it!
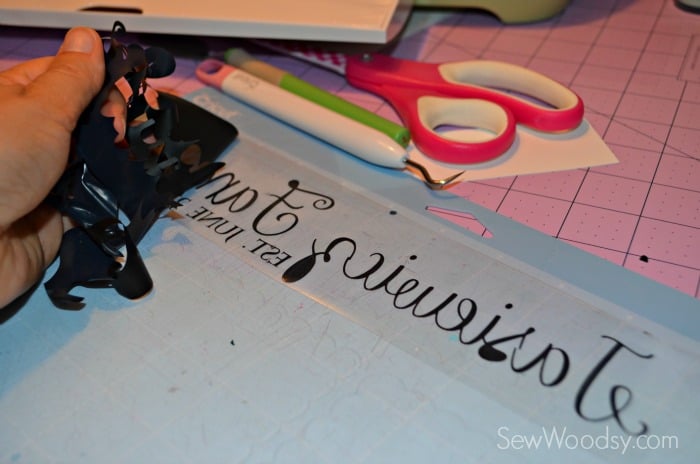
Begin to weed out your design (this means to remove all the negative Iron-On vinyl).
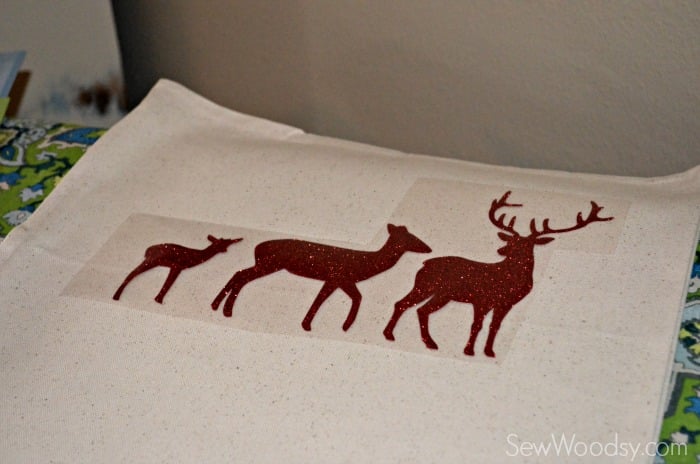
Once your ready, preheat your iron. Place the deer on the pillow first. Then, place a hot iron (with no steam) on top of the vinyl for a few seconds. This will set it in place.
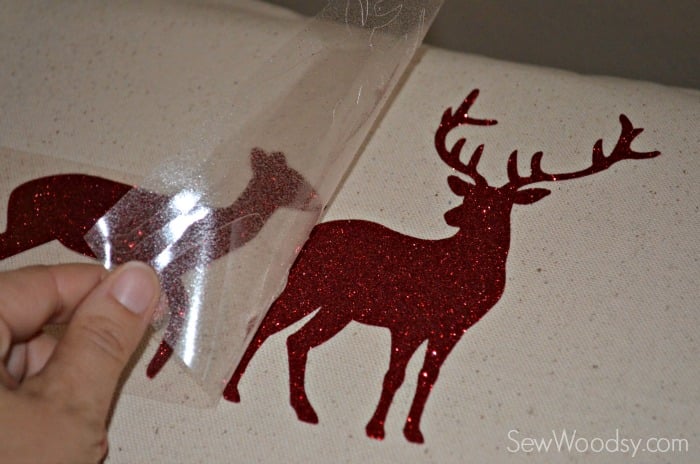
Then, carefully remove the plastic.
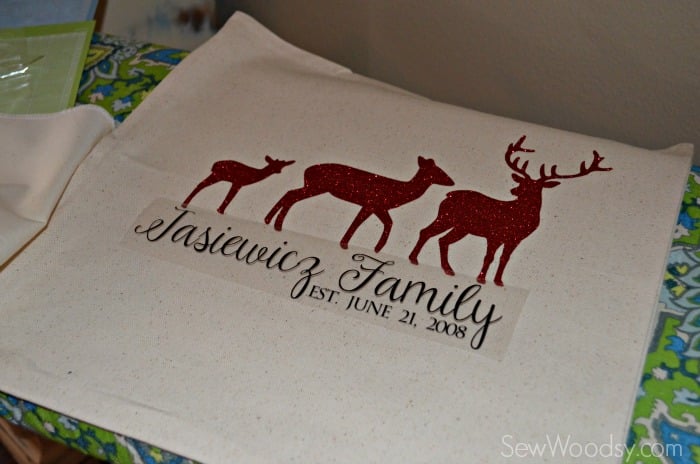
Then place the name under the deer, press with a hot iron (with no heat) until the plastic begins to bubble (only a few seconds).
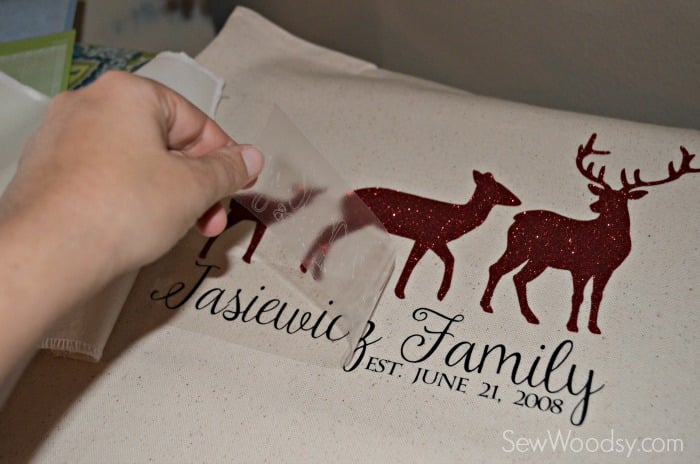
Then, carefully remove the plastic.
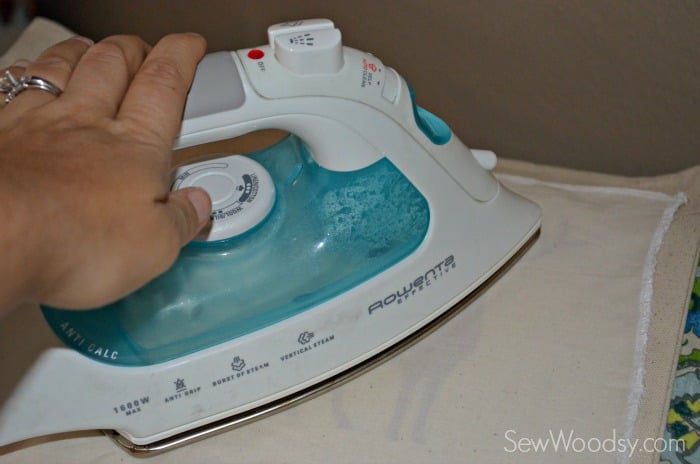
Lastly, you’ll want to heat-set with a cloth on top for a few seconds making sure that the Iron-on vinyl is really set on.
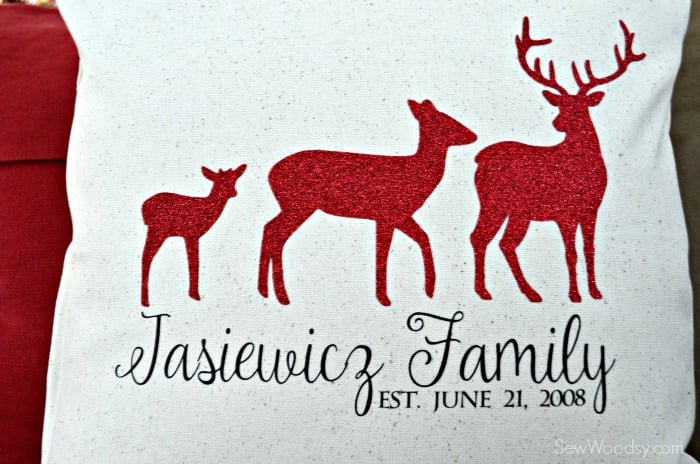
Here is a close up of what the design looks like. I used red Iron-On glitter and solid black Iron-On for the name.
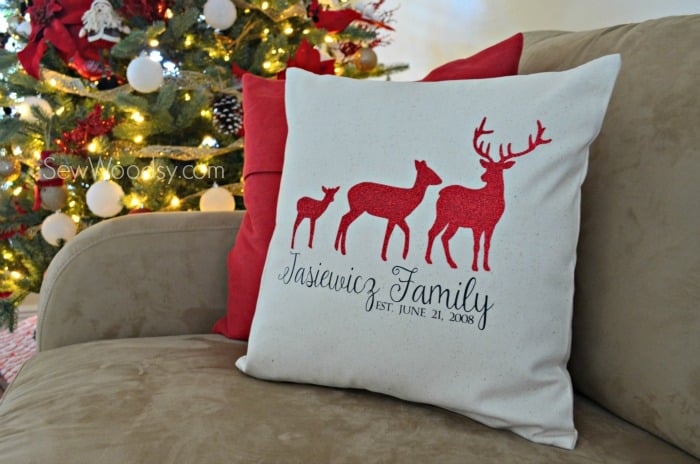
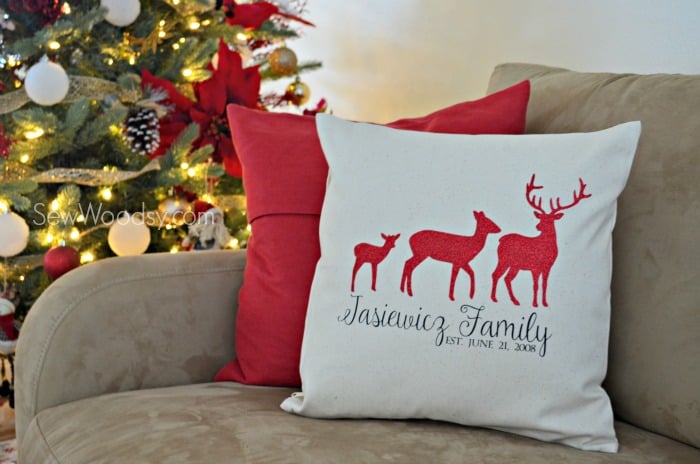
I seriously, am in love with this pillow cover. So in love that I’ve made a few as gifts for close family! And sent this to my Cricut Secret Santa. I’ll share what her pillow cover looks like next week once her pillow cover arrives!
I opted to use our anniversary date verse using Ryder’s birthdate. This was the big debate in our home. I like the way I made it–but either way works!

If you don’t have a Cricut Explore or just want to grab some more supplies I invite you to check out Cricut 12 days of Christmas: Shop amazing deals through 12/16! And you still have time to get Free shipping on all orders with code FREESHIPDEC at Cricut.com
Disclaimer: Cricut supplied me with all the Cricut supplies for this post. I love the brand and would use it regardless. As always all opinions are my own!
