• Skip to primary navigation
  • Skip to main content
  • Skip to primary sidebar

Sew Woodsy logo

  • Patriotic
  • DIY
  • Crafts
  • Cricut
  • Travel
  • About
menu icon
go to homepage
search icon
Homepage link
  • Home
  • Patriotic
  • DIY
  • Cricut
  • Travel
  • About Us
    • Email
    • Facebook
    • Instagram
    • Pinterest
    • RSS
    • Twitter
    • YouTube
  • ×

    Sew Woodsy » Sewing

    Published: Jan 8, 2012 · Modified: Jan 11, 2012 by Katie · This post may contain affiliate links.

    How To Hem Jeans

    Sharing is caring!

    4 shares
    • Facebook
    • Twitter

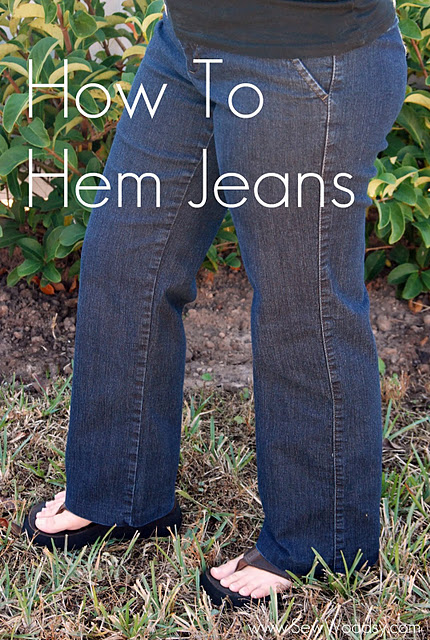
    Two months ago I found a pair of jeans that I loved, but of course were way too long for me. I’m 5’1, so naturally I have a difficult time finding pants that fit my short self! I’ve spent money in the past for a skilled tailor to hem my pants to fit me, and was thinking about paying him a visit when I decided to be bold and attempt to hem them myself. I’ve watched the tailor do it before, and it’s taken them only a few minutes (of course they are a pro and do it for a living). How difficult could hemming my own jeans really be?
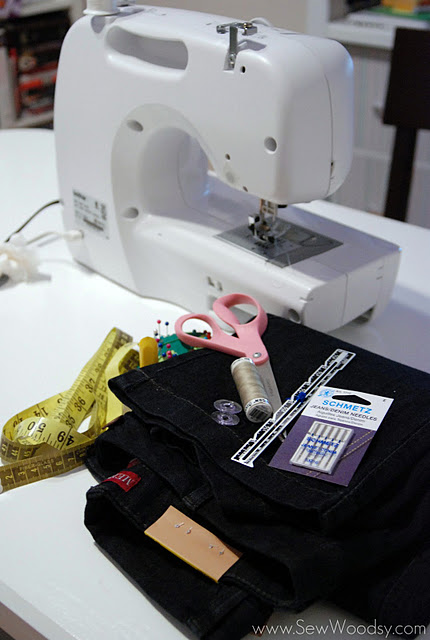
    So I challenged myself to save a little money and learn how to hem my own jeans. I watched multiple YouTube tutorials and read a few articles online and I was ready to complete the challenge! I’m here to teach you how to hem your own denim jeans (in about 20-30 minutes)! First, gather all of your supplies: sewing machine, denim needle, thread, jeans, tape measure, ruler, seam ruler, chalk pen, scissors, and straight pins.
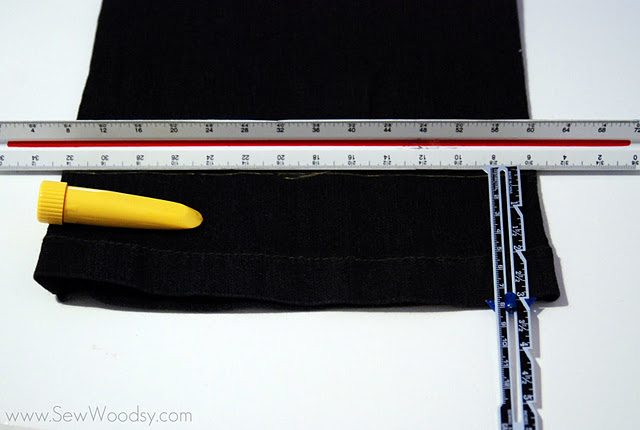
    Next, decide how many inches you need to hem your pants. In my case, I needed 3 inches taken off the bottom.
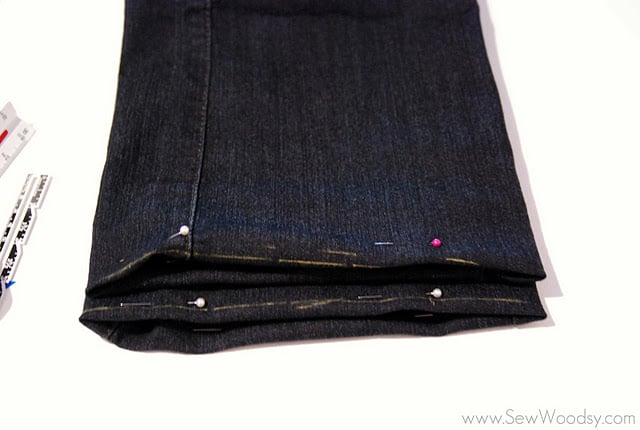
    Next, you want to pin the jeans at your desired length, and try them on. It’s always good to double check before you cut. Once you cut the jeans their is no going back!
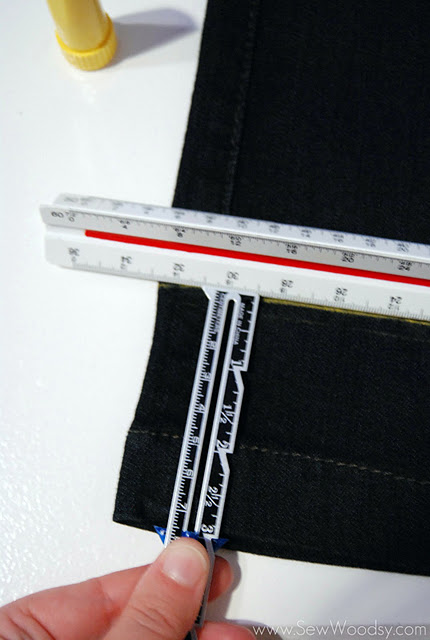
    Next, you’ll want to take the pins off the jeans. Then, using a ruler and a seam ruler begin marking out the three inches. I went inch by inch making sure that my line was exactly three inches throughout my markings.
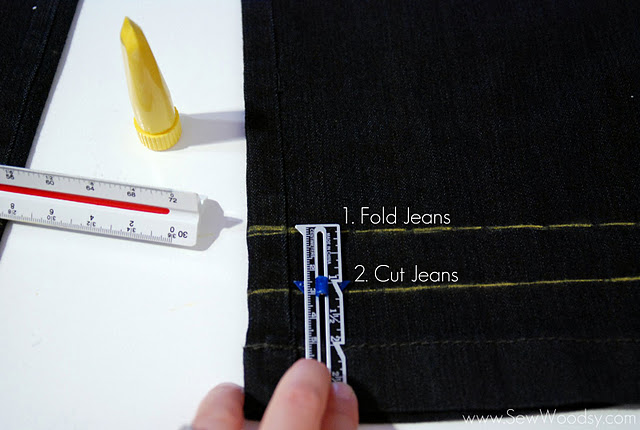
    Once you’ve marked the three inches you will want to mark another line one inch below the hem line. This will allow a one-inch seam allowance.
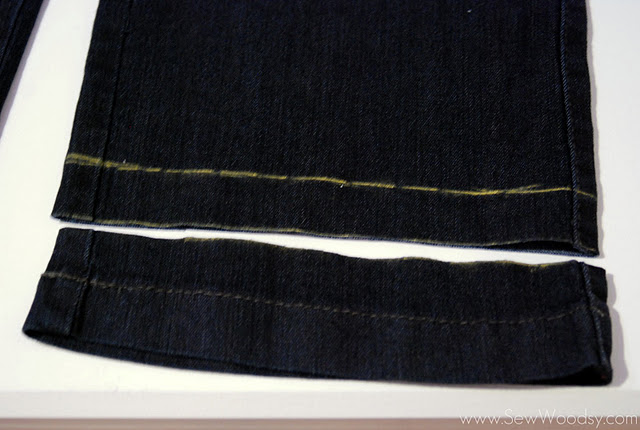
    Here is the big moment, you cut the first chalk line. You’ll notice you still have a yellow chalk line visible. That is where you will fold the jeans.
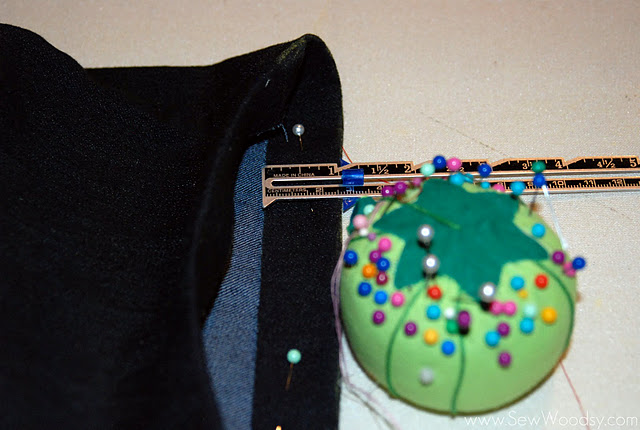
    Fold the jeans, and begin to pin. Using your seam ruler double check to make sure that your seam allowance is exactly one inch all the way around the pant leg.
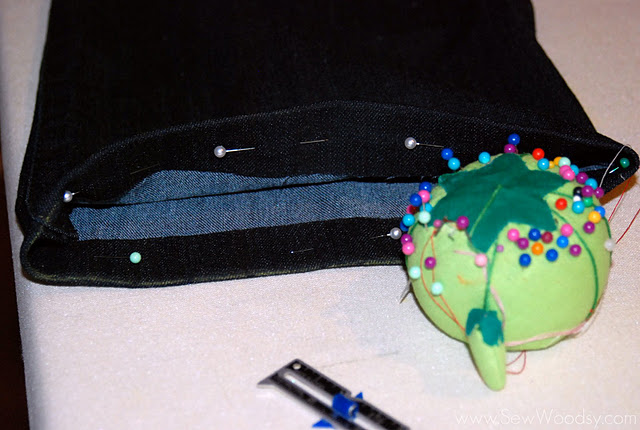
    This is what your pant leg should look like before you begin to hem.
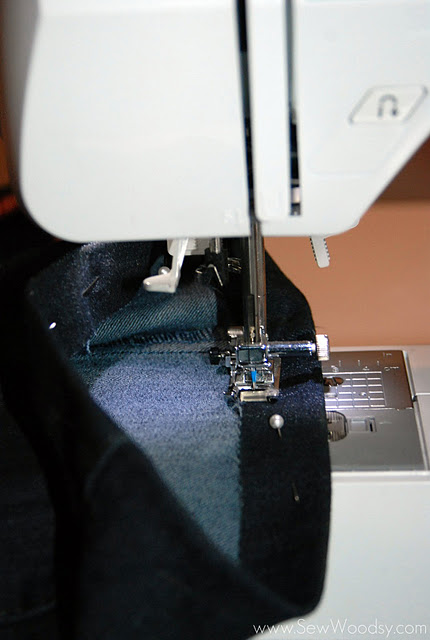
    Begin sewing a straight stitch on the edge of the jean leg. Once you’ve sewn around the pant leg, press the seam using a hot iron and steam. Repeat this step for the other pant leg.
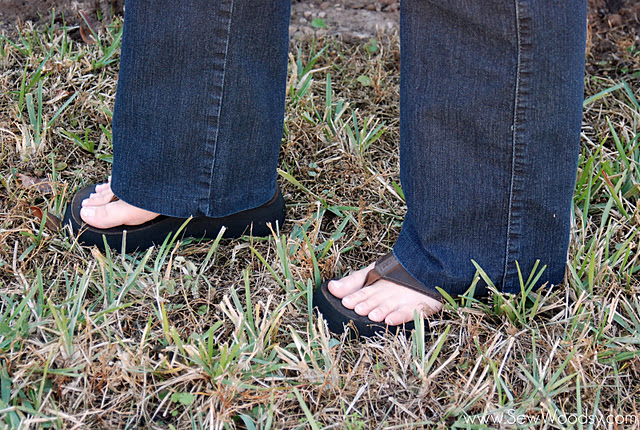
    Wear your pants proud knowing that you hemmed your own jeans!

    And because I hardly ever share photo’s of our dog, Lola, on Sew Woodsy… here is Lola posing with my hemmed jeans!

    *UPDATE–I left the cut jeans raw and did not surge or stitch around them (just wasn’t thinking about it at the time I was hemming my jeans). Yes, the edges have frayed a little bit, BUT it’s not noticeable. This is something I will take into consideration on my next pair of pants I hem!

    « Tacky Christmas Sweaters
    To Tuft or Not To Tuft… that is the question! »

    Reader Interactions

    Comments

    1. B.Cheniful says

      January 08, 2012 at 10:42 pm

      Awesome tutorial girl! Thanks sharing–maybe I’ll get the guts to try it myself 🙂

      Reply
    2. Anngela says

      January 09, 2012 at 9:16 am

      Lucky your jeans are too long–mine are always too short, and there’s no getting around that!! 😉
      Those jeans look super cute!! 🙂

      Reply
      • Mrs. Woodsy aka Katie says

        January 11, 2012 at 8:09 am

        Thanks Anng! Do what Sarah (While They Snooze) does… she takes the hem out of her pants to make them longer! BTW… the jeans were $30 at Target!

        Reply
    3. Karrie says

      January 09, 2012 at 1:16 pm

      I usually hem my kid’s pants keeping the original hem. Also, on my own pants, less scary than cutting them and then having them crooked! I followed a tut like this one: http://www.sew-much-ado.com/2011/06/tutorial-how-to-hem-jeans-and-keep.html (not my blog, but super helpful fi you want to keep the hem!)

      Reply
      • Mrs. Woodsy aka Katie says

        January 11, 2012 at 8:09 am

        I have heard of keeping the original hem. I think I might try that on my next pair of jeans I need to hem. I love Sew Much Ado, so thanks for sending over the link!

        Reply
    4. Jacqueline King says

      January 10, 2012 at 7:06 am

      A great explanation. Any beginner could follow your tutorial. However, I am surprised you did nothing to finish the raw edge before you sewed. A couple of options: 1. Press over 1/4″ on raw edge first, then fold over and stitch. 2. Run a zig-zag stitch along raw edge before you press and sew new hem. if you have a serger, serge and sew away! Good job and keep going. After the first 100 hems, it gets easyier!

      Reply
      • Mrs. Woodsy aka Katie says

        January 11, 2012 at 8:02 am

        Thank you for your advice. In hind sight I would definitely finish off the raw edge of the pants next time around.

        Reply
    5. Sarah Forhan says

      January 10, 2012 at 10:34 am

      Great tutorial. I too have to hem my jeans. *sigh*

      Reply
    6. K Watson says

      January 10, 2012 at 1:25 pm

      Correct me if I am wrong, but you are leaving an unfinished edge on your hem. You should add at least 1/2″ more to fold under and have a nice clean finish to the inside of the hem.

      Reply
      • Mrs. Woodsy aka Katie says

        January 11, 2012 at 7:58 am

        Yes, I did leave an unfinished hem on my jeans. *Keep in mind this was my first time ever hemming pants. I will keep in mind your advice for future pant hemming escapades!

        Reply
    7. Rita says

      January 10, 2012 at 3:34 pm

      Seems very easy! Does the hem fray since you don’t turn it under?

      Reply
      • Mrs. Woodsy aka Katie says

        January 11, 2012 at 7:59 am

        Yes, it was! I did sew close to the unfinished hem, so the fraying is not bad at all and not visible to the outside of the jean.

        Reply
    8. Jill Frank says

      January 13, 2012 at 6:41 pm

      I too have to hem just about any pair of pants I have. One thing I have learned – especially with jeans – wash them at least twice before you hem! The first time I didn’t wash, I had to make them into capris…

      Although a serger is not necessary, they sure make life easier. I got mine off Craig’s list for $100. I highly recommend one, especially if you are going to be hemming clothing a lot.

      Reply
      • Mrs. Woodsy aka Katie says

        January 14, 2012 at 9:27 pm

        I did wash them once before hemming. I have been keeping my eyes peeled to Craig’s List for a serger! Thanks for stopping by!

        Reply

    Leave a Reply Cancel reply

    Your email address will not be published. Required fields are marked *

    Primary Sidebar

    • Facebook
    • Instagram
    • Pinterest
    • RSS
    • Twitter
    • YouTube
    Male and female hugging on each other in the woods.

    Hi, we're Katie & Jon! Welcome to our home away from home!

    Sew Woodsy is a lifestyle blog focusing on crafts, home DIY projects, family, travel and all things life. Get comfy and join us on our adventure!

    More About Us →

    Featured On

    9 different logos from various media outlets where Sew Woodsy has been featured on.

    Patriotic Projects

    • 30+ Patriotic Crafts
    • Patriotic Coloring Pages
    • “Home of the Brave” Patriotic Cake Topper
    • USA Mini Bunting Banner

    Trending

    • How To Grow Green Onions
    • How to Host a Baby Shower at Work
    • Tips & Tricks on Installing Butcher Block Countertops
    • How to Create a Natural Log Pathway + Video

    Footer

    ↑ back to top

    9 different logos from various media outlets where Sew Woodsy has been featured on.

    About

    • About Us
    • Privacy Policy
    • Accessibility Statement

    Newsletter

    • Sign Up! for emails and updates

    Contact

    • Contact
    • Work with us
    • Advertise

    Copyright © 2010 - 2022 Sew Woodsy