Make a DIY Spider Web with webbed person and spider sacks to make a big statement for only a little bit of money! All you need is rope, newspaper, cheesecloth, and faux spider webs to recreate this giant homemade spider web.

It should come as no surprise that Halloween is one of our favorite holidays of the year. Early last October (2009) we watched an episode on HGTV that was all about decorating for Halloween. One of the DIY decorations they made was a very large spider web and webbed person.
We ran to the store the very next day, purchased the supplies we needed, and began constructing a life-size spider web of our own using rope. Fast forward one year later… we wanted to strive for a bigger and better web this year. That’s where the larva sacks came into play.
Why this Works
We love constructing our own decor for a few reasons:
When we make our own Halloween decor we can typically save a lot of money.
This web provides a big impact for not a lot of money at all.
You can customize the web size as well as how many or if you want a webbed person and/or the larva sacks!
Supplies
- 2 packets of 25 foot thin white rope
- Newspaper
- White Tape
- Cheesecloth
- White Spray Paint
- Screw with anchor
- Push Pins
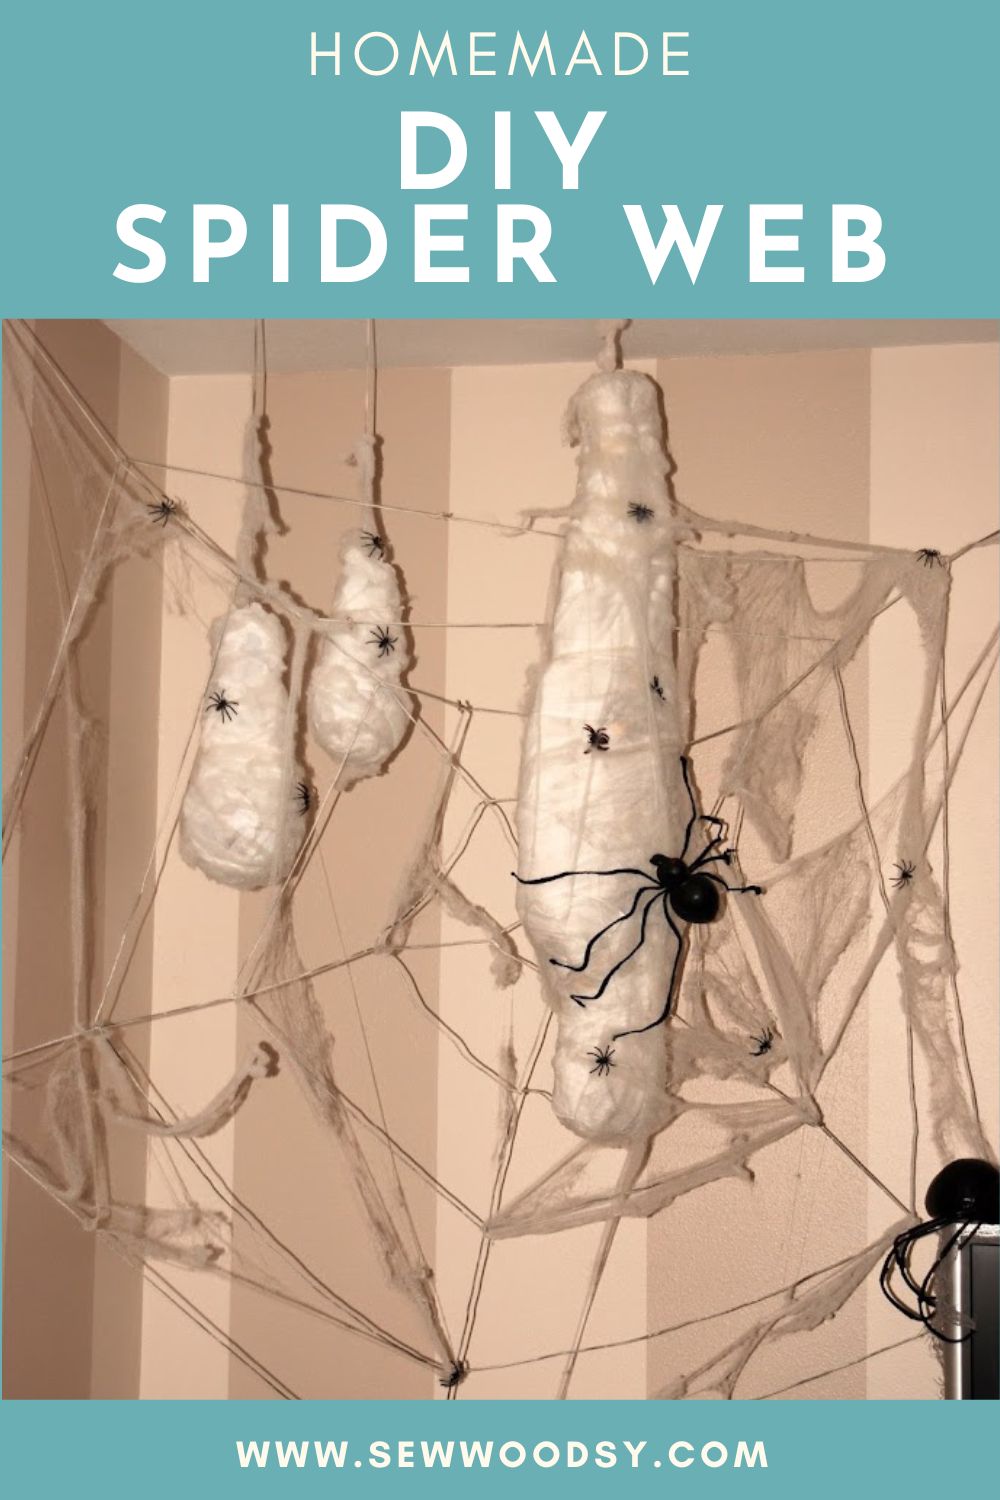
How to Make a Giant Spider Web

We used 2 packets of 25 foot thin white rope. Cut a 6-8 inch center ring and then take 5 equal pieces of rope and connect them to the center ring. These will be the pieces of rope that connect to the walls. From there you just start building off of it.

*I wish I had pictures to show you, but this web was constructed last year! This year we sprayed a black spray paint on to parts of the web to give it more of a rugged look.
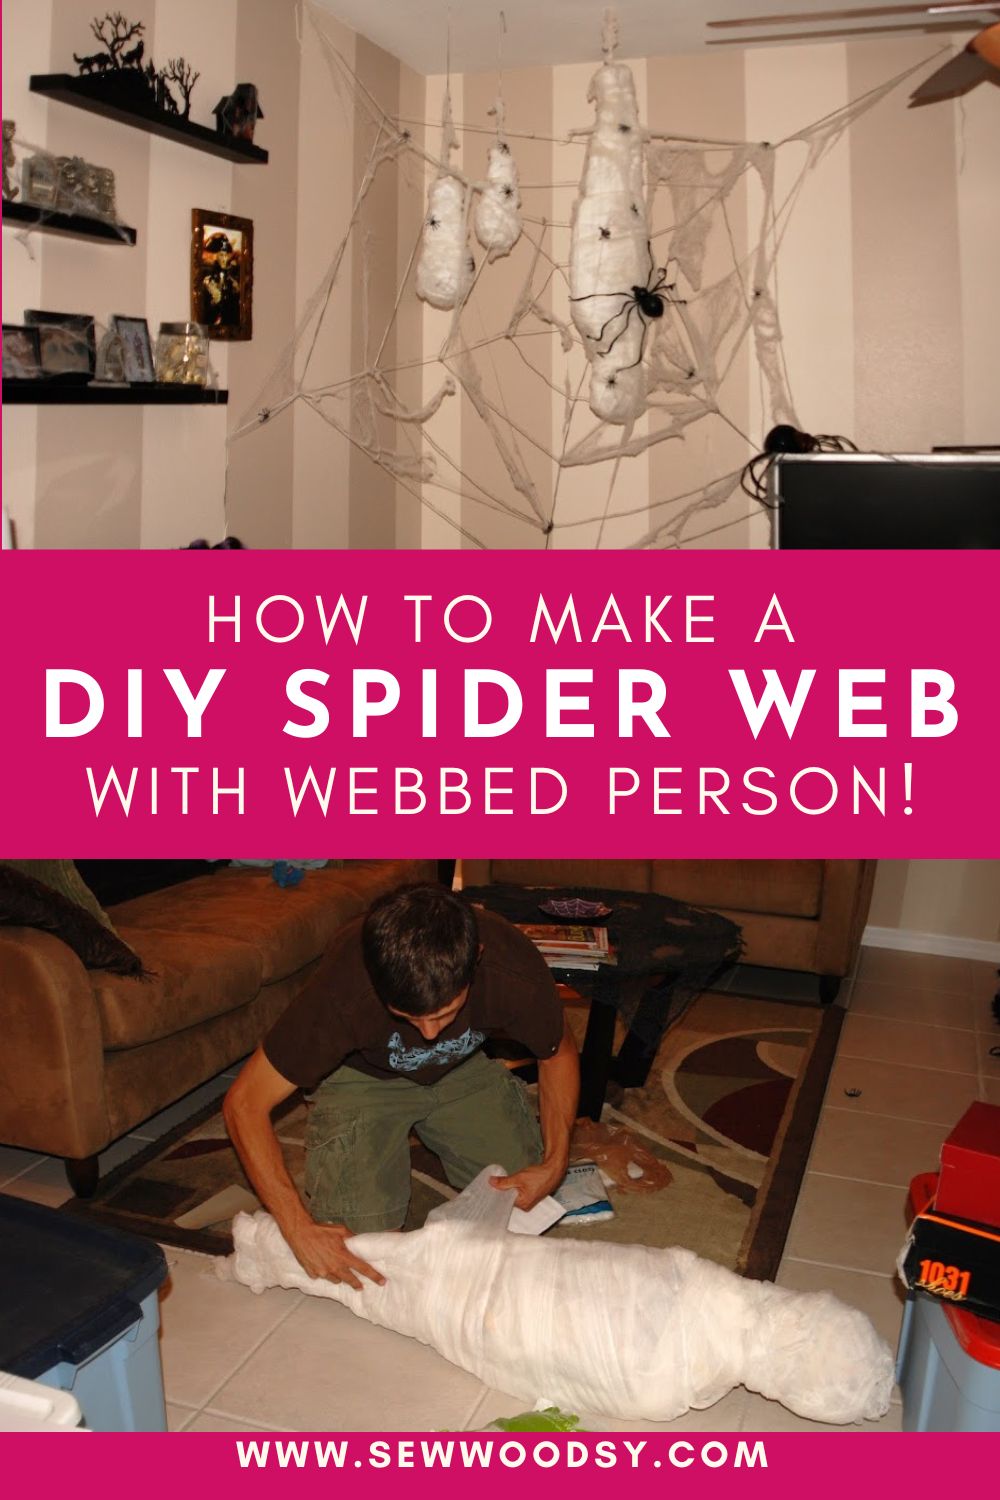
How to Construct the Webbed Person

This webbed person we made was about 4-ish feet in length. You can make it to be as large or small as you’d like.

We constructed the body using about a week’s worth of newspaper and a roll of white tape.
Then we used a few packages of cheese cloth and wrapped him until we could not see any more newspaper. Since pulling him down from the attic this year we noticed we could see quite a bit of the newspaper so we wrapped another package or two of cheesecloth around him. Once you have all the cheesecloth applied you’ll want to add cobwebs to your “webbed” person!

Now it’s time to hang this poor soul…
We literally hang him by part of the cob web we use to wrap him with!

Unfortunately, a thumbtack will not hold this webbed person up. It’s too heavy, so you will need to drill a hole in your ceiling and attach the mummy with a anchor and screw!
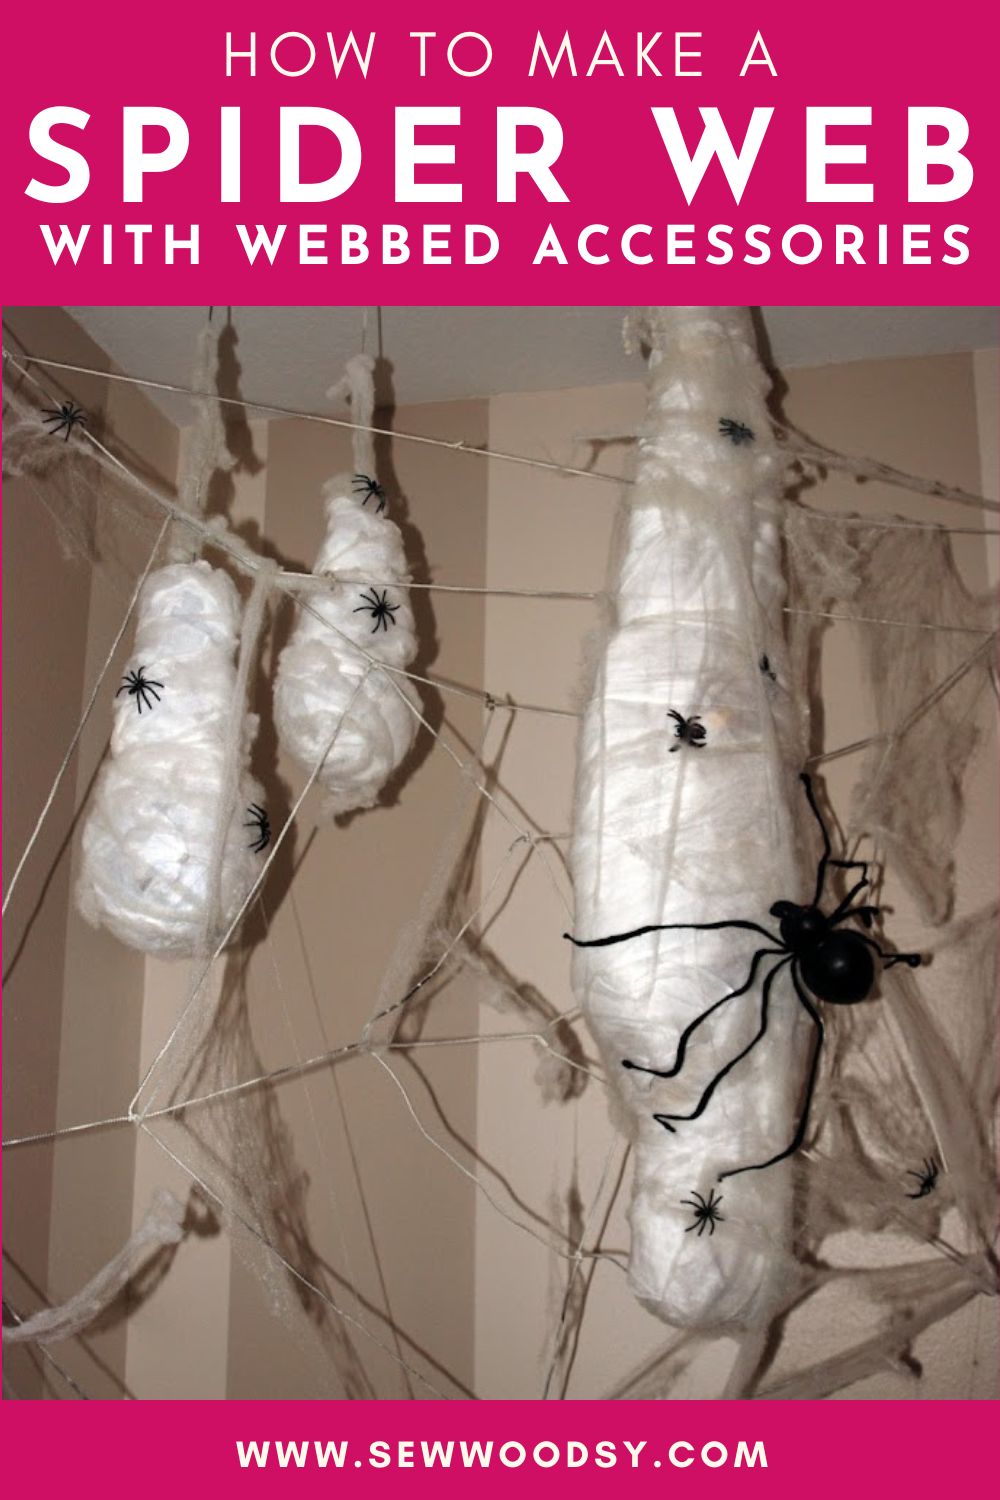
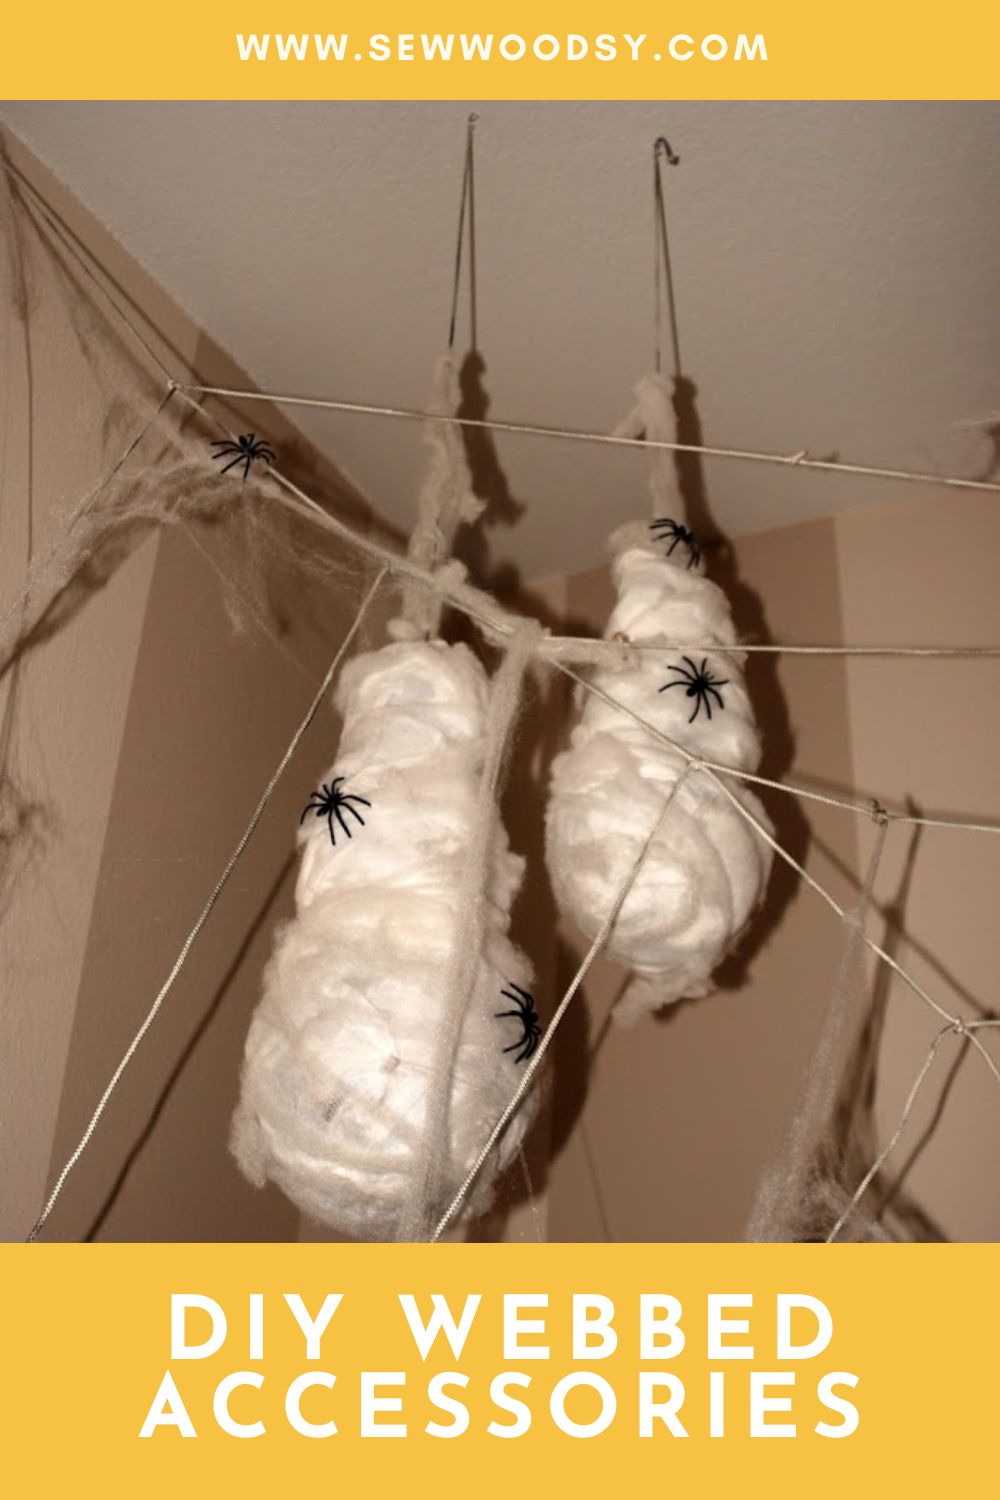
How to Construct the Larva Sack’s

First you will want to ball up newspaper and tape it together. Then you’ll want to spray the newspaper white. Attach a piece of string to each of the sacks, and begin wrapping with cheese cloth.
After you have enough cheesecloth on your sacks you’ll want to wrap some more cobwebs around them.

Now you may begin to hang your larva sacks. Luckily we did not need to drill another hole into our ceiling!

Regular push pins worked fine!

Lastly, you’ll want to add tons of cobwebs to your life-size web and additional spiders of all sizes!

I hope you found this tutorial helpful! Feel free to email me a picture of hows your turned out so I can share it on social media.
DIY Halloween Decor
Looking for more DIY Halloween decor projects? Try a few of my favorites.
If you make this DIY Spider Web, I would be honored and love for you to take the time to leave a star rating and comment! I spend hours developing and testing these projects, and always love to hear feedback and user experience!
Don’t forget to FOLLOW ME on Facebook, Pinterest, and Instagram, and subscribe to my email list!
Disclaimer: Tutorial updated with newer information, October, 2022. We made this project back in 2009/2010 and no longer have the project. These are rough estimates and an interpretation on how we built it over a decade ago.
