This is a sponsored conversation written by me on behalf of Cricut. The opinions and text are all mine.
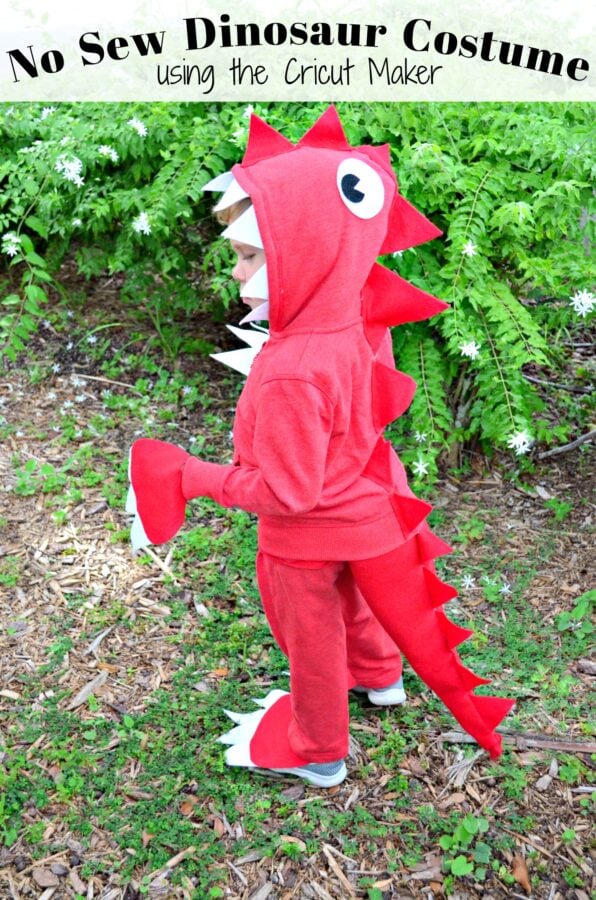
I’m so excited to share my No Sew Dinosaur Costume today. I made this costume for my son last year, and in my typical fashion–last minute. We love making DIY Halloween costumes in my home. Last year, I shared a few photos and even a live video on Facebook last year. It was my first time cutting felt with the Cricut Maker and I instantly fell in love. I partnered with my friends at Cricut today to share the full tutorial. I own a sewing machine and like to sew, but to be honest–it’s been so long since I’ve sewn I felt more comfortable just hot glueing this costume together.
It sounds crazy to hot glue a costume but trust me… hot glue is life in the costume world. Even better–it actually holds up in the wash. I made this costume so my son could wear the sweatshirt portion all winter long. He loved it and can still fit into it! This costume took me about two hours to put together and that was after I figured out what sizes to cut all the pieces and parts together. However, since I have done all the heavy lifting and created the templates in Cricut Design Space™ it should only take you an hour tops to put this together.
Supplies for No Sew Dinosaur Costume:
- Cricut Maker™
- No Sew Dinosaur Costume file found on Cricut Design Space™
- Cricut Rotary Blade™
- Cricut 12 in. x24in.FabricGrip™ Mat
- Felt
- Hot Glue Gun + Glue Sticks
- Hooded Sweatshirt with Pants
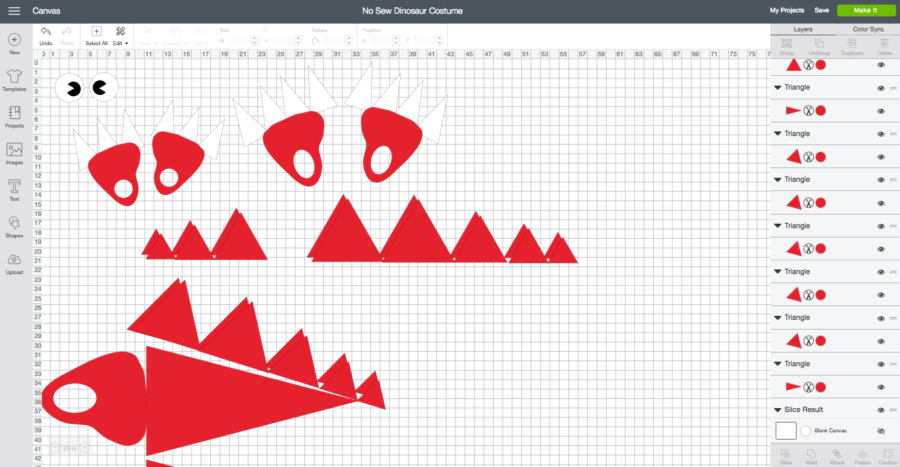
First, you’ll want to pull up Cricut Design Space™ and select my No Sew Dinosaur Costume file. I’ve done all the work for you so you don’t have to guess. This was sized to fit a 3t sweatsuit. So please keep that in mind! You may need to duplicate or even make yours larger. I also went with red felt because it’s what I had on hand. You could do a coordinating color and that would work too. Just change one triangle then go to the “color sync” option on the right hand side and drag all the red shapes to the color you select. That way–visually you know you are cutting the color you want. But that’s not something you have to do–just something for us visual people.
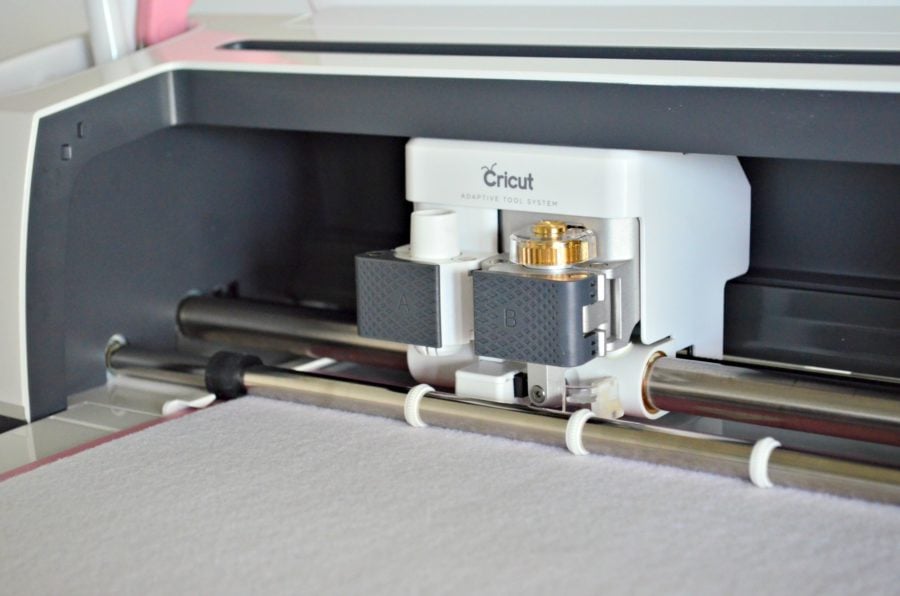
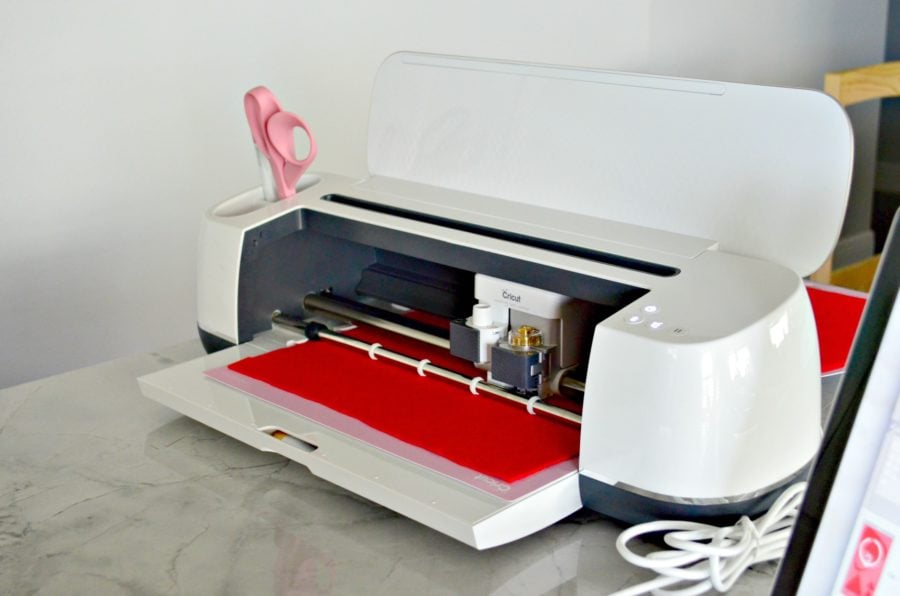
Make sure you place the Cricut Rotary Blade™ in the Adaptive Tool System “B” slot. The Rotary Blade™, glides, rolling action, cuts through virtually any fabric!
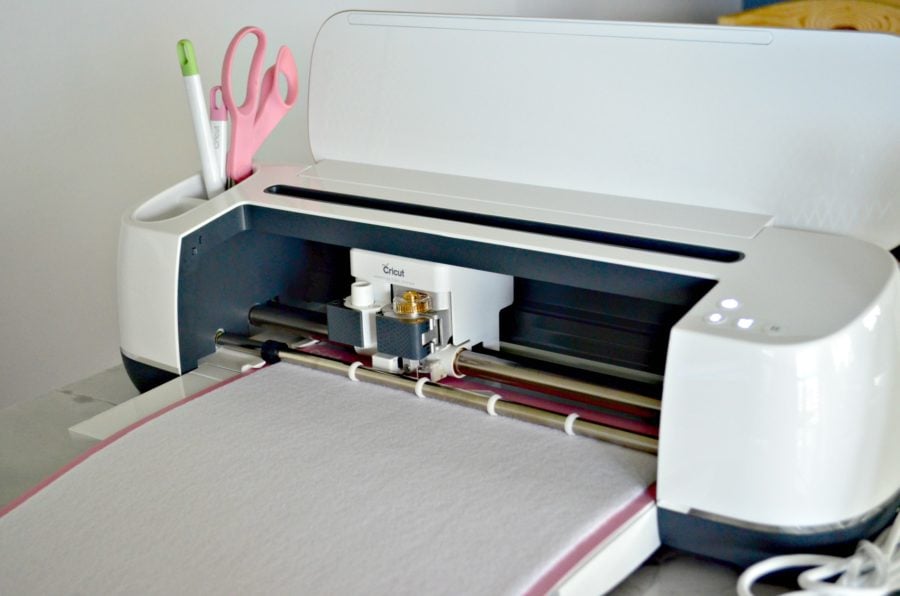
Then, it’s time to cut! Because you are cutting felt you will want to use the Cricut 12 in. x24in.FabricGrip™ Mat. The Cricut Maker is the Ultimate Smart Cutting Machine™. With its expandable suite of tools and advanced Rotary blade and Adaptive Tool System (including Knife Blade and Scoring Wheels1,) Cricut Maker™ gives you the freedom to make virtually any DIY project. It’s professional-level cutting performance, accessible to everyone.

The Cricut Maker™ cuts felt like butter! I was beyond impressed. Especially since I’ve cut felt using my Cricut Explore 2 and it did okay being cut with heat-n-bond but never was I able to cut just plain felt.
Next, I cut the red felt.
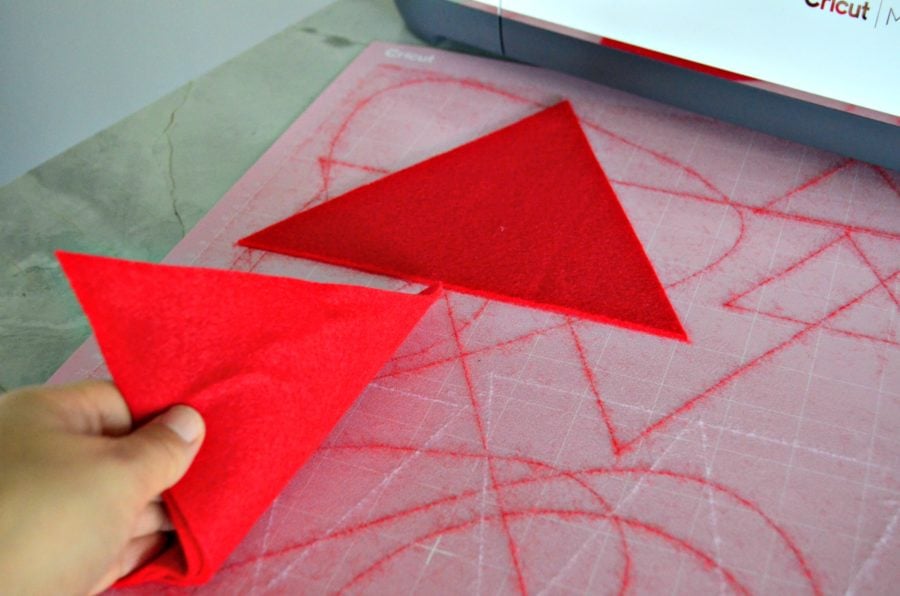
As you can see–the felt will leave residue on your FabricGrip™ Mat. That is okay–leave it on!
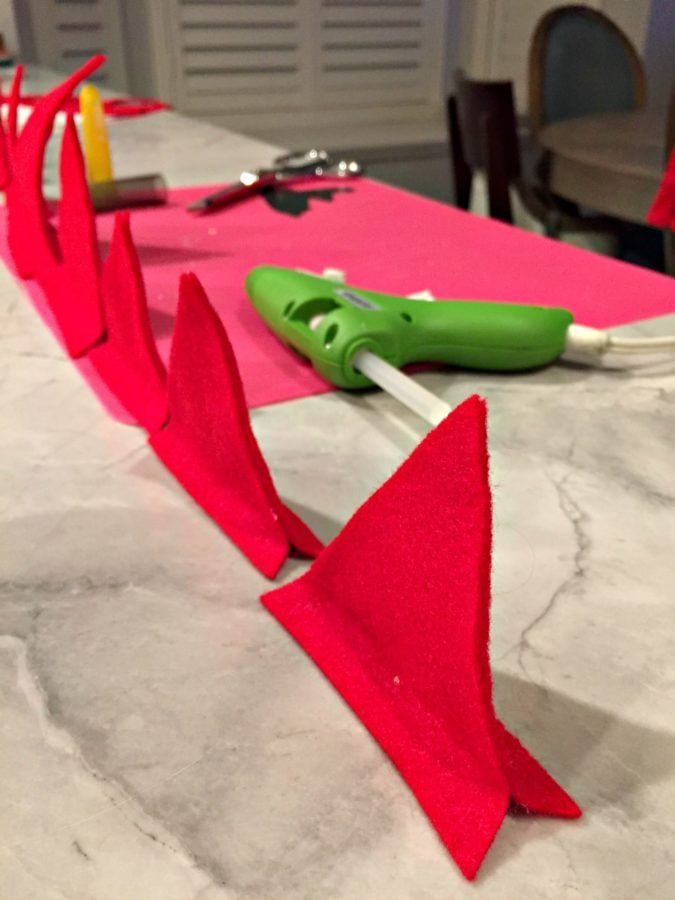
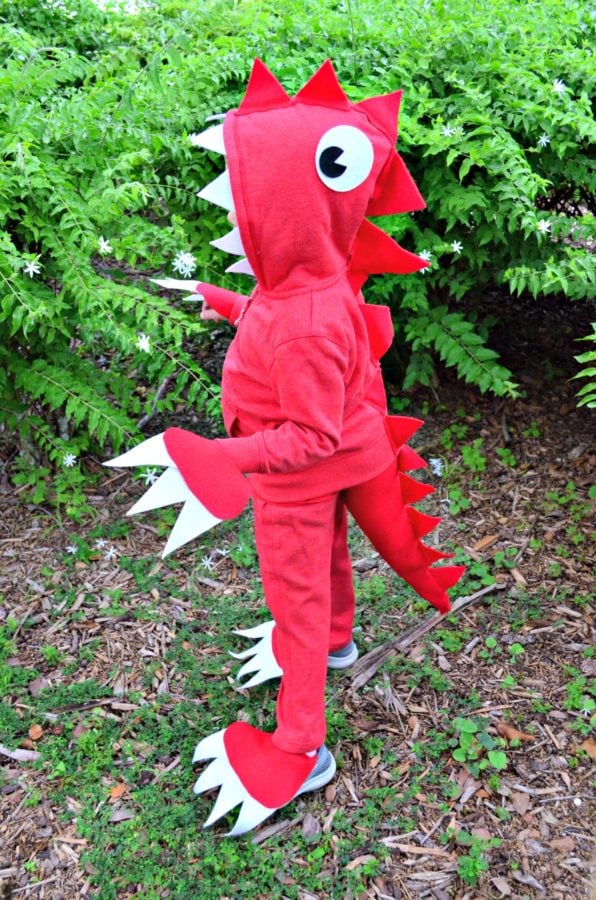
I knew that the spikes would not be able to stand up on it’s own. So I decided to hot glue two triangles together.
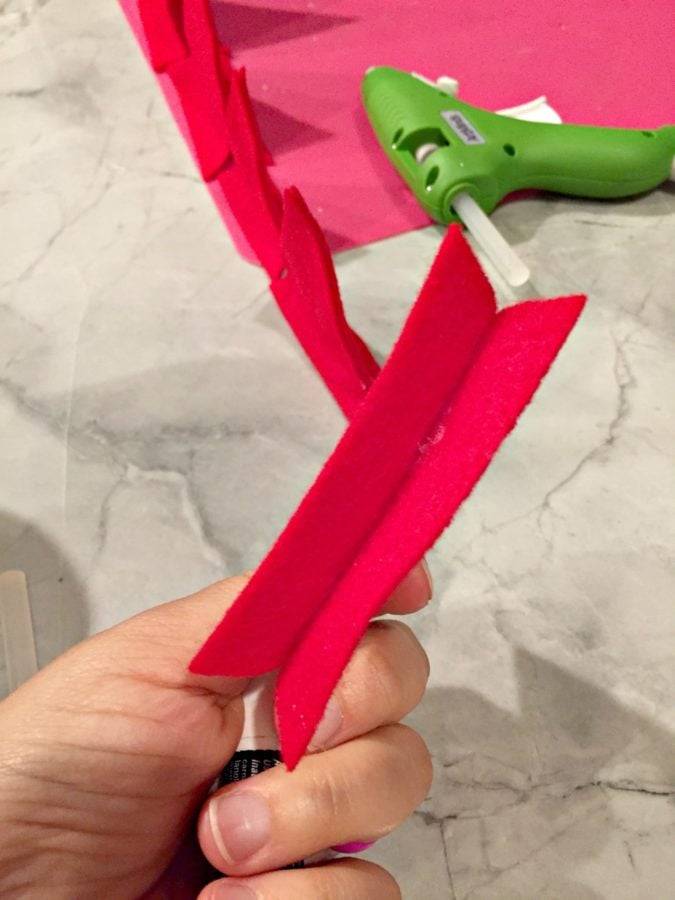
I left about a half inch exposed on the bottom so I could secure the spikes to the sweatshirt.
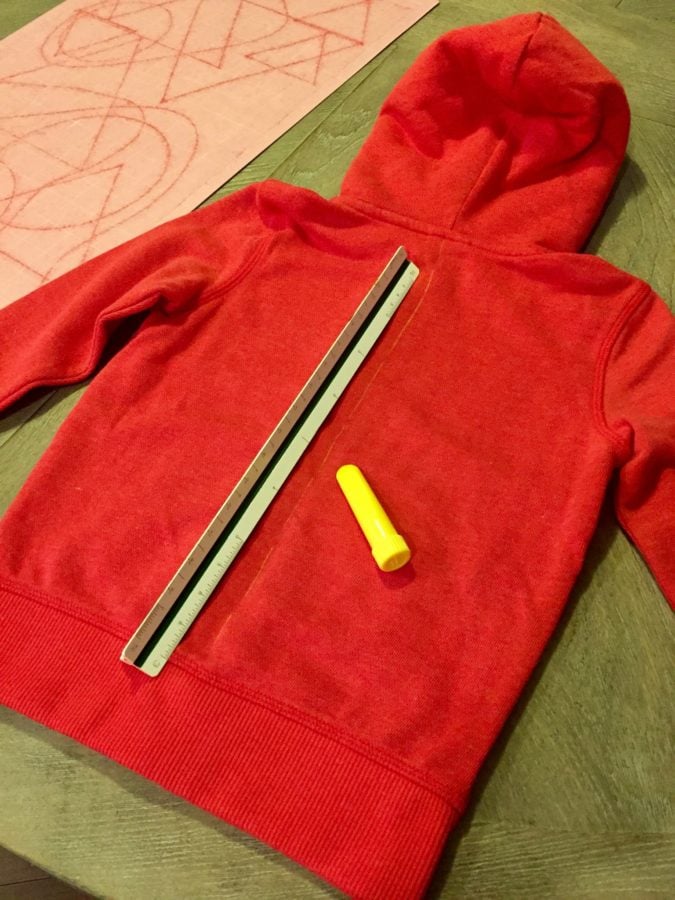
Next, using a fabric marker or chalk pen draw a line down the center of the sweatshirt.
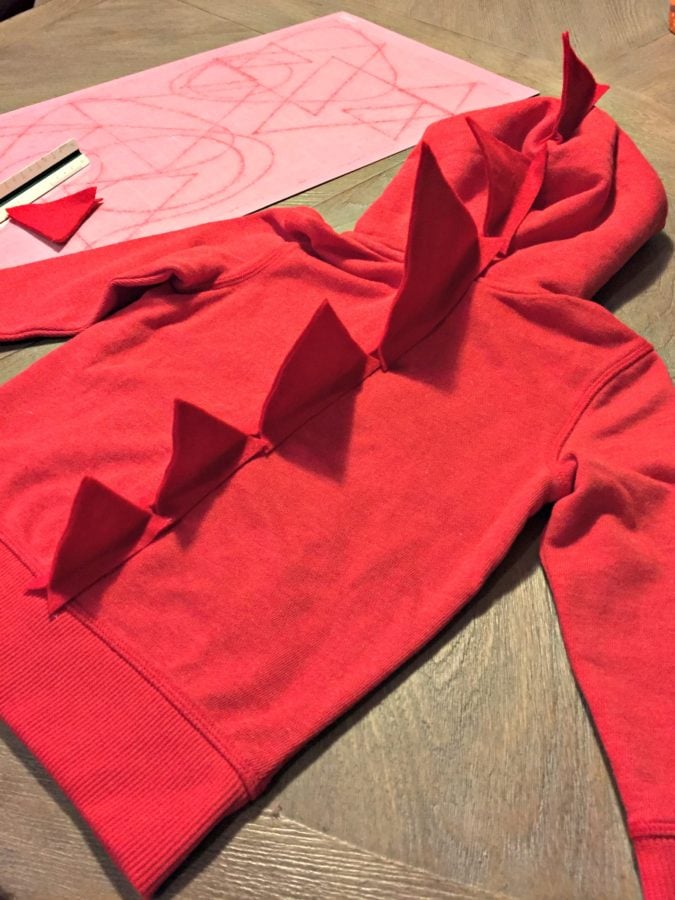
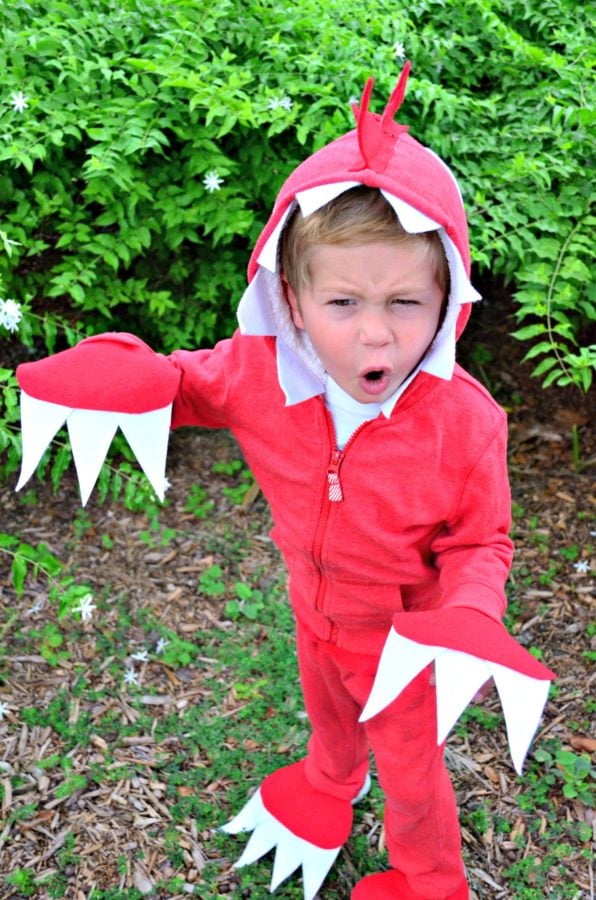
Next, you will glue each dino spike on to the sweatshirt. I started at the top of the hood and worked my way down.
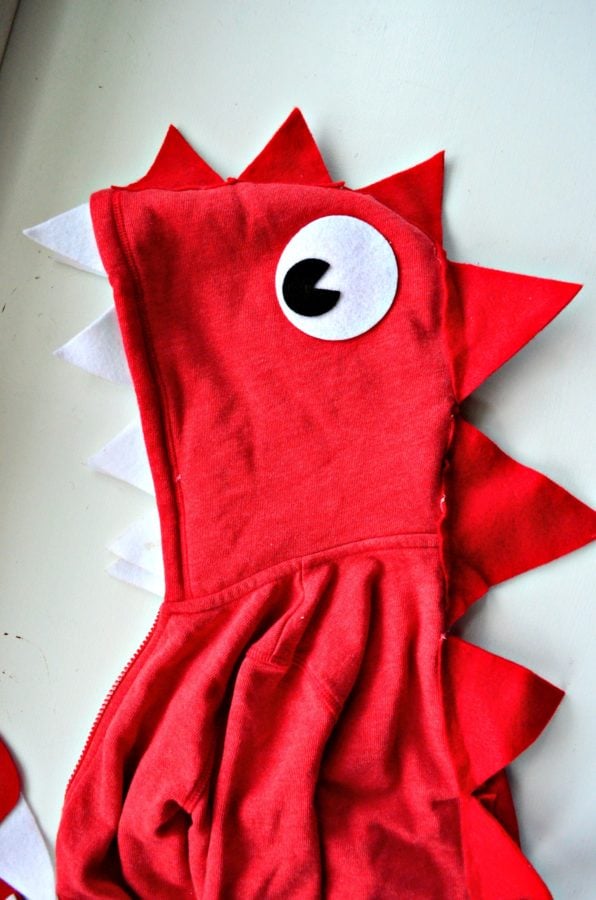
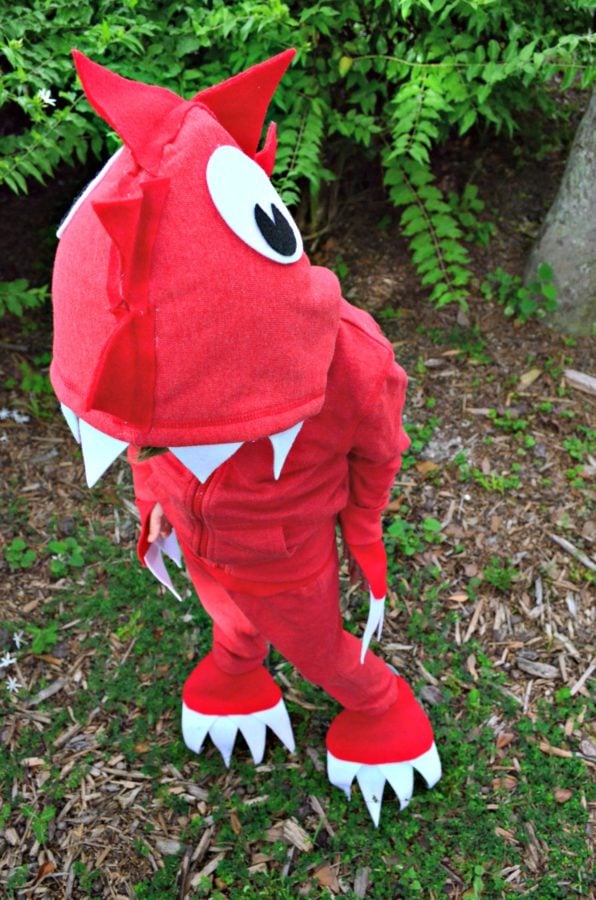
Not pictured; you will glue the black pupil on to the white circle for the eyes. Then glue the eyes on to the sides of the hood. Next, you will glue the white teeth in the inside of the hood.
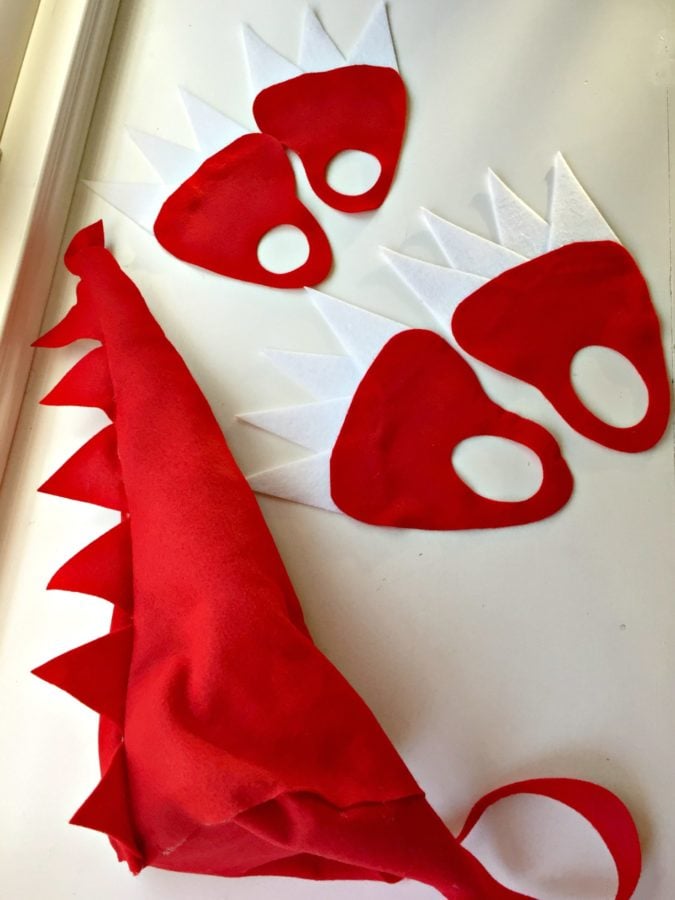
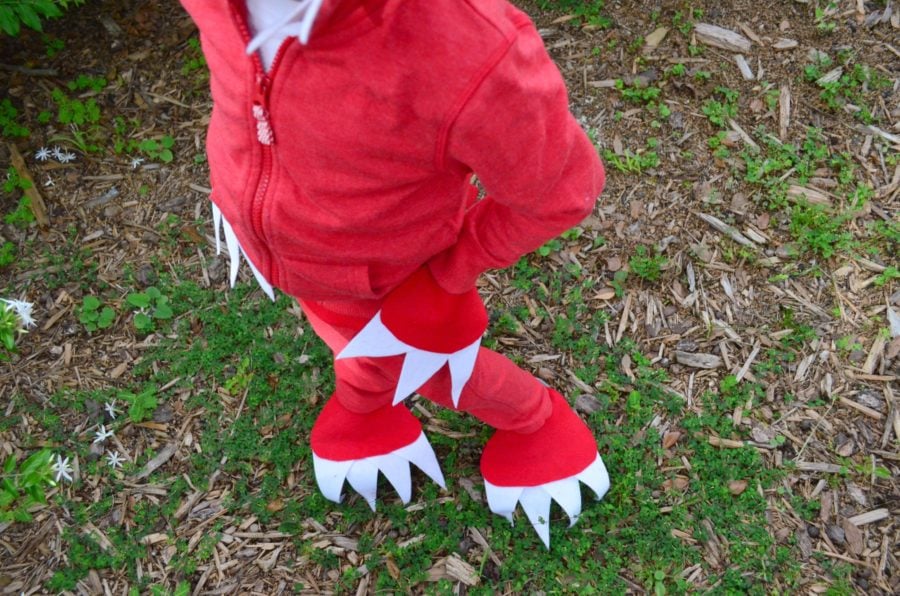
Also, not pictured: Glue the white claws on to the red hands and feet. I want to make note that you can also just glue the white claws to the sleeves of the sweatshirt instead of making the hands. They will be loose and I had to tuck them into my son’s sweatshirt for pictures. The same goes with the feet. I had to tuck them into my sons shoes. For his parade at school I eneded up taking them off and he looked just as cute!
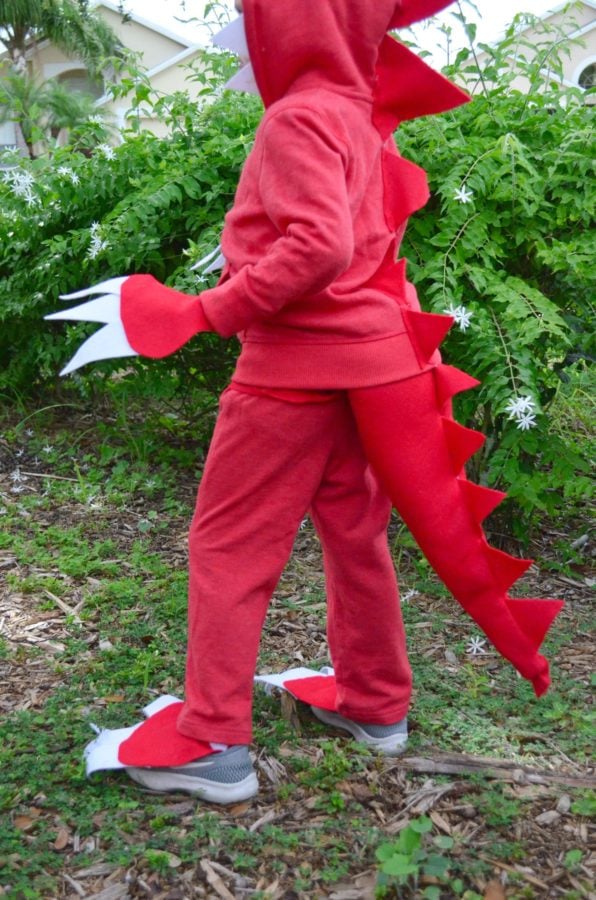
To construct the tail: you are going to use the same method you would if you were sewing. you will hot glue the spikes to one side of the long triangle (spikes facing inwards not out). Then apply hot glue to the two long sides of the triangle and apply the other triangle on top. Press firmly and let it dry for a minute. Then turn inside out. You will get the “seamless” look of the tail. I filled it with poly-fill then took another larger template for a foot (this was a happy accident–by the way and I didn’t want to waste scraps) folded the perimeter of the circle and then hot glued it all together. If the hole won’t fit your child’s waste you can always cut a circle of felt, glue that and then pin the tail on. For my son it fit him, so I just tucked it into his pants and then placed the sweatshirt on top of the tail!
In my typical procrastination style I made this the night before his school parade! I was feeling guilty that I bought him a costume plus he asked last minute to be a dinosaur so mommy had to deliver!
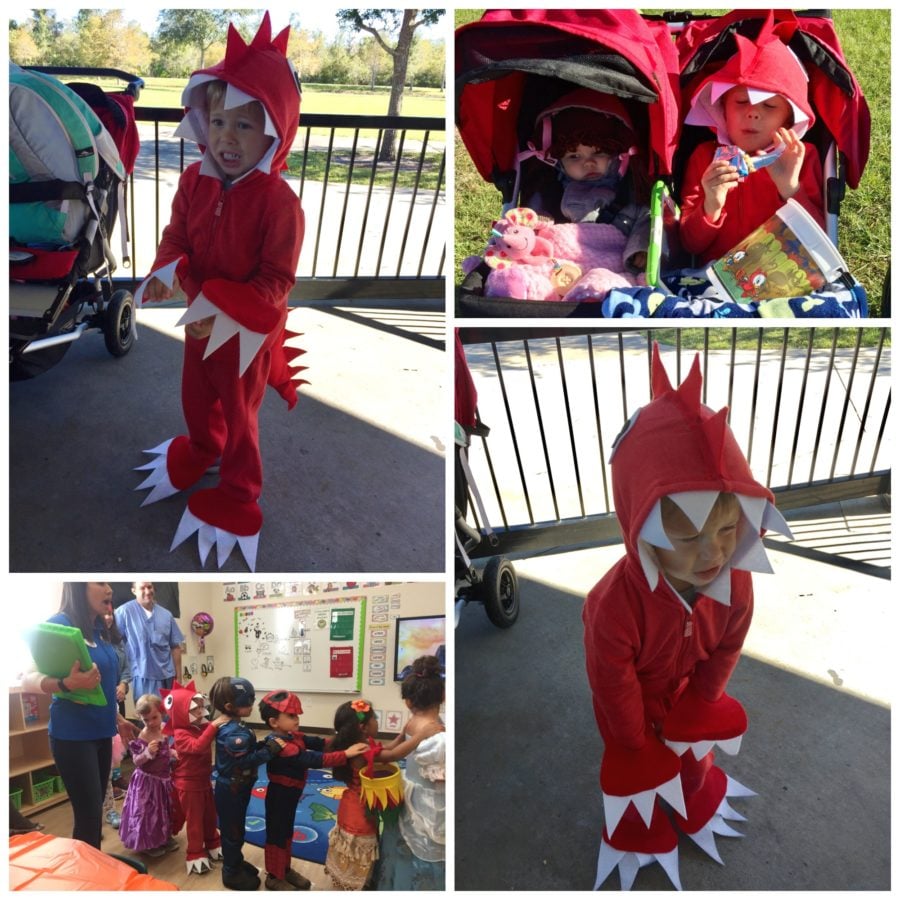
We live in Florida and it was actually cool out the days he needed to wear this costume!

Clearly we have the dinosaur rawrs down pat!
I love how this costume came together and easy at that!
Also, trying to get a 4 year old to model a costume is a workout in itself.
Love this angle of the costume!
I’ve washed the sweatshirt and it held up fine in the washer and dryer with the hot glue! So if your looking to make a Homemade Halloween costume for your little one I hope that my tutorial on my no sew dinosaur costume helps you create your very own!
Current Specials Going on at Cricut: Sign up for Cricut Access™ Premium and get 50% off digital orders on Cricut.com and in Cricut Design Space™
Disclaimer: Comments submitted may be displayed on other websites owned by the sponsoring brand. There are affiliate links in this post. That means, if you click on a link and purchase something from it we will receive a small percentage of the sale at no additional cost to you.

