• Skip to primary navigation
  • Skip to main content
  • Skip to primary sidebar

Sew Woodsy logo

  • Patriotic
  • DIY
  • Crafts
  • Cricut
  • Travel
  • About
menu icon
go to homepage
search icon
Homepage link
  • Home
  • Patriotic
  • DIY
  • Cricut
  • Travel
  • About Us
    • Email
    • Facebook
    • Instagram
    • Pinterest
    • RSS
    • Twitter
    • YouTube
  • ×

    Sew Woodsy » DIY

    Published: Jun 3, 2012 · Modified: Jun 2, 2012 by Katie · This post may contain affiliate links.

    {Part 2} More Dresser Prep

    Sharing is caring!

    0 shares
    • Facebook
    • Twitter

    The other day I showed how we sanded and prepped our dressers. Now, let’s fast forward 2 months– the dressers were still sitting in the garage–sanded. Acting as a nice resting place for all the crap in our garage. At this point–I just want to be able to put our clothes in dressers. See we had clothes in our nightstands and ever since we switched out our nightstands we have had to resort to storing our clothes either stuffed in our closet or piled sky high on our only 6 drawer dresser.

    Earlier last week, I got a burst of energy and decided I would finish these dressers with or without Mr. Woodsy. So, with a damp cloth I began wiping off all the sawdust from the dressers.

    After months of deliberating, we decided we wanted to paint some blue onto the dressers so when we sand through we will have some specs of blue that come through.

    So, I began painting on blue–in no particular order or way just slopping it on the dressers. My kind of painting if you ask me.

    We chose to go with BEHR’s Velvet Morning. It’s what our back wall in our master bedroom is painted and I love the color.
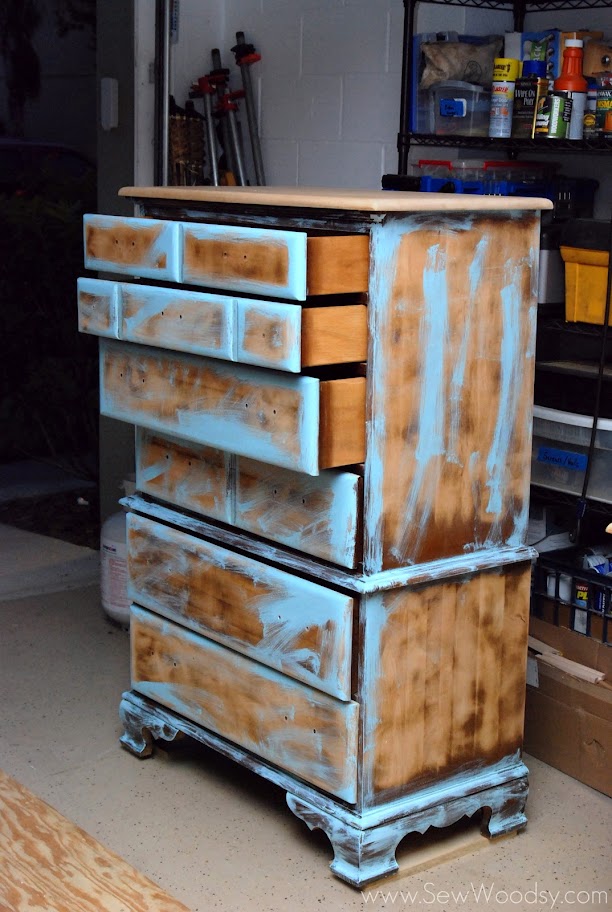
    The tall dresser was done and on to the long dresser.

    Mr. Woodsy wasn’t doing his job–all I asked was that he take pictures of the progress. This is the only progress photo from the long dresser!

    Here it is–all painted up in blue! For a hot minute, Mr. Woodsy wanted to keep our dressers like this and then I reminded him of the bigger picture! Remember, this is our first major furniture painting. We are going along by trial and error. So far it’s all trial and no errors.

    Stay tuned to see the final product!

    Disclaimer: Paint was provided by BEHR paints. We were not compensated to write this post. We truly love the product and wanted to share our experience. All opinions are always our own.

    « {Part 1} Sanding & Prepping the Dressers
    {Modifying} Classic Wood Center Mount Drawer Slides »

    Primary Sidebar

    • Facebook
    • Instagram
    • Pinterest
    • RSS
    • Twitter
    • YouTube
    Male and female hugging on each other in the woods.

    Hi, we're Katie & Jon! Welcome to our home away from home!

    Sew Woodsy is a lifestyle blog focusing on crafts, home DIY projects, family, travel and all things life. Get comfy and join us on our adventure!

    More About Us →

    Featured On

    9 different logos from various media outlets where Sew Woodsy has been featured on.

    Patriotic Projects

    • 30+ Patriotic Crafts
    • Patriotic Coloring Pages
    • “Home of the Brave” Patriotic Cake Topper
    • USA Mini Bunting Banner

    Trending

    • How To Grow Green Onions
    • How to Host a Baby Shower at Work
    • Tips & Tricks on Installing Butcher Block Countertops
    • How to Create a Natural Log Pathway + Video

    Footer

    ↑ back to top

    9 different logos from various media outlets where Sew Woodsy has been featured on.

    About

    • About Us
    • Privacy Policy
    • Accessibility Statement

    Newsletter

    • Sign Up! for emails and updates

    Contact

    • Contact
    • Work with us
    • Advertise

    Copyright © 2010 - 2022 Sew Woodsy