• Skip to primary navigation
  • Skip to main content
  • Skip to primary sidebar

Sew Woodsy logo

  • DIY
  • Crafts
  • Cricut
  • Travel
  • About
menu icon
go to homepage
search icon
Homepage link
  • Home
  • Thanksgiving
  • DIY
  • Cricut
  • Travel
  • About Us
    • Email
    • Facebook
    • Instagram
    • Pinterest
    • Twitter
    • YouTube
  • ×

    Sew Woodsy » Video

    Published: Jan 3, 2014 by Katie · This post may contain affiliate links.

    {Video} Kitchen Island Custom Bookcase

    Sharing is caring!

    21 shares
    • Facebook
    • Twitter

    This is a sponsored post on behalf of Homes.com.

    Kitchen Island Custom Bookcase video tutorial created for @homesdotcom by SewWoodsy.com #DIY #kitchen

    Here we go… the first of many kitchen projects. I’m so excited to share our Kitchen Island Custom Bookcase today!

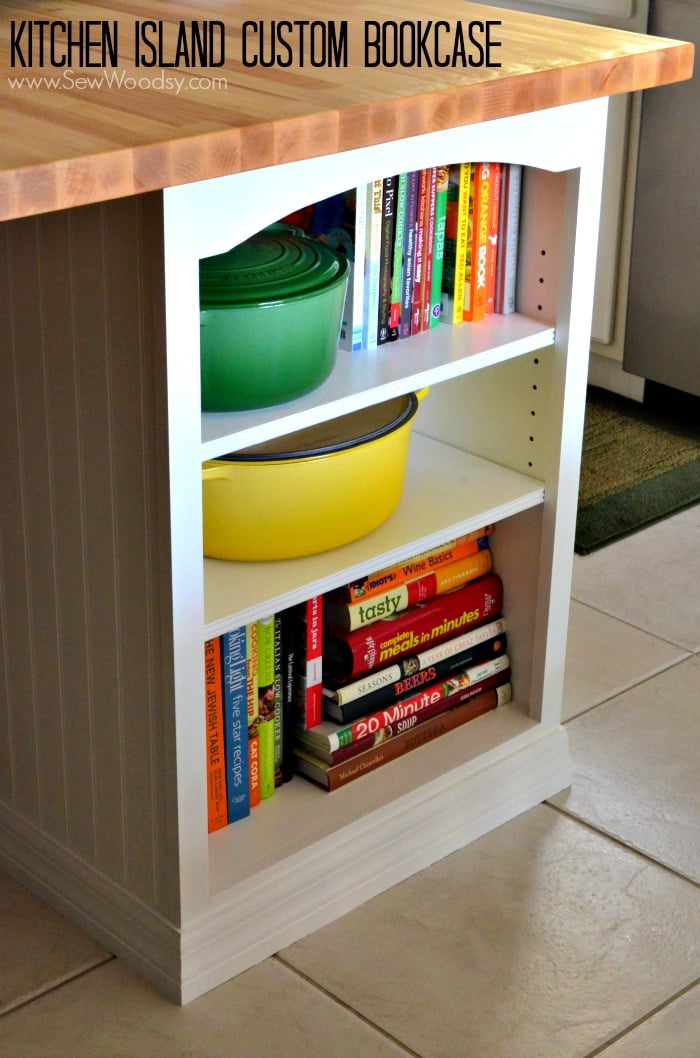
    When we first started talking about what we wanted to change in our kitchen I knew I wanted to extend our kitchen island. While we were extending the island I knew I wanted more storage. That is where the kitchen island custom bookcase came into play. I dreamed of having a few shelves to access a few more of my cookbooks. Earlier this year, we added a floating shelf in our kitchen that houses some of my cookbooks, but not all of them. So this extra storage is more than welcomed!

    There were a lot of steps we had to take before we could get to the finish project.

    kitchen island bookcase

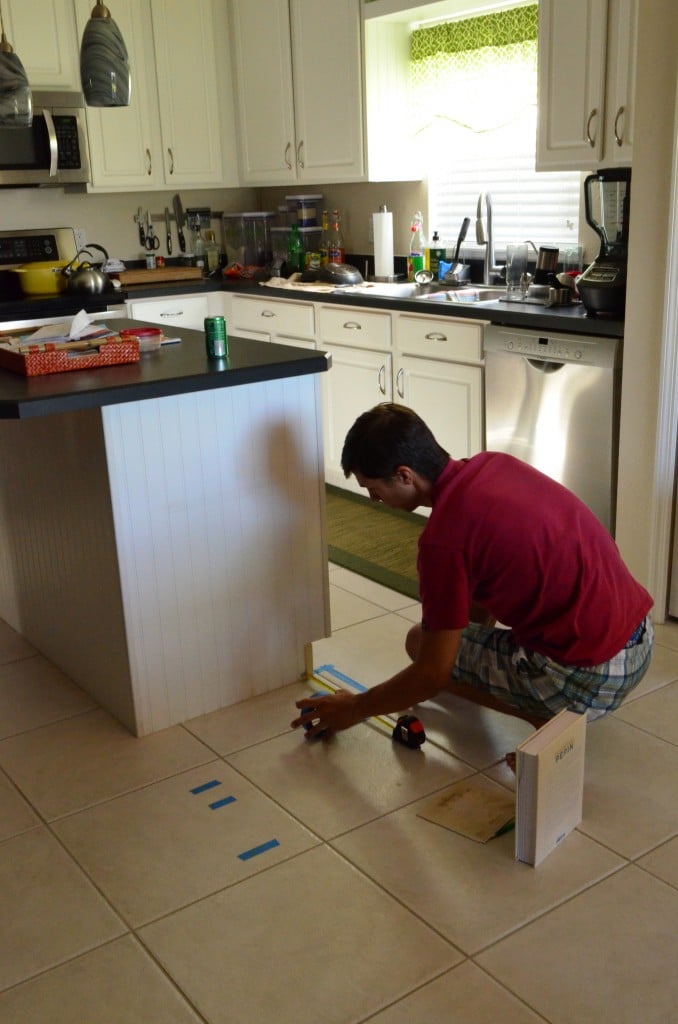
    Using painters tape, Jon mapped out where the bookshelf would go.

    kitchen island bookcase 2

    And then it was time to empty out the entire island. I placed a padded table cloth on our kitchen table and emptied everything on to it. Needless to say we did not eat at the kitchen table for a good week or two.

    kitchen island bookcase 3

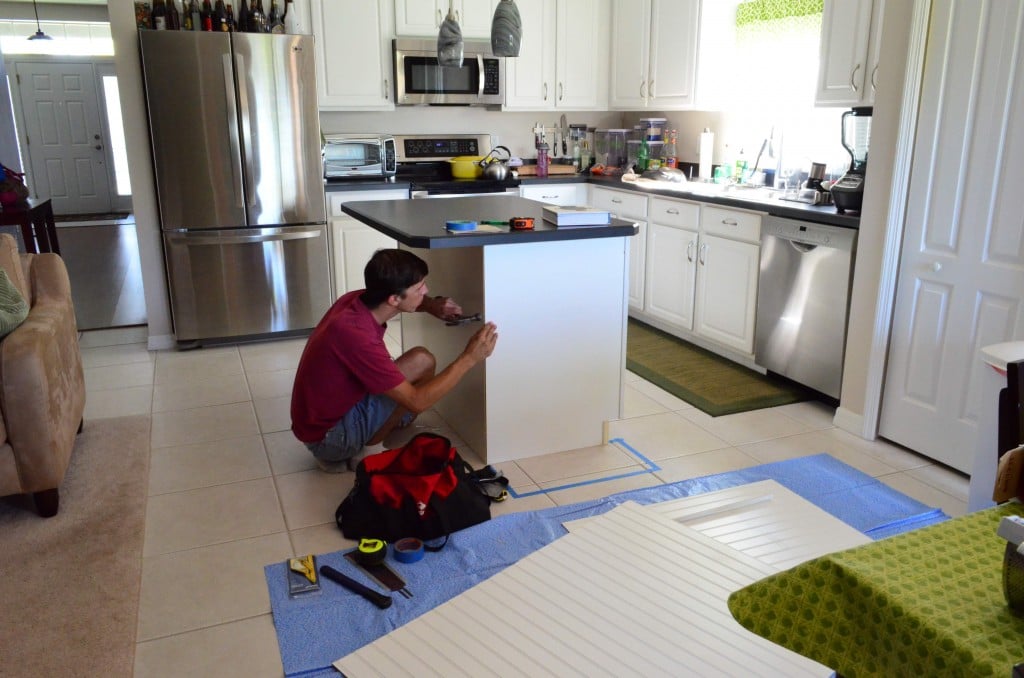
    Then, Jon began removing all the old bead board we installed 4 years ago.

    kitchen island bookcase 13Then it was into the garage where Jon build the bookcase.

    kitchen island bookcase 12

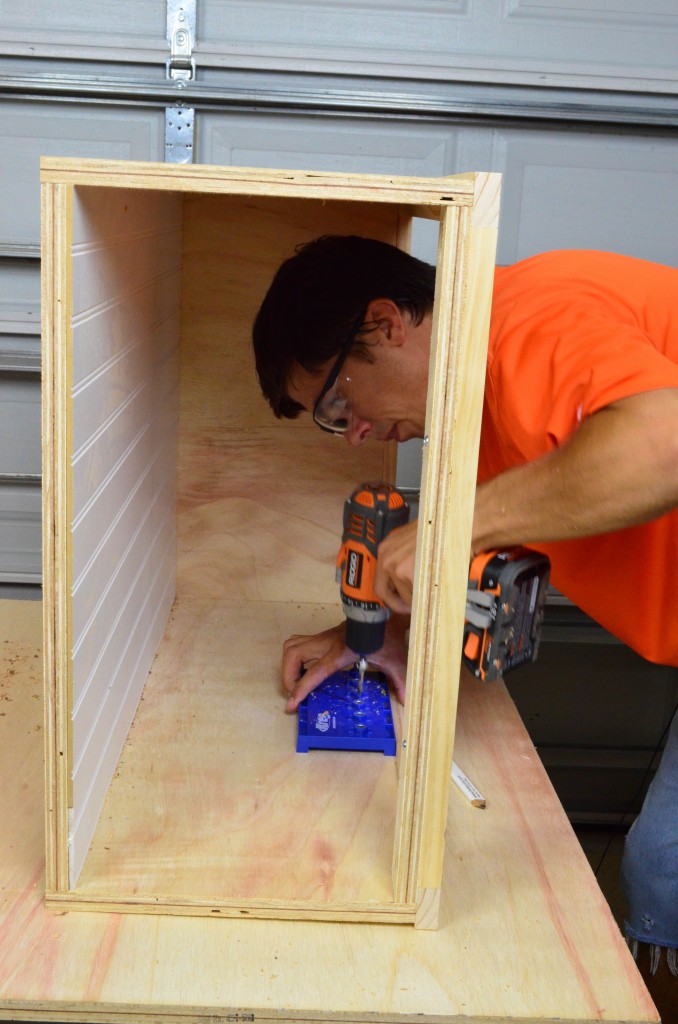
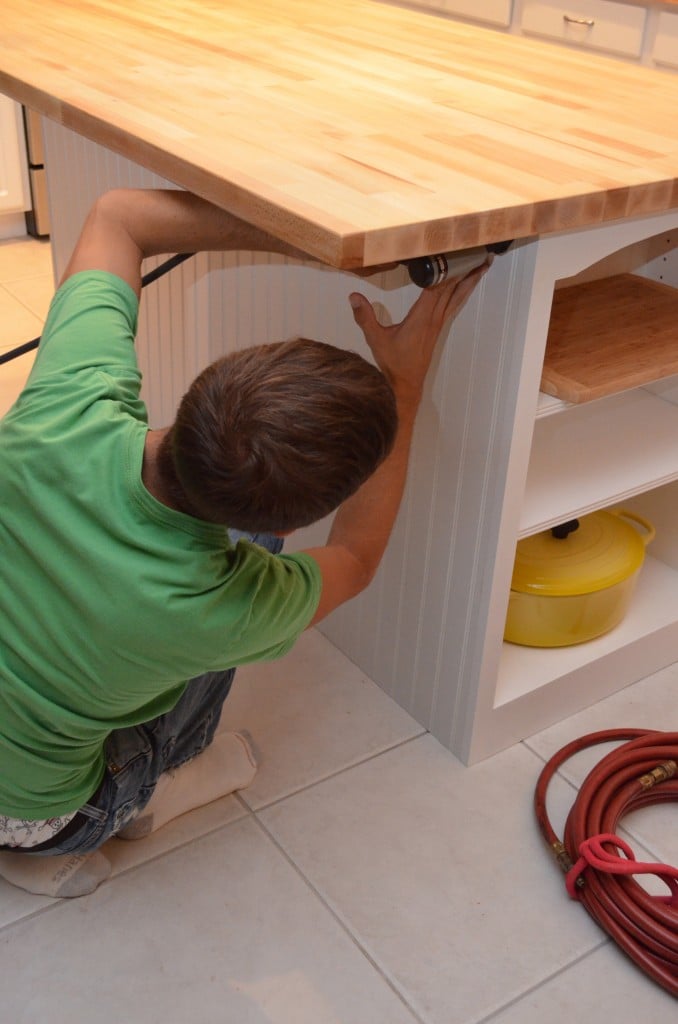
    He also finally had the chance to use the Kreg Pin Jig system. It works great and a much easier way to drill holes for shelves!

    kitchen island bookcase 1

    Once the shelf was ready he secured it from the inside and out. This was another good reason why having the kitchen island emptied came in handy!

    kitchen island bookcase 7
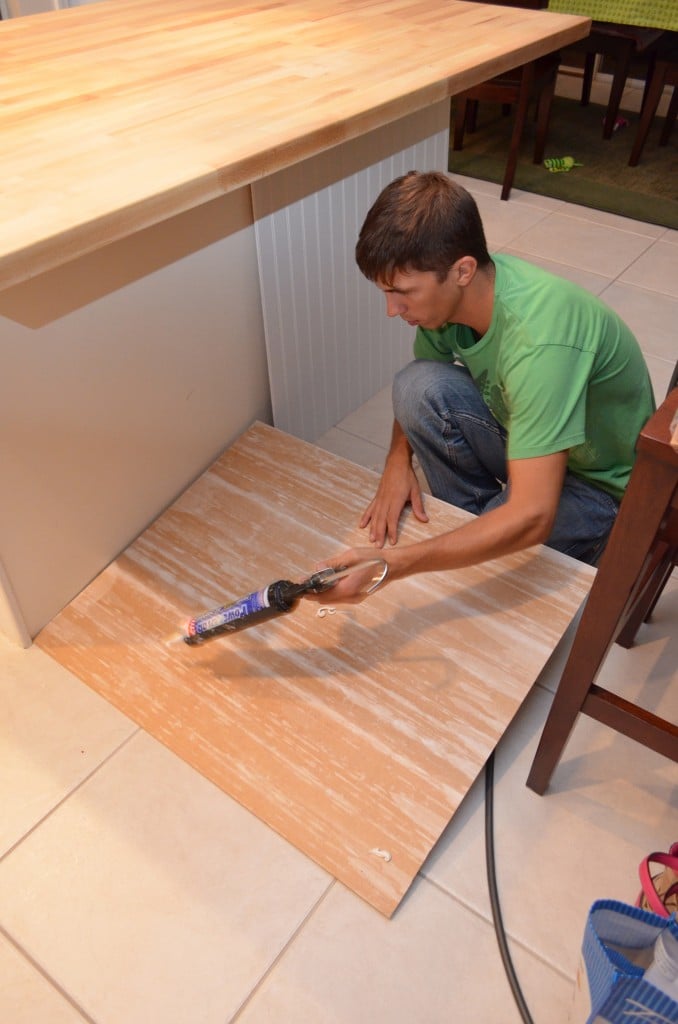
After it was installed it was time to add new bead board back to the island. Jon added a little adhesive to the back of the bead board.

    kitchen island bookcase 8Then used the nail gun to secure it in place. We received the RYOBI AirStrike a few days after he installed the bead board.

    kitchen island bookcase 9
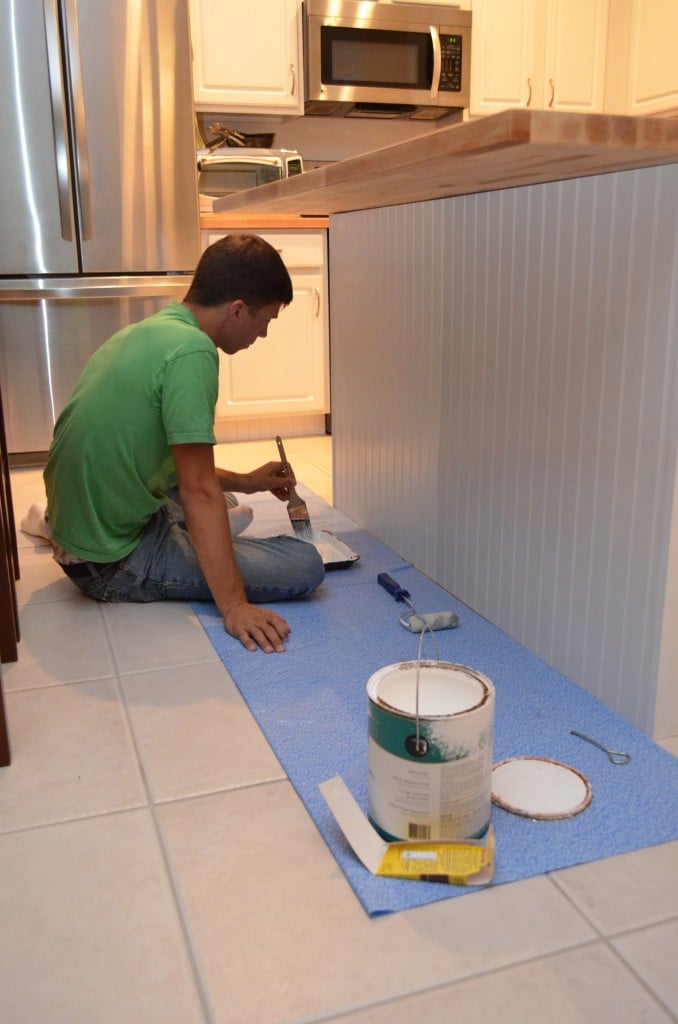
Then he painted the bead board. He decided to paint the bead board once it was installed verse before it was installed.

    kitchen island bookcase 4
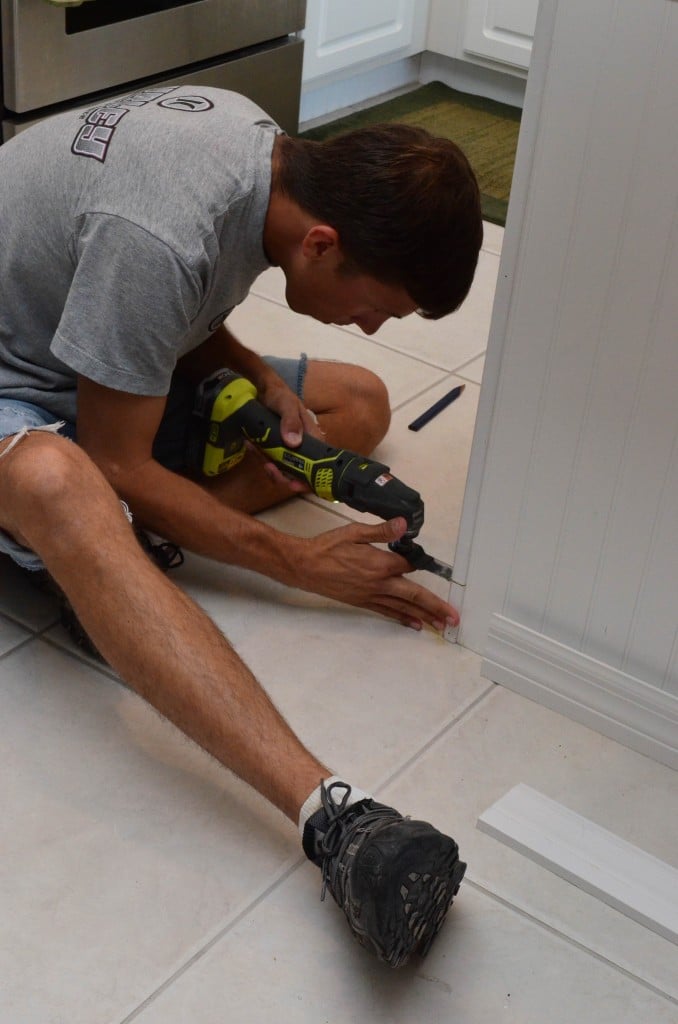
A few weeks later (that’s how we really roll here), he added the trim to the bottom of the island. Using the RYOBI JobPlus multi-tool he had to cut out a portion of the corner trim on the island.

    kitchen island bookcase 5

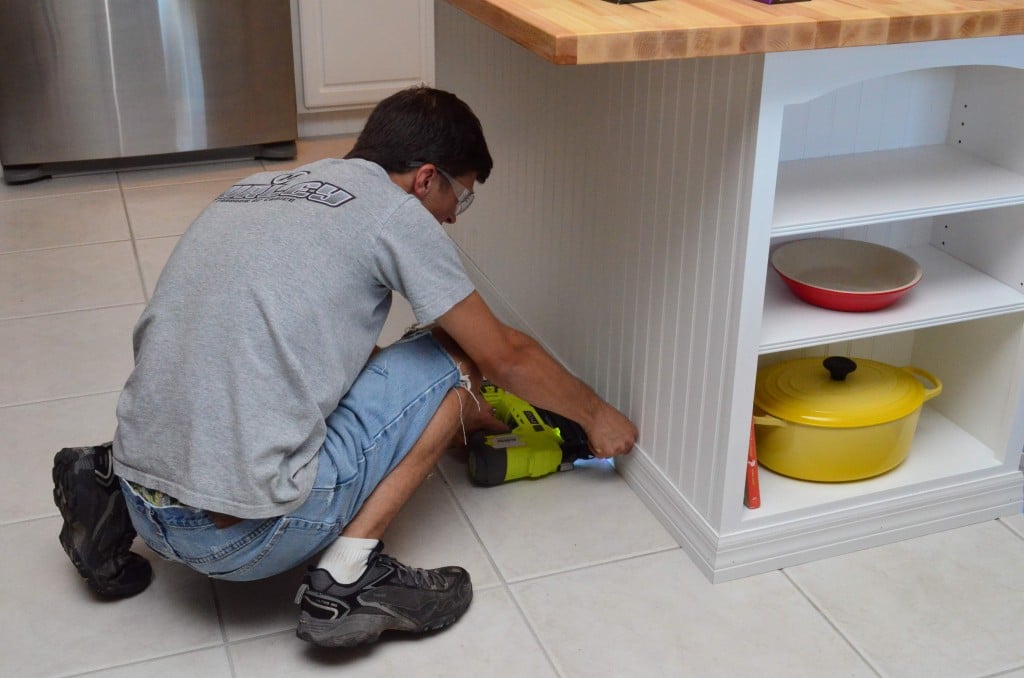
    Then, using the RYOBI AirStrike Cordless Brad Nailer Jon behan to secure the moulding in place.

    kitchen island bookcase 10

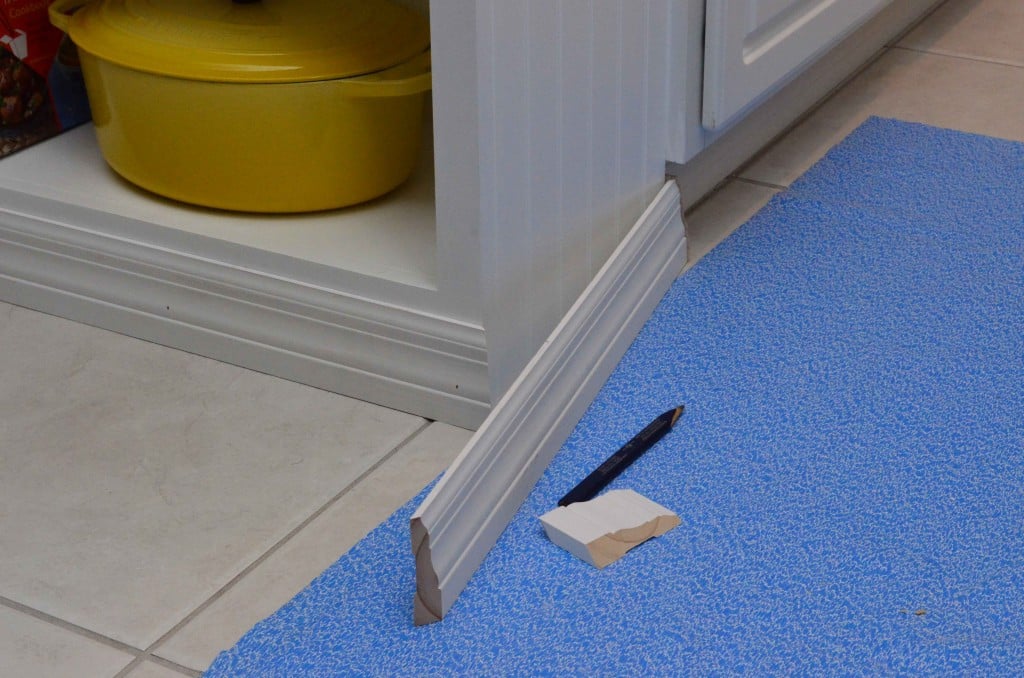
    He made sure to have the moulding completely  wrap around the island.

    kitchen island bookcase 6
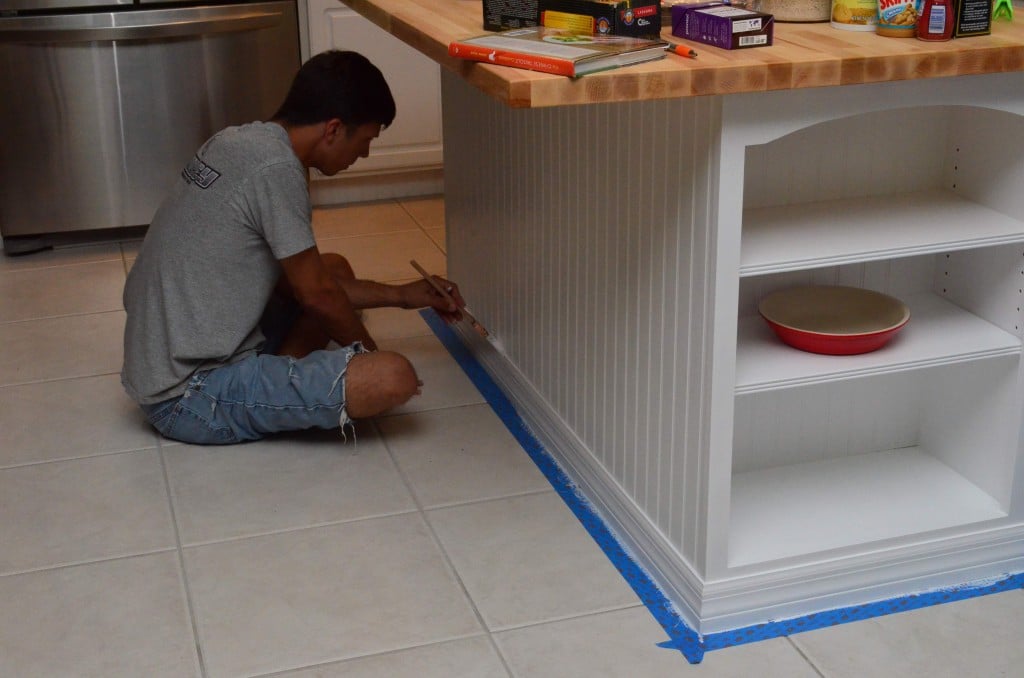
Lastly, it was time to paint the moulding! By adding a layer of painters tape it made it super easy to paint. And that’s that… We took our time and completed this project on the weekends and nights we had available. In the end it turned out great!

    Kitchen Island Custom Bookcase video tutorial created for @homesdotcom by SewWoodsy.com #DIY #kitchen

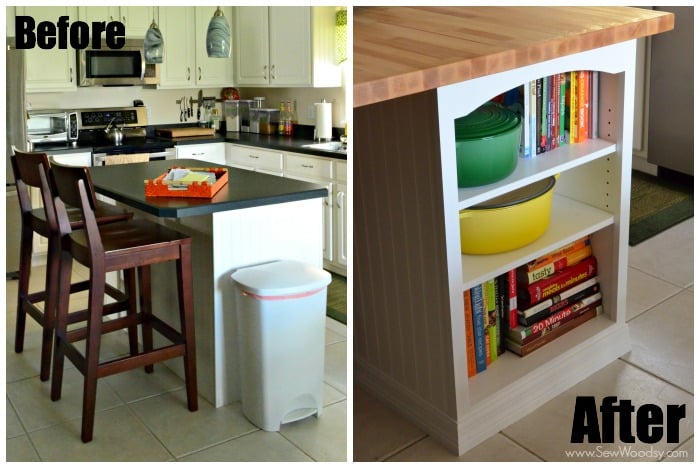
    Here is the before and after… pretty drastic, right?

    Kitchen Island Custom Bookcase video tutorial created for @homesdotcom by SewWoodsy.com #DIY #kitchen

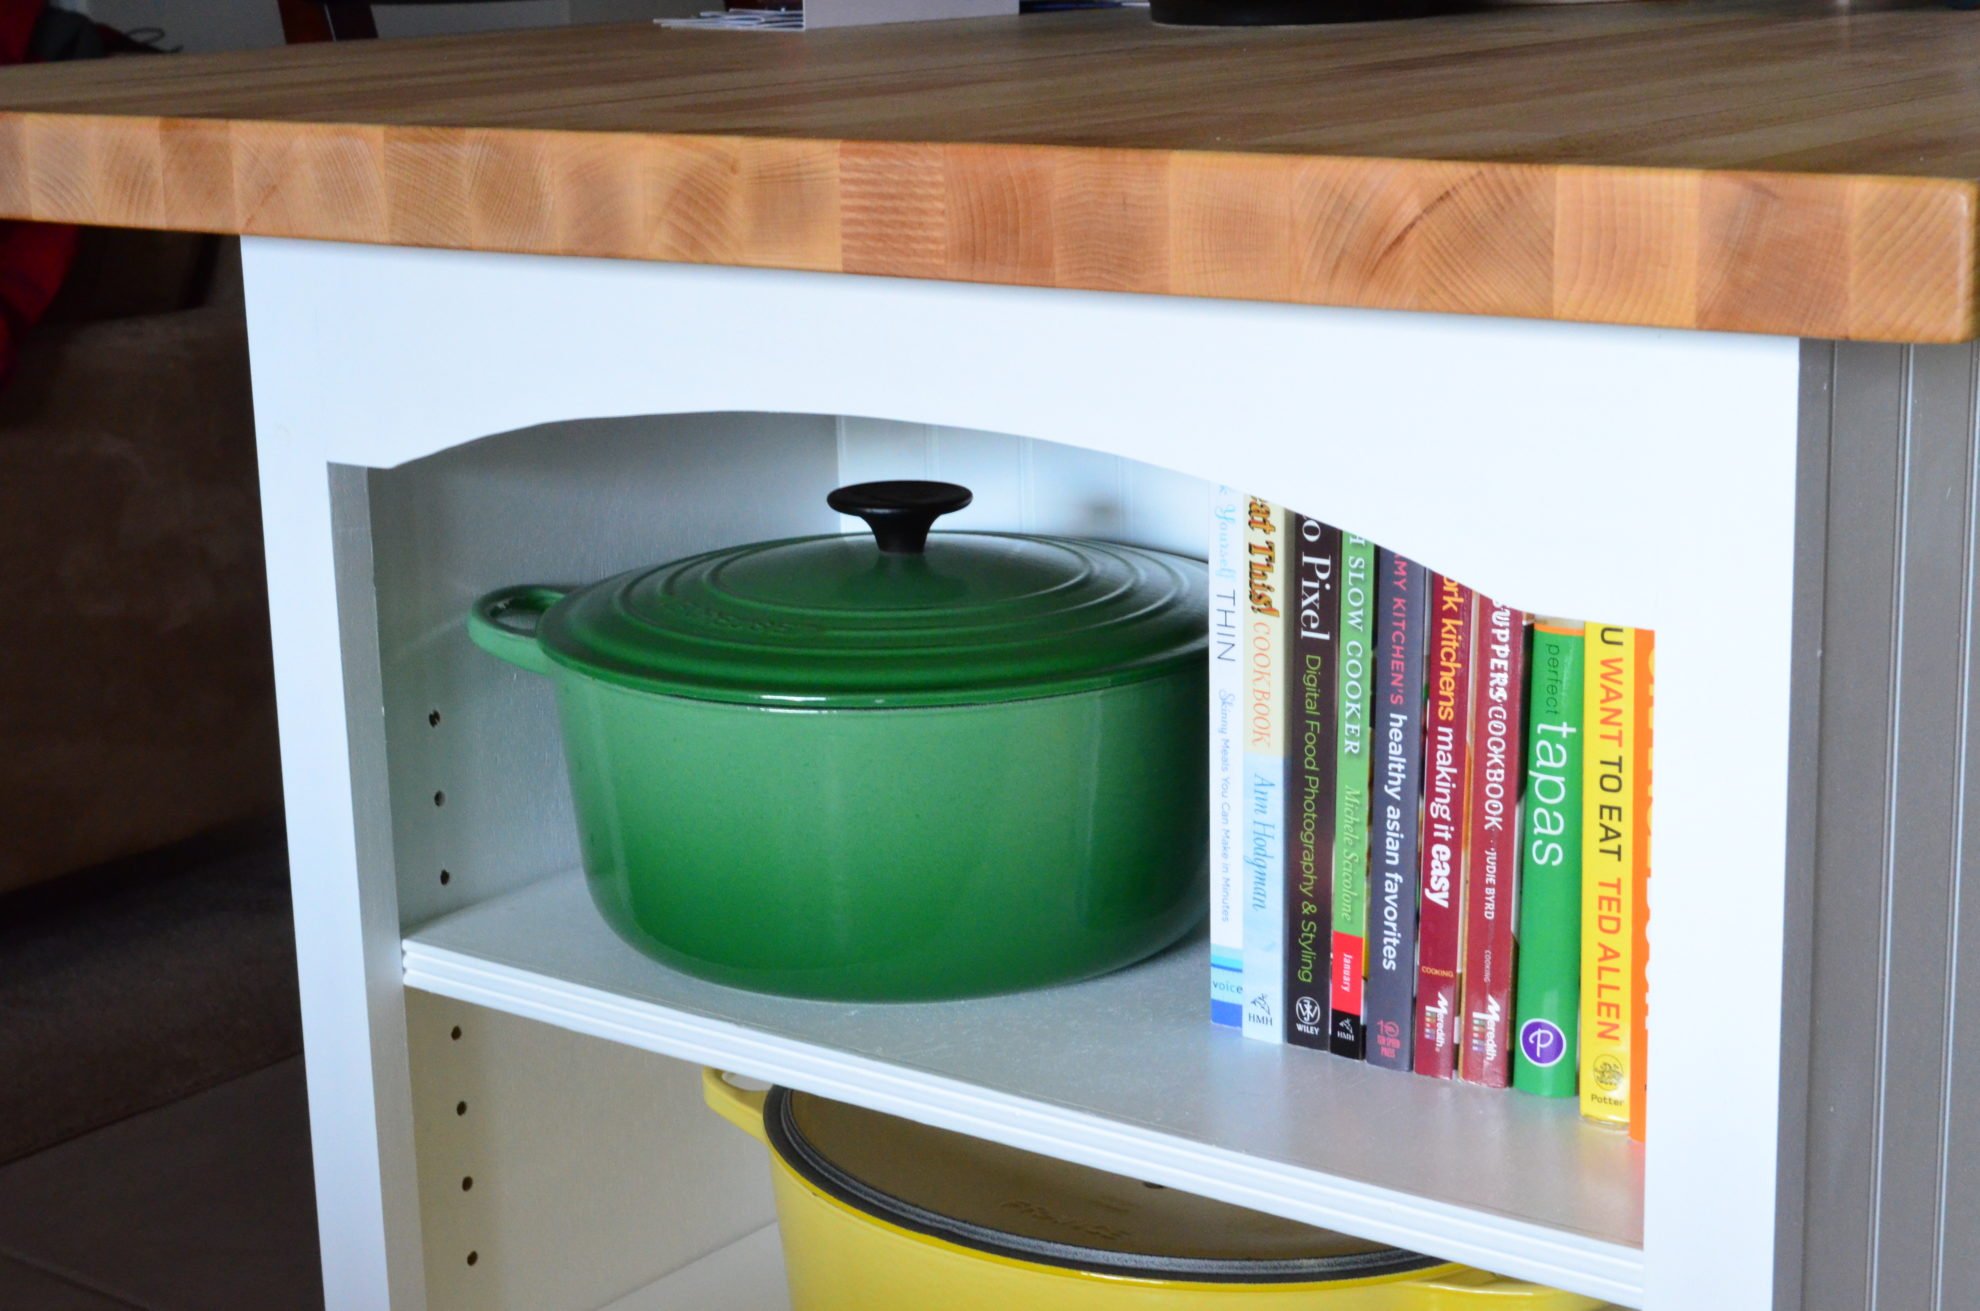
    Here is a close up of the top part of the bookcase.

    Kitchen Island Custom Bookcase video tutorial created for @homesdotcom by SewWoodsy.com #DIY #kitchen


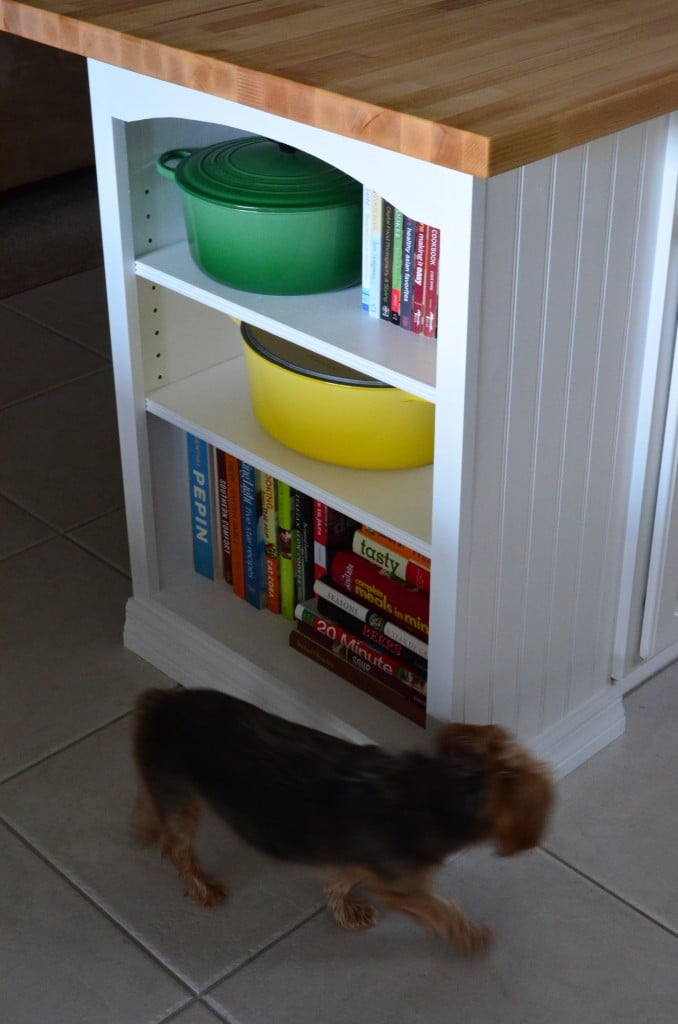
    And here is what it looks like from the other side. And for good measure I had to share the photo that was photo bombed by our four-legged friend, Lola.

    Disclosure: We have a working relationship with Homes.com and are video brand ambassadors for 2013 (thus we are compensated). As always all opinions are our own.

    « {Video} How to Add Custom Trim Moulding to Windows
    {Video} How to Refinish an End Table with 3M DIY »

    Reader Interactions

    Comments

    1. gail says

      January 03, 2014 at 8:51 pm

      Love the new addition! Jon did a great job.

      I didn’t see anything about the butcher block top?

      gail

      Reply
      • Katie says

        January 07, 2014 at 2:02 pm

        Gail–the butcher block top is coming next… look out! 🙂

        Reply
    2. Julie @ follow your heart woodworking says

      January 04, 2014 at 11:02 am

      That looks really nice. The bottom shelf will be perfect for baby toys soon!

      Reply
      • Katie says

        January 07, 2014 at 1:58 pm

        Julie–that’s too funny. Everyone keeps telling me–those books won’t be their for long…

        Reply
    3. Stacy Risenmay says

      January 05, 2014 at 4:04 pm

      Wow! It looks amazing! Off to pin 🙂

      Reply
      • Katie says

        January 07, 2014 at 1:58 pm

        Thanks Stacy!

        Reply
    4. Sarah @ Bombshell Bling says

      January 05, 2014 at 9:07 pm

      I LOVE IT!! You guys are an AMAZING team!

      Reply
      • Katie says

        January 06, 2014 at 9:48 am

        Thanks Sarah! The bookcase has been up for a few months now and I still love looking at it! 🙂

        Reply
    5. Kathy Penney @ Sparkles And A Stove says

      January 06, 2014 at 11:21 am

      What an awesome DIY project! I would love to have this in my kitchen!

      Reply
      • Katie says

        January 07, 2014 at 1:56 pm

        Thanks Kathy! I’m all for extra storage!

        Reply
    6. Britni says

      January 10, 2014 at 1:47 am

      This is fantastic, I wish I had a bookcase built right into my island. Great tutorial!

      Reply
      • Katie says

        January 10, 2014 at 6:46 pm

        Thanks Britni! It has definitely come in handy!

        Reply
    7. Pat Cobb says

      July 09, 2014 at 9:36 am

      Great Job! The video was very helpful! Thanks for sharing!

      Reply
      • Katie says

        July 14, 2014 at 9:56 pm

        Thanks Pat! Glad you enjoyed it.

        Reply

    Leave a Reply Cancel reply

    Your email address will not be published. Required fields are marked *

    Primary Sidebar

    • Email
    • Facebook
    • Instagram
    • Pinterest
    • Twitter
    • YouTube
    Male and female hugging on each other in the woods.

    Hi, we're Katie & Jon! Welcome to our home away from home!

    Sew Woodsy is a lifestyle blog focusing on crafts, home DIY projects, family, travel and all things life. Get comfy and join us on our adventure!

    More About Us →

    9 different logos from various media outlets where Sew Woodsy has been featured on.

    Easter Projects

    • Kids Easter Basket Ideas
    • 25 Easter Basket Ideas for Toddlers
    • Free Easter Coloring Pages
    • 17 Easter Craft Ideas

    Trending

    • How to Create a Natural Log Pathway + Video
    • Tips & Tricks on Installing Butcher Block Countertops
    • How to Host a Baby Shower at Work
    • How to Use Heat n Bond

    Male and female hugging on each other in the woods.

    Hi, we're Katie & Jon! Welcome to our home away from home!

    Sew Woodsy is a lifestyle blog focusing on crafts, home DIY projects, family, travel and all things life. Get comfy and join us on our adventure!

    More About Us →

    9 different logos from various media outlets where Sew Woodsy has been featured on.

    Easter Projects

    • DIY Follow the Bunny Pillow Cover
    • Bunny Kisses & Easter Wishes Burlap Garden Flag
    • Easter Bunny Family Pillow
    • DIY Easter Bunny Onesie with Name

    Trending

    • How to Create a Natural Log Pathway + Video
    • Tips & Tricks on Installing Butcher Block Countertops
    • How to Host a Baby Shower at Work
    • How to Use Heat n Bond

    Footer

    ↑ back to top

    9 different logos from various media outlets where Sew Woodsy has been featured on.

    About

    • About Us
    • Privacy Policy
    • Accessibility Statement

    Newsletter

    • Sign Up! for emails and updates

    Contact

    • Contact
    • Work with us
    • Advertise

    Copyright © 2010 - 2022 Sew Woodsy