
This post is a collaboration with 3M DIY.


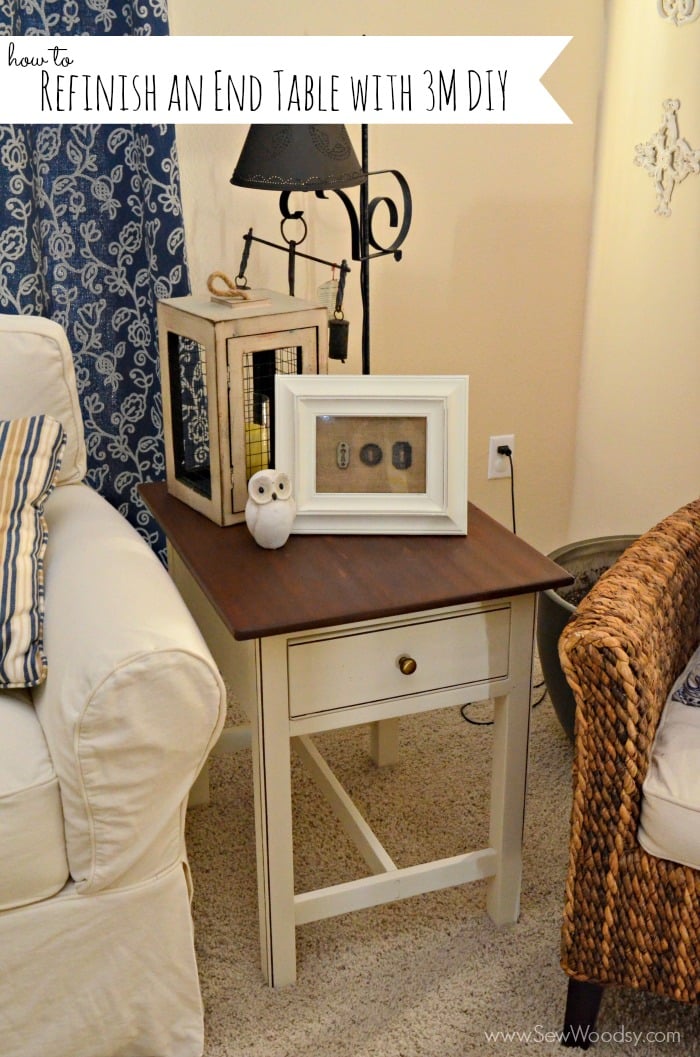
Early last year, our neighbor, Edie, came to us asking if we could help her refinish an end table. We told her yes, but then project after project (and pregnancy) got in the way. We made it a resolution to ourselves that we were going to refinish the end table for her birthday (which was last Friday)! We picked it up in the morning and brought it back to her by the end of the day. She was amazed at the drastic difference and said it was her best birthday gift she had received! We had all the supplies on hand… it just took time and a lot of tender, love, and care to refinish the end table. We’ve partnered with 3MDIY.com to teach you about safety and share with you how we refinished this end table. You can watch our step-by-step video or scroll down below for step-by-step photos of the process.
 to teach you about safety and share with you how we refinished this end table. You can watch our step-by-step video or scroll down below for step-by-step photos of the process.
Supplies:
- 3M™ Safety Products; Safety Glasses, WorkTunes, and Respirator
- ScotchBlue™ Painter’s Tape
- 3M Advanced Abrasives
- RYOBI Belt Sander
- Orbital Sander
- RYOBI Cat Corner Finish Sander
- Foam Brush
- Minwax® Pre-Stain Wood Conditioner
- Minwax® Wood Finishing Cloths – Dark Mahogany
- BEHR Flat Paint – Antique White
- Paint Brush

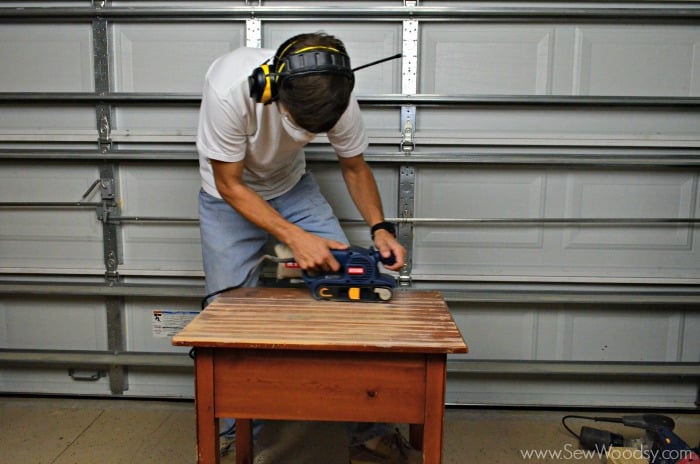
First up, place your safety equipment on; glasses, respirator, and hearing protection. Then use a belt sander and begin to sand the top of the end table. Because ours had a texture to it, Jon didn’t want to strip the texture away (the grooves). 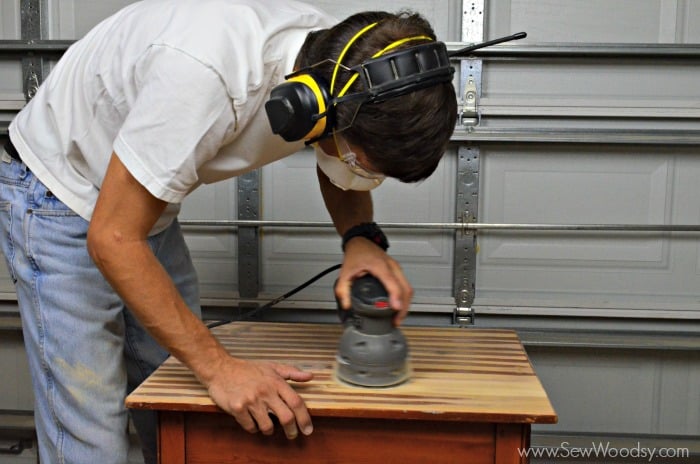
Then, using an orbital sander, sand in between the grooves to get the remaining stained wood removed. 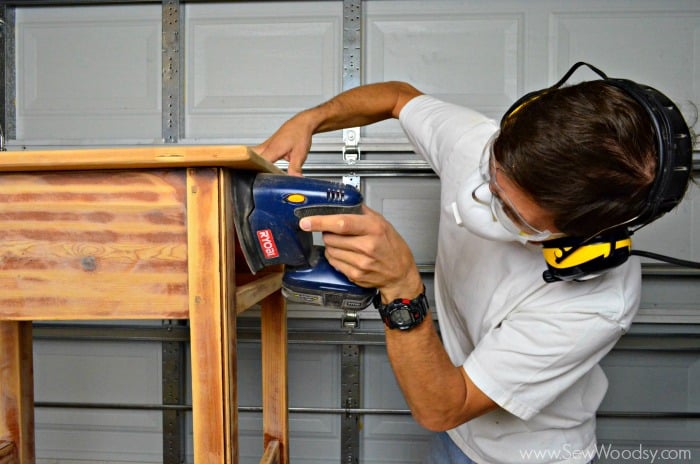
Next up, using a Cat Corner sander sand the remainder of the end table. Remember, if you don’t have any of these tools you can always hand sand (its just going to take a lot of time and elbow grease).
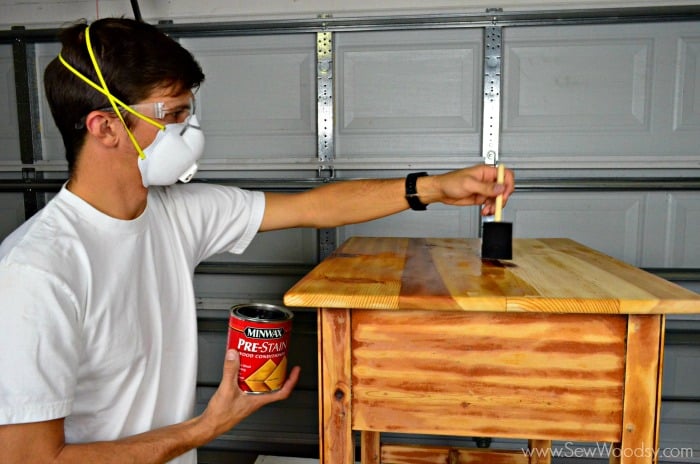 If your project has a lot of gauges we recommend you use 3M Wood Filler to fill in all the imperfections. Use it according to the package and then sand if necessary. Once your furniture is completely sanded, wipe down the entire end table with a damp cloth. Then, add a thin coat of Pre-Stain to the top of the end table where you will apply the stain.
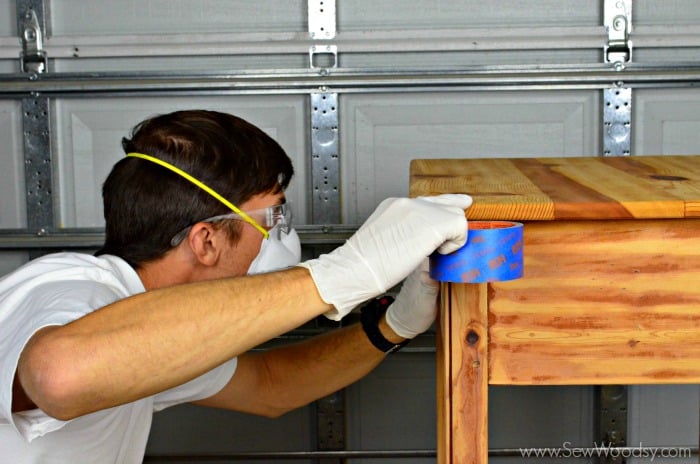 While the Pre-Stain dries add a layer of 3M ScotchBlue Painters Tape to the perimeter of the end table. This is good to do to ensure that no stain touches the other parts of the sanded wood that you want painted white.
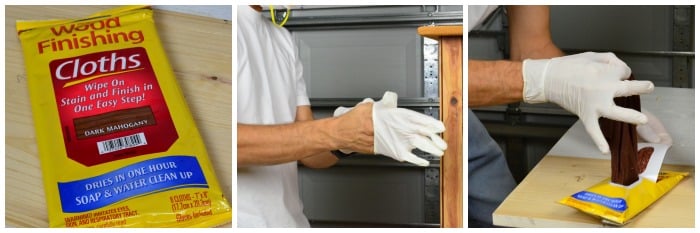
We normally use gel stain, but decided to give the new Minwax staining cloths a try. They were awesome and easy to use. Just put on the gloves (provided on the packaging) open up the package and start staining! Easy as that!

Cover the top like you normally would with stain; working with the grain of the wood. Then, re-wipe the entire top to remove any excess/streaks. Although when you use Pre-Stain you should never have streaks.
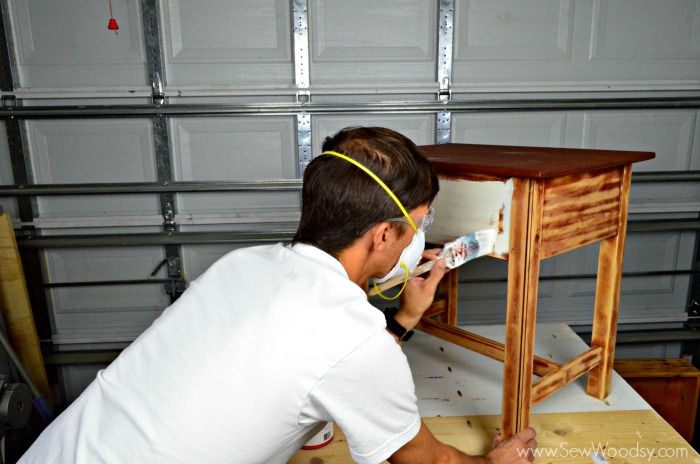
Next up, time to paint the rest of the end table.
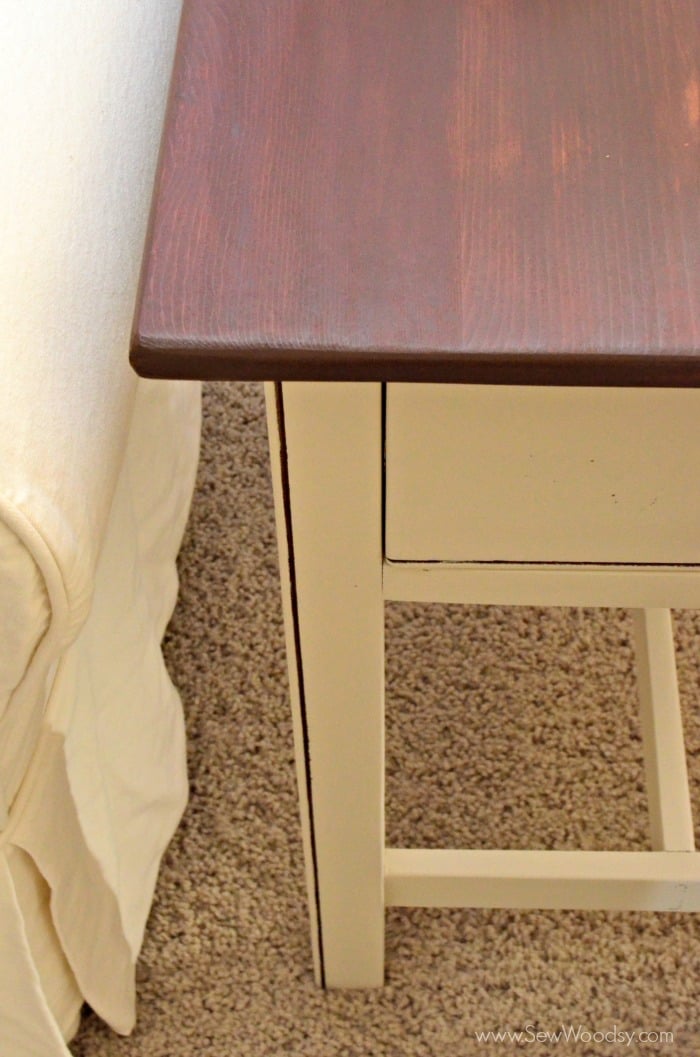
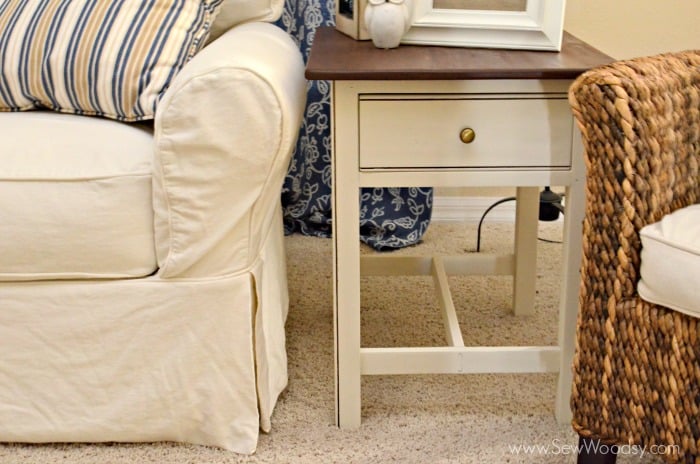
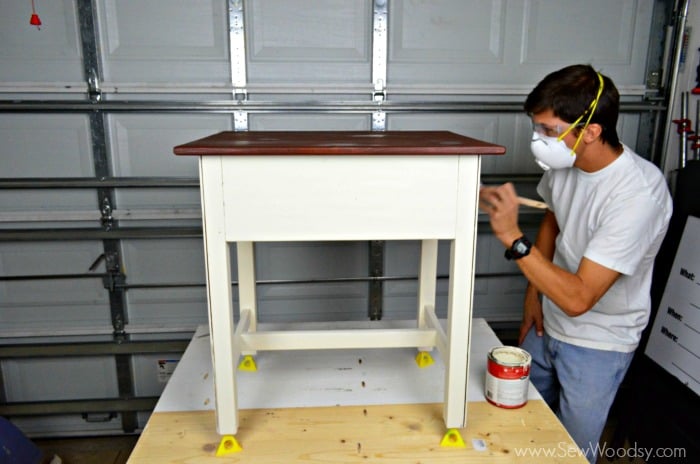 After two coats of paint the end table is almost finished. Jon chose to not paint in the lines/details of the end table. He kept those the original wood color to give it more character. He also didn’t fill any of the knots with paint. He wanted those to be exposed. That’s the wood worker in him…
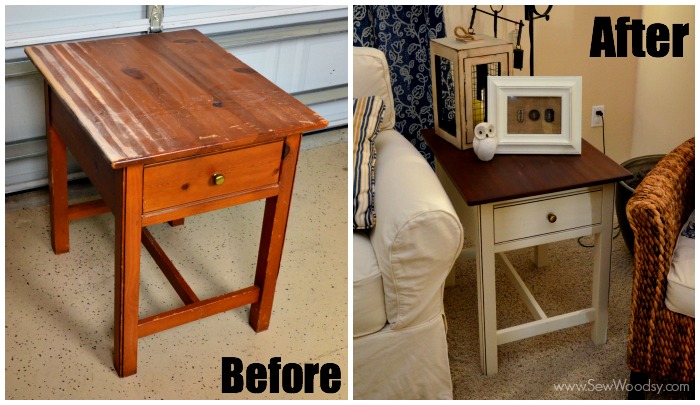
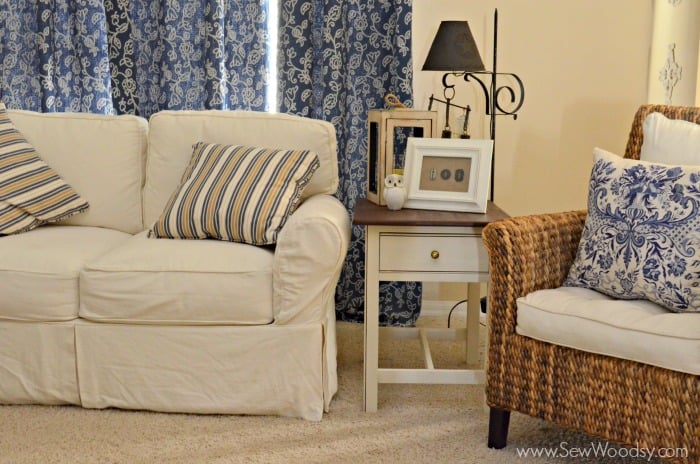
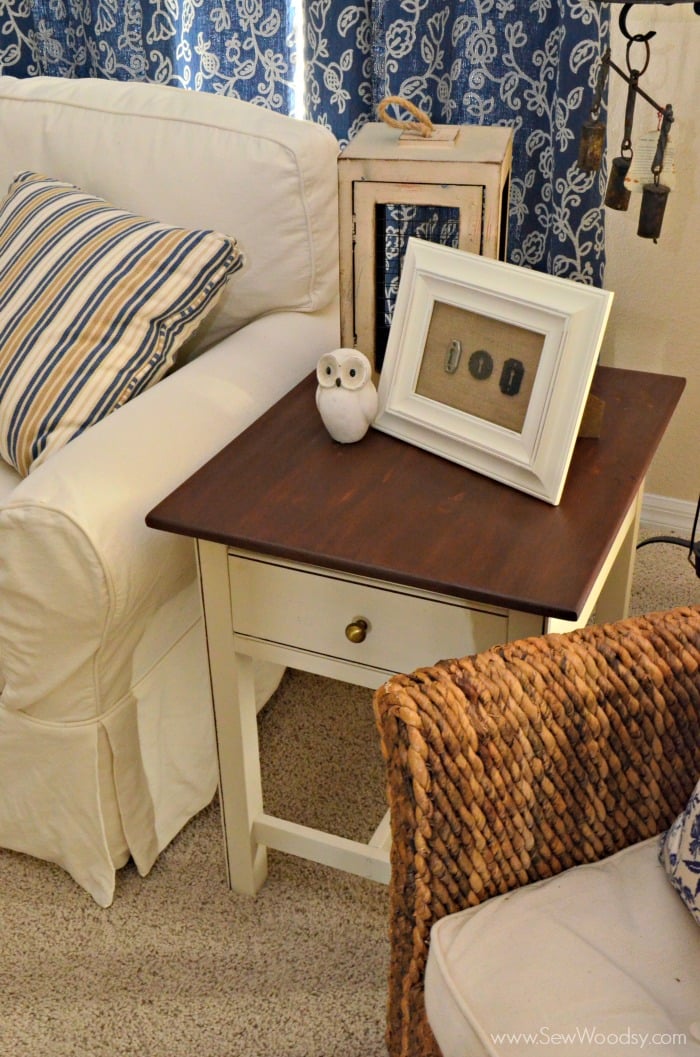
Look at the drastic difference!!! I’m in love with this table and honestly wish it was ours! Now I think I’m going to be on a hunt for a curbside find like this so I can refinish one for us!
Honestly, anyone can refinish a piece of furniture. It is not rocket science!
I hope you feel more confident and will tackle a piece of furniture of your own this year. Before you kick it to the curb, try to refinish it and make it brand new again!
For more 3M DIY projects get social with them on: 3M DIY Twitter Page | 3M DIY Facebook Page | 3M DIY YouTube Page | 3M DIY Pinterest
This post is a collaboration with 3M DIY. To keep up-to-date on projects, products and sampling visit 3MDIY.com.
