• Skip to primary navigation
  • Skip to main content
  • Skip to primary sidebar

Sew Woodsy logo

  • DIY
  • Crafts
  • Cricut
  • Travel
  • About
menu icon
go to homepage
search icon
Homepage link
  • Home
  • Thanksgiving
  • DIY
  • Cricut
  • Travel
  • About Us
    • Email
    • Facebook
    • Instagram
    • Pinterest
    • Twitter
    • YouTube
  • ×

    Sew Woodsy » Holiday » Christmas

    Published: Nov 21, 2014 · Modified: Jun 22, 2021 by Katie · This post may contain affiliate links.

    DIY Baby’s First Ugly Christmas Sweater

    Sharing is caring!

    0 shares
    • Facebook
    • Twitter

    I wrote this post as part of a paid campaign with I Love to Create and Blueprint Social. The opinions in this post are my own.

    DIY Baby's First Ugly Christmas Sweater #uglysweaterchallenge

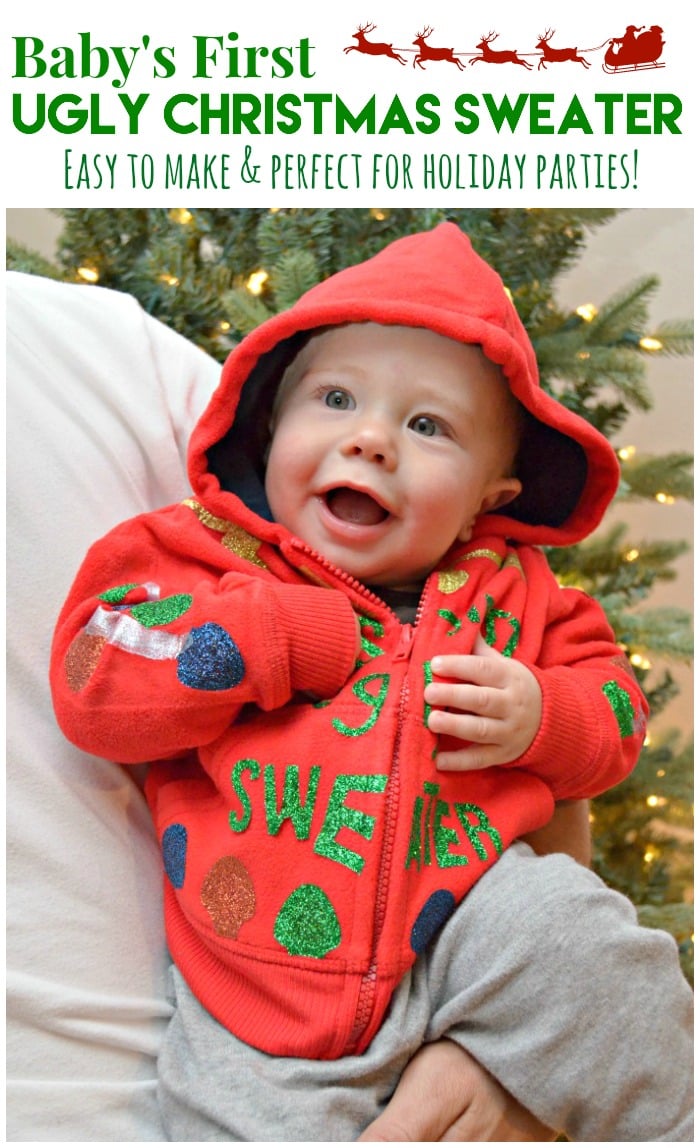
    I’m so excited about today’s project that I’m sharing with you. Jon and I made tacky Christmas sweaters a few years back. We figured it would be super cute to make Ryder his first ugly Christmas sweater, too! Making your baby an ugly Christmas sweater should be a new family tradition each and every year. I hope that my tutorial gives you holiday inspiration for your own ugly Christmas sweater!
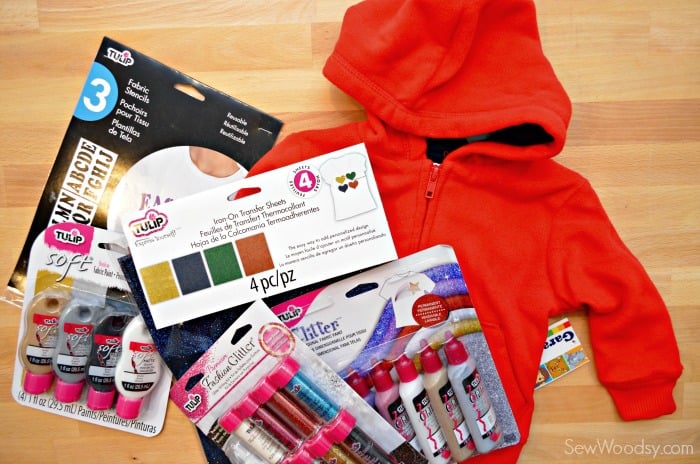
    baby ugly sweater 3

    Supplies:

    • Hooded Fleece Sweatshirt
    • Cricut Explore + Tools
    • Tulip® Fashion Glitter® Shimmer Transfer Sheets
    • Iron and Ironing Board
    • Tulip® Soft® Fabric Paint
    • Paint Brush

    baby ugly sweater 1

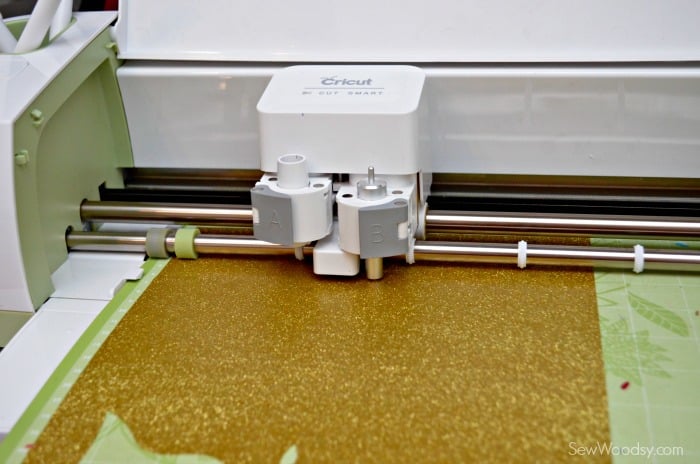
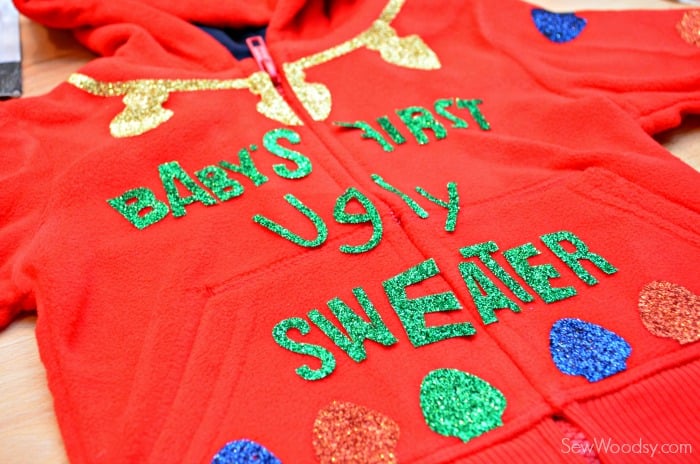
    First up, I added a Tulip® Fashion Glitter® Shimmer Transfer Sheet to my Cricut Explore. I did have some challenges cutting it on my die-cutting machine. I tried the traditional Iron-On Vinyl setting then bumped it down to the vinyl setting. The larger traditional shapes cut fine. Cutting small words was a little challenging. So to add to the “ugliness” I hand cut a few letters that didn’t cut out for me.

    baby ugly sweater 2

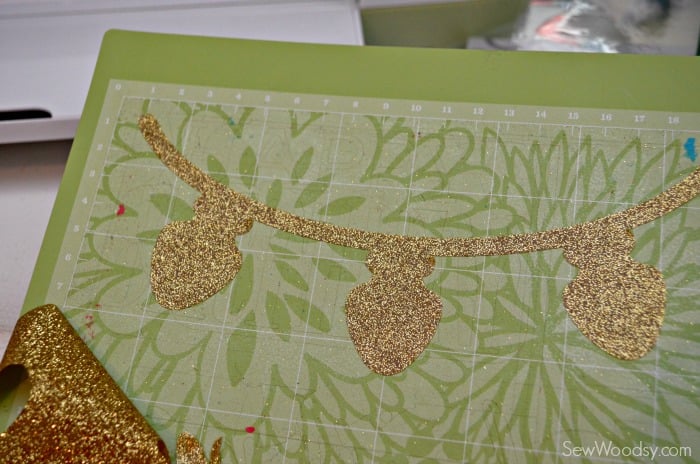
    I went with a Christmas light theme. They cut out perfectly on my machine!

    baby ugly sweater 4

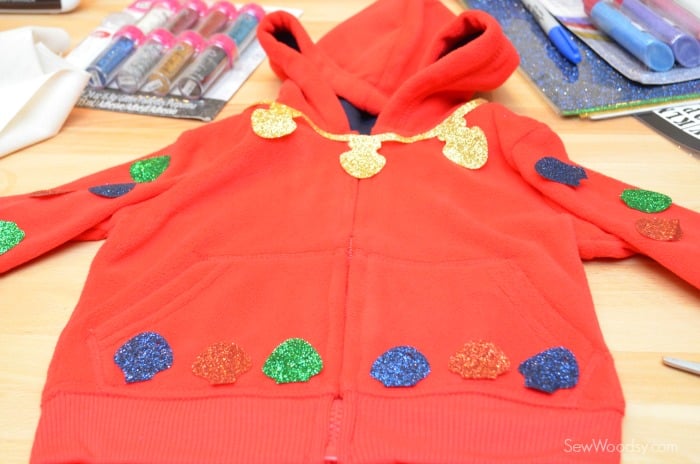
    Next up, I laid out all the Christmas lights.

    baby ugly sweater 5

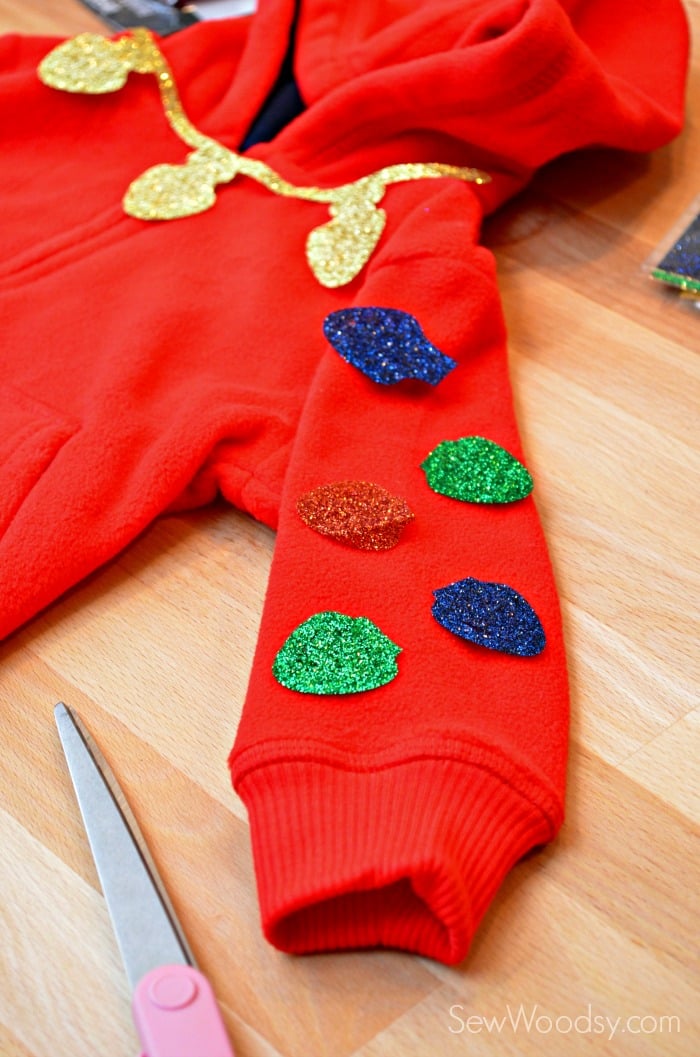
    I decided to put Christmas lights down the arms too! I also cut the gold string of lights in half at the zipper area (not pictured).

    baby ugly sweater 6

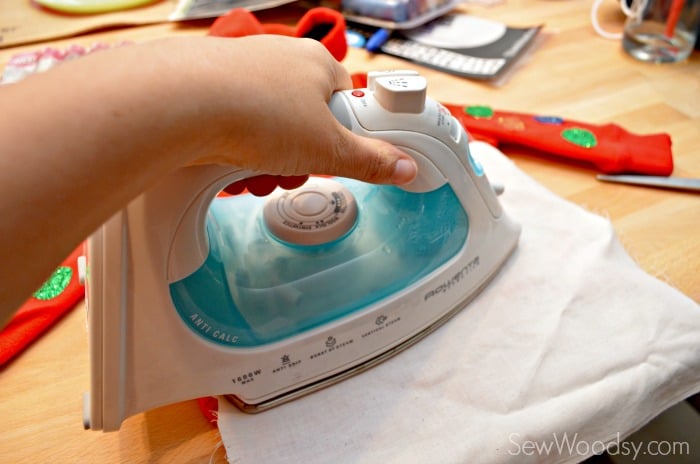
    I ironed them on one-by-one.

    baby ugly sweater 7

    After the lights were ironed-on I placed all the letters on the sweater and then ironed those on.

    baby ugly sweater 8

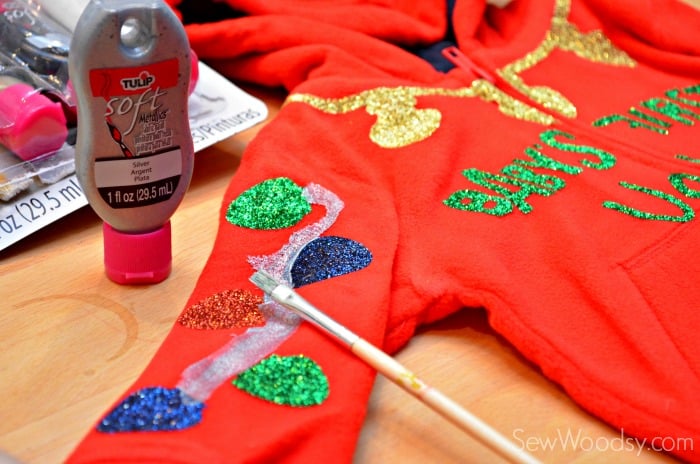
    I used the Tulip® Soft® Fabric Paint and painted on a line that is suppose to look like a cord! Because I did a thin line it

    baby ugly sweater 9

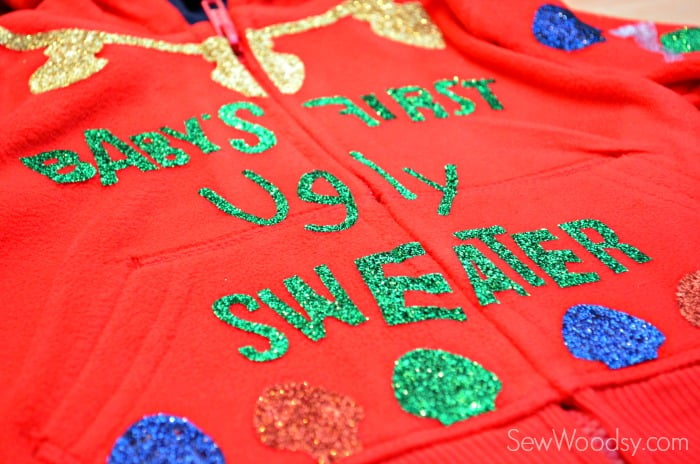
    This is what it looked like after the sweater was done!

    DIY Baby's First Ugly Christmas Sweater

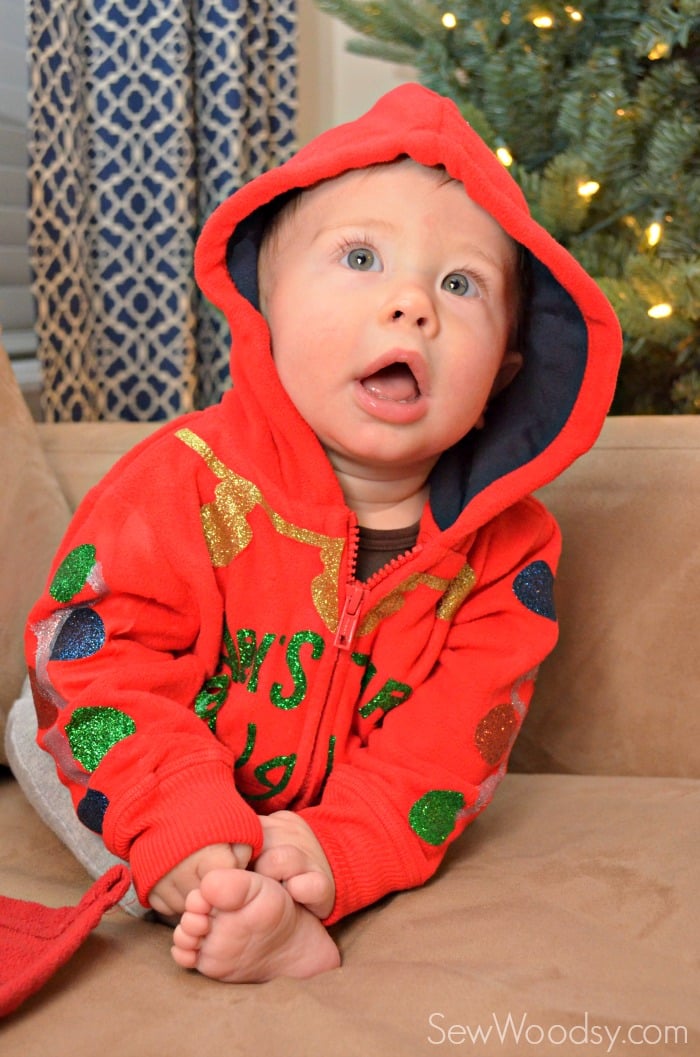
    It’s now just about impossible to photograph my almost 8 month old baby.

    DIY Baby's First Ugly Christmas Sweater

    And trying to get him to actually look into the camera… forget about it! Right after this we had extreme melt down. So Jon scooped him up and put him in his arms.

    DIY Baby's First Ugly Christmas Sweater

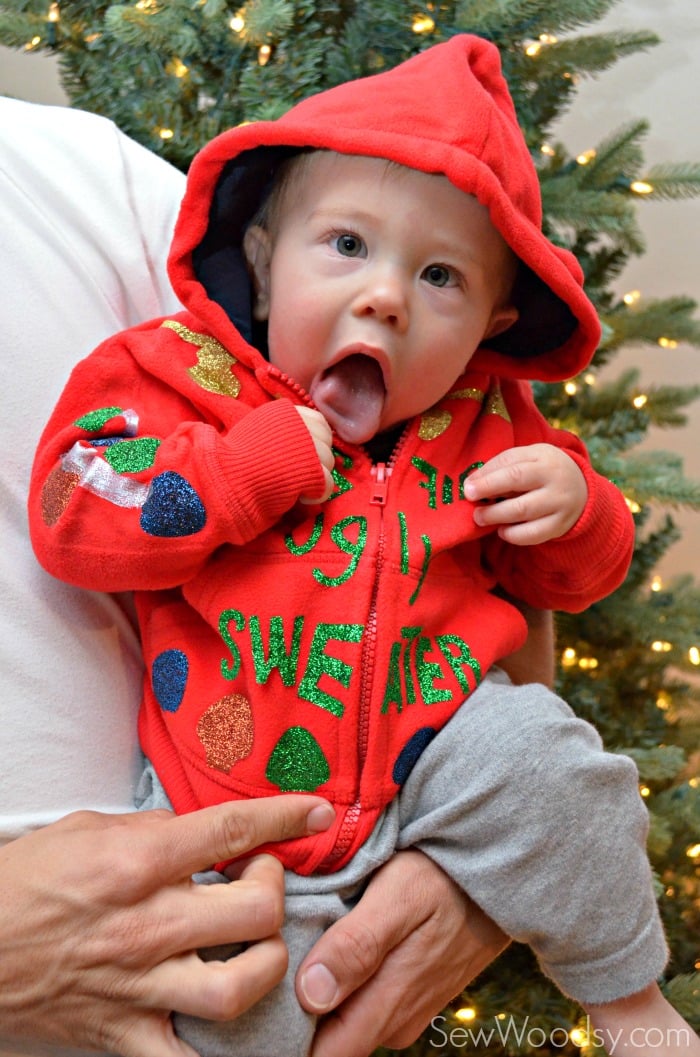
    All Ryder wanted to do was eat his Sweater. More reason why I used the Shimmer Transfer Sheets and not 3-dimensional items on the sweater! DIY Baby's First Ugly Christmas Sweater

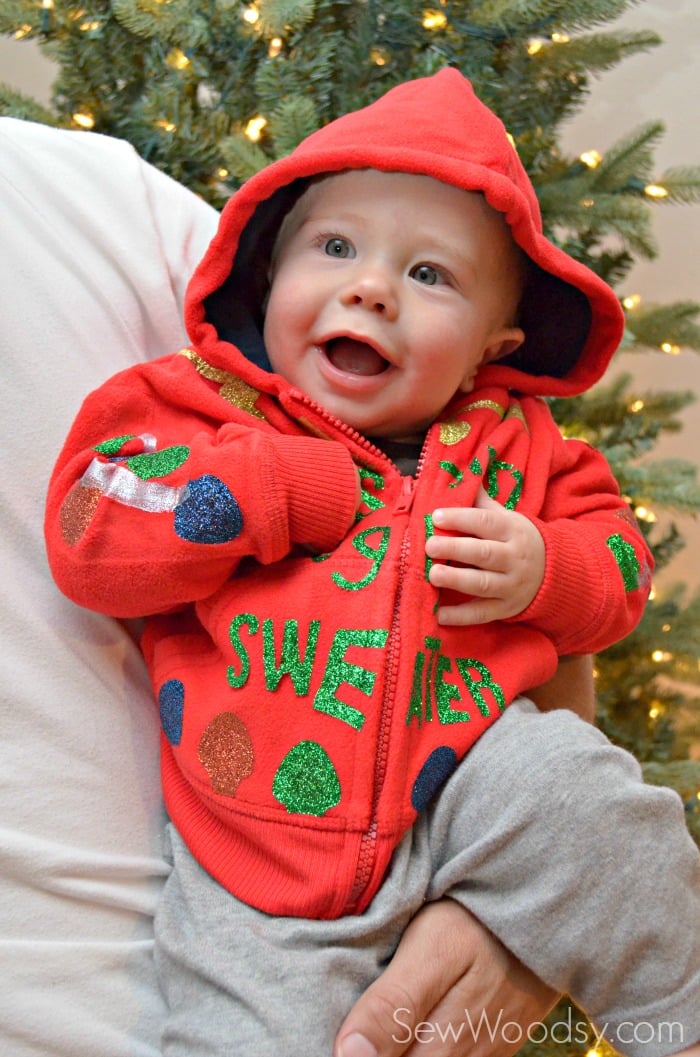
    There’s the happy baby I love and know!

    Need more inspiration? Check out some of the other ugly sweaters:

    You can stay social with Tulip Brand on Facebook, Twitter, and Pinterest.

    « DIY Santa’s Cookie and Milk Placemat
    10 Reasons Why I LOVE the Cricut Explore® »

    Primary Sidebar

    • Email
    • Facebook
    • Instagram
    • Pinterest
    • Twitter
    • YouTube
    Male and female hugging on each other in the woods.

    Hi, we're Katie & Jon! Welcome to our home away from home!

    Sew Woodsy is a lifestyle blog focusing on crafts, home DIY projects, family, travel and all things life. Get comfy and join us on our adventure!

    More About Us →

    9 different logos from various media outlets where Sew Woodsy has been featured on.

    Easter Projects

    • Kids Easter Basket Ideas
    • 25 Easter Basket Ideas for Toddlers
    • Free Easter Coloring Pages
    • 17 Easter Craft Ideas

    Trending

    • How to Create a Natural Log Pathway + Video
    • Tips & Tricks on Installing Butcher Block Countertops
    • How to Host a Baby Shower at Work
    • How to Use Heat n Bond

    Male and female hugging on each other in the woods.

    Hi, we're Katie & Jon! Welcome to our home away from home!

    Sew Woodsy is a lifestyle blog focusing on crafts, home DIY projects, family, travel and all things life. Get comfy and join us on our adventure!

    More About Us →

    9 different logos from various media outlets where Sew Woodsy has been featured on.

    Easter Projects

    • DIY Follow the Bunny Pillow Cover
    • Bunny Kisses & Easter Wishes Burlap Garden Flag
    • Easter Bunny Family Pillow
    • DIY Easter Bunny Onesie with Name

    Trending

    • How to Create a Natural Log Pathway + Video
    • Tips & Tricks on Installing Butcher Block Countertops
    • How to Host a Baby Shower at Work
    • How to Use Heat n Bond

    Footer

    ↑ back to top

    9 different logos from various media outlets where Sew Woodsy has been featured on.

    About

    • About Us
    • Privacy Policy
    • Accessibility Statement

    Newsletter

    • Sign Up! for emails and updates

    Contact

    • Contact
    • Work with us
    • Advertise

    Copyright © 2010 - 2022 Sew Woodsy