Learn how to make these homemade 7 Dwarf Shirts with my step-by-step guide on how to create these charming costumes for your next themed event or group Halloween costume.
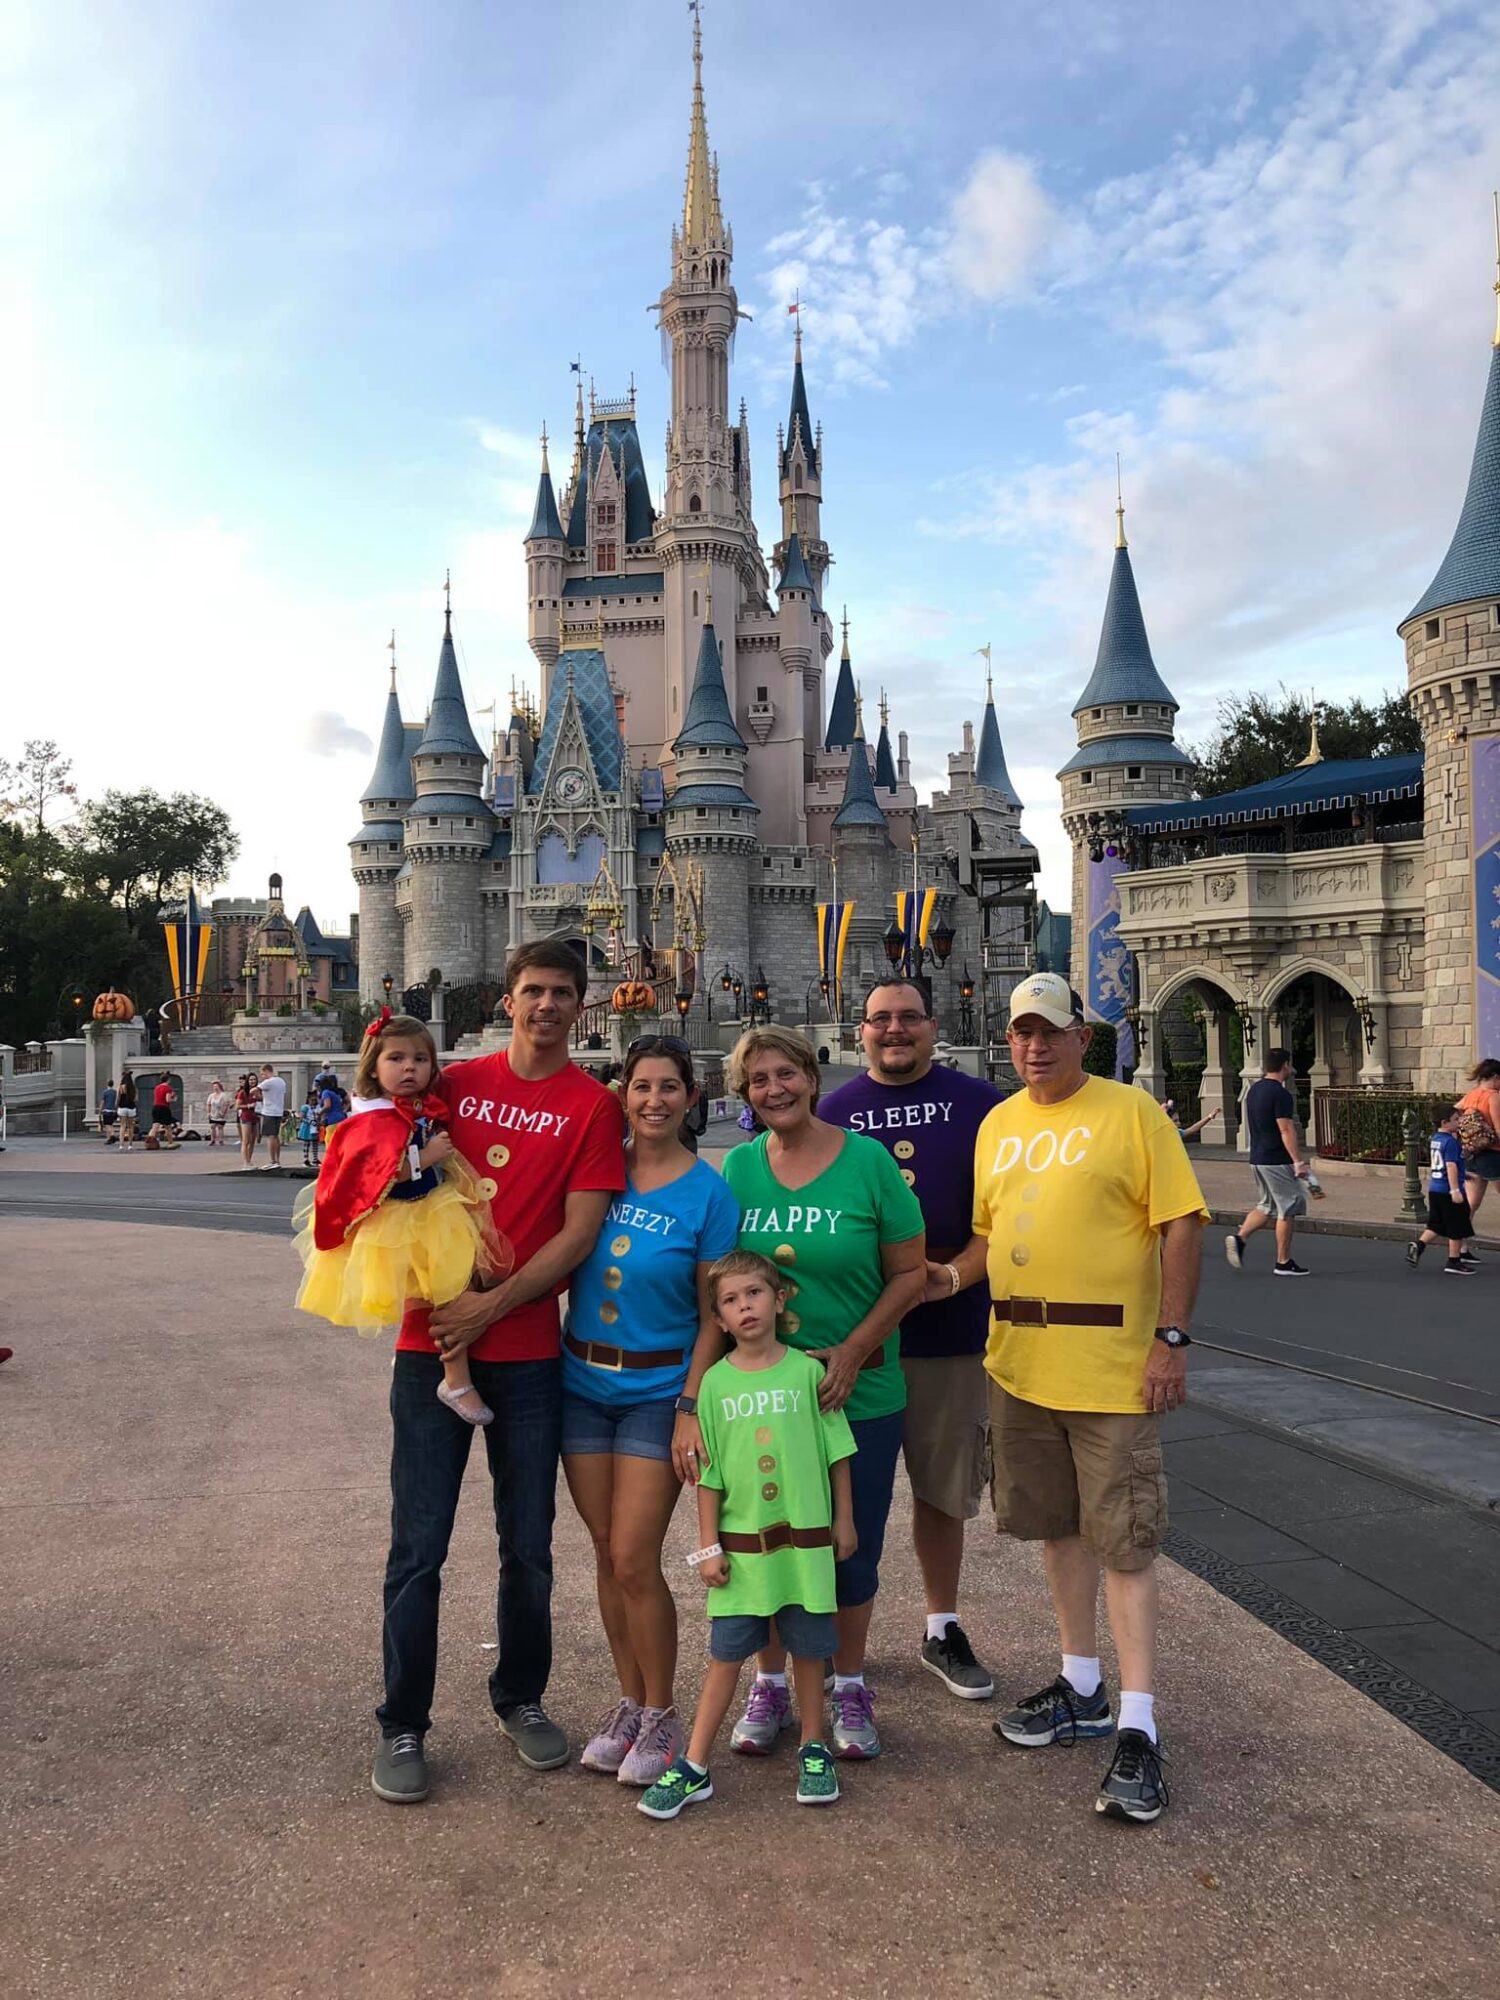
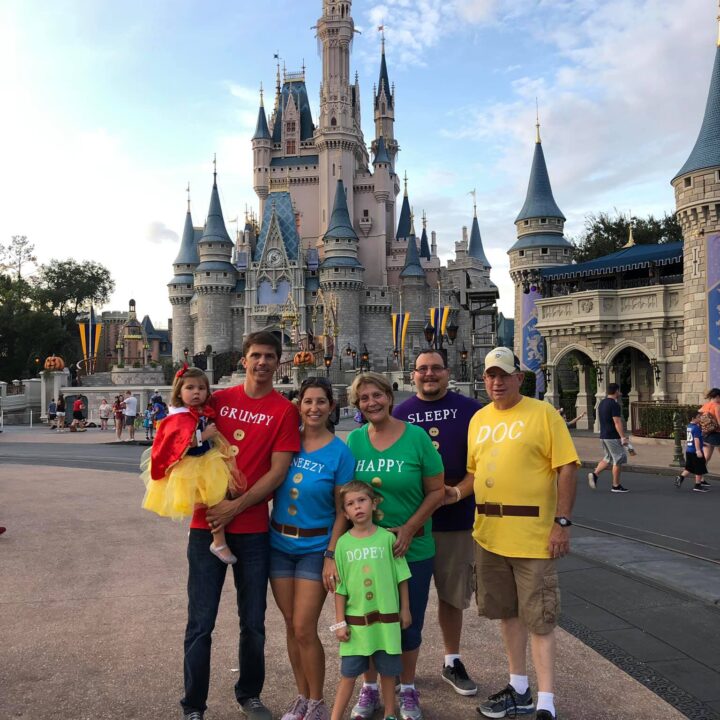
Last week, I shared on the blog that we surprise our children and took them to Mickey’s Not So Scary Halloween party! We went with a simple theme since we had a large group of us going. My daughter already owned a Snow White costume, so I ran with the idea of Snow White and the Seven Dwarfs! Except, we only had six of us so we were Snow White and the Six Dwarfs. But whose judging!? Lol We had a lot of compliments from the minute we walked up to the ticket and transportation center to ride the monorail over to Disney’s Magic Kingdom.
When I started researching this costume idea I found quite a few shirts sold on Etsy. This is great if you’re not the crafty one. But if you’re looking at this post– most likely you are the crafty one which means you can totally make these shirts for a fraction of the price on your own.

If you own a Cricut machine you are in luck my friend! I’ve done all the work for you. I have a free cut file that you can find on Cricut Design Space. It took me about three hours from start to finish to make six shirts. I did have to stop to make lunch for my daughter and answer a few phone calls. So it might take you a little last time if you don’t have to keep starting and stopping.
Table of contents
Supply List for DIY Dwarf Shirts:

- Cricut
- Cricut Design Space with Dwarf Cut File
- 7 cotton t-shirts in various colors
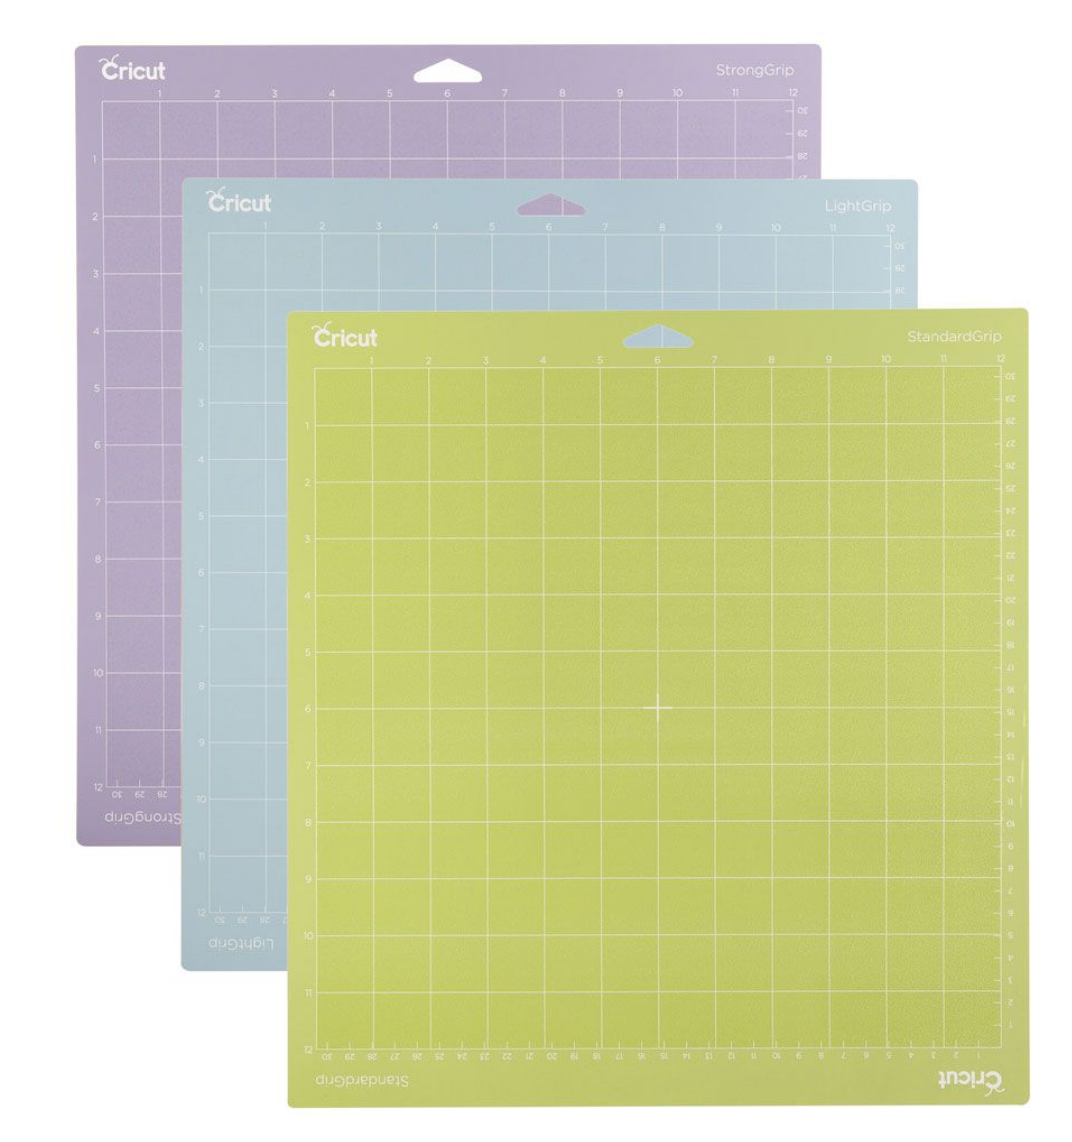
- Cricut Mat
- Cricut Iron-On Vinyl; 1 roll each; Gold, Brown, and White
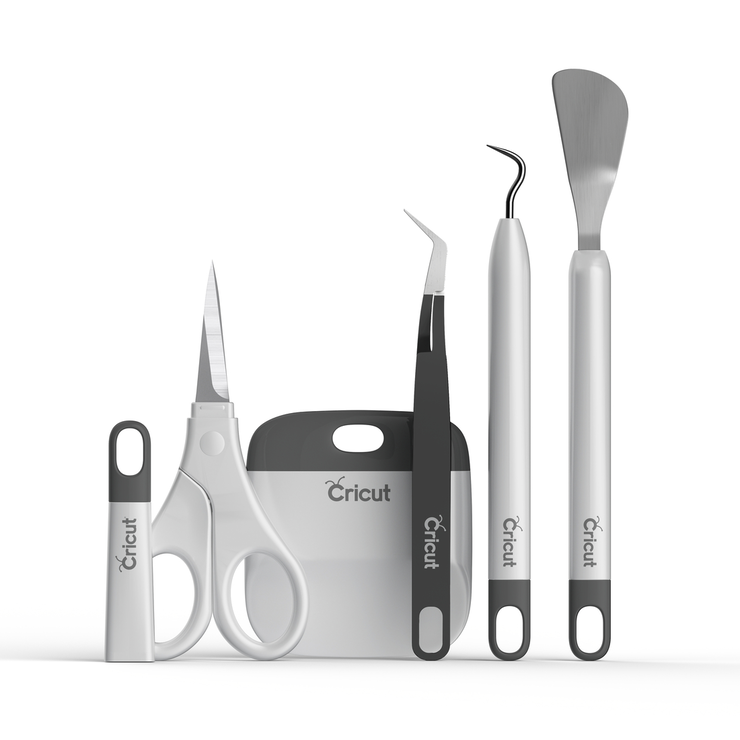
- Cricut Tools
- Cricut BrightPad
- Cricut EasyPress Tote
- Iron / Heat Press / Cricut EasyPressCricut EasyPress™ Mat
How to Cut Iron-On Vinyl with a Cricut
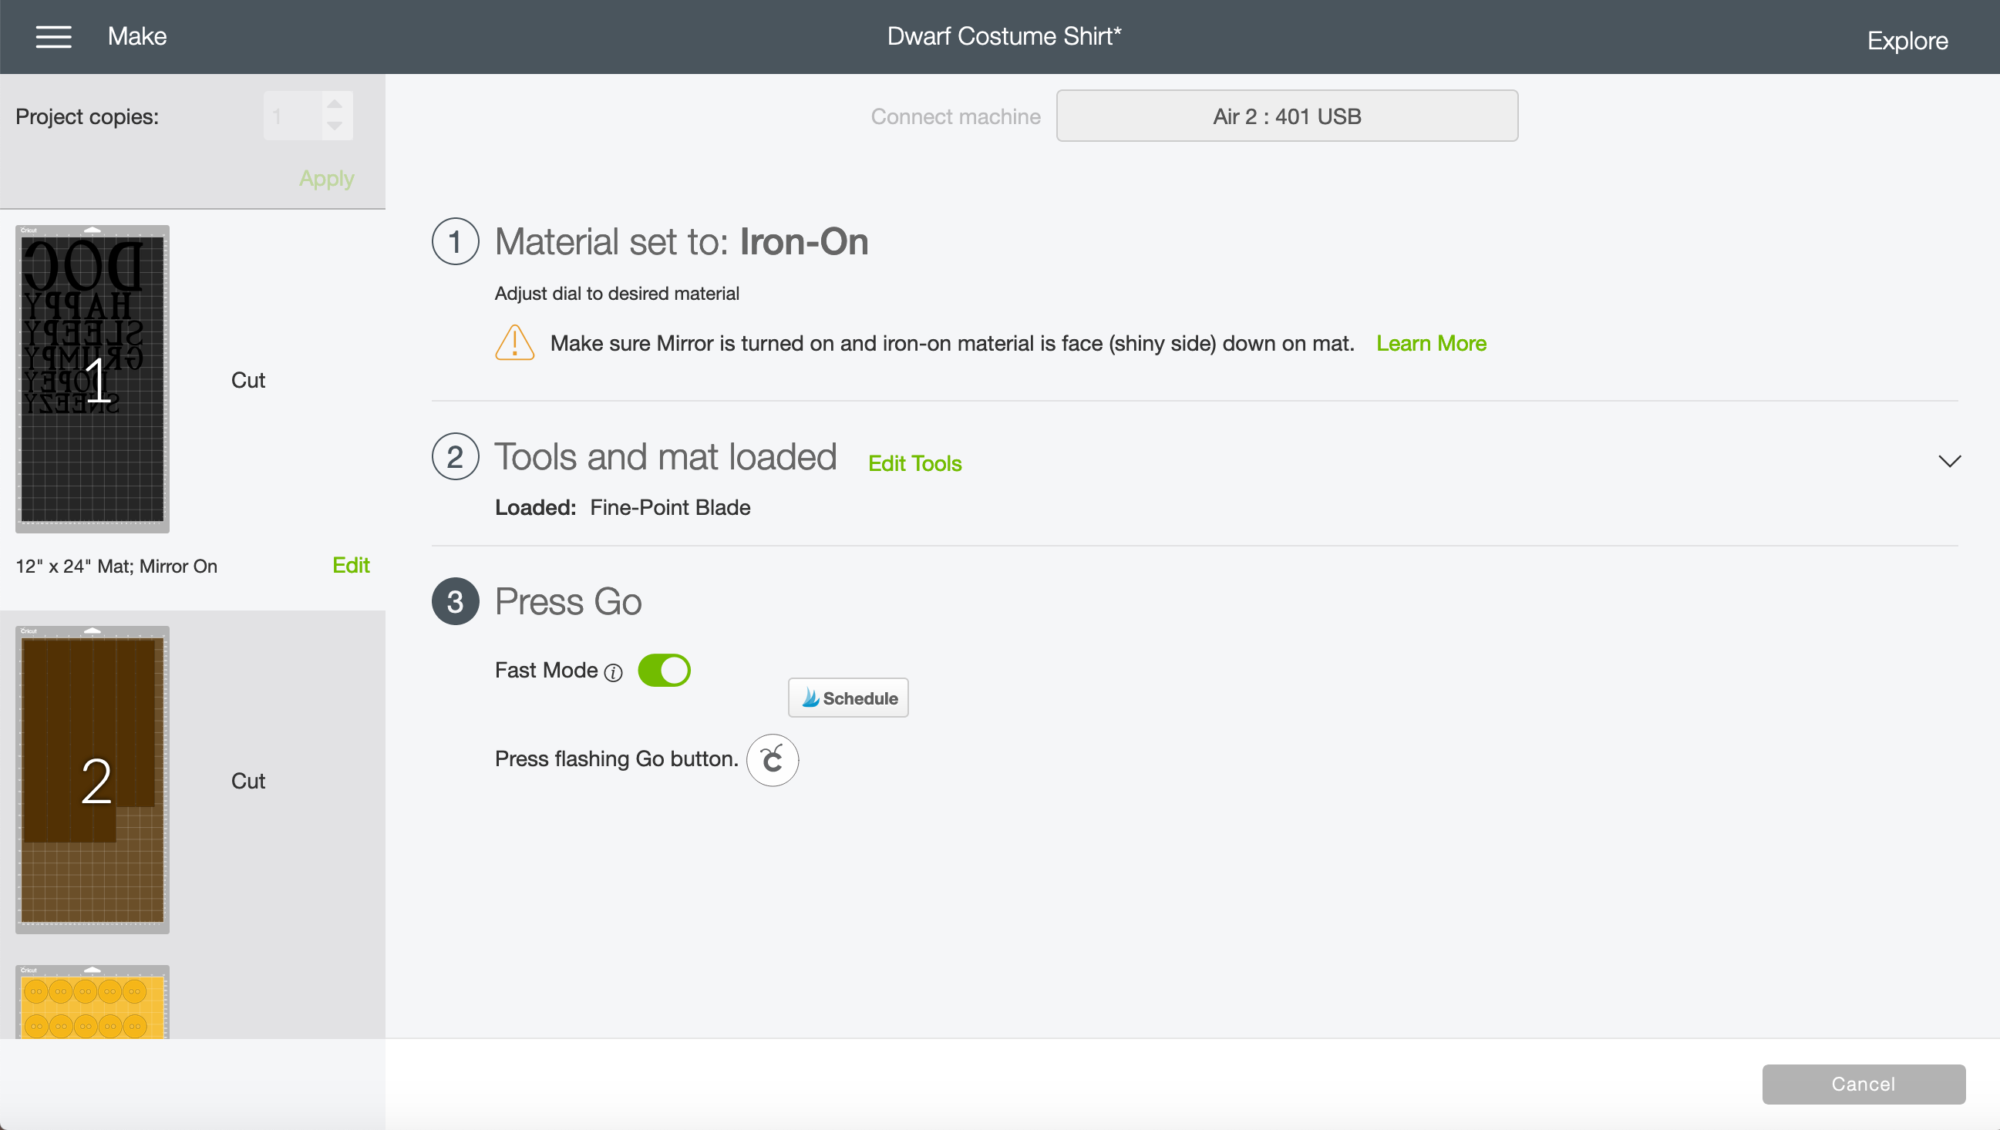
First you need to cut each layer from the Dwarf Costume shirt file in Cricut Design Space. Make sure you mirror every layer. You’ll notice that in Design Space the dwarf names are in black. I did this so you could see it better on the screen. I just used a white roll of Iron-On vinyl to cut out the names.
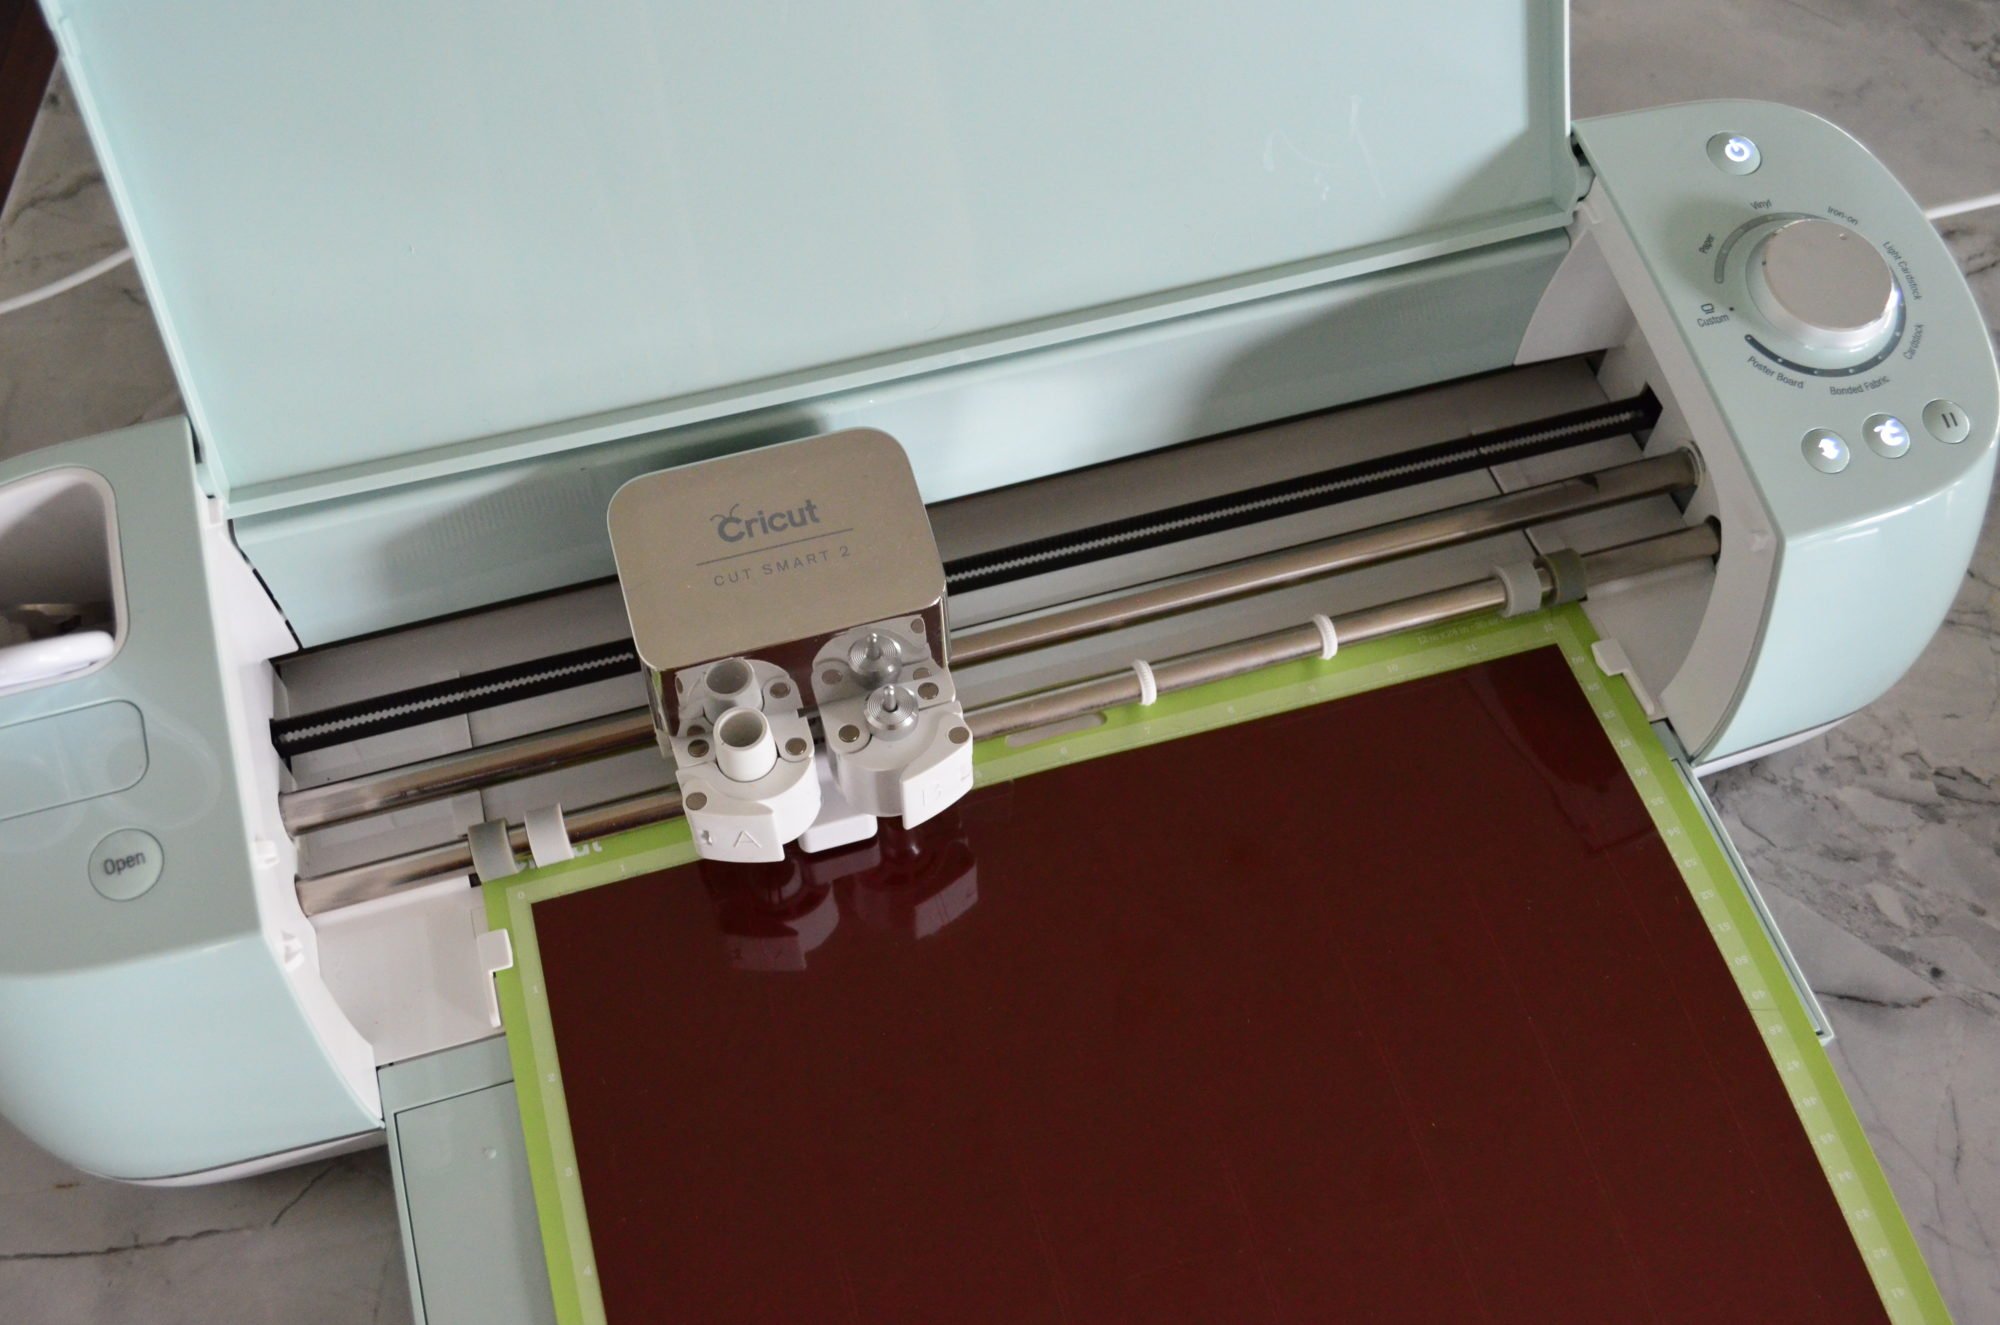
Cut each layer. I used the 12×24 mat for this project so I only had to make 3 passes on the Cricut.

Once everything is cut it’s time to start weeding the negative from the vinyl.
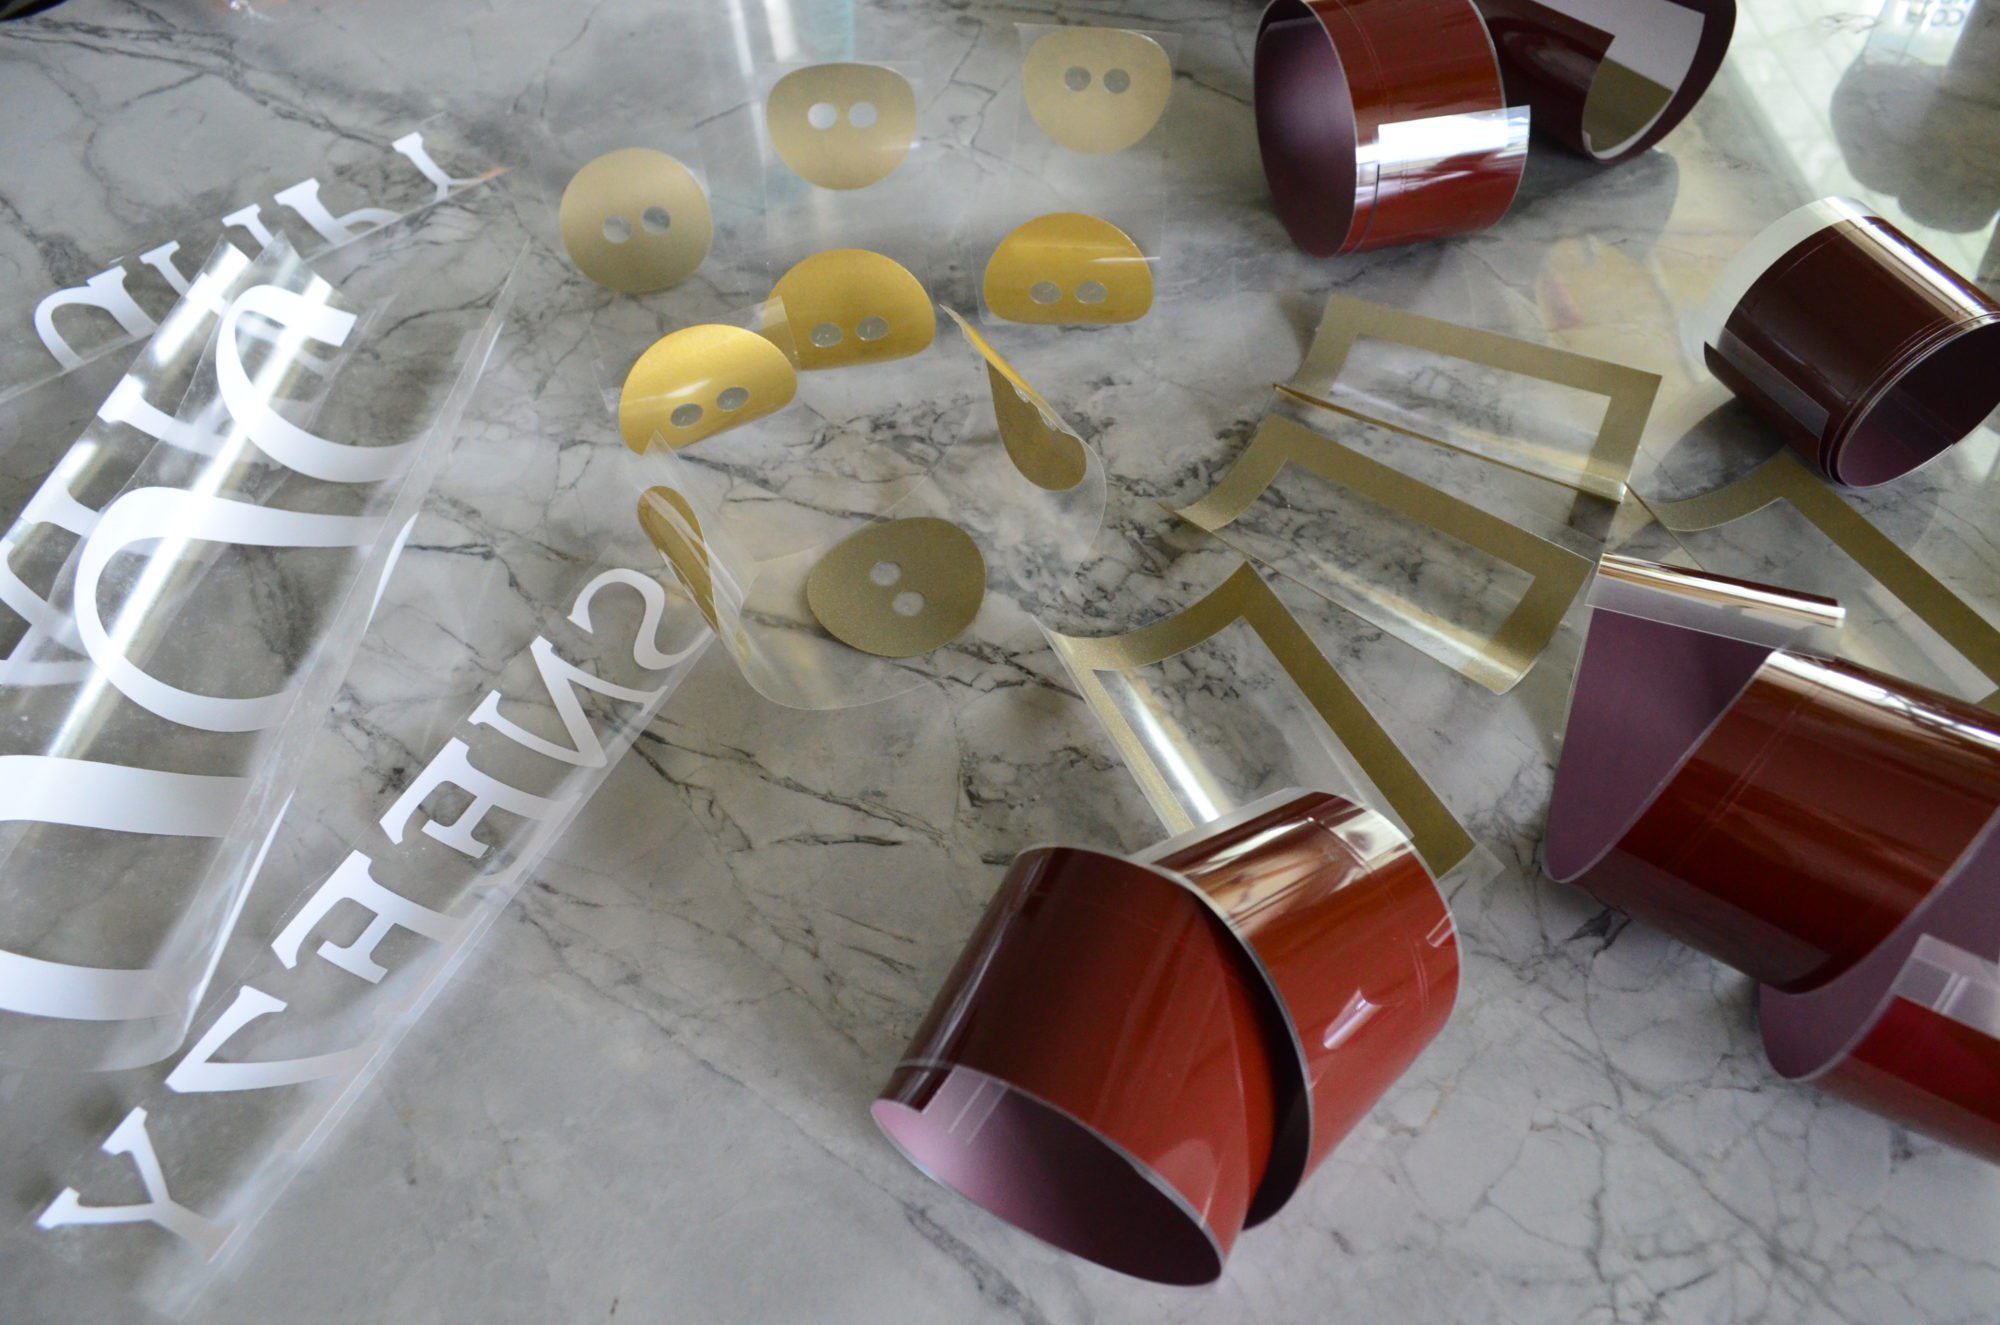
Then, carefully use scissors to cut the names apart as well as belts, buckles, and the 3 button set.
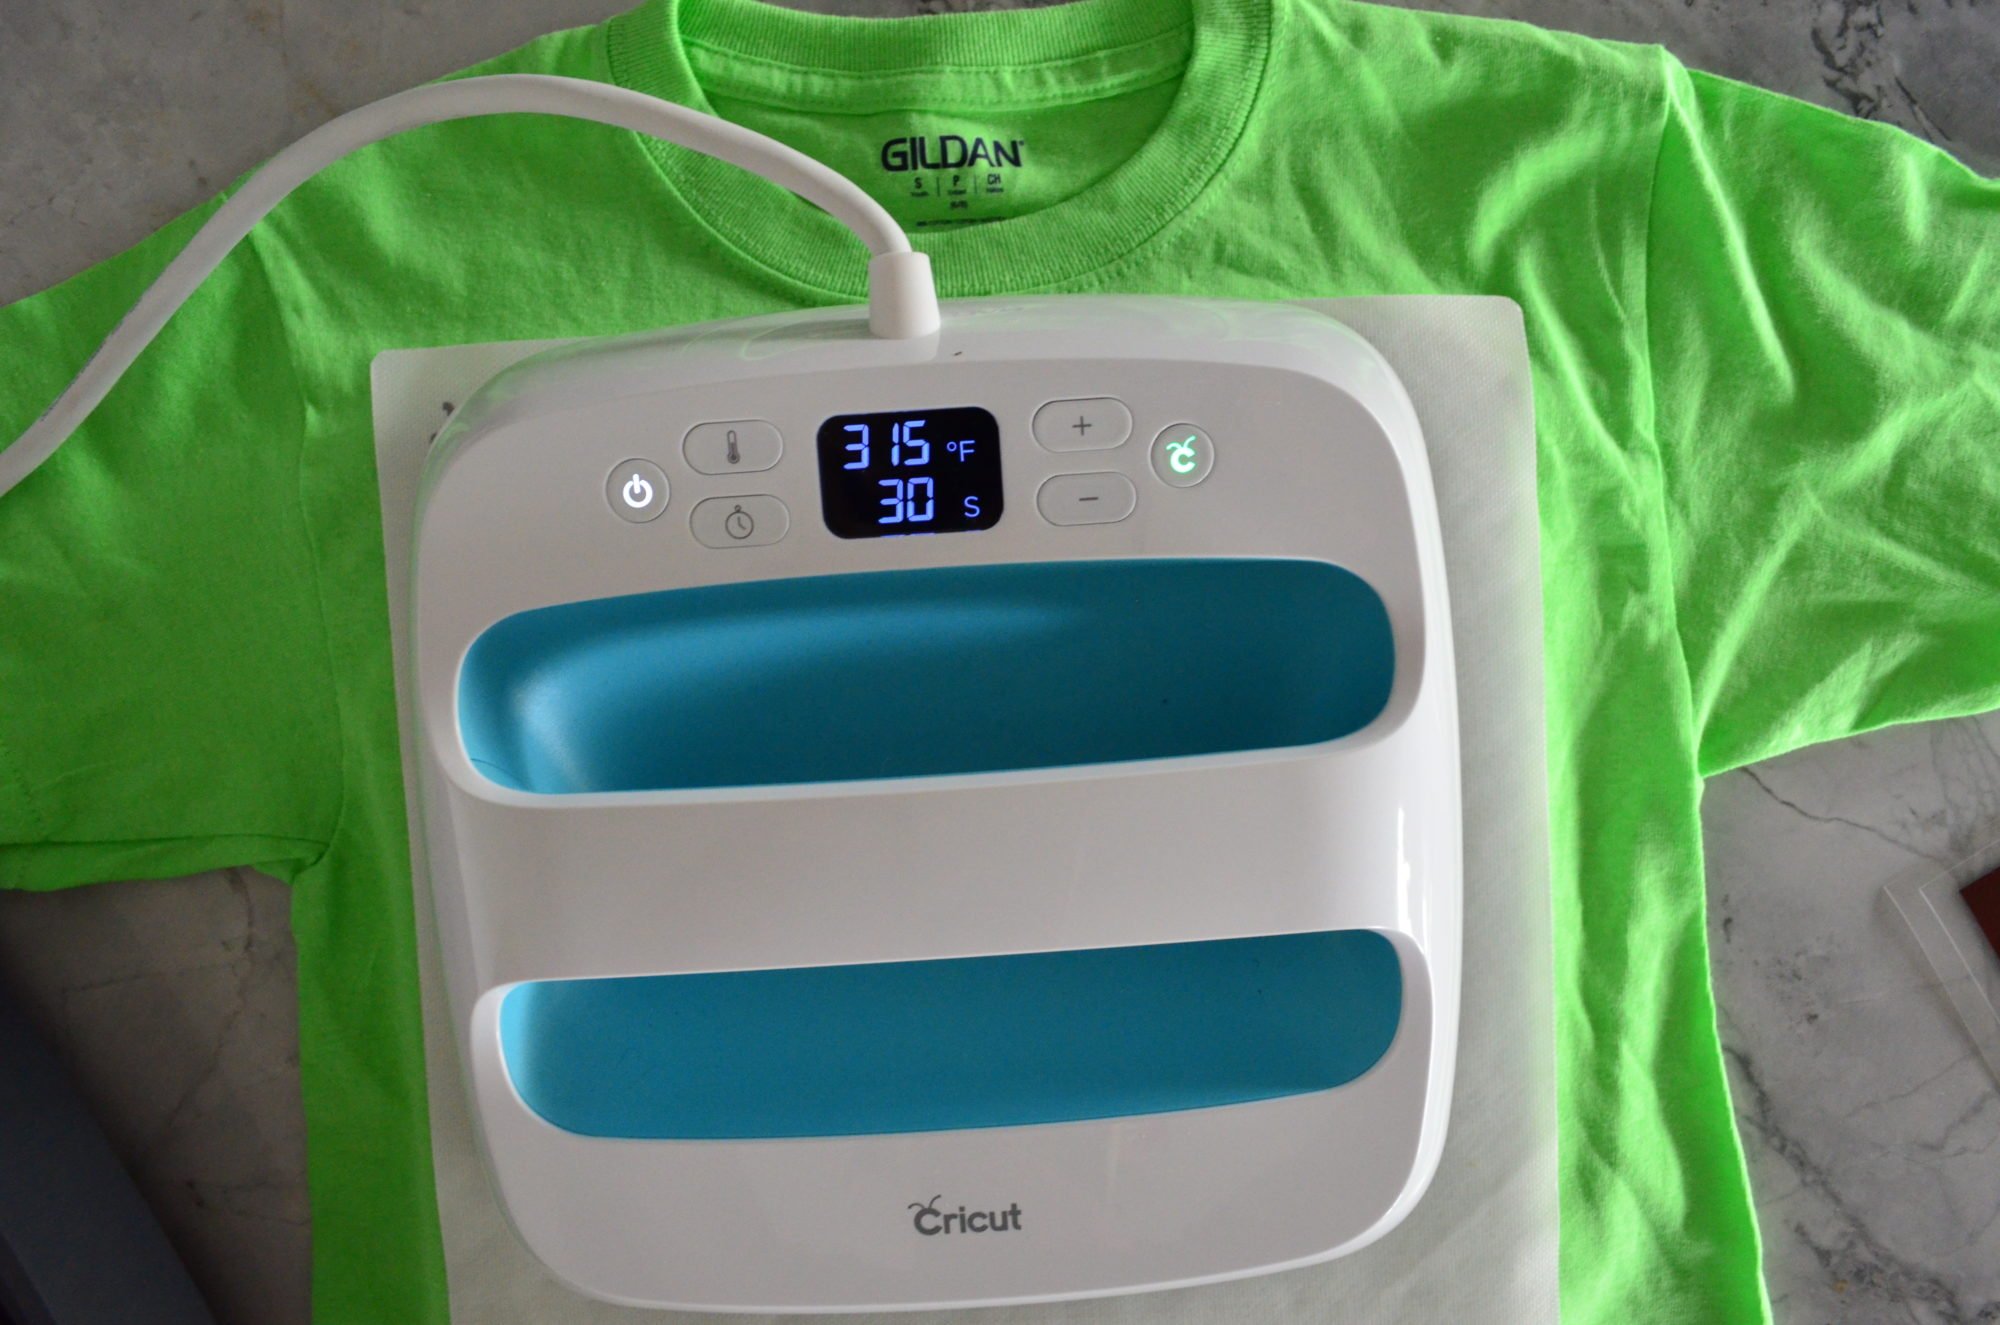
Next, fire up your Cricut EasyPress. Check out the Interactive EasyPress guide. For a cotton t-shirt with Everyday Iron-On material you need to press for 30 seconds at 315 degrees Fahrenheit. But read all the instructions.
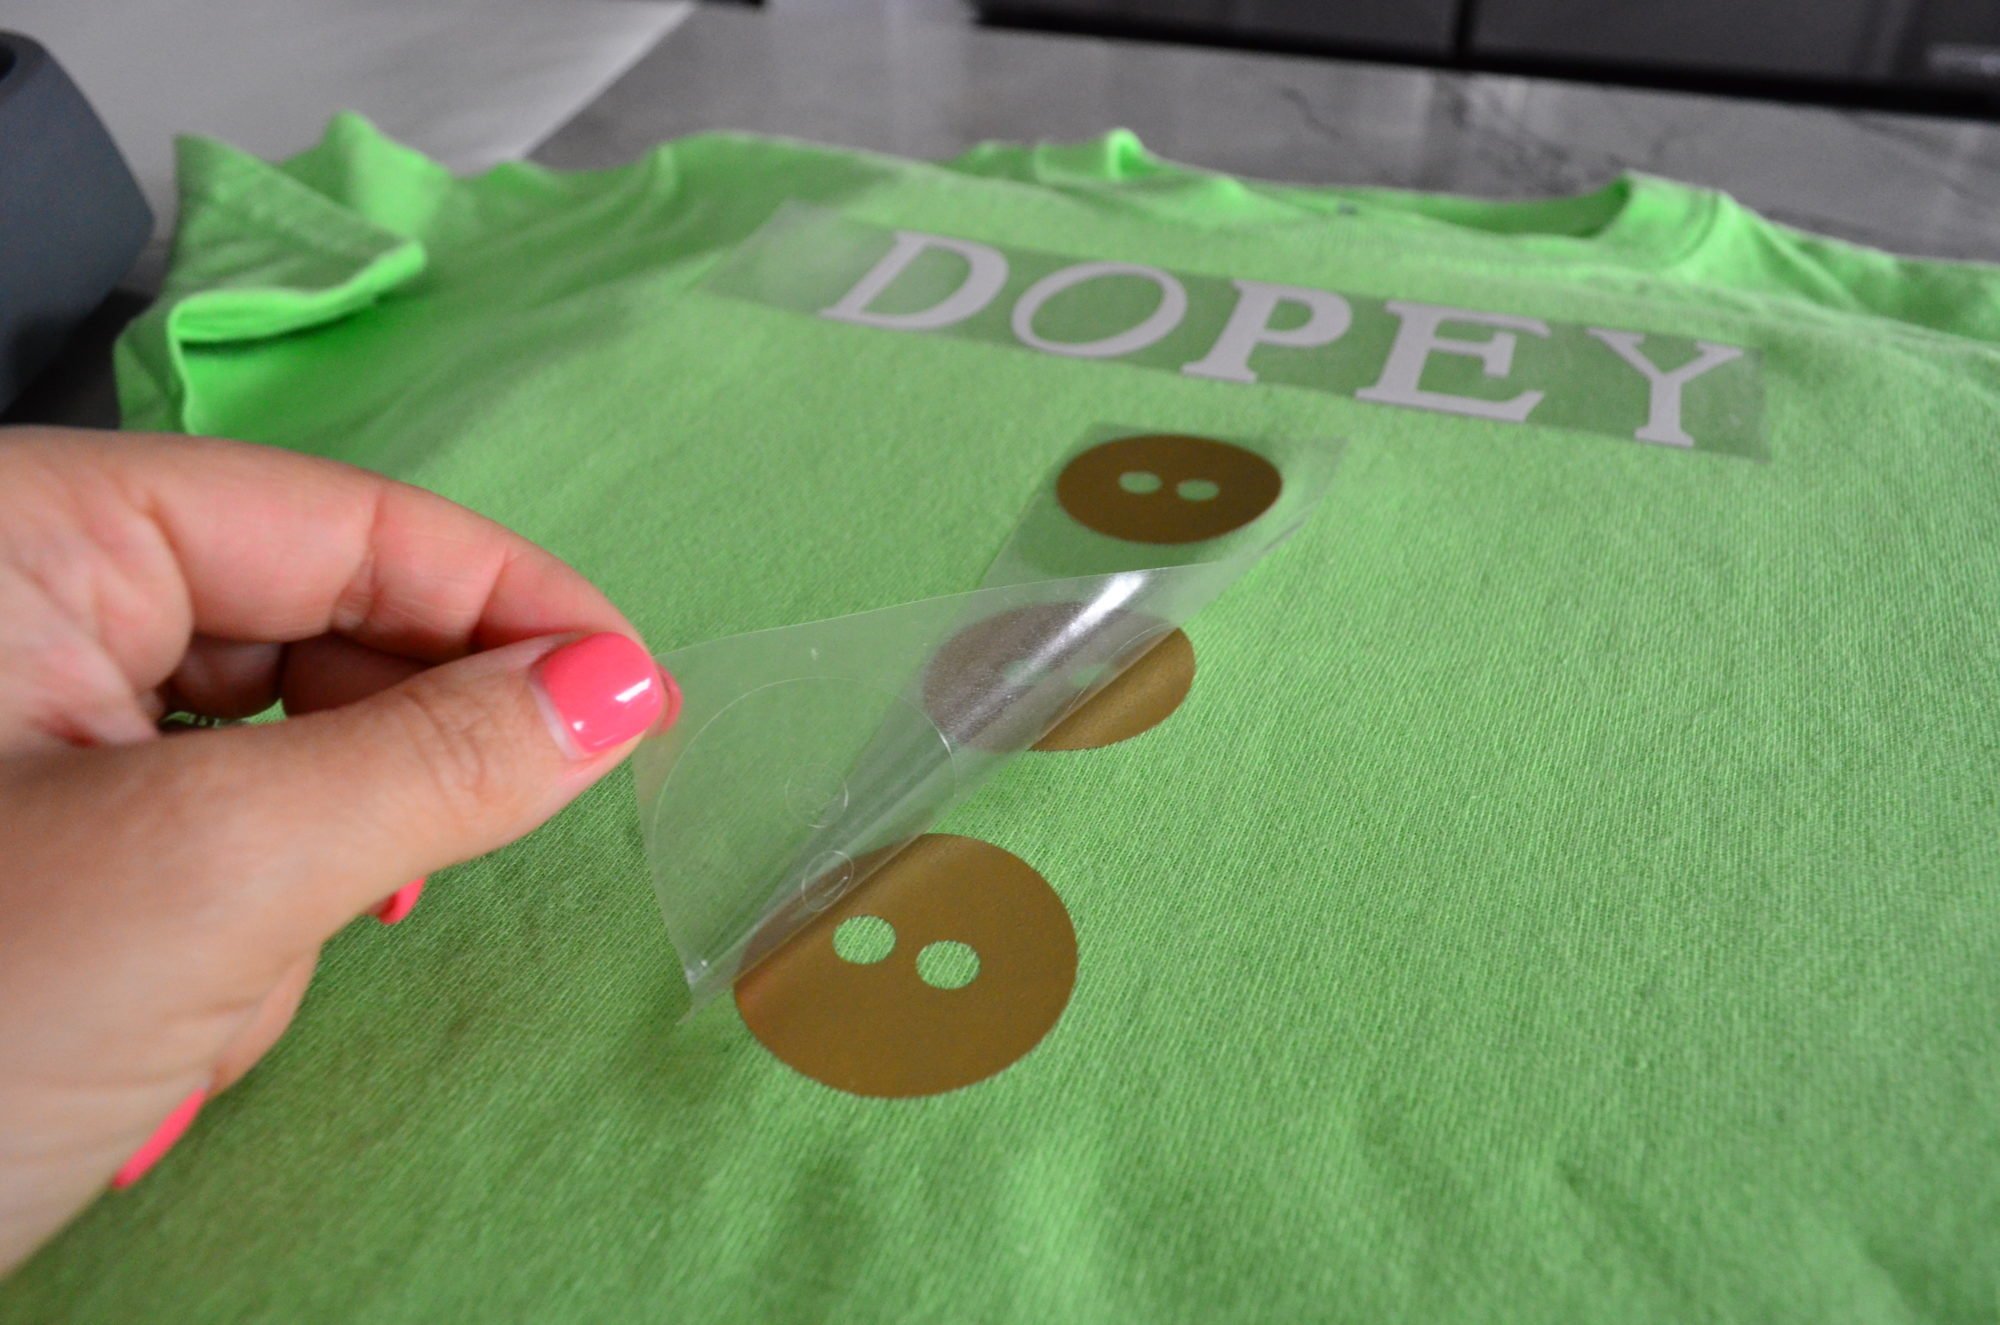
I pressed 3 times. I pressed the name and buttons first. Then, carefully removed the plastic doing a warm-peel.
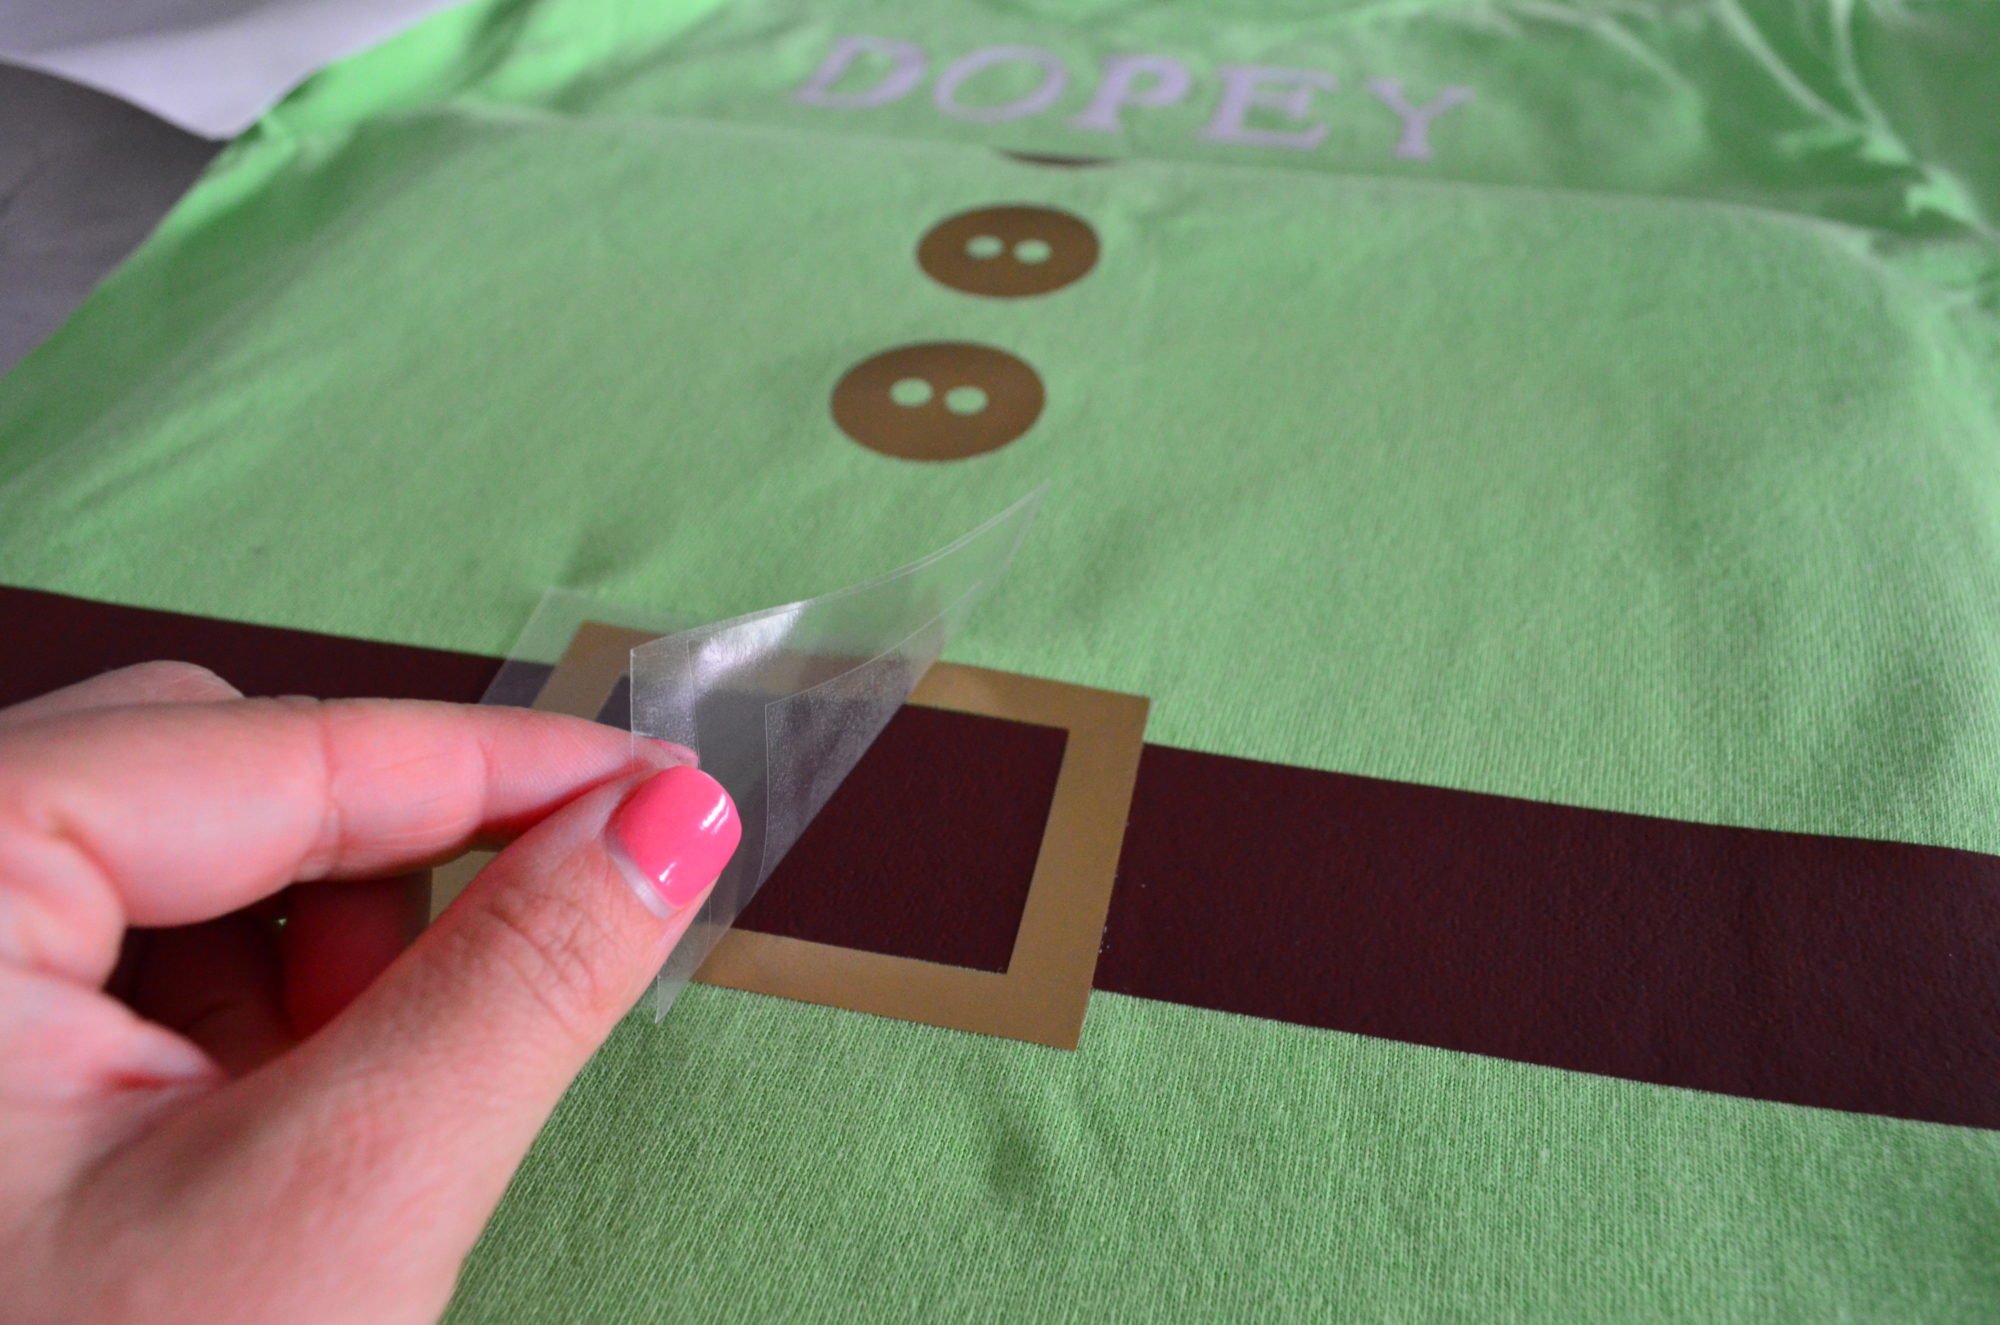
Then, apply the belt. Carefully, remove the plastic film layer. Last step, add on the belt buckle. Then carefully remove the plastic film.
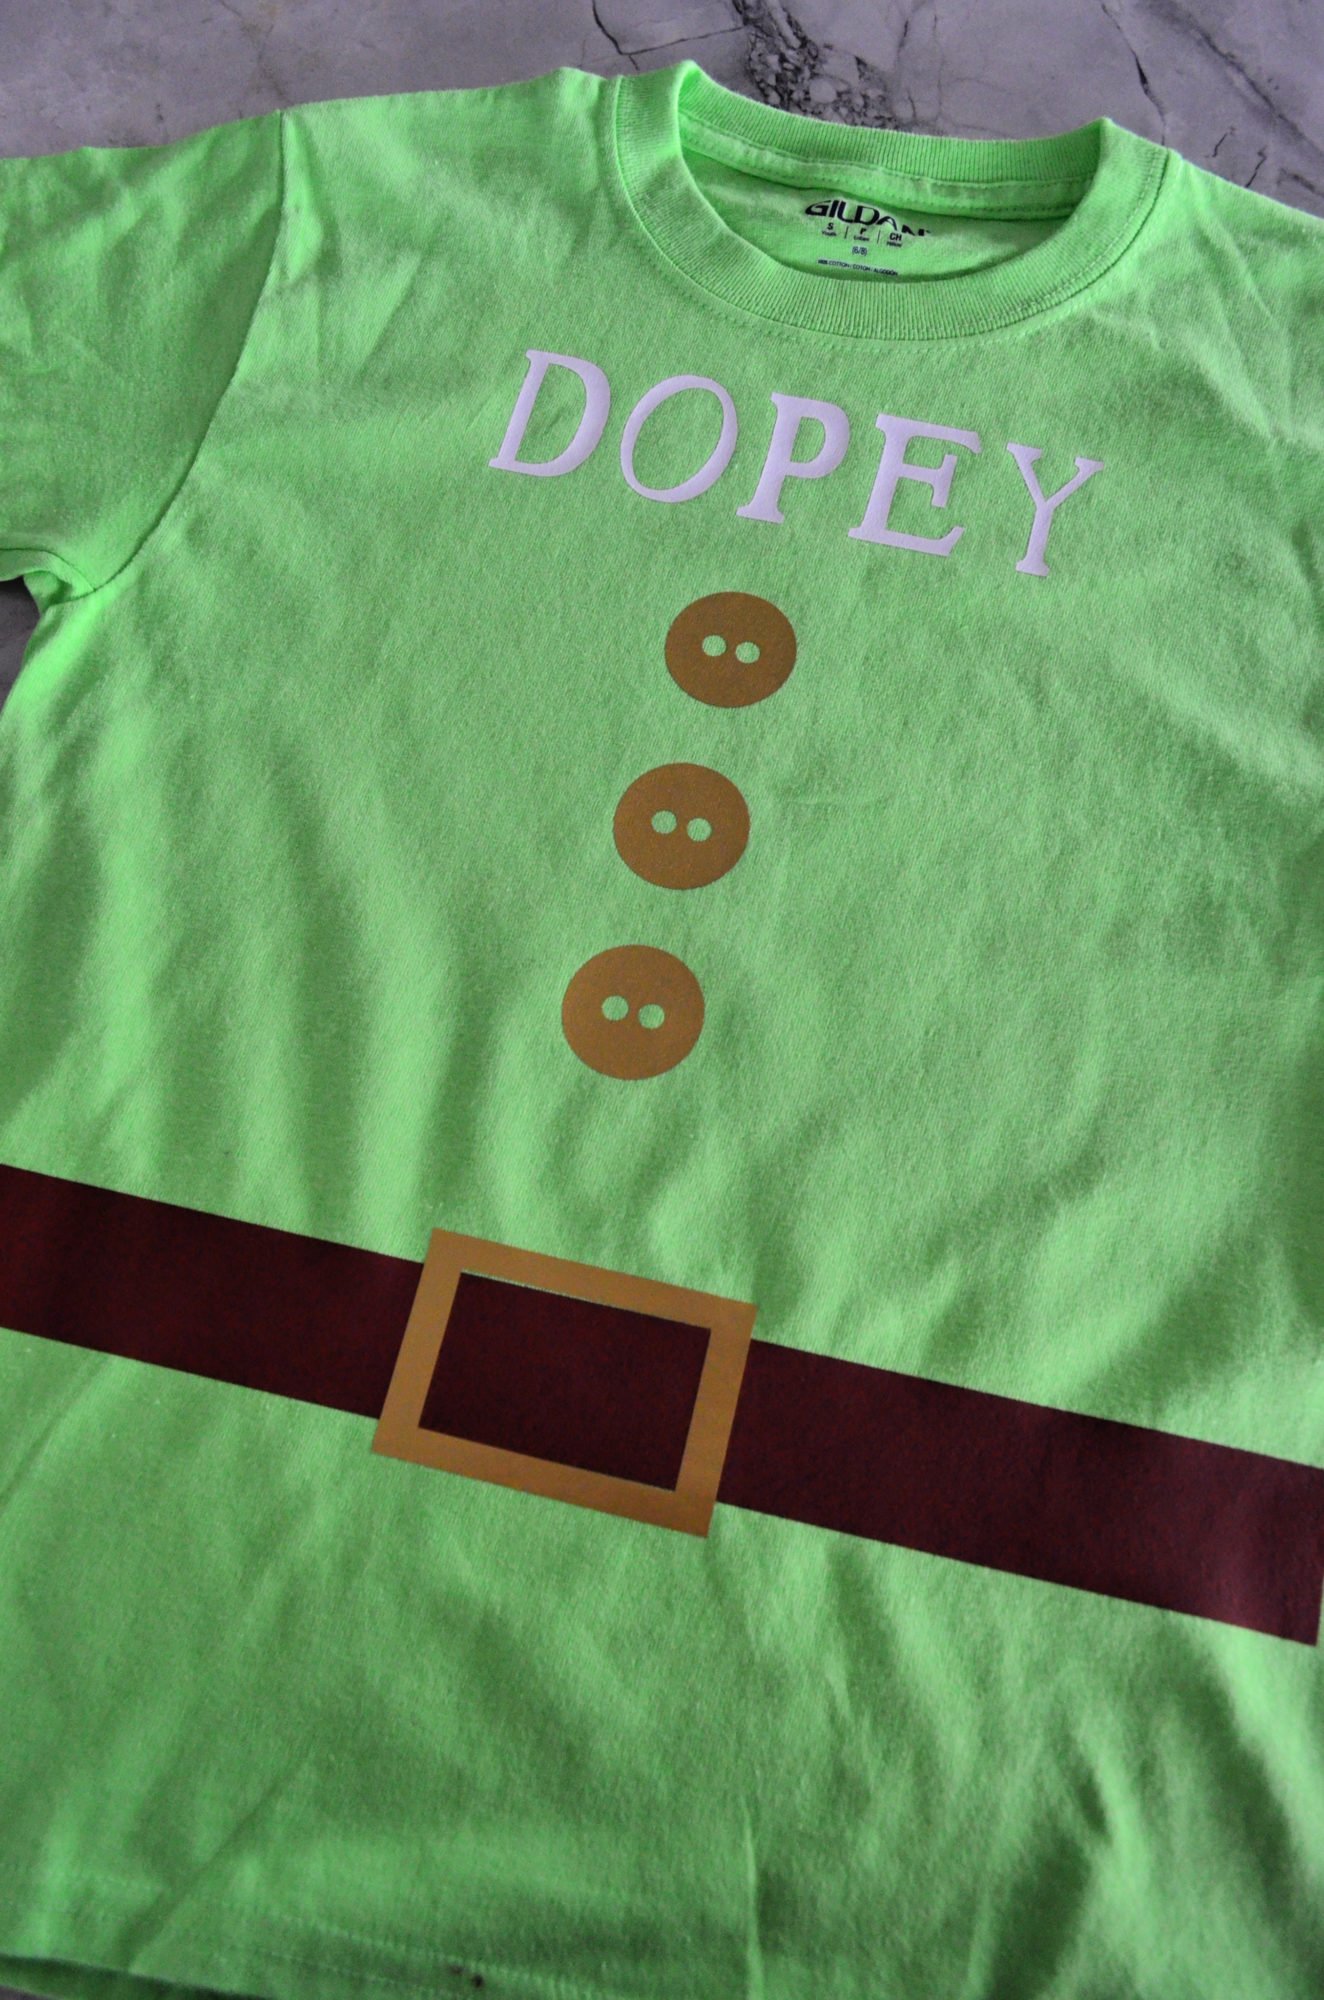
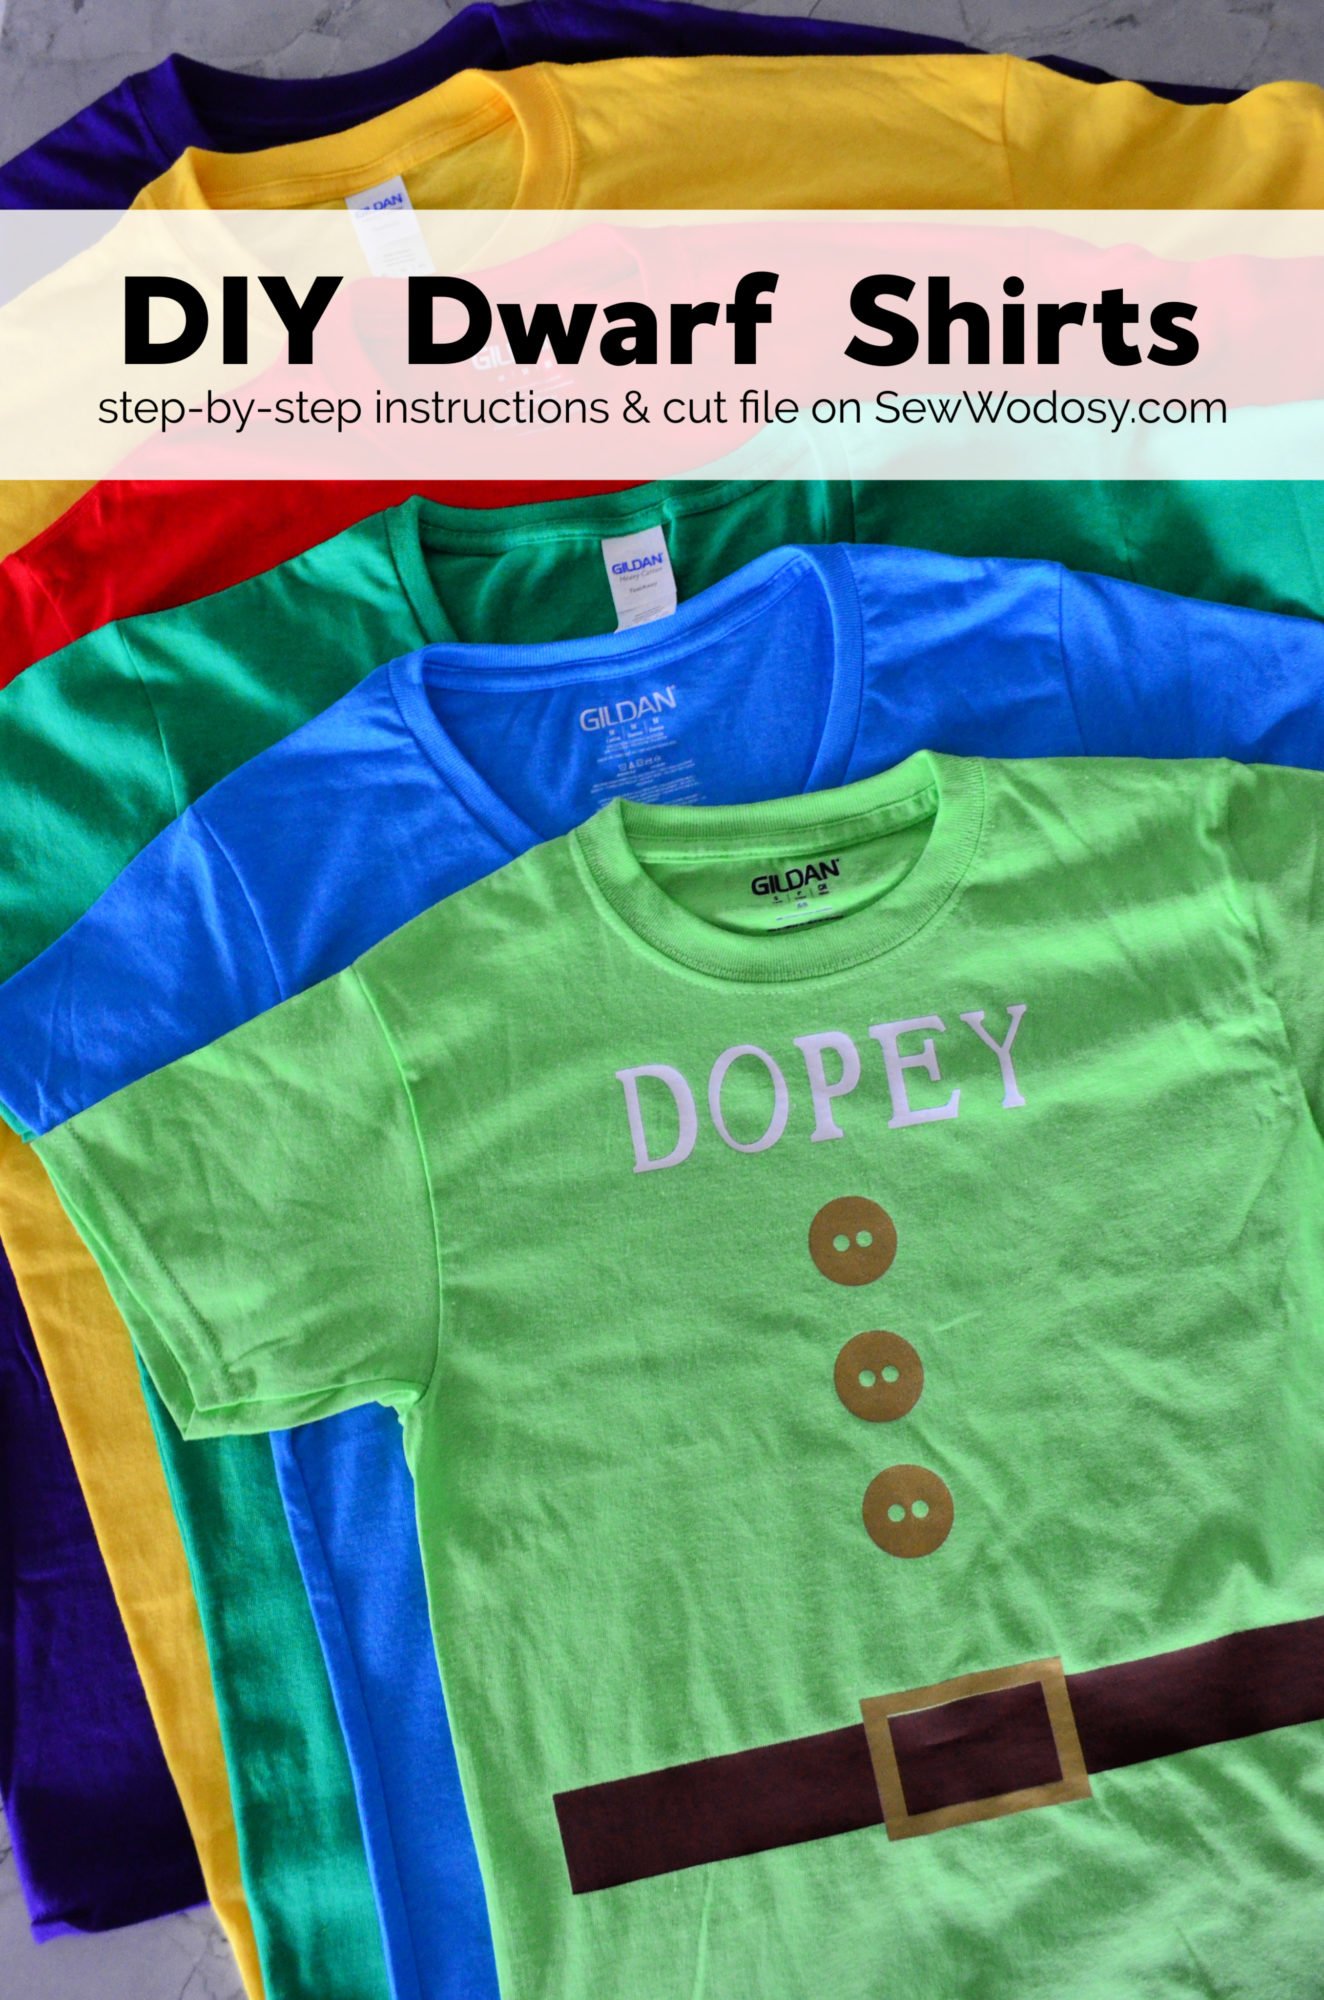
This is what the final shirt looks like!

And my adorable little Dopey the Dwarf!
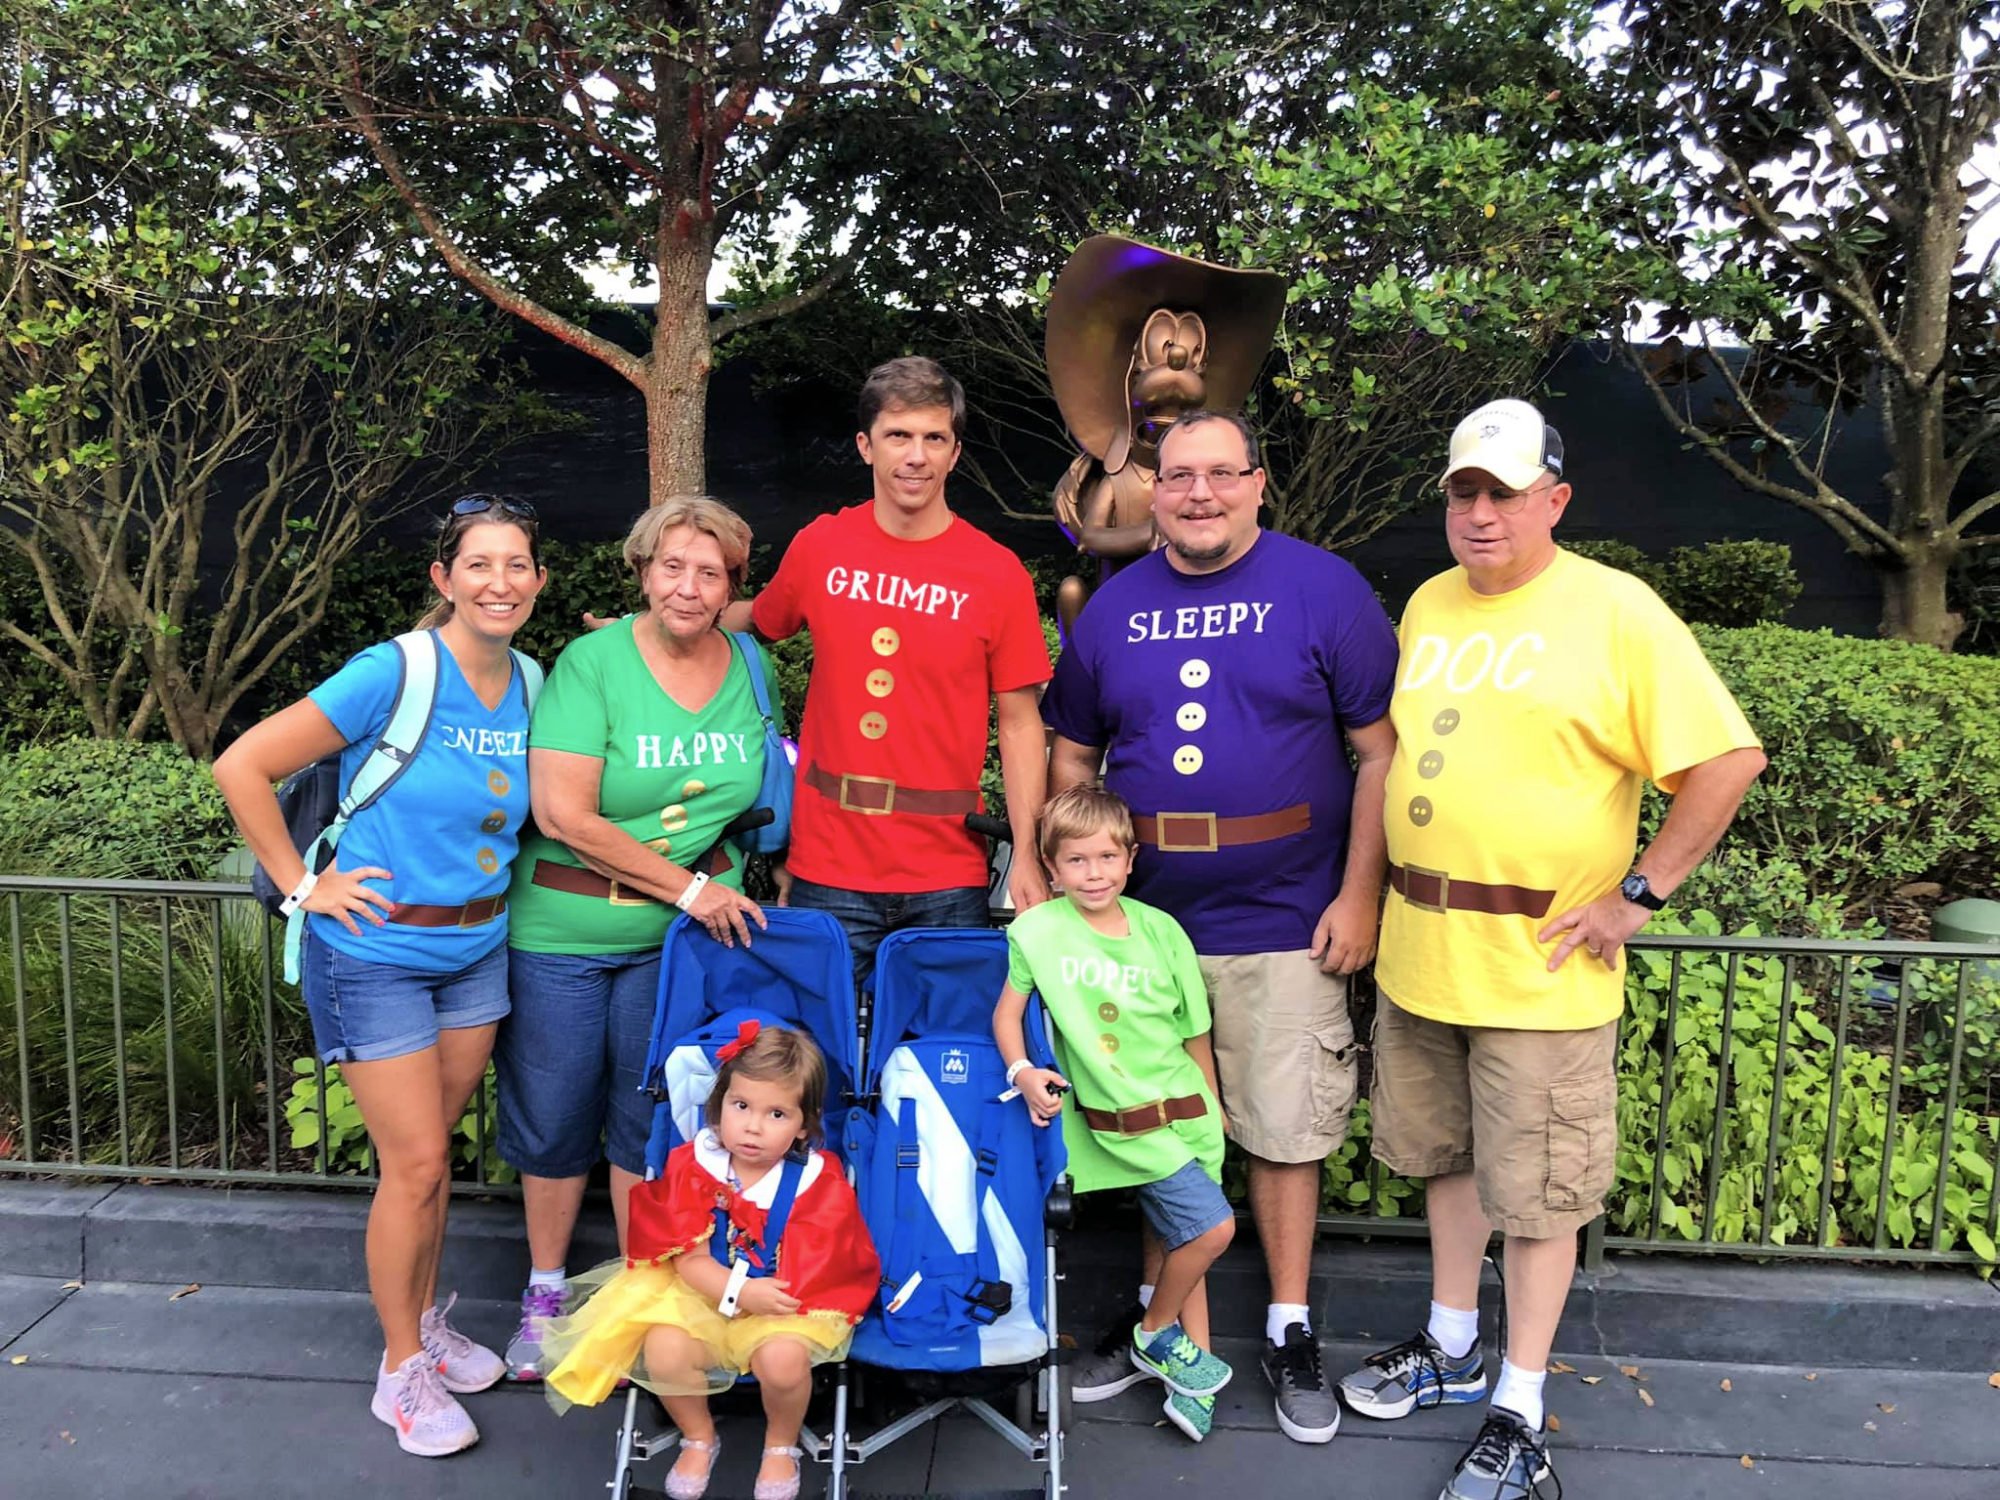
Here is what all six shirts looked like! Love how they turned out.
FAQs
No sewing skills are required for making these shirts. It’s a simple and straightforward crafting project suitable for all skill levels. You just need a cutting machine like a Cricut or Silhouette.
The time required depends on your crafting experience and the number of shirts you’re making. On average, it can take a few hours to complete all 7 shirts.
Yes, you can! To ensure the longevity of your homemade Dwarf shirts, turn your shirt inside out when you go to wash and dry the your shirt with iron-on vinyl.
Tips and Tricks
Here are a few of my favorite tips and tricks when making Dwarf Shirts.
Costume Design File – You’ll notice that in Design Space the dwarf names are in black. I did this so you could see it better on the screen. I just used a white roll of Iron-On vinyl to cut out the names.
Cricut Mat – I used the 12×24 mat for this project so I only had to make 3 passes on the Cricut.
Washing Instructions – When washing Iron-On Vinyl make sure to turn the shirt inside out to protect the design while washing and drying.
Add personal touches – Feel free to add your own creative flair to the Dwarf shirts. You can include your initials, a funny quote, or any extra details that make the costume uniquely yours.
DIY Disney Costumes
Looking for more DIY Disney costume ideas. I have a few for you!
If you make these 7 dwarfs shirts, I would be honored and love for you to take the time to leave a star rating and comment! I spend hours developing and testing these projects, and always love to hear feedback and user experience!
Don’t forget to FOLLOW ME on Facebook, Pinterest, and Instagram, and subscribe to my email list!
DIY Dwarf Shirts
Learn how to make these homemade 7 Dwarf Shirts with my step-by-step guide on how to create these charming costumes for your next themed event or group Halloween costume.
Materials
- 7 cotton t-shirts
Tools
- Cricut
- Cricut Design Space with Dwarf Cut File
- Cricut Mat
- Cricut Iron-On Vinyl; 1 roll each; Gold, Brown, and White
- Cricut Tools
- Cricut BrightPad
- Cricut EasyPress Tote
- Iron / Heat Press / Cricut EasyPressCricut EasyPress™ Mat
Instructions
- First you need to cut each layer from the Dwarf Costume shirt file in Cricut Design Space. Make sure you mirror every layer.
- Cut each layer of colored Iron-On Vinyl for the shirts.
- Once everything is cut it’s time to start weeding the negative from the vinyl.
- Then, carefully use scissors to cut the names apart as well as belts, buckles, and the 3 button set.
- Next, fire up your Cricut EasyPress. Check out the Interactive EasyPress guide. For a cotton t-shirt with Everyday Iron-On material you need to press for 30 seconds at 315 degrees Fahrenheit. But read all the instructions.
- I pressed the iron-on vinyl 3 times. I pressed the name and buttons first. Then, carefully removed the plastic doing a warm-peel. Then, apply the belt. Carefully, remove the plastic film layer. Last step, add on the belt buckle. Then carefully remove the plastic film.
- Repeat until all shirts are made.
Notes
- Costume Design File - You’ll notice that in Design Space the dwarf names are in black. I did this so you could see it better on the screen. I just used a white roll of Iron-On vinyl to cut out the names.
- Cricut Mat - I used the 12×24 mat for this project so I only had to make 3 passes on the Cricut.
- Washing Instructions - When washing Iron-On Vinyl make sure to turn the shirt inside out to protect the design while washing and drying.
Recommended Products
As an Amazon Associate and member of other affiliate programs, I earn from qualifying purchases.