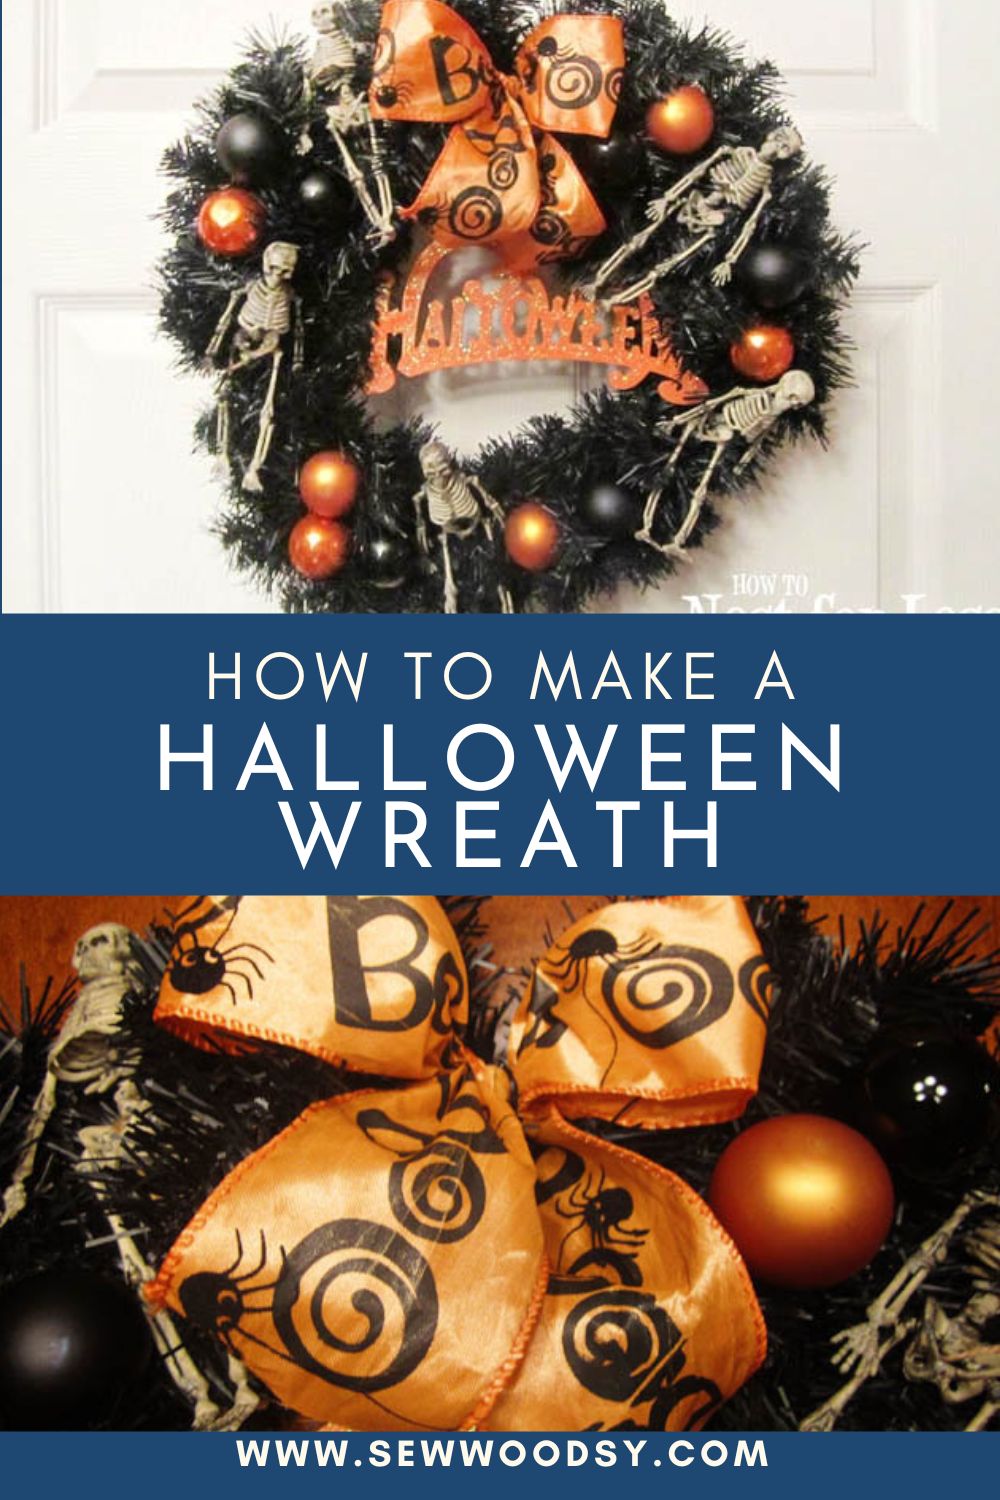

I’m here to share with you how to make a Halloween wreath using items you purchase from your local craft store. This spooky wreath comes together in under a half hour’s time.

Halloween is one of my favorite holidays and I have a blast decorating my house with eerie and spooky decor. Making a Halloween wreath is the perfect addition for your front door. This tutorial was originally a guest post from 2014 by my friend Erin from How to Nest for Less. She shared this wreath tutorial and I absolutely loved it.
Halloween wreaths are not only a festive way to welcome guests but also serve as a wonderful DIY project, allowing individuals to infuse their personal style into their Halloween decor. This Halloween Wreath is completely customizable; from classic orange and black to more elaborate, haunted house-themed wreaths adorned with ghostly figures and cobwebs. Once your wreath is complete, hang it on your front door to welcome trick-or-treaters or inside to set the perfect atmosphere for your Halloween party.
Table of contents
Supplies

- Black garland wreath
- Skeleton garland
- Black and orange Halloween ornaments
- Wired Halloween ribbon
- Glittery Halloween decal
- Twist Ties
- Hot Glue Gun
- Hot Glue Sticks
Directions

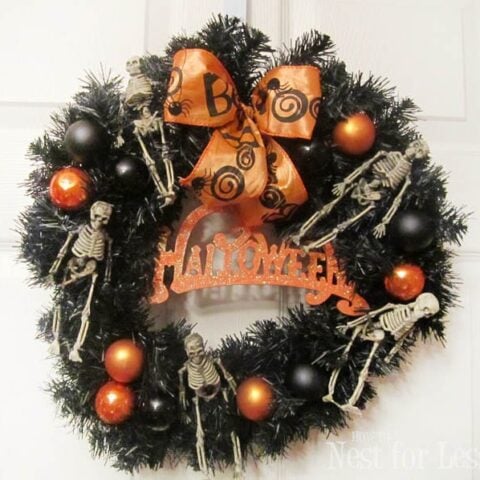
I started by taking apart the skeleton garland and tying each little guy to the wreath with twine.

Next I got out the small orange and black ornaments I got from Hobby Lobby. I removed the top hooks from each ornament.

I then used hot glue to secure each ornament (12 total) around the wreath.

Next I tied the glittery Halloween tag sign to the metal frame of the wreath. I just used black trash bag twisty ties so it would blend in with the black garland wreath. Note: the glittery Halloween tag sign came with pre-drilled holes from Hobby Lobby… score!

I added a wire ribbon bow to the top of the wreath in orange and black to finish it off.

So, what do you think? Spooky yet spunky?
FAQs

It’s important to distribute decorations evenly and pay attention to color and texture balance. Start with a focal point and build around it.
Store your wreath in a cool, dry place when not in use, and avoid exposing it to direct sunlight or harsh weather conditions.
Absolutely! Wreath-making is a creative endeavor, so feel free to customize it to match your personal style or a specific theme, whether it’s rustic, modern, or holiday-themed.
Securing the decorations to the wreath base is a common concern. People often inquire about the most effective techniques, such as using hot glue, floral wire, or adhesive dots to ensure their Halloween wreath is durable.
Many people who are not experienced in crafting wonder if they can still make a Halloween wreath. They might ask about beginner-friendly ideas, tips for easy assembly, and where to find simple DIY tutorials.
Tips and Tricks
Here are a few of my favorite tips and tricks when making a Halloween wreath.
- Ornaments – If you can’t find black and orange ornaments you can always spray paint them to use on your wreath.
- Layer and Add Depth – To create a visually appealing Halloween wreath, consider layering your decorations and elements to add depth and dimension. Start with a base layer of black, then add larger decorations like pumpkins or ghosts, and finally, fill in gaps with smaller embellishments like spiders or bats. This layering technique will make your wreath look more intricate and interesting.
- Secure Decorations Properly – It’s essential to secure your decorations to the wreath base effectively to ensure they stay in place and don’t fall off. Here are some common methods for attachment:
- Hot Glue Gun: Hot glue is often a quick and reliable way to attach items to your wreath. Be cautious with the hot glue to avoid burns.
- Floral wire – This method is excellent for securing larger or heavier decorations. Wrap the wire around the decoration and attach it to the wreath frame. If you don’t have floral wire you can use twist ties that you get from your bread bag or even trash bags. Make sure to spray paint them black before using them on the wreath so they are hidden in disguise.
- Adhesive dots or tape – These can be used for smaller, lightweight items and are less visible than other attachment methods.
Halloween Crafts
Here are a few more Halloween craft ideas you can make at home.
Making a Halloween wreath can make for a fantastic DIY project that allows you to showcase your spooky creativity and welcome the spirit of Halloween into your home in a fun and personalized way.
Halloween Wreath
I’m here to share with you how to make a Halloween wreath using items you purchase from your local craft store. This spooky wreath comes together in under a half hour's time.
Materials
- Black garland wreath
- Skeleton garland
- Black and orange Halloween ornaments
- Wired Halloween Ribbon
- Glittery Halloween decal
- Twine
- Wired Twist Ties
- Hot Glue Sticks
Tools
- Hot glue gun
Instructions
- Take apart the skeleton garland and tie each one to the wreath with twine.
- Remove the top hooks from each ornament.
- Hot glue to secure each ornament (12 total) around the wreath.
- Tie the glittery Halloween tag sign to the metal frame of the wreath.
- Add a wire ribbon bow to the top of the wreath in orange and black to finish it off.
Notes
- Twist Ties - You can use floral arrangement twist ties or twist ties that you get from your bread bag or even trash bags. Make sure to spray paint them black before using them on the wreath so they are hidden in disguise.
- Ornaments - If you can’t find black and orange ornaments you can always spray paint them to use on your wreath.
Recommended Products
As an Amazon Associate and member of other affiliate programs, I earn from qualifying purchases.

Leave A Reply!