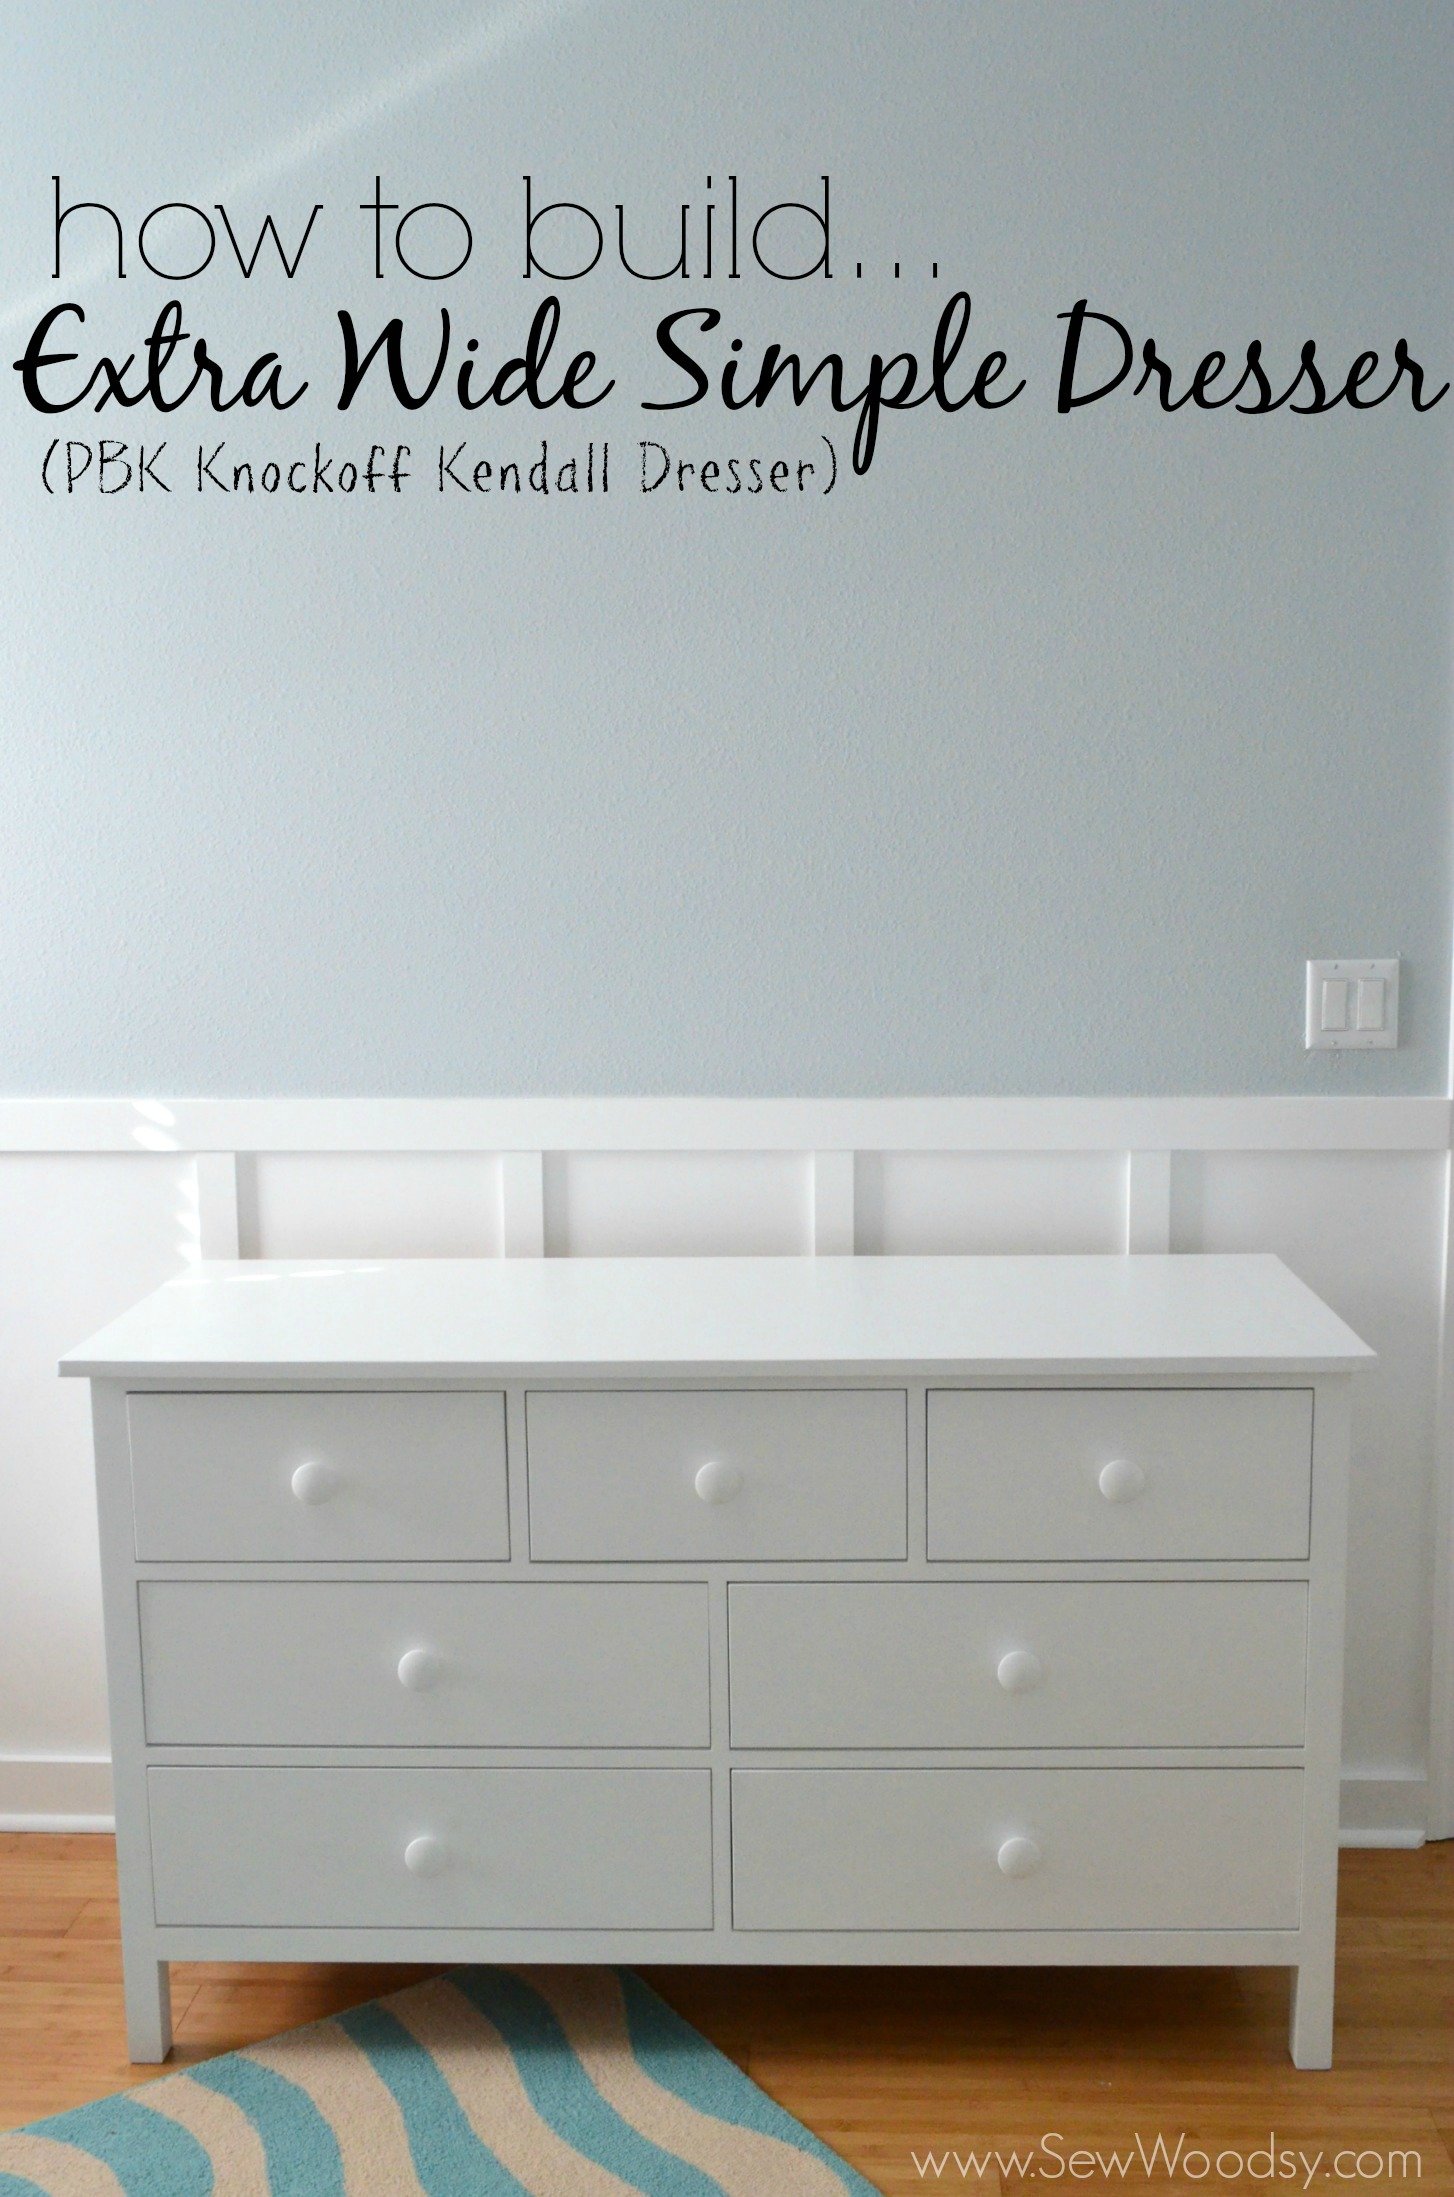
 Today, we’ve teamed up with the amazingly talented Ana White to share how we built this extra wide simple dresser. This may look familiar, you know, the ridiculous expensive Pottery Barn Kids Kendall dresser that is oh-so cute (but not so much the price tag–$900…ouch)! We met Ana at Haven two years ago and have remained friends ever since. She is the sweetest most humble lady I know. And her husband, Jacob is a charm too. He’s been at Haven both years and Jon and him hit it off immediately. I mean they both love to do the same stuff, fish, hunt, and build stuff! Jon loves talking with Jacob to get a glimpse of what it’s like to hunt and fish in Alaska. It’s his dream, and one day maybe we will just get to visit them out in Alaska (and maybe our boys can play together since they will only be a few months apart)!
We have wanted to work together for a while, and when Jon and I started brainstorming ideas for the nursery I knew that this was the perfect time to work together. When I emailed Ana and told her our exciting news her first response back was “I had a feeling you were pregnant at Haven, but kept it to myself”! I had a feeling that there would be a few people who would catch on, and Ana was definitely one of them. Jon’s goal for this nursery project of our was to make ALL the furniture. I had to talk him off the ledge and remind him that it probably was best to buy the crib. It killed him to not make the crib (since they look relatively easy to put together). Luckily, his parents came to our rescue and bought the crib for us. I will add that the whole time he was putting together our Pottery Barn Kids Kendall Crib (the whole 10 minutes it took him) he kept saying how easy this would have been to build, and then I reminded him that it would have taken him hours if not days to actually build this crib from scratch. He smiled at me–I knew he knew I was right. He just wouldn’t admit it. Surprisingly the dresser did not take as long as we both thought it would take. We knocked out the frame together in one day and over the course of a week Jon worked on the drawers, painting the dresser, and then putting it all together. We work on projects whenever we have free time, an hour here two hours there…
Head on over to Ana White to get the free plans for the Extra Wide Simple Dresser.
Cut List:
2 – 3/4” PureBond Hardwood plywood @ 15-1/2” x 26-1/4” (side panels)
4 – 2×2 @ 31-1/4” (legs)
2 – 2×2 @ 49-1/2” ( top back support and front bottom support)
3 – 2×4 @ 49-1/2” (back supports) I used 1x4s here because I used rear mount sockets for the drawer slides
3 – 1×2 @ 49-1/2” (front trim)
4 – 1×2 @ 7-1/2” (front trim between drawers vertically)
1 – 2×2 @ 15-1/2” (bottom support) If you used 1x4s on back, this board must be 3/4” longer in length
DRAWERS – CUT TO FIT!!!
Plan uses 1×6 for drawer boxes and 1×8 for drawer faces
TOP
1 – 3/4” PureBond Hardwood plywood @ 15-1/2” x 54-1/2” (49 – 1/2″ for finished sides for staining)
1 – 1×2 @ 54-1/2”
1 – 1×3 @ 54-1/2”
2 – 1×3 @ 15- 1/2″ (for sides) I did this so in the future I can sand it down and stain the top
BACK: PureBond Hardwood plywood 52-1/2” x 26-1/4”
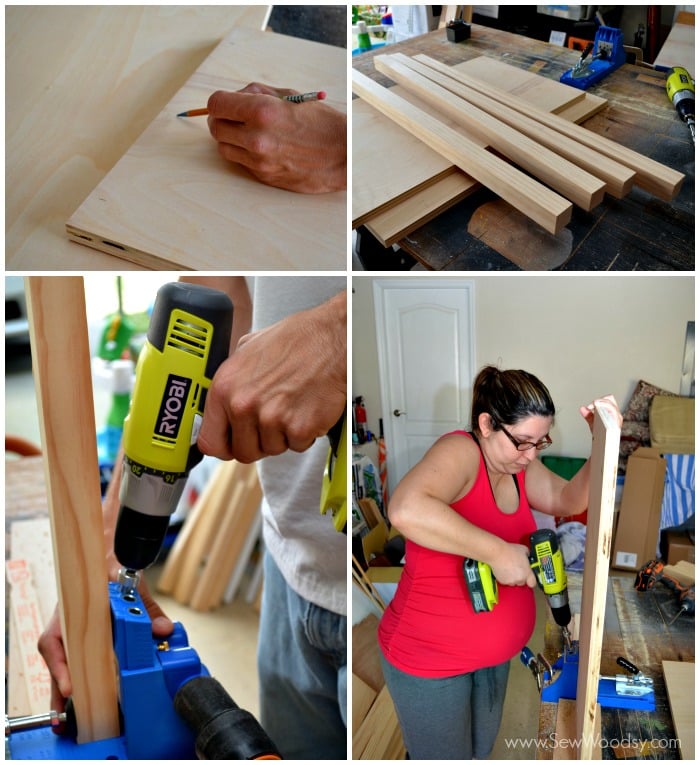
First up, we created the sides for the dresser. Jon cut the wood (although you can have your local hardware store do this for you), and then marked out where he wanted me to drill the pocket holes using our Kreg Jig and RYOBI drill (space out the pocket holes evenly across the sides and along the top).
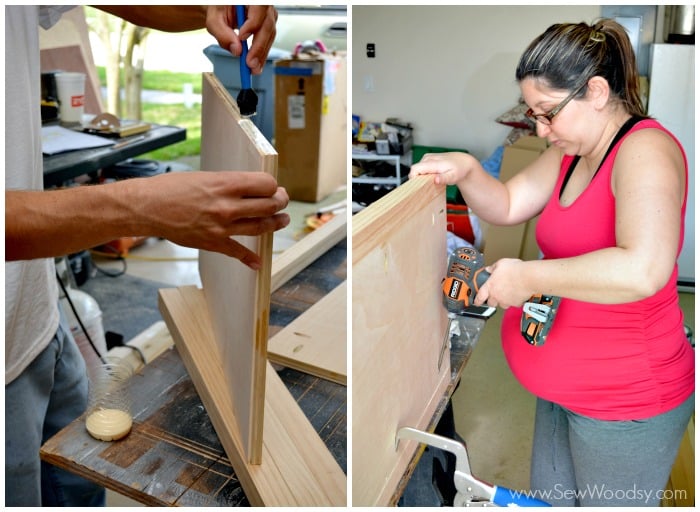 The plans don’t call for it, but whenever Jon builds anything he almost always uses wood glue. So he lathered up a nice coat of wood glue to each side of the 3/4″ panel before I secured the legs using 1-1/4″ pocket hole screws (make sure the side panel is flush to the inside of legs when secured).
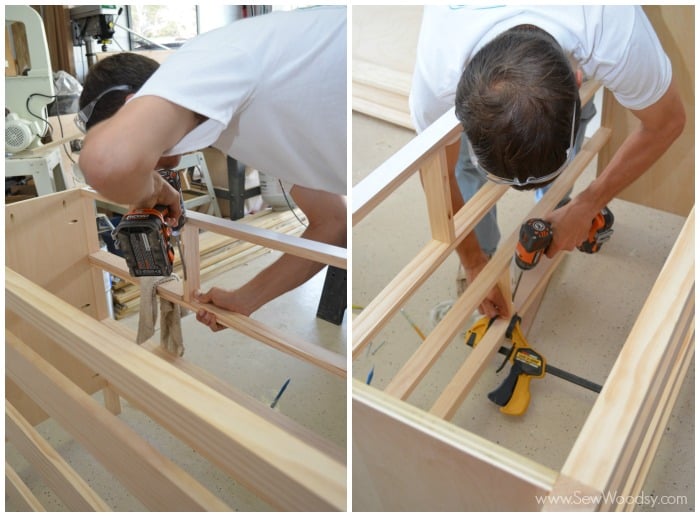
Next up, secure the back pieces of wood to the sides of the dresser. To give the rear mount sockets a little extra room, Ana recommended using 1×4’s instead of the 2×4’s to keep them flush to the back. Jon attached a 2×2 on top and drilled 1-1/2″ pocket holes with 2-1/2″ pocket hole screws. Since we used rear mount sockets for the drawers we used 1×4’s for the three other back supports drilling a 3/4″ pocket holes and attached with 1-1/4″ pocket hole screws. In hindsight, we should of used 1×6’s for the two middle back supports because our rear mount drawer sockets did not completely sit on the board.

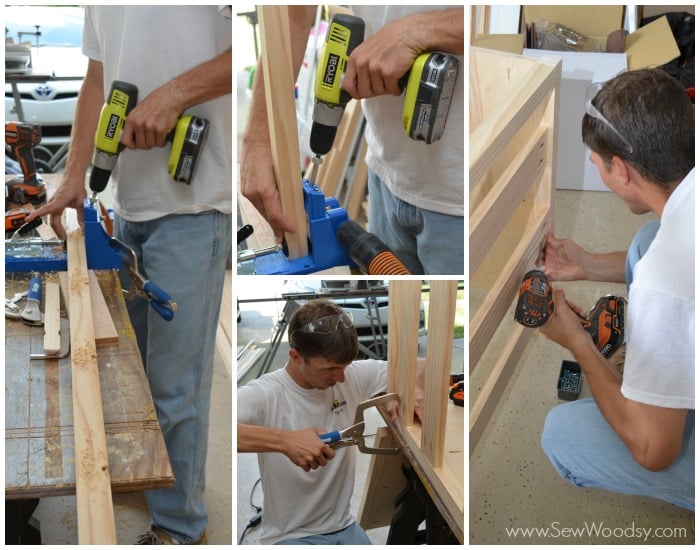
Next up, add the front boards. Jon found it helpful to create a jig using a piece of scrap wood so that he knew each row was exactly spaced. Once again we drilled 1-1/2″ pocket holes with 2-1/2″ pocket hole screws for the bottom 2×2. The top three pieces we drilled 3/4″ pocket holes and used 1-1/4″ pocket hole screws.
Next up, Jon attached the 1×2 vertical dividers putting the pocket holes on the back of the dividers to hide the pocket holes. He set the kreg jig at 1-1/2 depth and the drill bit at 4″ and attached it with 1-1/4 screws. He made a 16″ jig for the top drawers and 24-3/8″ jig for the bottom drawers to guarantee he had the correct spacing for the drawers.
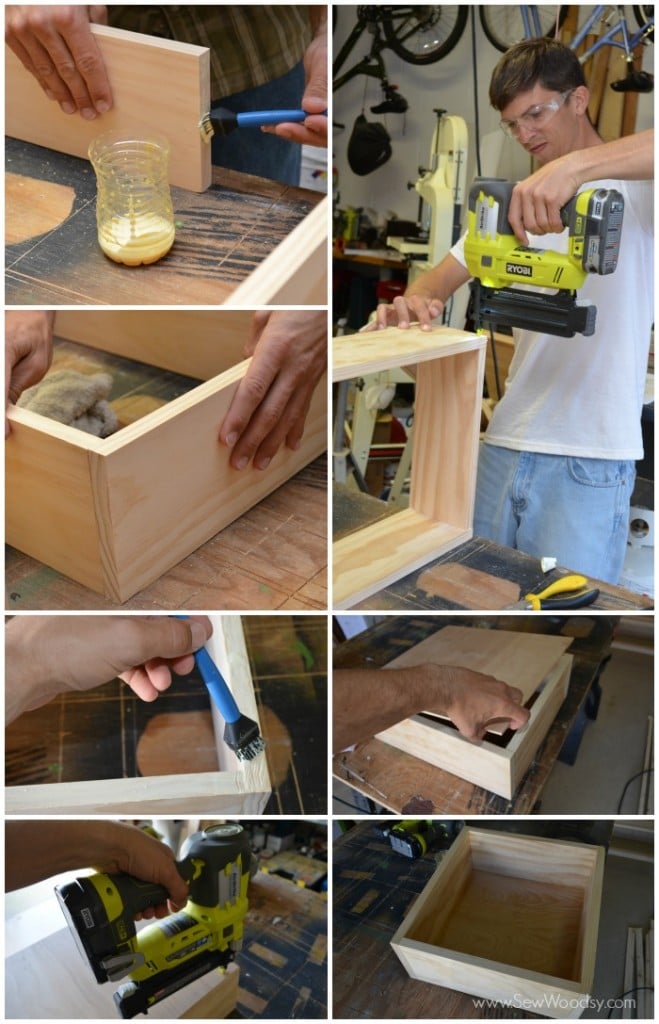
Now, it’s drawer time! You’ll want to build 3 small drawers and 4 larger drawers. Jon cut the wood to size, glued the sides, and used our RYOBI AirStrike Cordless Brand Nailer to secure the wood together. The drawers can be put together using pocket holes and screws and then nailing the bottom board to the boxes. *Note, each drawer should be built to fit the openings, there should be no variance between drawer openings.

Then he cut the drawer faces to leave an 1/8″ gap on all sides. He did not install the drawers yet because he wanted to paint everything before installing the drawers.
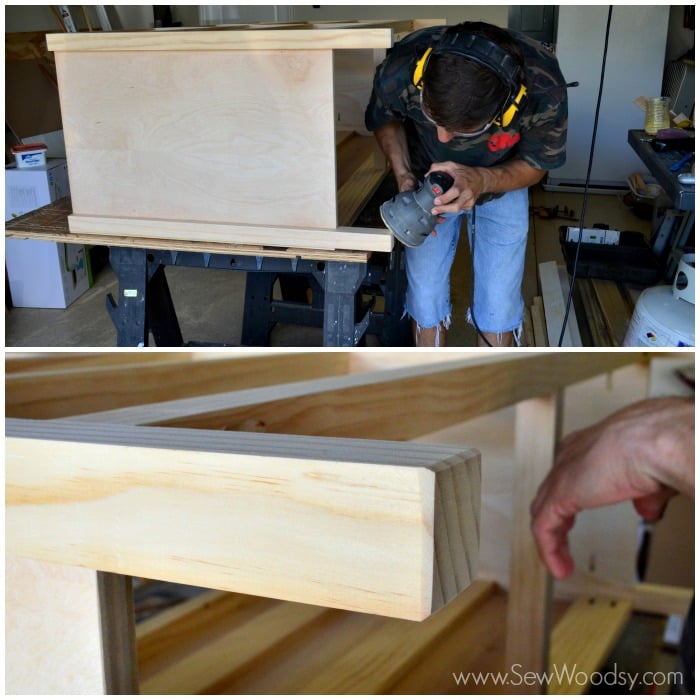
Next up, Jon took a break from building and gave the dresser frame a good sanding. He also rounded out the edges of the legs to prevent the wood chipping if the dresser is ever moved without being picked up.

Next up, Jon created the top of the dresser. He made a frame around one large piece of 3/4″ plywood at 49-1/2 x 15-1/2″. Make the frame with a 1×2 on the back and 1x3s around the other sides using. Jon attached the frame using 3/4″ pocket holes and 1-1/4″ pocket hole screws.
(not pictured) before he painted the dresser he added the back panel on to the dresser using 1″ nails to secure the back board.
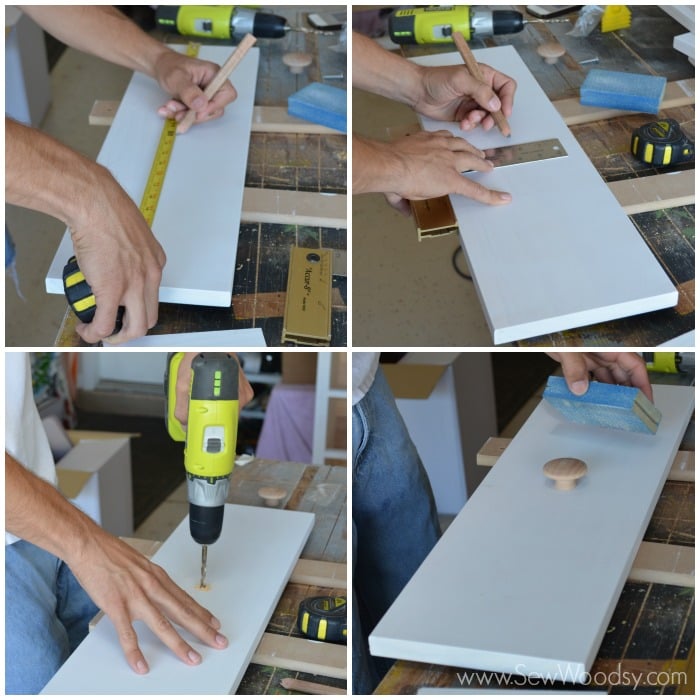
Jon primed all the pieces and parts to the dresser (not pictured) then before spraying the wood with the final coat of paint he measured out and centered the holes for the knobs. He kept the knobs separate from the drawer while painting and then installed them later on.
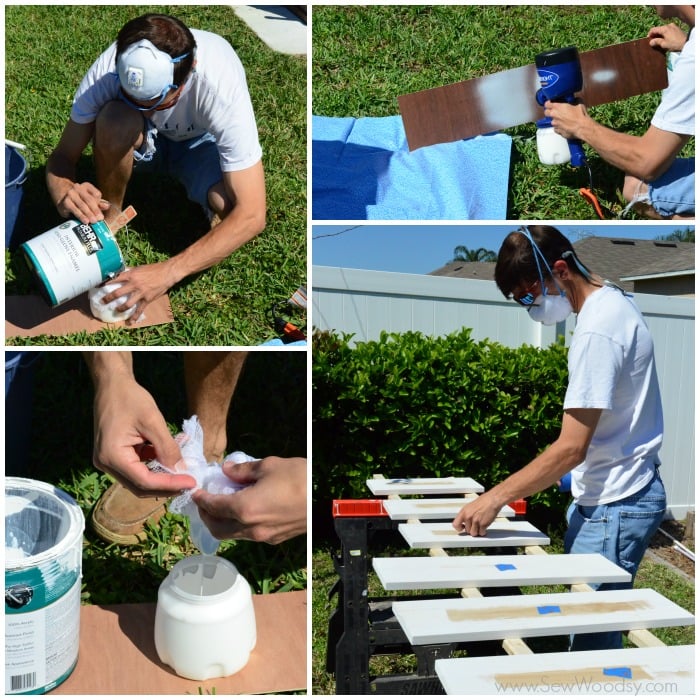
Jon brought the dresser outside and began to start the prep work. This was the first time we used the HomeRight Finish Max HVLP sprayer. Any time you are trying something new always test on a piece of scrap wood to make sure its working correctly. After reading a few tutorials, including this great tutorial from Gail at My Repurposed Life, we knew that straining the paint with cheese cloth was the way to go.
Also, a tip that Jon wanted me to share is to number the backs of your drawer face frames. He numbered them (on the back) right by the holes he drilled for the knobs and then placed a small piece of painters tape on the back of each of them. Since some of the backs of the drawer faces will be exposed when you open the drawer it’s a good idea to paint most of the back of the face frame.
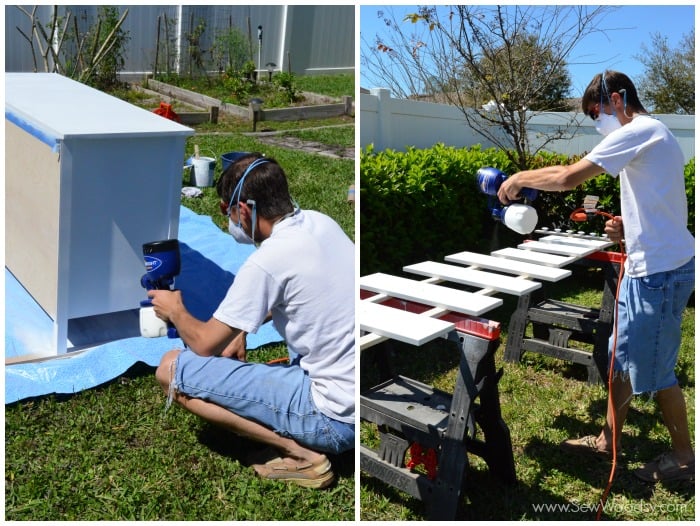
Once Jon had everything prepped it was time to paint. He has a heavy duty industrial HVLP paint sprayer and was really interested in trying out this smaller version. Hands down he was impressed. He said he will never paint anything again without the Finish Max, and on top of that it hardly used ANY paint. We chose to go with a bright white satin eggshell paint by BEHR. After just a few light coats the dresser was dried and he moved it back into the garage for the final installment.
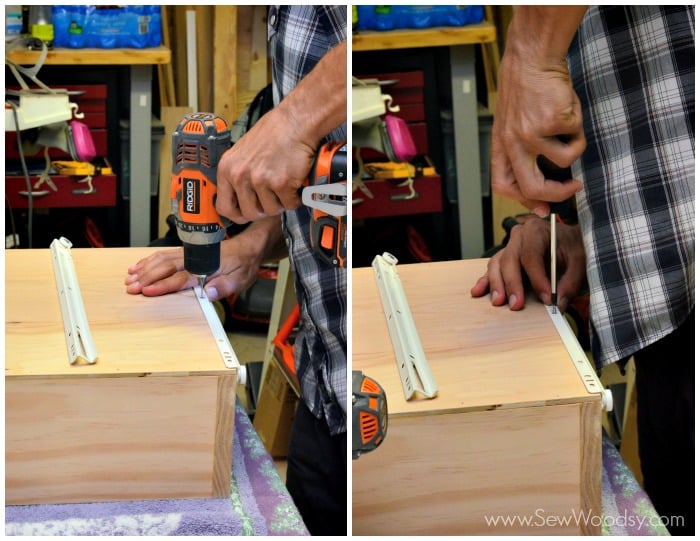
Next up, Jon added the drawer slides to each of the drawers. He drilled pilot holes first, and then manually screwed in each screw. The screws were tiny and brittle and he didn’t want to break them by using a drill.
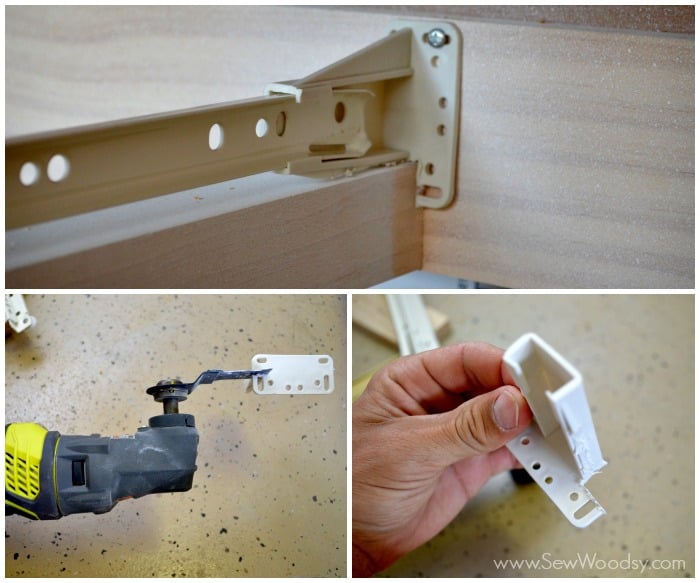
Jon found that in order to inset the rear mount sockets into the middle part of the dresser for the bottom drawers he needed to modify them to fit in flush. Using his RYOBI JobPlus Multi-Tool he was able to get the job done.
For the other drawers, he attached the drawer slide directly to the side of the cabinet. Use caution when drilling the sides of the cabinet to make sure you don’t drill through the sides of the cabinet.
Next, Jon attached the knobs to the face frames before putting all the pieces together. Inset the screw into the face frame for the knob so it doesn’t interfere when you attach it to the drawer.
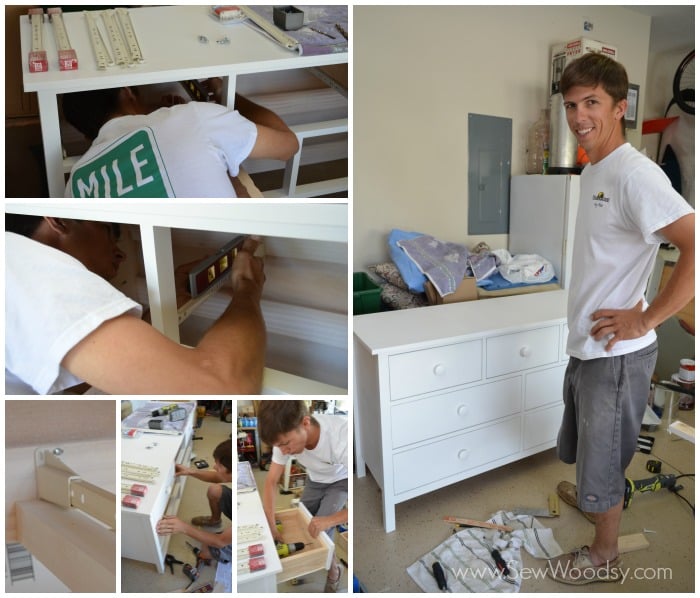
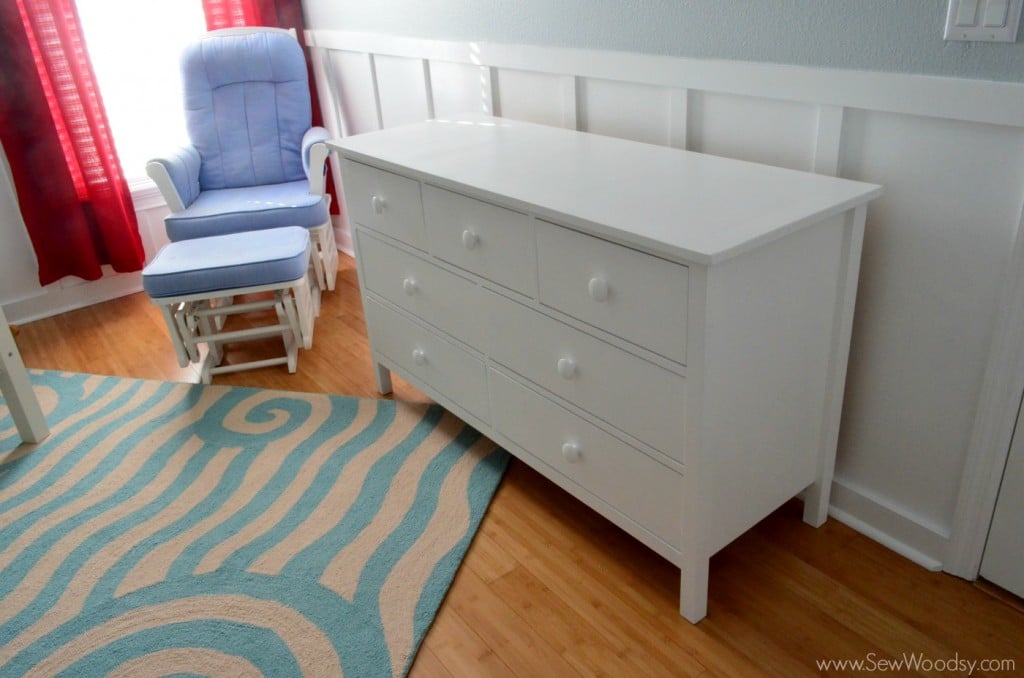
Lastly, once he had all the drawer slides in place he inserted the drawers and attached the face frames. Leaving 1/8″ gap on all sides. He used a paint stick as a his spacer and it worked out perfect. And there he is in all his glory. He built his son a dresser for his room.
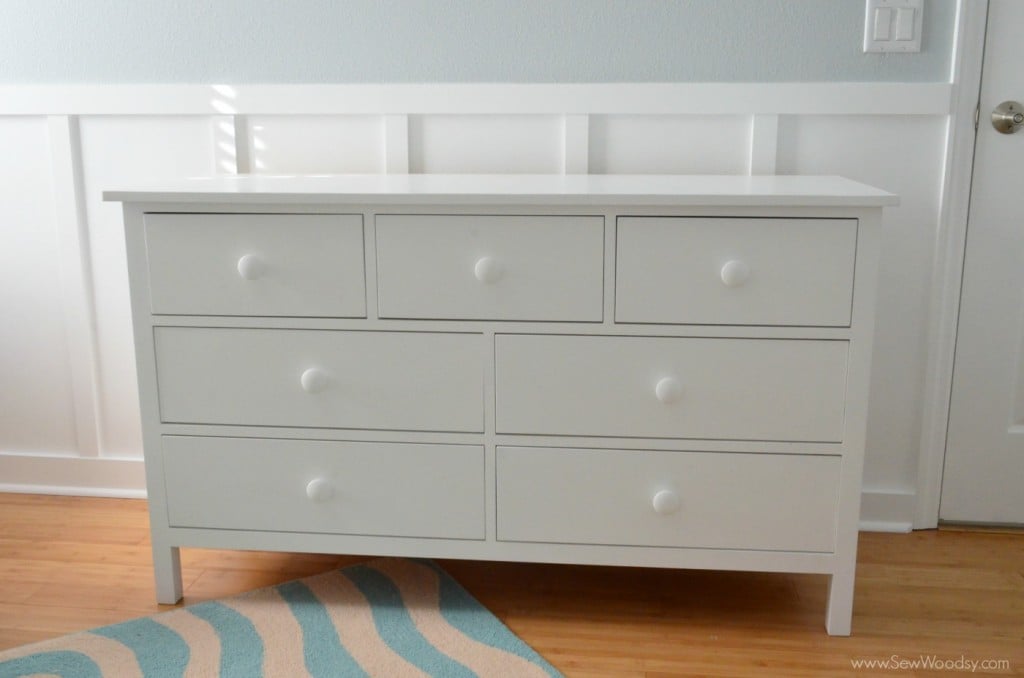
A timeless dresser that I’m sure will be with our son for many years. Who know’s maybe one day when our son is married and has a child it will be passed down to his child. Makes me tear up just thinking about it. Oh pregnancy hormones… go away!
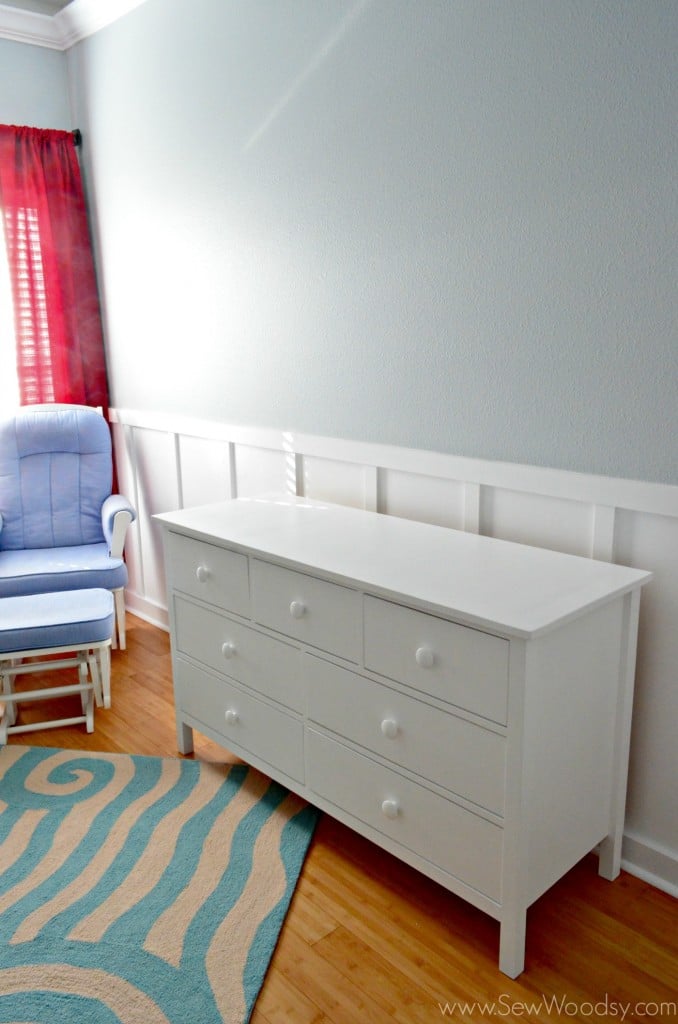
I’m in love with how the dresser turned out, and also in love with the rug in the nursery! It’s from Lamps Plus and its called Resort Yala Blue Area rug. We love the wave/beachy feel it gives off. 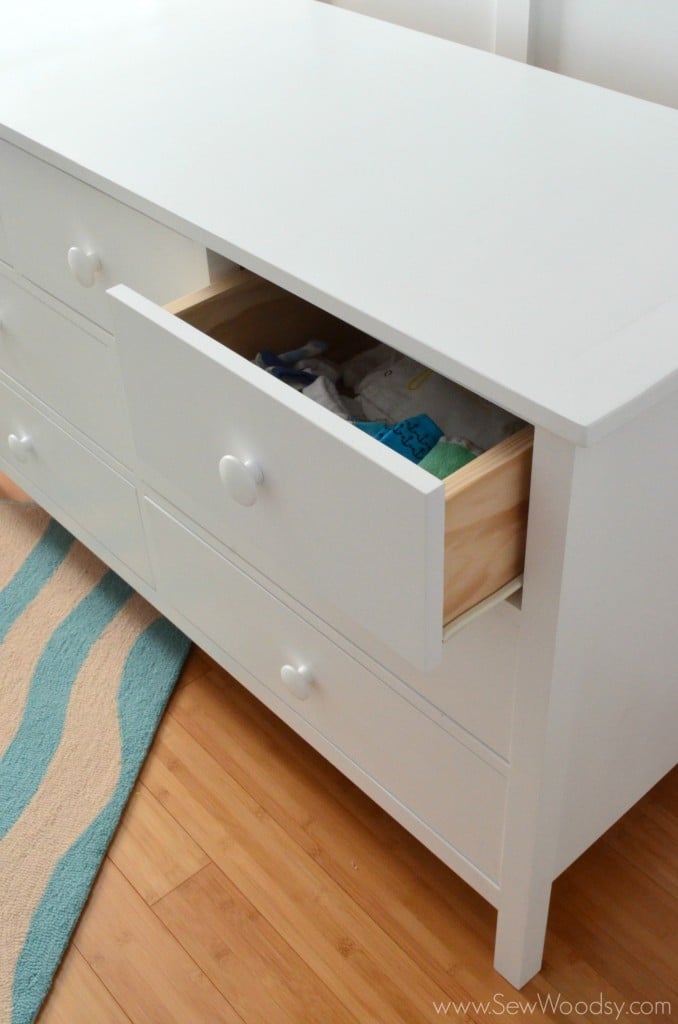
As soon as Jon and our neighbor moved the dresser into the nursery I was busy putting away the bins of clothing, blankets, and towels I’ve been washing. Yes, I stored all the washed goods in bins and then transferred them over to his dresser. 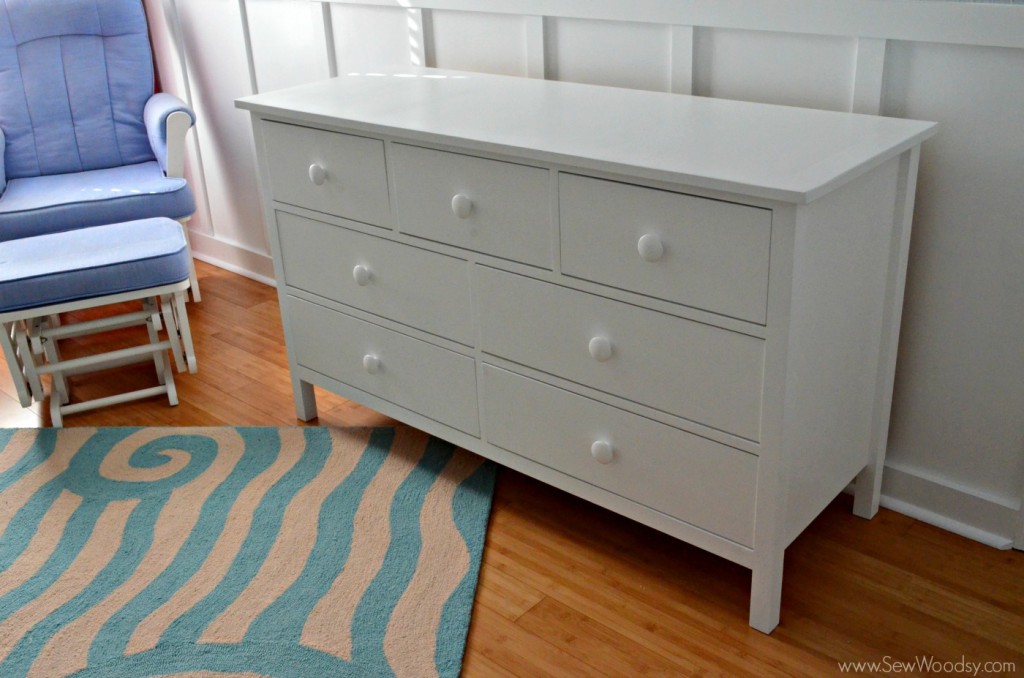
Little by little the nursery is coming together. I keep joking that the baby hasn’t arrived yet because he knows that we are still busy preparing his bedroom!
 Here are the other tutorials from our nursery project:
- How to De-Clutter a Room… aka clean it out for a nursery!
- Painting the Nursery
- Whale Nursery Inspiration Board
- DIY Board & Batten
- How to Install a Ceiling Fan
shared at: My Repurposed Life
Disclaimer: We received the Purebond Hardwood Plywood and the HomeRight Paint Sprayer for free. We love the products and wouldn’t want any other product in our nursery. There are affiliate links in our post. As always all opinions are our own.
