Learn how easy it is to make DIY Pirate Shirt Costumes. All you need is a Cricut, and an inexpensive solid shirt to transform it into a pirate’s costume in less then 30 minutes time.

Earlier this month I whipped up these inexpensive DIY Pirate Shirt Costumes using my Cricut, Iron-On Vinyl, and t-shirts! My friends loved them so much we took them on our Halloween cruise last weekend. They are super simple to make and even the most beginner of crafters can create these costumes!
Table of contents
Supplies for DIY Pirate T-shirt Costumes
- Cricut Explore Air 2
- Cricut Design Space Pirate T-shirt
- White Cotton Shirt
- Red Cotton Shirt
- Cricut Mat
- Cricut Black Iron-On Vinyl; (other colors to use could be glitter red, metalic red, silver, gold, grey)
- Cricut Tools
- Cricut BrightPad
- Iron / Heat Press / Cricut EasyPress
- Cricut EasyPress Tote
- Cricut EasyPress™ Mat
How to Cut Iron-On Vinyl for Cricut
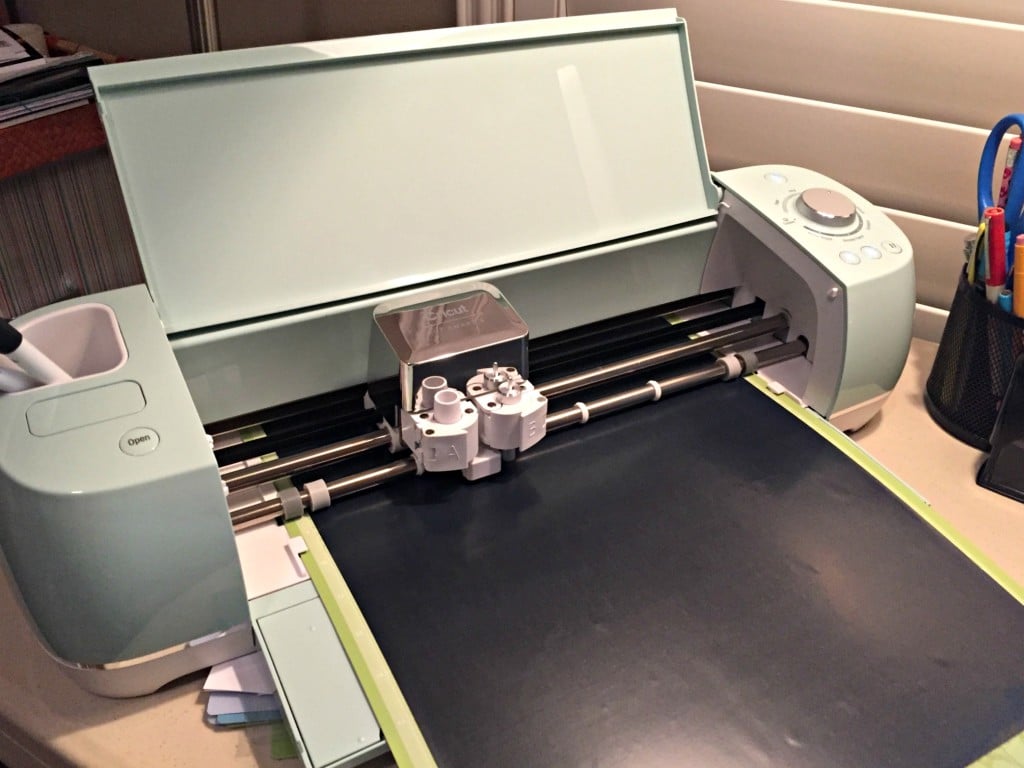
First you need to cut each layer from the Pirate T-shirt Cut File in Cricut Design Space. Make sure you mirror the skull (and patch if you are using that). Then remove all the negative space from the sheet of Iron-On vinyl so you have just the image.
Iron-On Skull Design
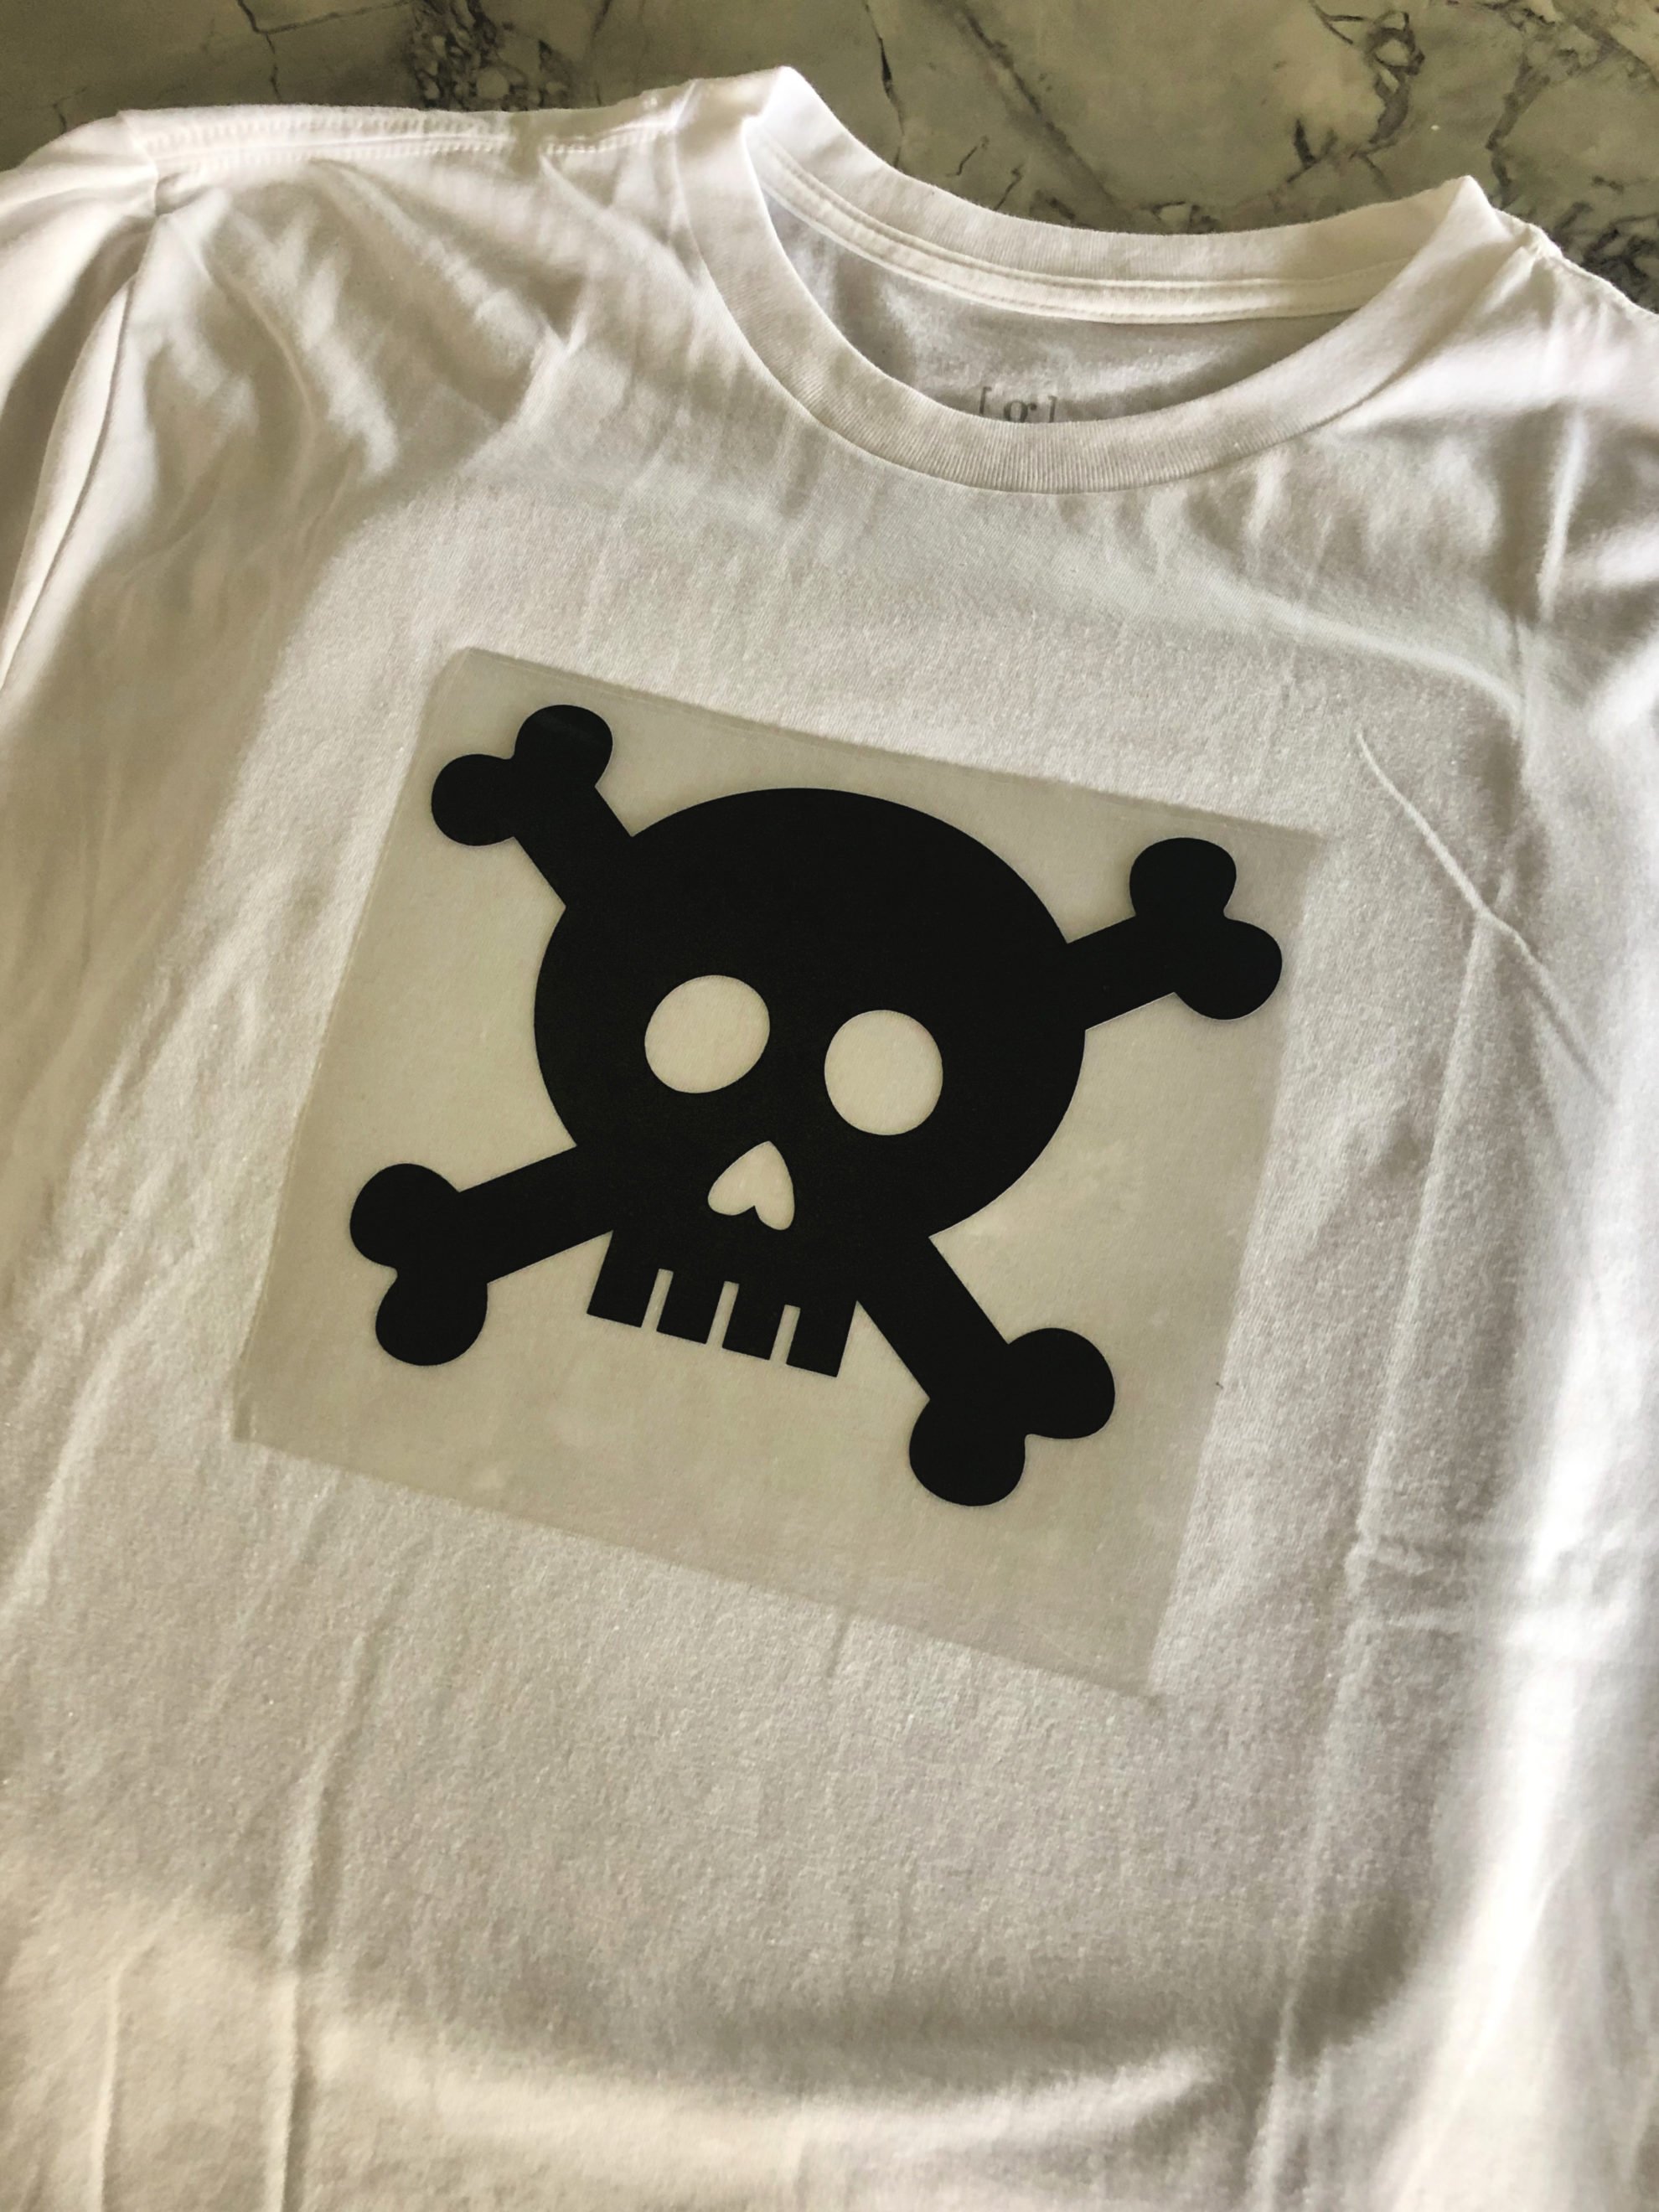
Next, add the skull with crossbones on to the shirt.
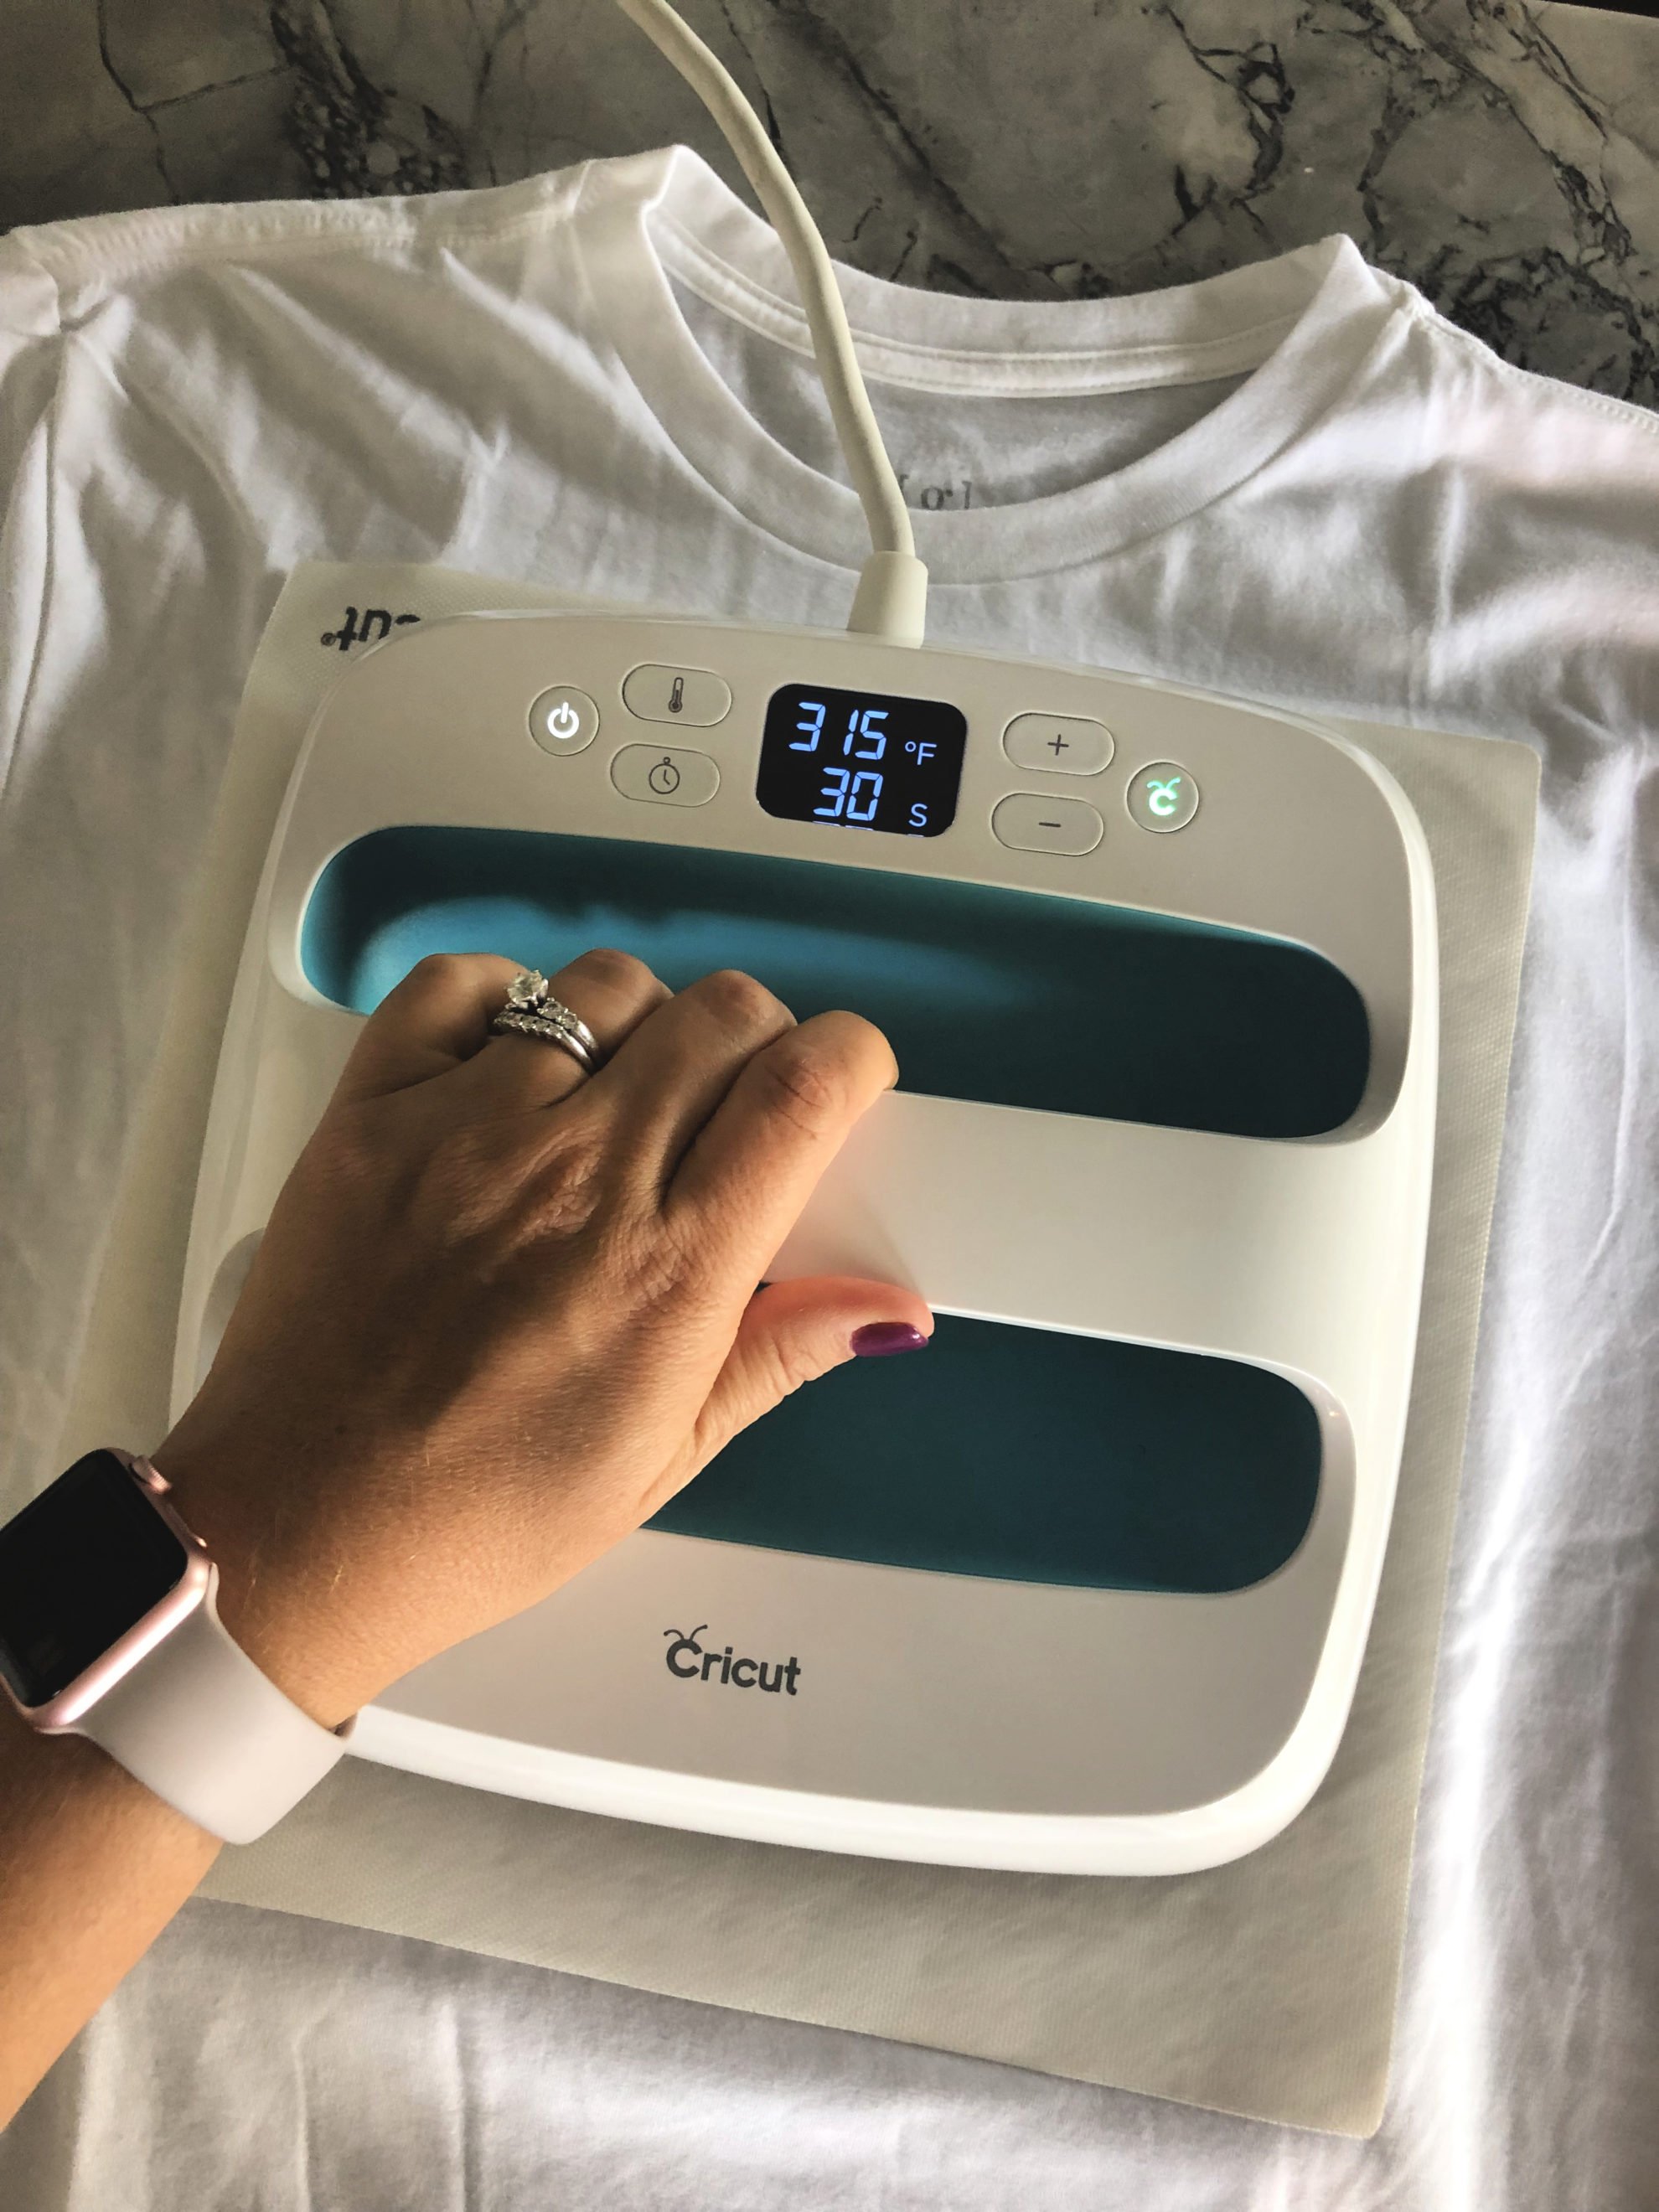
Using the Cricut EasyPress press the Iron-On Vinyl on to the shirt. This was a cotton/poly blend so I pressed it at 315 degrees Fahrenheit for 30 seconds. Flipped it over then pressed it for an additional 15 seconds.
Next, you carefully pull the plastic layer off while it’s still warm. If using the patch then apply the patch on next. Repeat with the exact instructions I shared above.
Cut Shirts
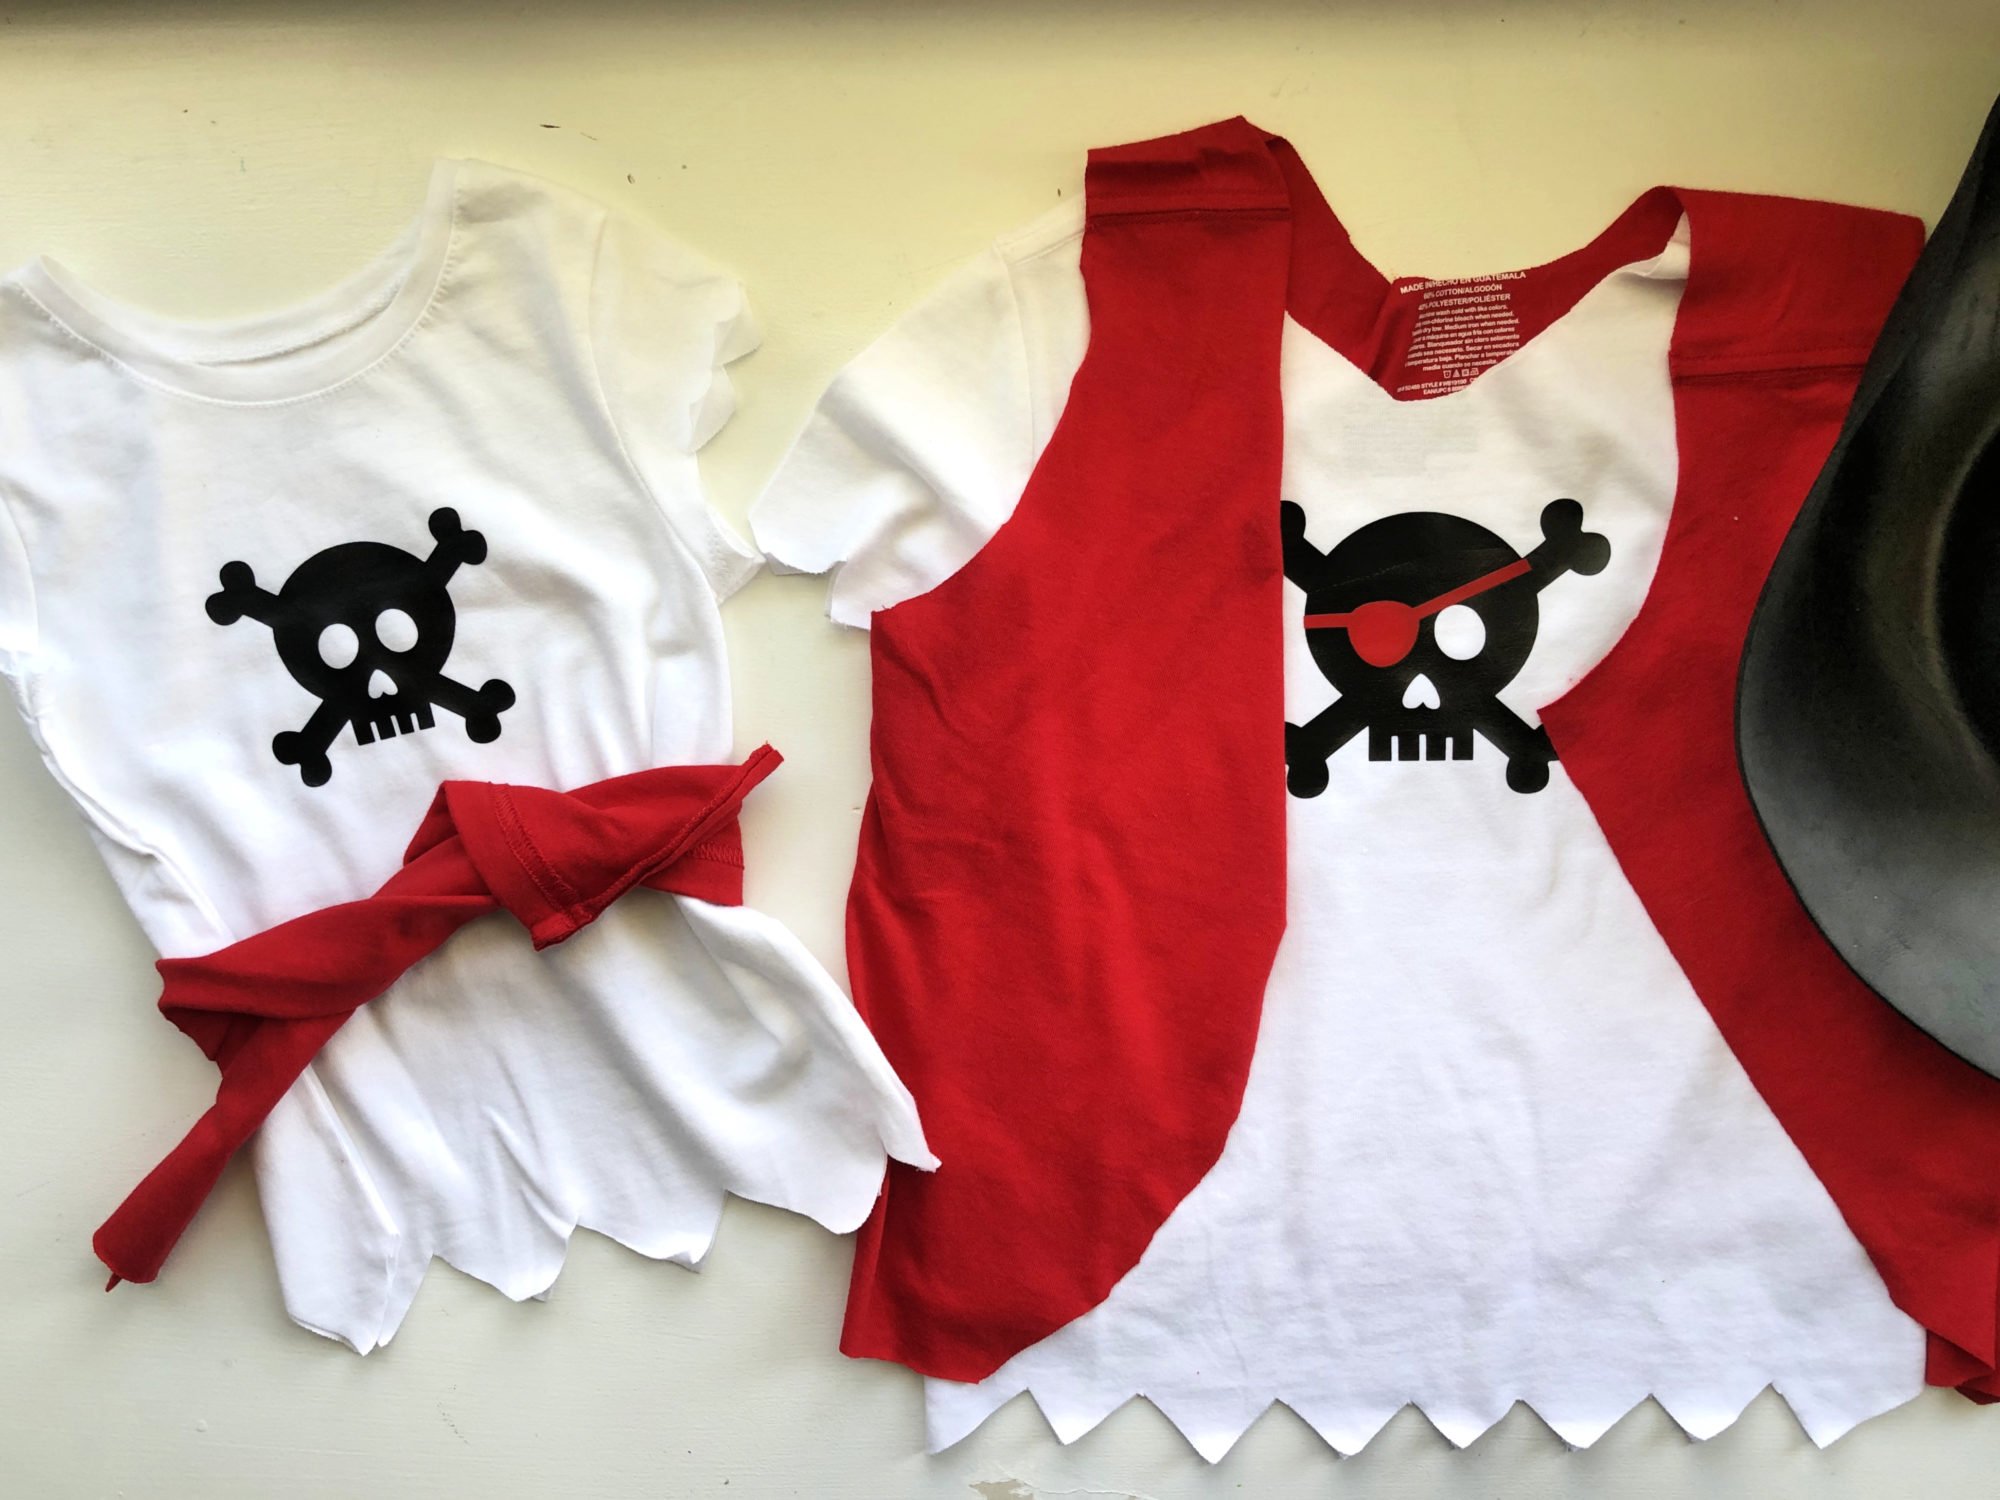
Lastly, you want to cut the bottoms of the shirt in a zig zag pattern. I also cut the sleeves and on some of them I cut the neck. You will want fabric sheers to cut your shirts.
Make a Red Shirt Vest
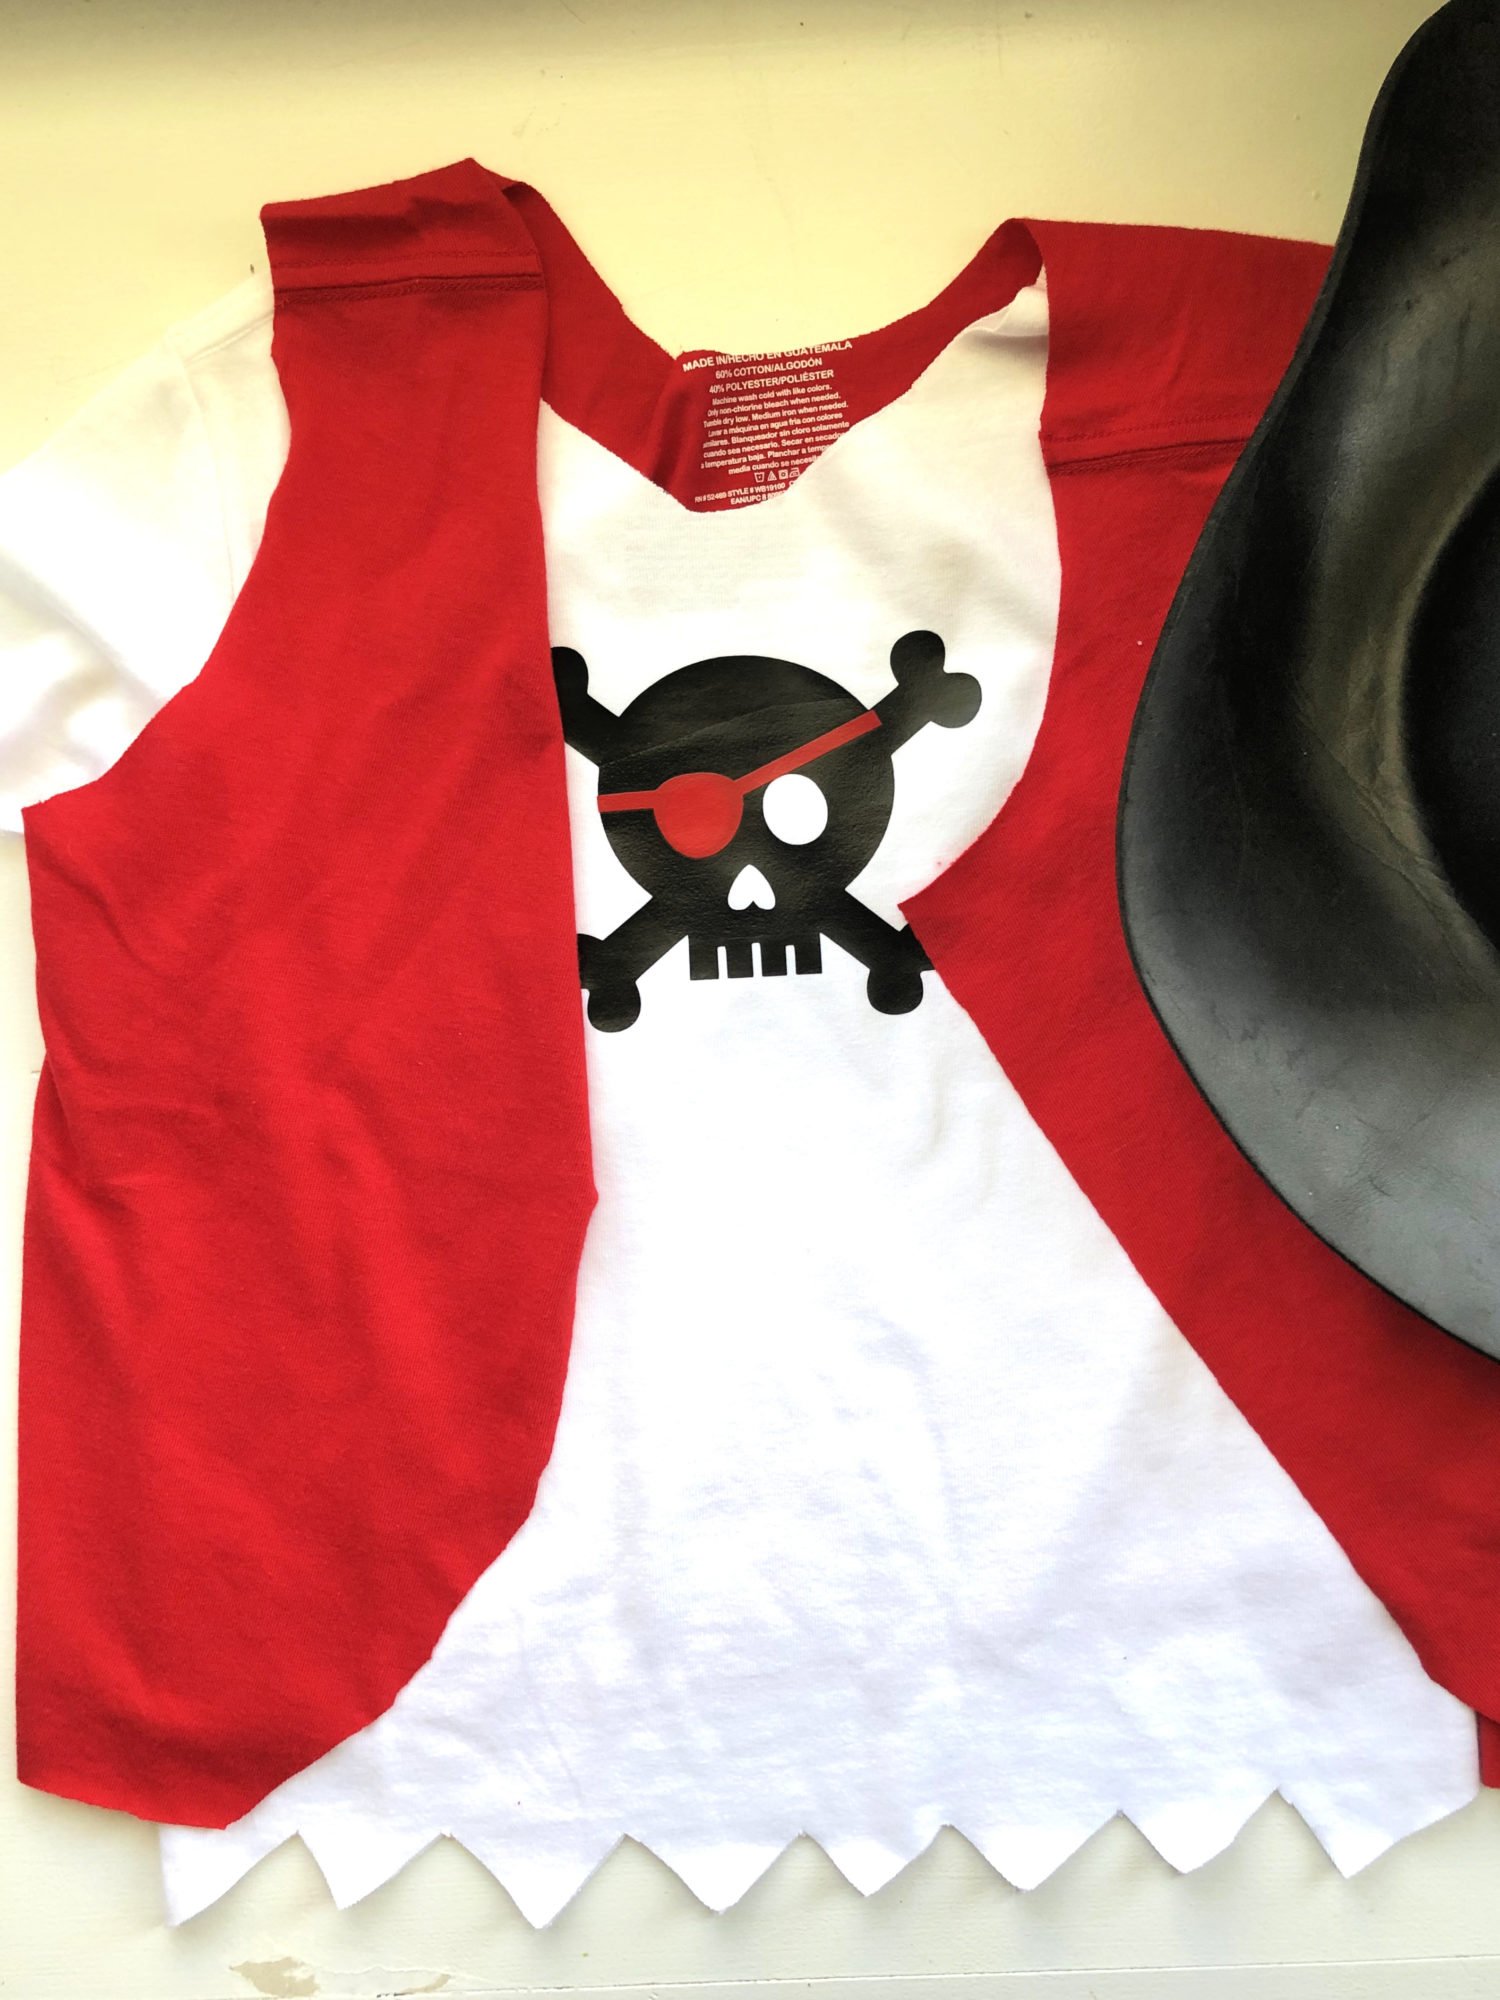
To make the red vest, I simply cut the sleeves and neck off a red shirt. Then cut 1-4 inches off the bottom of the shirt horizontally. This all depends on the size of the shirt and person. Next, cut a slit down the middle of the shirt to create the vest. I also added a little curve at the bottom to give it a little more detail.
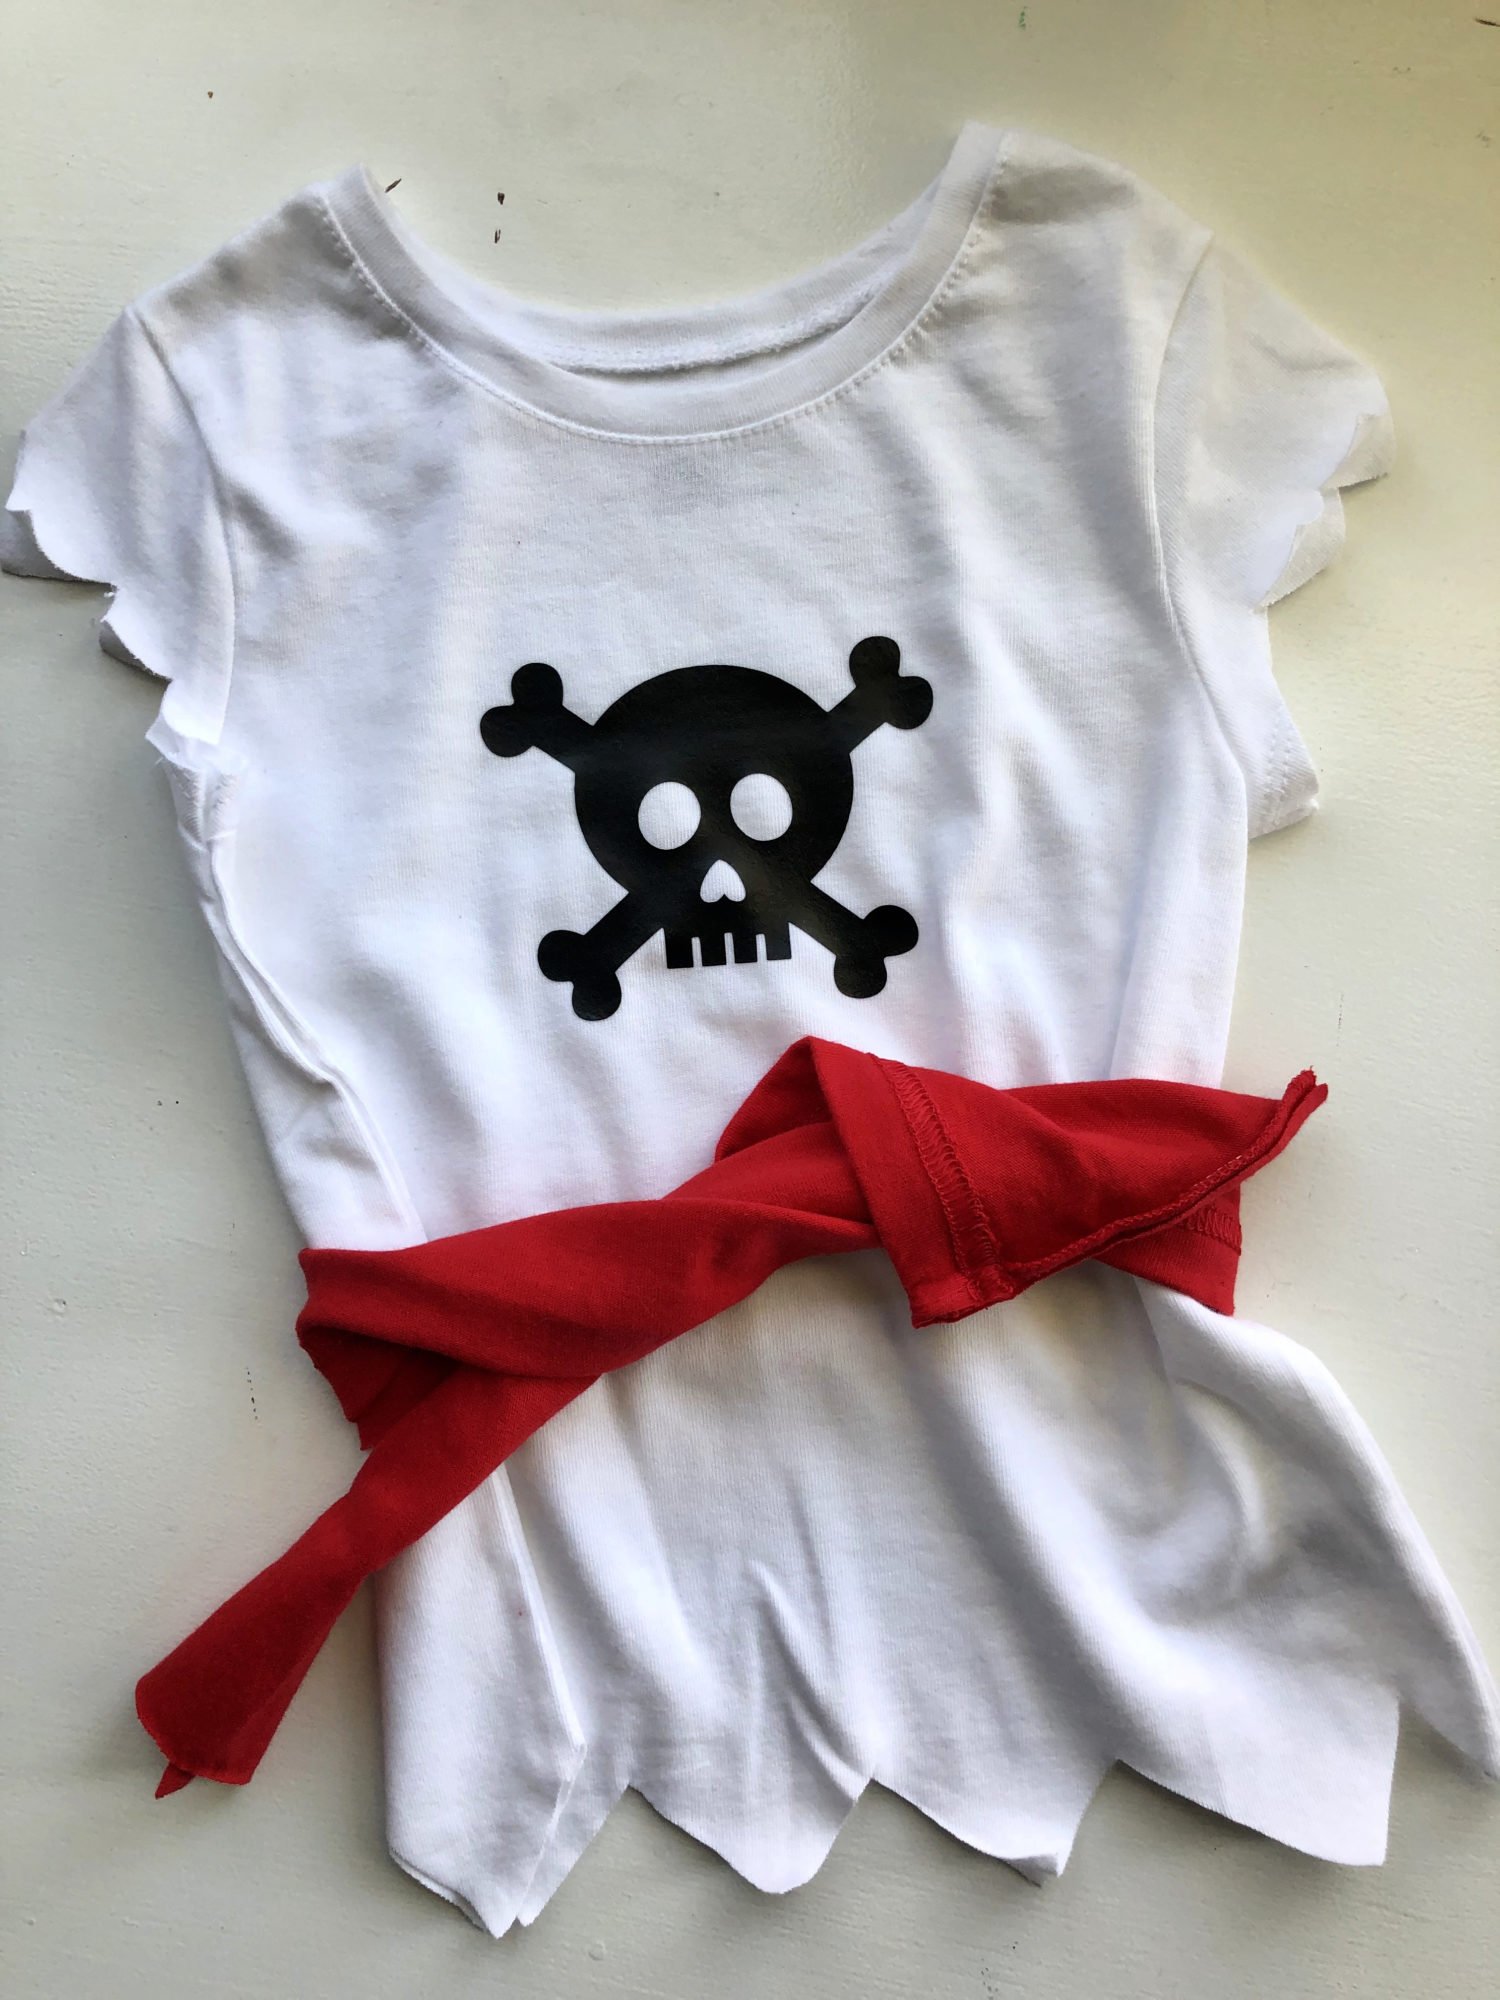
**Make sure to save all scraps. We used the bottom of the shirt as a belt (cut in half), and sleeves as our pirate du-rags.

This little princess wore her pirate costume after trick or treating to the playground. I had to include this photo–it’s just too cute to not too.

We wore these costumes at LEGOLAND Brick or Treat earlier in the month and then packed them for our Halloween Themed Carnival Cruise last weekend!

Daddy and his tiny pirate!

4 of our 6 pirates

9 of our 12 pirates last weekend. We made each family a different color skull and cross bones! My family had the black, my friend Kelly’s family had red glitter, and my friend Jaclyn has the grey crossbones. So many options as to what colors you can use! Same goes with the vest/accessories!
Easy Halloween Costumes
If you are still looking for easy Halloween costumes, here are a few more of my favorites.
How to Make a DIY Pirate Shirt Costume

DIY Pirate Shirt Costumes
All you need is a Cricut, and an inexpensive solid shirt to transform it into a pirate’s costume in less than 30 minutes' time.
Materials
- Cricut Design Space Pirate T-shirt
- White Cotton Shirt
- Red Cotton Shirt
- Cricut Mat
- Cricut Black Iron-On Vinyl; (other colors to use could be glitter red, metallic red, silver, gold, or grey)
Tools
- Cricut Tools
- Cricut BrightPad
- Iron / Heat Press / Cricut EasyPress
- Cricut EasyPress Tote
- Cricut EasyPress™ Mat
- Cricut Explore Air 2
Instructions
- First, you need to cut each layer from the Pirate T-shirt Cut File in Cricut Design Space.
- Make sure you mirror the skull (and patch if you are using that).
- Then remove all the negative space from the sheet of Iron-On vinyl so you have just the image.
- Next, add the skull with crossbones onto the shirt.
- Using the Cricut EasyPress press the Iron-On Vinyl onto the shirt. This was a cotton/poly blend so you need to press it at 315 degrees Fahrenheit for 30 seconds.
- Flip it over then pressed it for an additional 15 seconds.
- Next, you carefully pull the plastic layer off while it’s still warm. If using the patch then apply the patch next.
- Repeat with the exact instructions I shared above.
- Lastly, you want to cut the bottoms of the shirt in a zig-zag pattern.
- Also, cut the sleeves and on some of them cut the neck. You will want fabric sheers to cut your shirts.
- To make the red vest, I simply cut the sleeves and neck off a red shirt.
- Then cut 1-4 inches off the bottom of the shirt horizontally.
- Next, cut a slit down the middle of the shirt to create the vest.
- Also, add a little curve at the bottom to give it a little more detail.
Notes
Extra Scraps - Make sure to save all scraps. We used the bottom of the shirt as a belt (cut in half), and sleeves as our pirate du-rags.
Recommended Products
As an Amazon Associate and member of other affiliate programs, I earn from qualifying purchases.


Leave A Reply!